Gradient text is a very eye-catching effect that can enhance the design of your work. In this article from MiniTool MovieMaker – a free video editor, we will introduce how to make gradient text in Photoshop.
In the design field, gradient text is popular for its unique visual effects. It adds rich color and depth to the text, making the overall design more vivid. Creating gradient text in Photoshop is not complicated. After mastering a few simple steps, you can easily achieve this effect. Next, we will detail how to make gradient text in Photoshop to help you achieve more creative expression in your designs.
MiniTool MovieMakerClick to Download100%Clean & Safe
How to Make Gradient Text in Photoshop
As a powerful image-processing application, Photoshop is widely favored by designers and artists. Its rich tools and flexible operation methods enable you to realize a variety of creative effects. Among them, gradient text is a popular design technique that can add attraction to the text.
With Photoshop’s gradient text generator, we can easily create outstanding gradient text effects. Whether it’s for advertising, promotional materials, or personal projects, this technique can add a unique style to your designs. In the next section, we’ll show the exact steps for making gradient text in detail, including how to edit gradient in Photoshop.
Step 1: Download and install Photoshop
Go to the official Photoshop website. Download and install this app on your computer.
Step 2: Create a new file
Launch this software, and go to File > New in the top toolbar. You can set the size and resolution of your document in the pop-up window.
Step 3: Add your text
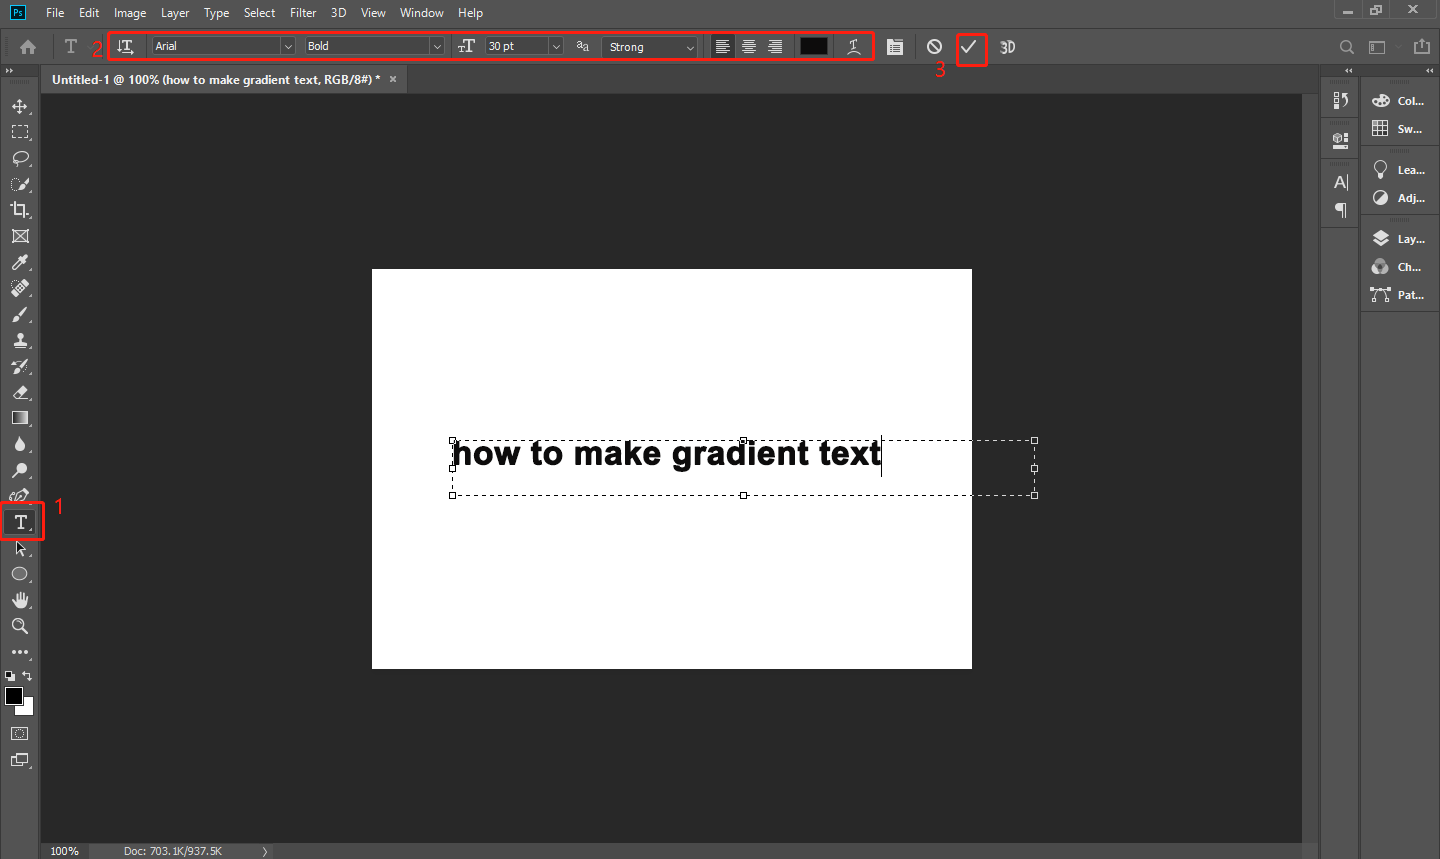
After creating the new file, click the T icon in the left toolbar or press T on your keyboard to apply the text tool. Drag out on your canvas to add a text box and type your needed text. You can choose the text font, size, and more at the top of the screen. Once you’ve completed the previous operations, click the check mark to save the current text.

Step 4: Select the gradient tool
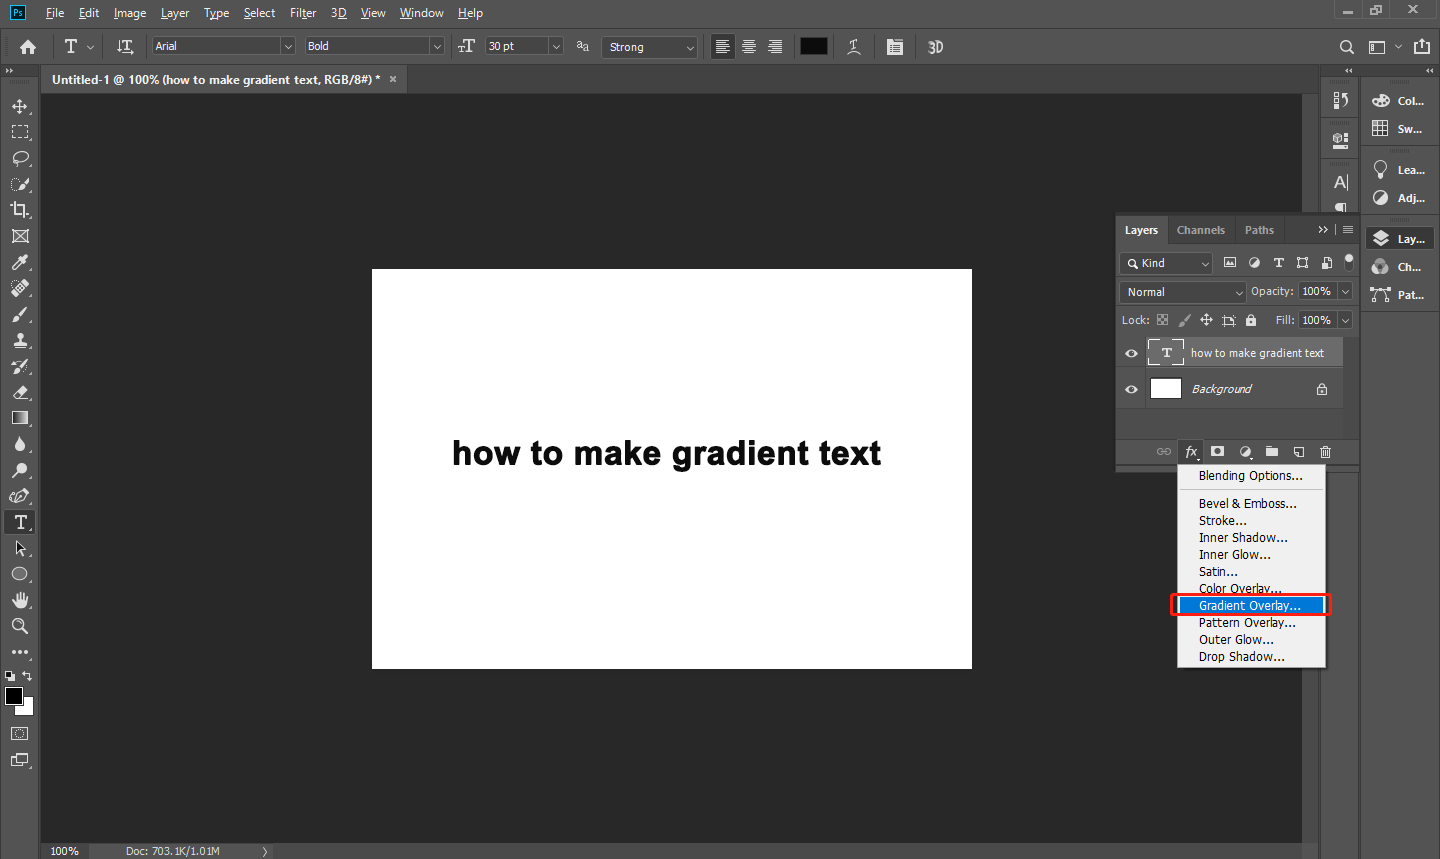
Go to the Layers panel, select the text layer, click the fx button, and choose Gradient Overlay to open the gradient window.

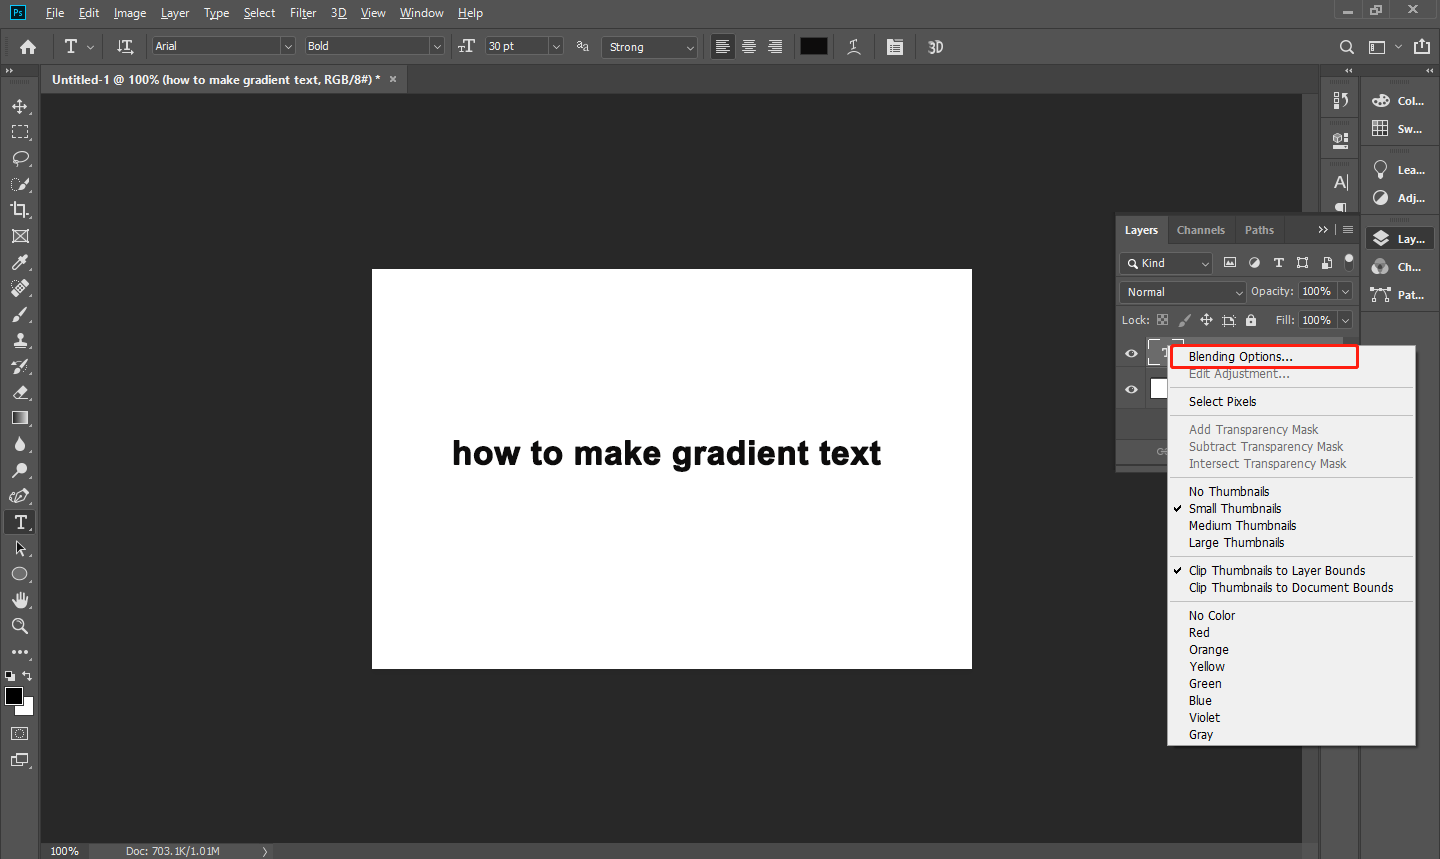
You can also right-click on the text layer, choose Blending Options in the pop-up window, and select Gradient Overlay in the Layer Style window to find the gradient tool.

Step 5: Add a gradient color
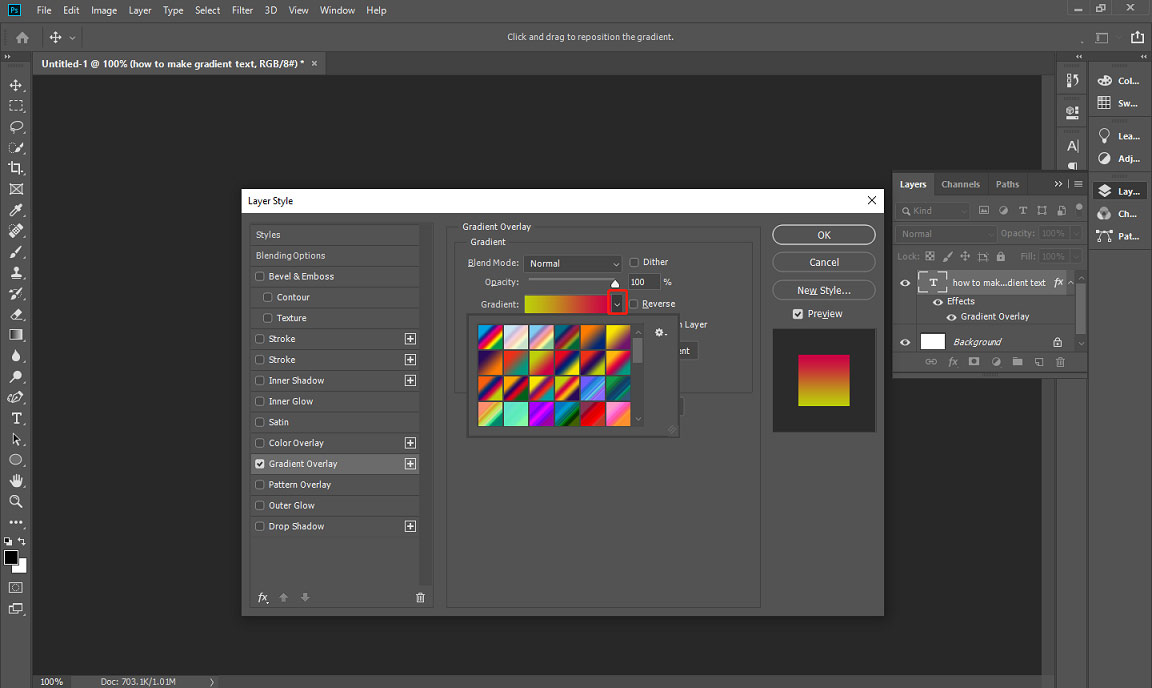
In the Gradient Overlay window, click the dropdown arrow next to the Gradient box to get a list of preset gradients, and choose your favorite gradient color. After clicking the desired gradient color, it will be displayed in this Gradient box.

Step 6: Edit your gradient
If you want to make some adjustments to the current gradient color, click the Gradient box and drag the slider on the gradient bar to adjust the gradient color. After that, you can also edit the gradient property including Blend Mode, Opacity, Style, and more to get a better effect. Finally, click OK to save the gradient effect.
Step 7: Save your work
After getting a satisfactory gradient text, go to File > Save As to save your work.
How To Create Transparent Gradient Text in Photoshop
Transparent gradient text is a unique design that combines gradient effects with transparency. It can bring a delicate and soft visual effect to the text. This design technique not only enhances the expression of the text but also allows it to blend better with the background. In the following content, we will guide you on how to achieve transparent gradient text by using the gradient tool and layer masks.
Step 1: Launch Photoshop, and go to File > New to create a new document.
Step 2: Click the T icon, drag a text box, and input your text content.
Step 3: Go to the Layers panel, click the fx icon, and choose Gradient Overlay. Then choose a desired gradient preset in the Gradient dropdown menu.
Step 4: Click the Add vector mask icon at the bottom of the Layers panel.
Step 5: Select the Gradient tool in the left toolbar, click the gradient bar in the top toolbar, click the Basics folder, select the foreground to transparent gradient, and click OK.
Step 6: Set the foreground color to black. Click and drag your mouse over your text to create a transparent effect.
Step 7: Go to File > Save As to save your new work.
Bottom Line
This is all about how to make gradient text in Photoshop. I hope this article can bring you more inspiration for your creation.


User Comments :