There are always times when you need to blur faces in your photos for privacy and anonymity. Sometimes you may also want to blur faces in a picture to add a sense of mystery or direct the viewer’s attention elsewhere. So, how to blur faces in a photo? This post offers a quick tutorial.
How to Blur Faces in a Photo on Windows
Discover how to blur someone’s face in a photo using MiniTool MovieMaker and Photoshop on a Windows computer.
Method 1: Use MiniTool MovieMaker
While MiniTool MovieMaker is primarily designed as a video editor for easy creation and quick editing, it can also serve as a simple photo editor, as most of its features can be applied to images, such as filters, text, elements, and effects.
Best of all, it’s free to edit your photos and doesn’t leave a watermark on the final result.
Here’s how to blur faces in a photo using MiniTool MovieMaker.
Step 1: Install the Application
Click the button below to download and install the software on your computer.
MiniTool MovieMakerClick to Download100%Clean & Safe
Step 2: Import Your Photo
Launch the application and close the pop-up window to access the main interface. Then, click the Import Media Files button to add your photo. Next, drag it to the timeline to start editing.
Step 3: Blur Faces in the Photo
Select Elements from the top toolbar, then search for “mosaic” in the box. Choose a mosaic effect and drag it to the timeline. Then, drag the Scale slider in the Elements Property to resize the mosaic. Next, go to the player window and position the mosaic over the person’s face.
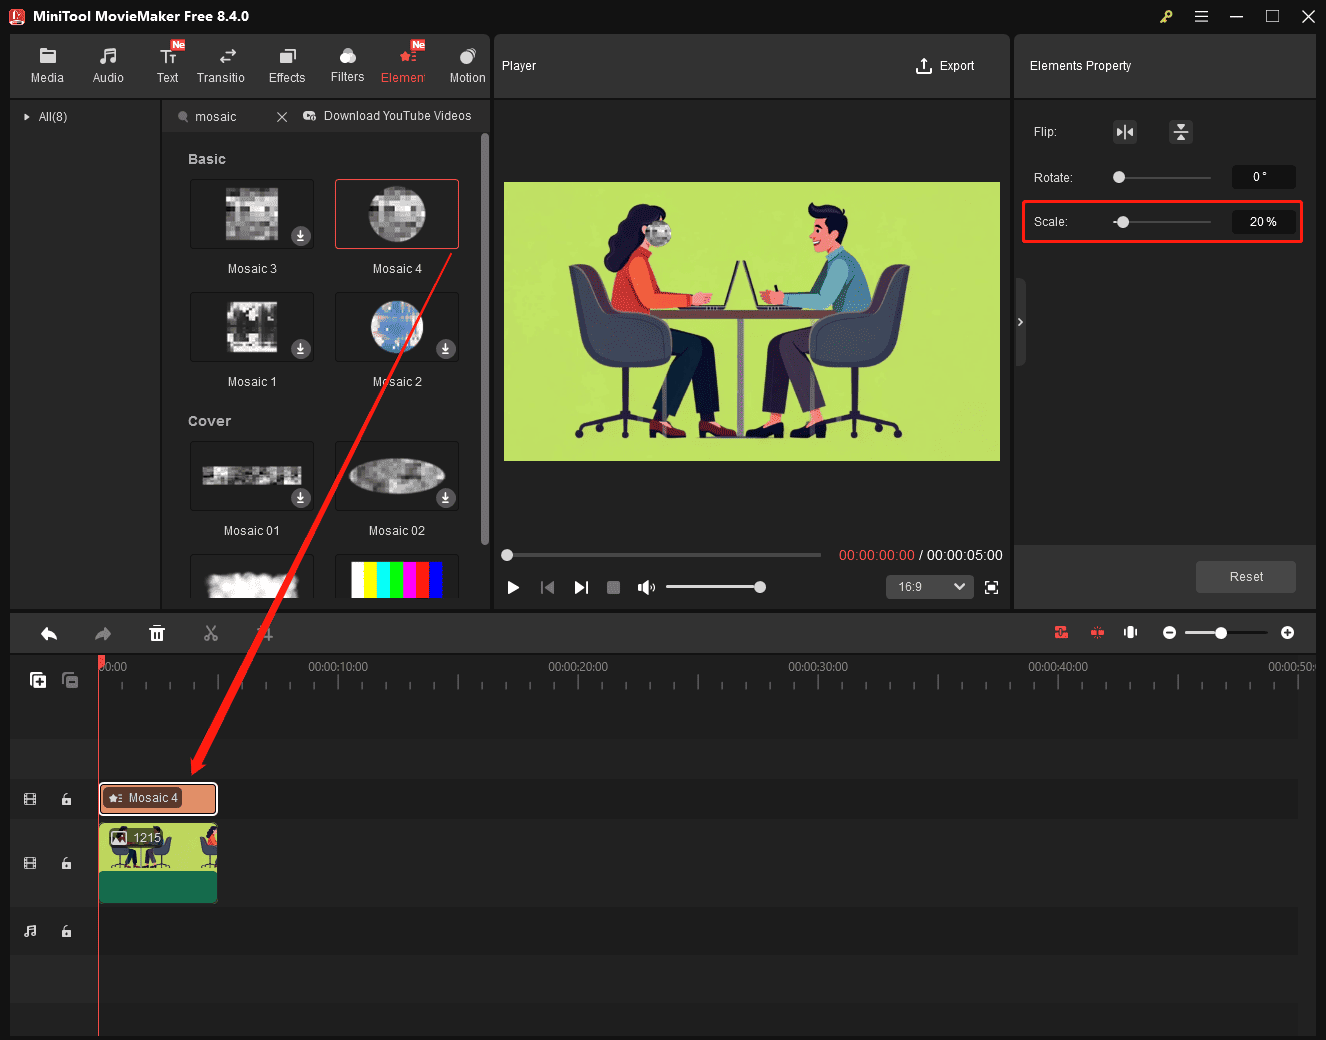
If multiple faces need to be blurred in the photo, copy the mosaic element on the timeline and paste it on the upper layer. Then, go to the player window to drag the mosaic to cover another face.
Step 4: Save the Photo
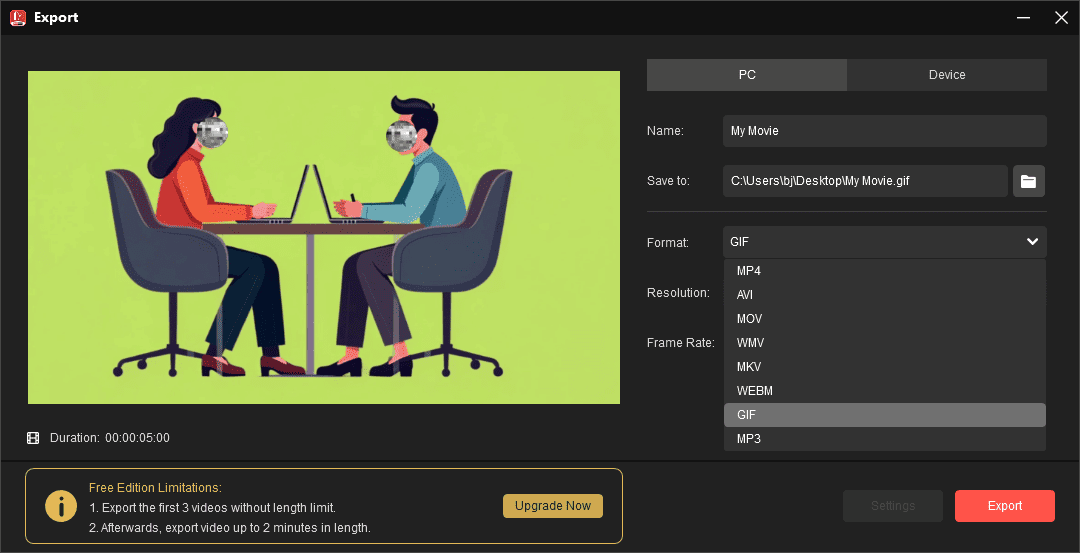
Click the Export button in the upper-right corner, set Format to GIF, then click the Export button to save the file.
Method 2: Use Photoshop
As the industry-leading image processing software, Photoshop is definitely capable of blurring faces in photos through different choices.
Here’s how to blur a face in a photo using Photoshop.
Step 1: Open Your Photo
Run Adobe Photoshop, then click File and choose Open to add your picture.
Step 2: Select the Face
Use the Lasso Tool, Elliptical Marquee Tool, or even the Selection Brush Tool to select the face you want to blur.
Step 3: Apply the Blur Effect
Click Filter at the top, choose Blur from the dropdown list, then select a blur type, like Gaussian Blur.
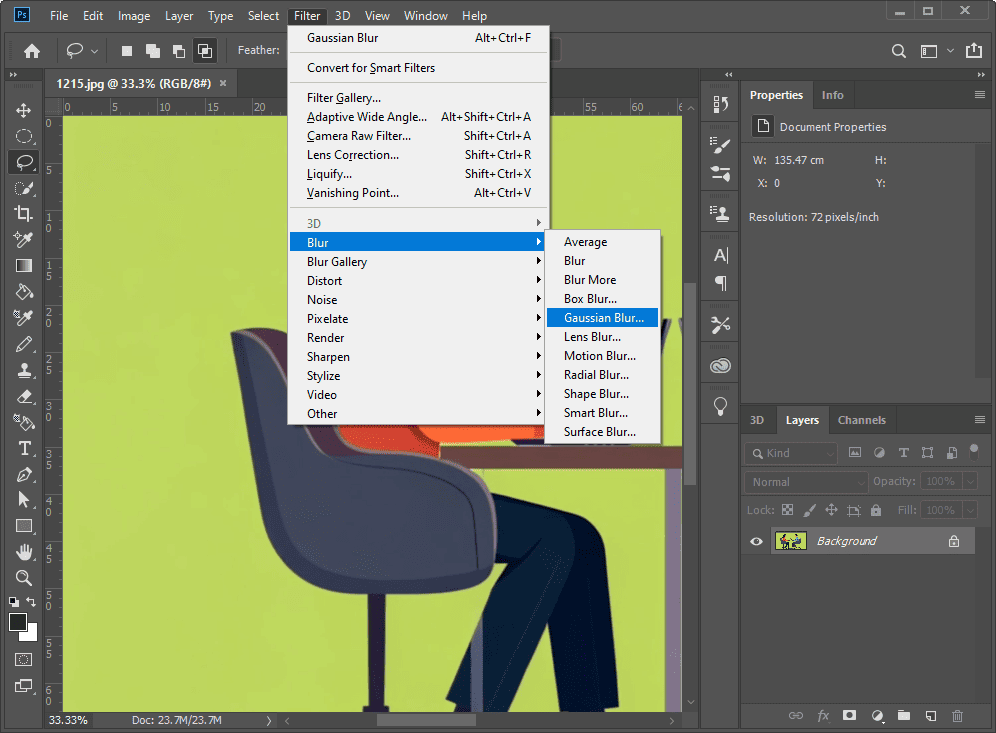
Next, set the Radius to obscure the face and click OK to save changes.
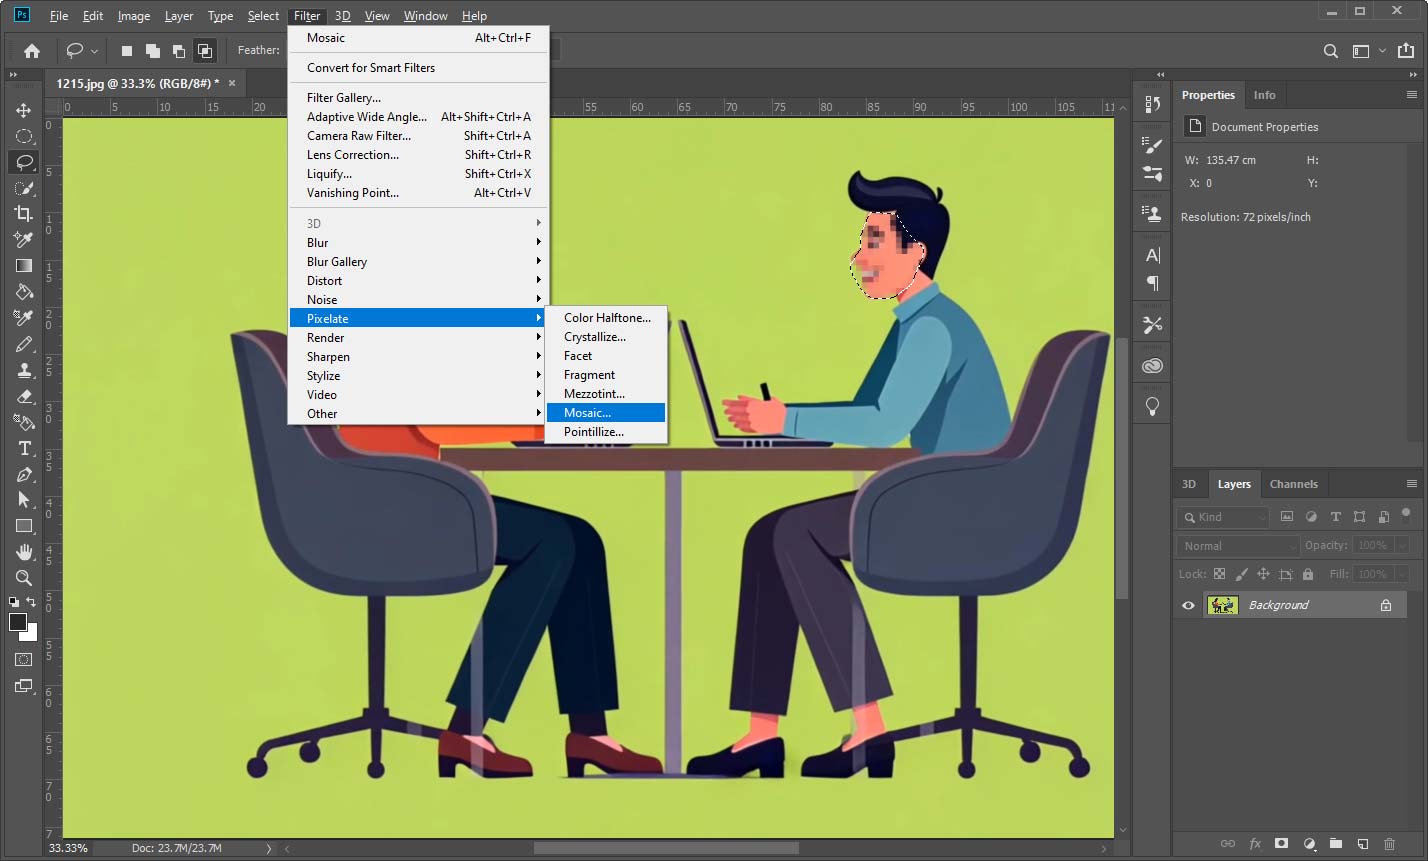
Alternatively, you can go to Filter > Pixelate > Mosaic, then adjust the Cell Size slider to ensure the face is blurred. If you’re satisfied with the result, click OK.
Step 4: Save the Photo
Click File > Save as, select your desired output format, specify the output folder, and click Save.
How to Blur Faces in a Photo Online
If you don’t want to install software on your computer or need a quick solution, try online tools to blur faces in a photo. Here, iLoveIMG is recommended due to its automatic face detection and the ability to blur multiple faces in a single shot.
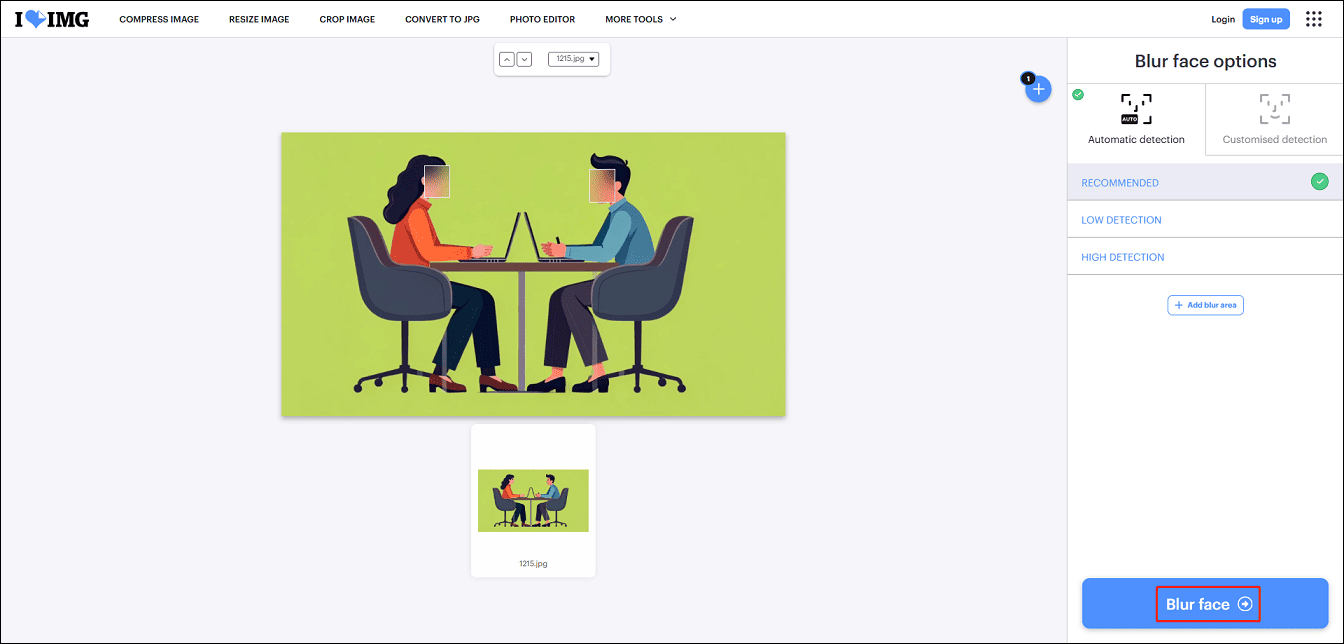
Step 1: Upload Your Photo to iLoveIMG
Navigate to the iLoveIMG website and click the Blur face option. Then, click the Select images button to open your photo.
Step 2: Blur Faces
Once the photo is uploaded, iLoveIMG will automatically detect faces and add blur effects. Then, you can resize the blur effects to ensure everything looks right.
Step 3: Save the Photo
Click the Blur face button to begin the task immediately. Then, the photo will be automatically downloaded to your PC.
How to Blur Your Face in a Photo on Instagram
Here’s how to blur your face in a photo on Instagram.
Step 1: Open the Instagram app, tap the + icon at the bottom, and go to STORY.
Step 2: Swipe left at the bottom of the screen and tap the Browse Effects icon.
Step 3: Tap the search icon and type “blur face”.
Step 4: Tap a blur effect and then take a photo.

Conclusion
If you’re searching for how to blur faces in a photo, this post is right for you. Whether you want a desktop program for precise controls or an online tool for convenience, this post has you covered. Follow the steps above to hide faces in your photos to protect privacy.
About The Author

Position: Columnist
Cora is a tech writer specializing in digital media workflows, with over six years of hands-on experience in video post-production, media transcoding, and screen capture. Her writing is always clear and practical. Cora also produces in-depth software reviews for users across skill levels to help them find the right tool and enjoy video editing.
User Comments :