This post from MiniTool MovieMaker (a free video maker) will teach you how to add grain to a photo on a Windows computer. Explore this post to find the best tools to achieve a retro feel for your photos.
The grain effect is a popular photo filter that enhances photos’ retro feel and adds visual depth and artistry. If you’re wondering how to add grain to a photo, you’re in the right place. Here are some professional apps that can add film grain to photos.
How to Add Grain to a Photo on Windows
MiniTool MovieMaker is one of the best photo/video filter applications for Windows users, offering multiple types of filters to adjust the look and feel of your footage. There are LUT filters to convert your videos/photos to black and white, artistic effects to add a retro feel, Instagram-like filters to help you create Instagram-style videos, and other common filters to adjust the tone and color of your footage.
MiniTool MovieMaker has a user-friendly interface and is easy to use. Furthermore, it won’t add watermarks to your exported photos and videos.
Here’s how to add grain to a photo using MiniTool MovieMaker.
Step 1. Click the button below to download and install the software on your PC.
MiniTool MovieMakerClick to Download100%Clean & Safe
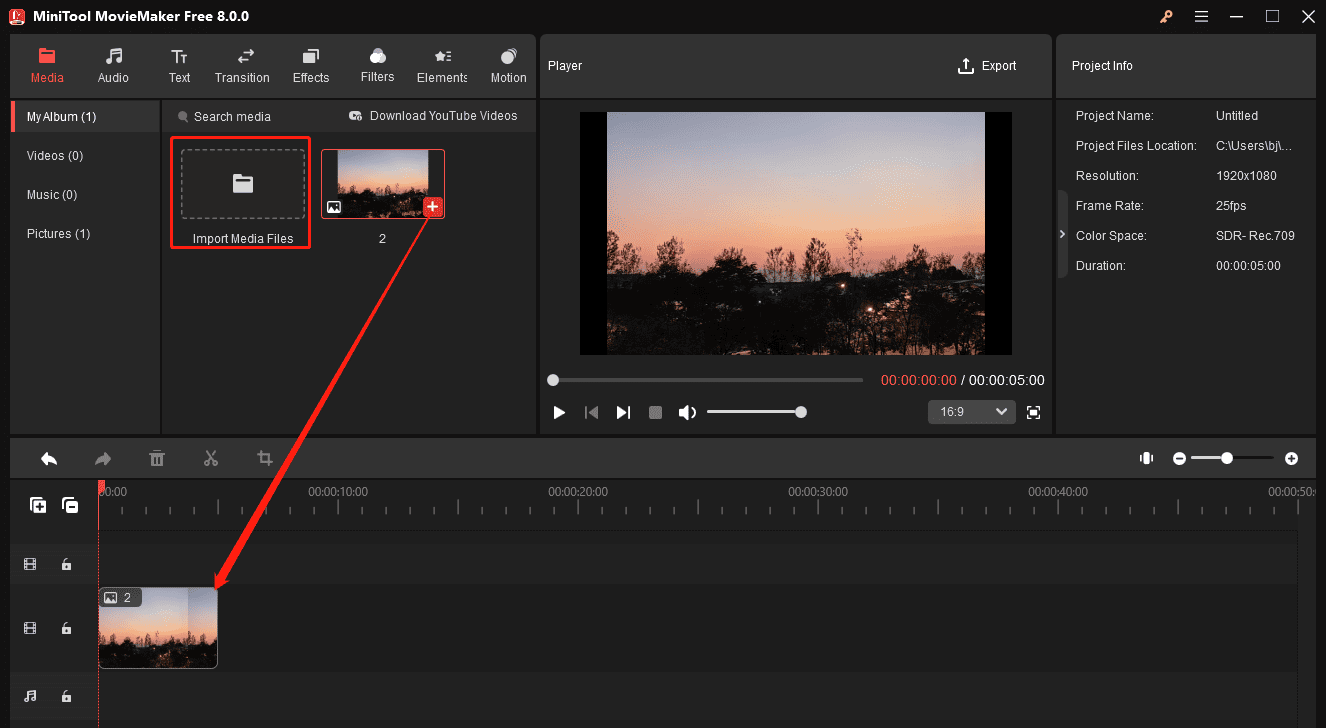
Step 2. Launch MiniTool MovieMaker and close the project library window to enter the main user interface. Click the Import Media Files button to import your photo. You can open PNG, JPG, JPEG, GIF, BMP, ICO, and TIF files in this program. Then, click the + icon on the picture to add it to the timeline.
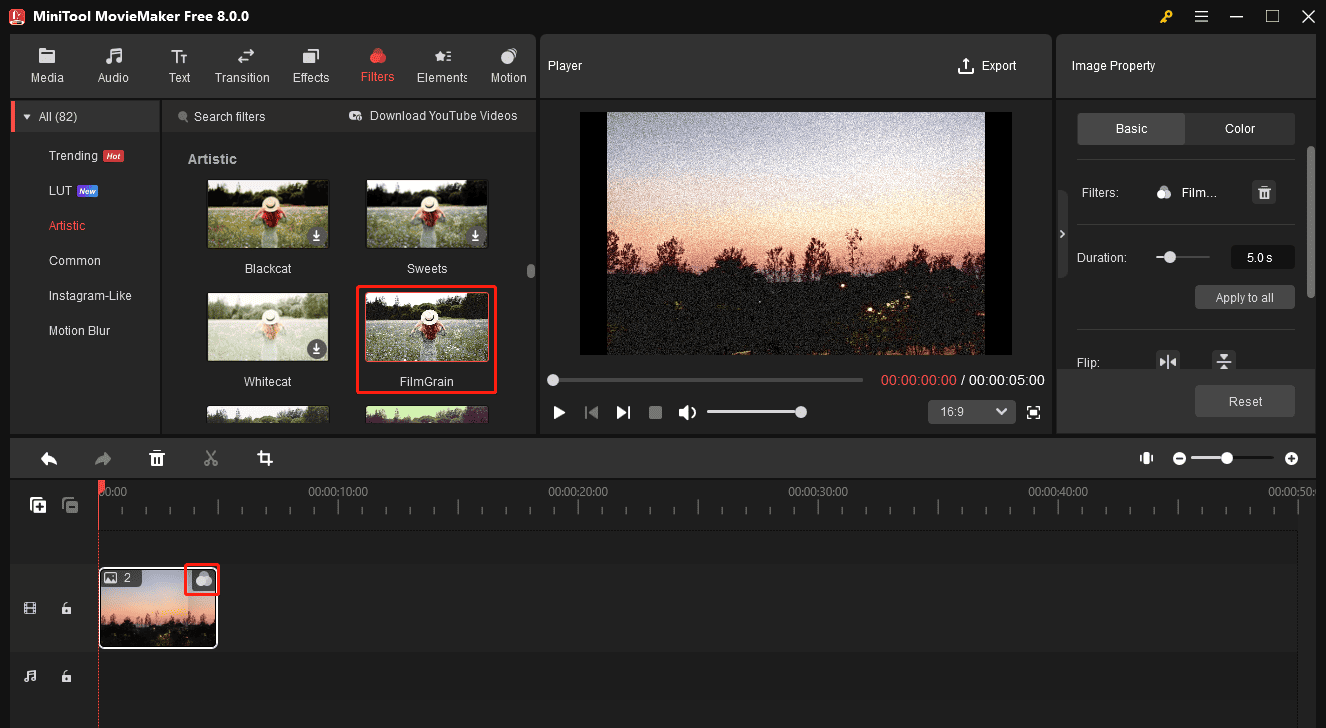
Step 3. Find the grain effect. Go to Filters at the top, select Artistic on the left sidebar, and you’ll see the FilmGrain filter. Click the small download icon to download this filter. Alternatively, type “gain” in the search box to locate the effect.
Step 4. You have two options to add the grain filter to a picture in MiniTool MovieMaker.
#Add FilmGrain to the entire photo
When you drag and drop the FilmGrain effect to the clip on the timeline, a filter icon will appear in the top right of the clip on the timeline.
#Apply FilmGrain to parts of a photo
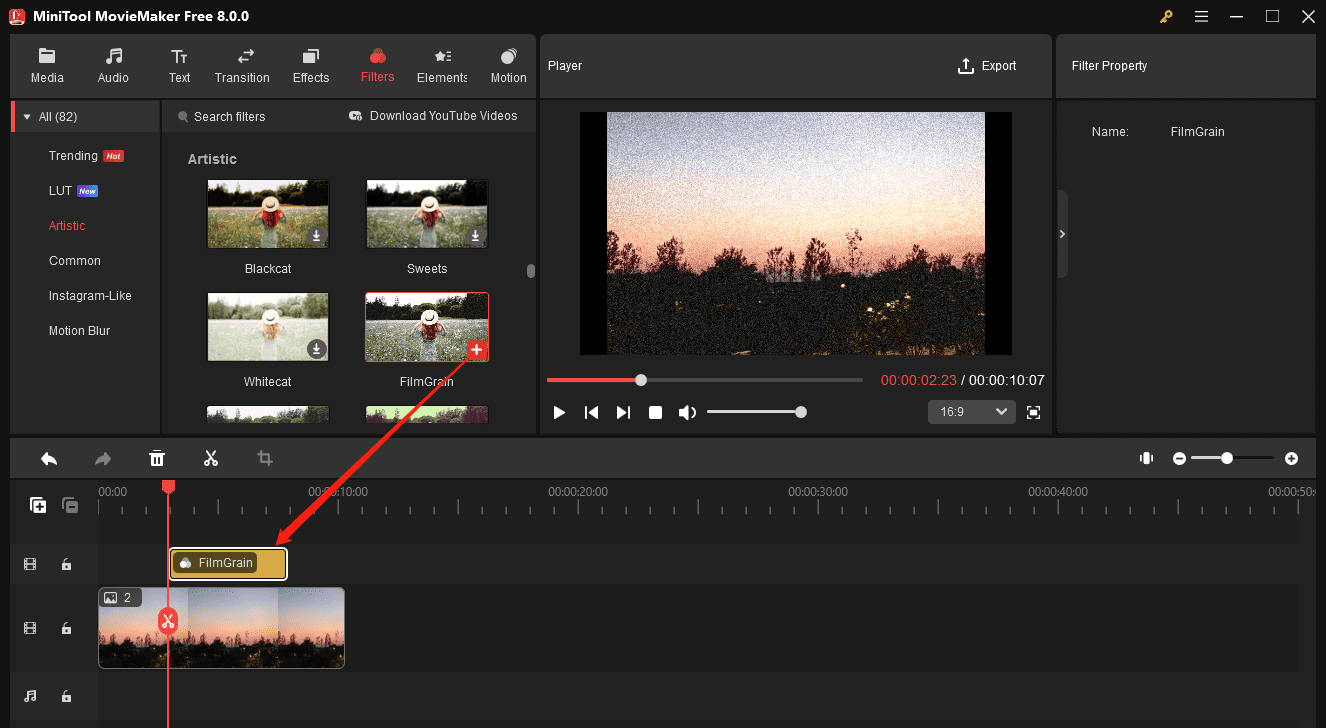
Drag the playhead to where you want the grain effect to start and click the + icon to the FilmGrain effect.
Step 5. To further enhance your photo, you can adjust the photo’s color to show the grain effect better. Go to the Color tab under Image Property to adjust the clip’s brightness, saturation, and contrast until you’re happy with the final result.
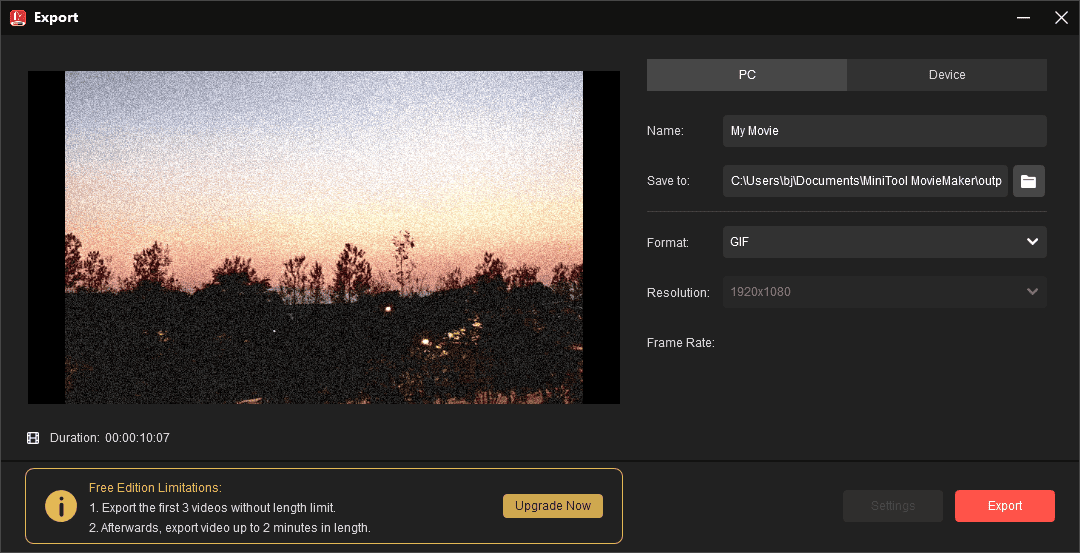
Step 6. Click the Export option in the upper-right corner to export your photo. Set the Format as GIF and click the Export button.
How to Add Grain to a Photo Online
Here are 2 tools that let you add grain to a photo online.
Fotor
Fotor is considered one of the best online photo editing software due to its powerful features and simple operation. This platform covers various tools and effects to enhance your photos, such as effects, frames, text, and more. In addition to these common options, Fotor provides some AI-powered tools to help you easily transform your images.
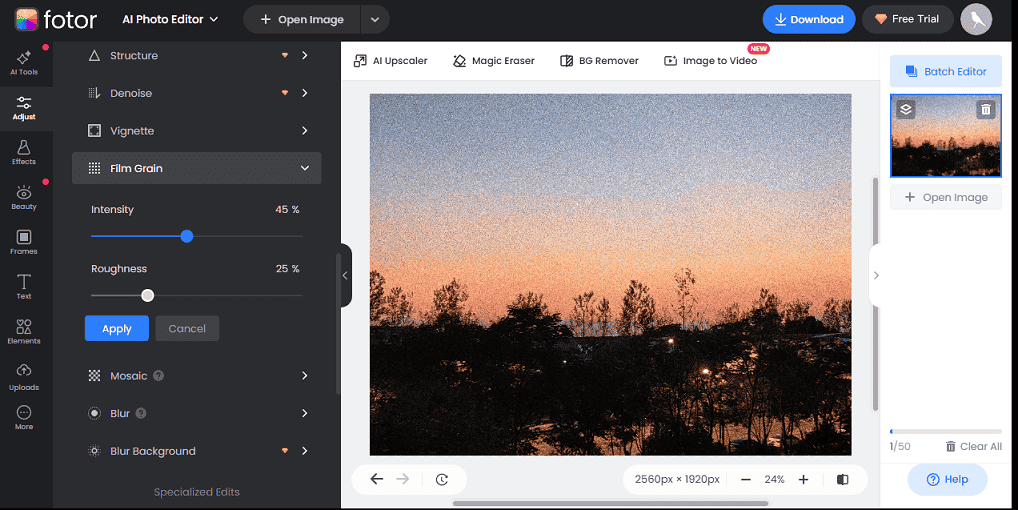
To add film grain to a photo with Fotor, click the Adjust icon, click the Film Grain option, and adjust the effect’s intensity and roughness.
Befunky
BeFunky enjoys equal popularity with Fotor. It provides almost all the tools and effects to edit photos, such as the ability to crop, resize, rotate, and sharpen images, remove backgrounds and objects, add frames, apply effects, and more. Additionally, it works as a collage maker and graphic designer.
To add film grain to a photo in BeFunky, select Effects > Cinematic > Film Grain.
Conclusion
Adding grain to your photos is easy with the right tools. This post explains 3 methods to add a realistic grainy effect to your images. Follow the steps above to enhance the aesthetic appeal of your photos with the power of film grain.



User Comments :