This post from MiniTool MovieMaker will mainly explain to you the different methods on how to add film grain in Premiere Pro, including using the noise effect and film grain plugin. If you're curious, read the information below until you understand it.
What Is Film Grain?
Film grain refers to the random distribution of black and white particles on a film’s surface. The origin of film grain goes back to the advent of film technology. The defects in the film itself and the chemicals used in the development process cause the grain to appear on the film. The particles range in size from 0.1 to 0.5 microns.
The number of film grains in a given image is determined by several factors, such as the ISO speed, the kind of film used, and the development process. Film grain may be visible to the naked eye or not, according to viewing conditions.
However, modern video editing software like Adobe Premiere Pro, allows you to add film grain effects digitally.

Method 1: Add Film Grain in Premiere Pro Using the Noise Effect
To start, you can learn how to add film grain in Premiere Pro by using the noise effect. Proceed as follows:
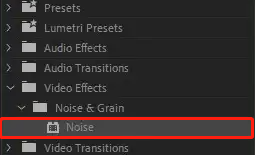
Step 1: Go to Effects > Noise & Grain > Noise.
Step 2: Drag and drop the effect onto your clip. Premiere Pro adds Gaussian noise at 50% opacity by default.
Step 3: Select Opacity in the Effect Controls panel to change the opacity.
Step 4: Navigate to Type under the Effect Controls panel and choose from uniform, Gaussian, or luma noise.

Method 2: Add Film Grain in Premiere Pro Using the Film Grain Plugin
Another way to learn how to add grain in Premiere Pro is by using a plugin. You can look for free film grain overlays online, and some are available for purchase.
FilmConvert Pro 2 is recommended as it has a large number of presets and controls for adding film grain. Besides, the following five film grain overlays, captured organically by Shutterstock using real film stock and film cameras, are an excellent way to give digital footage a vintage look. They are:
- Distortion Scratches
- 35mm Fine Grain
- 35mm Coarse Grain
- 16mm Coarse Grain
- 8mm Coarse Grain
Here’s how to use these film grains in Premiere Pro:
Step 1: Import your footage and any of these film grains into Premiere Pro.
Step 2: Position your footage into the timeline and put the imported film grain on top of the footage in the v2 slot.
Step 3: Click on the film grain clip in the timeline and head to the Effect Controls panel.
Step 4: Under the Opacity toggle, there will appear a drop-down menu called Blend Modes.
Step 5: Select Overlay to make the film grain transparent on top of the clip in the timeline.
Step 6: Just copy and paste the clip of the film grain along the timeline to extend it.

Bonus Tip: Try This Free Premiere Pro Alternative for Beginners
MiniTool MovieMaker
MiniTool MovieMakerClick to Download100%Clean & Safe
MiniTool MovieMaker is an excellent video editing software with a wide range of features and tools to help beginners complete stunning video projects through its intuitive and clean user interface.
It’s also a fantastic free Premiere Pro alternative that allows you to make videos with video clips, images, and background music. And, it supports the most popular media formats, such as MP4, MOV, AVI, WMV, MP3, WAV, PNG, JPG, JPEG, GIF, and so on.
This free video editor offers you different types of titles, captions, and credits that enable you to adjust the text size, color, font, position, etc. To make your videos more appealing, you can use it to apply video transitions, filters, motions, and animated stickers.
With it, you can also rearrange video and image clips, split, trim, and crop videos, combine multiple clips into one video, flip videos vertically or horizontally, rotate videos from any angle, speed up or slow down videos, reverse videos, and more.

Conclusion
In short, there are two different methods on how to add film grain in Premiere Pro. You can use either the noise effect or a film grain plugin. We hope these are helpful to you, and if other methods work, please share them with us.
User Comments :