How to Compress Video in Premiere Pro
When using Premiere Pro for video editing, working with large video files is often a challenge. Especially if your video resolution is high or your project is long, the file size can become very large. Next, we’ll introduce detailed steps to compress video in Premiere Pro to help you better balance file size with video quality.
Let’s see how to reduce file size in Premiere Pro
Step 1: Launch Premiere Pro on your computer. Create a new project and import the video you want to compress.
Step 2: Go to the Sequence menu at the top of the screen and select the Sequence Settings option. Then, reduce the Frame Size, Frame Rate, and Pixel Aspect Ratio to your desired settings. Click OK to save the editing.
Step 3: Drag your video to the timeline from the project panel. Go to File > Export > Media or use the shortcut Ctrl + M on your keyboard.
Step 4: In the Export Settings window, click the Format dropdown icon and choose H.264. After choosing H.264, you will see a variety of export presets. You can select Match Source – High Bitrate for a good balance of quality and file size.
Step 5: Go to the Video tab, you can adjust the resolution, frame rate, and bitrate to reduce the file size.
Step 6: Scroll down to the Bitrate Settings section in the Video tab. Set Bitrate Encoding to VBR, 2 Pass. Reduce the Target Bitrate and Maximum Bitrate to 5-7 Mbps.
Note: The Maximum Bitrate is slightly higher than the Target Bitrate.
Step 7: After completing all operations, click Export to begin the video compression process.
Compress Video in Premiere Pro Alternative
Although Premiere Pro is a powerful video editing tool, its features may seem too complicated for some users who need to accomplish video compression quickly and efficiently. However, MiniTool MovieMaker, a free video editor without watermark, provides an excellent alternative.
With its intuitive interface and simple operation, this software can help you compress video files easily, making it ideal for situations where fast video processing is required. Next, we will introduce how to use this free video compressor to reduce video size.
Step 1: Download and install MiniTool MovieMaker on your PC.
MiniTool MovieMakerClick to Download100%Clean & Safe
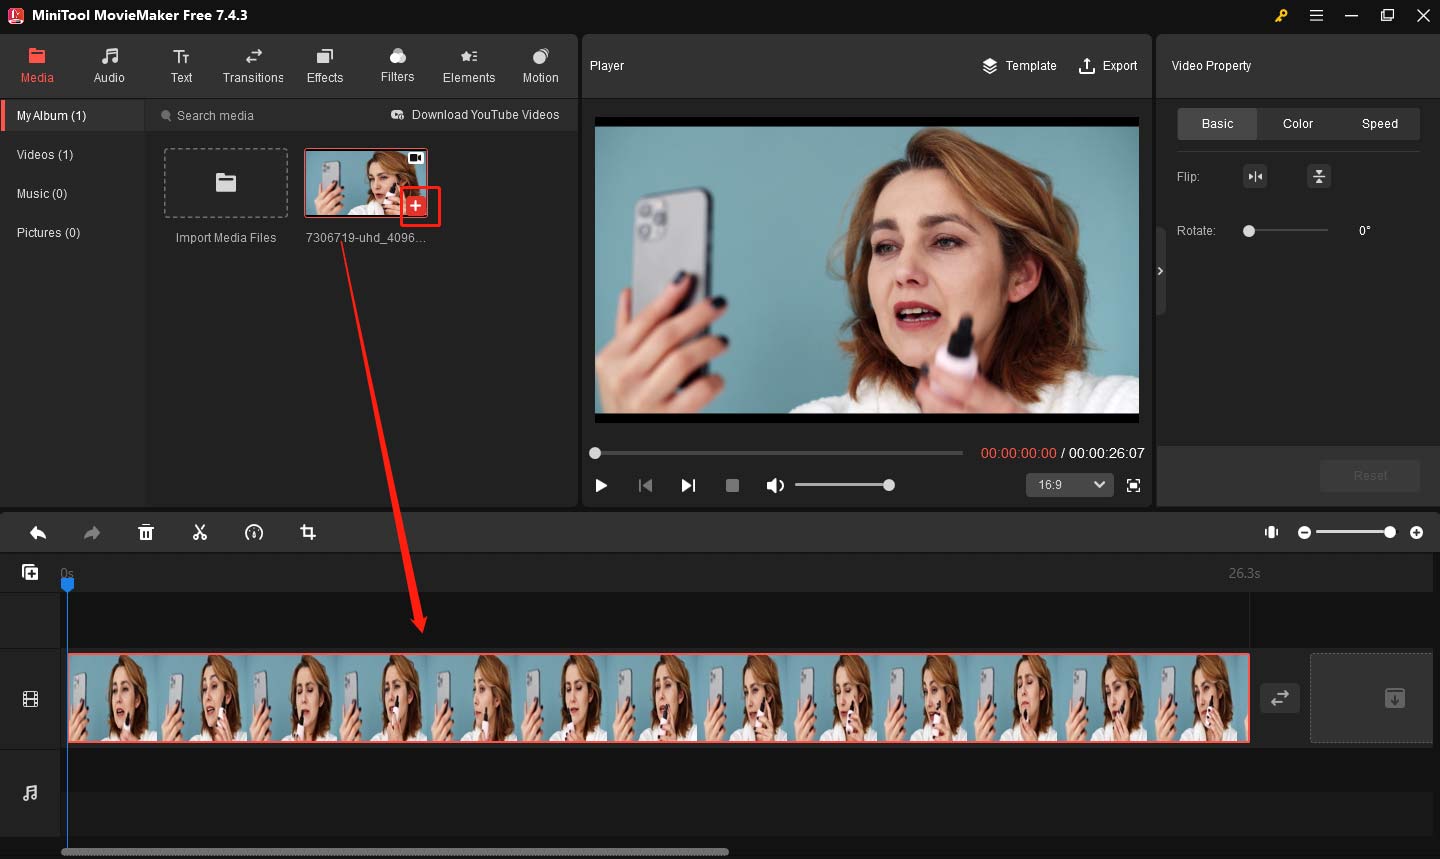
Step 2: Launch this app and close the promotion window. Click Import Media Files to upload your video.
Step 3: After importing the video, click the plus icon on the video file or drag and drop it to the timeline.

Step 4: You can edit your video including trimming videos, adding text, transitions, music, and more to videos.
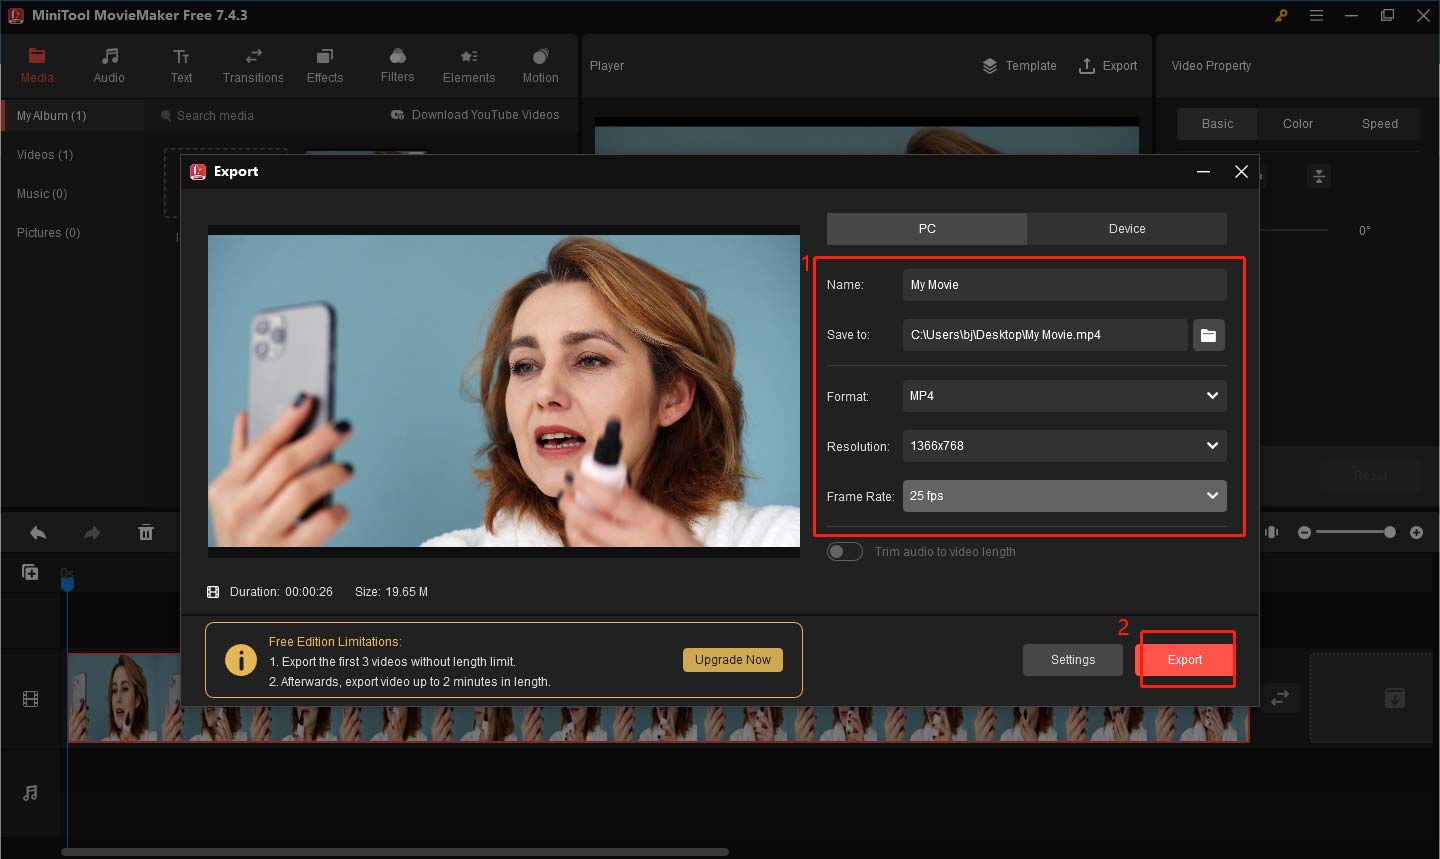
Step 5: Once done, click the Export button in the upper right corner. Set your file name and location. If you want to get a smaller video size, you can choose the Format with great compression efficiency like MP4, WEBM, WMV, etc. You can also reduce the Resolution to the right value as needed. In addition, you can choose a smaller Frame Rate. Finally, click Export to start the compression.

Bottom Line
Have you learned how to compress video in Premiere Pro? Compressing videos in Premiere Pro is an efficient and professional process, and you can achieve the best balance of video quality and file size by adjusting the relevant parameters. If you need a simpler alternative, MiniTool MovieMaker is a good choice. With its simple interface and fast operation process, it can help you accomplish the video compression task quickly.


User Comments :