Do you know how to make a slideshow in Premiere Pro? A slideshow is a common and effective way to present photos and photo collections. This article from MiniTool MovieMaker (a free movie maker) will describe how to make a slideshow in Premiere Pro and an easy alternative.
How to Make a Slideshow in Premiere Pro
Premiere Pro, as a professional video editing tool, provides you with a wealth of slideshow-making options with its powerful features and flexible operation. From importing images, and adding transitions to adding special effects, Premiere Pro can easily realize various complex effects to make your slideshow production more expressive. Next, we will show you how to make a creative slideshow in Premiere Pro.
Step 1: Launch Premiere Pro on your computer and click New Project in the Home window.
Step 2: In the New Project window, enter a name for your new project. Choose other settings and click the OK button to save the changes.
Step 3: Before importing your images, you can set the default duration for still images. Click Edit > Preferences > Timeline in the top toolbar, and set the Still Image Default Duration to your desired length. Click OK to save the editing.
Step 4: Click File > Import to import the images you need, and drag your images from the project panel to the timeline.
Step 5: If you want to change the duration of a segment, you can hover over the left or right edge of the image. Drag inward to reduce the image duration, and drag outward to increase the image duration.
Step 6: Go to Window > Effects and you will see the Effects panel in the menu bar. Click the Effects button and choose your favorite transition. Drag the target transition to your desired location.
Step 7: After finishing all editing, go to File > Export > Media. Click the Export button to save your work on your PC.
Best Alternative to Premiere Pro for Making Stunning Slideshows
Although Premiere Pro is a powerful video editing tool, its operation difficulty and complex interface may not be very friendly for certain beginners. If you are looking for a simpler alternative slideshow maker to make slideshows, then MiniTool MovieMaker is a good choice.
This software offers a wealth of templates, transition effects, and an easy-to-use interface, making it perfect for those who want to create beautiful slideshows quickly. In the next section, we will introduce how to make a slideshow in MiniTool MovieMaker easily.
Step 1: Download and install MiniTool MovieMaker on your computer.
MiniTool MovieMakerClick to Download100%Clean & Safe
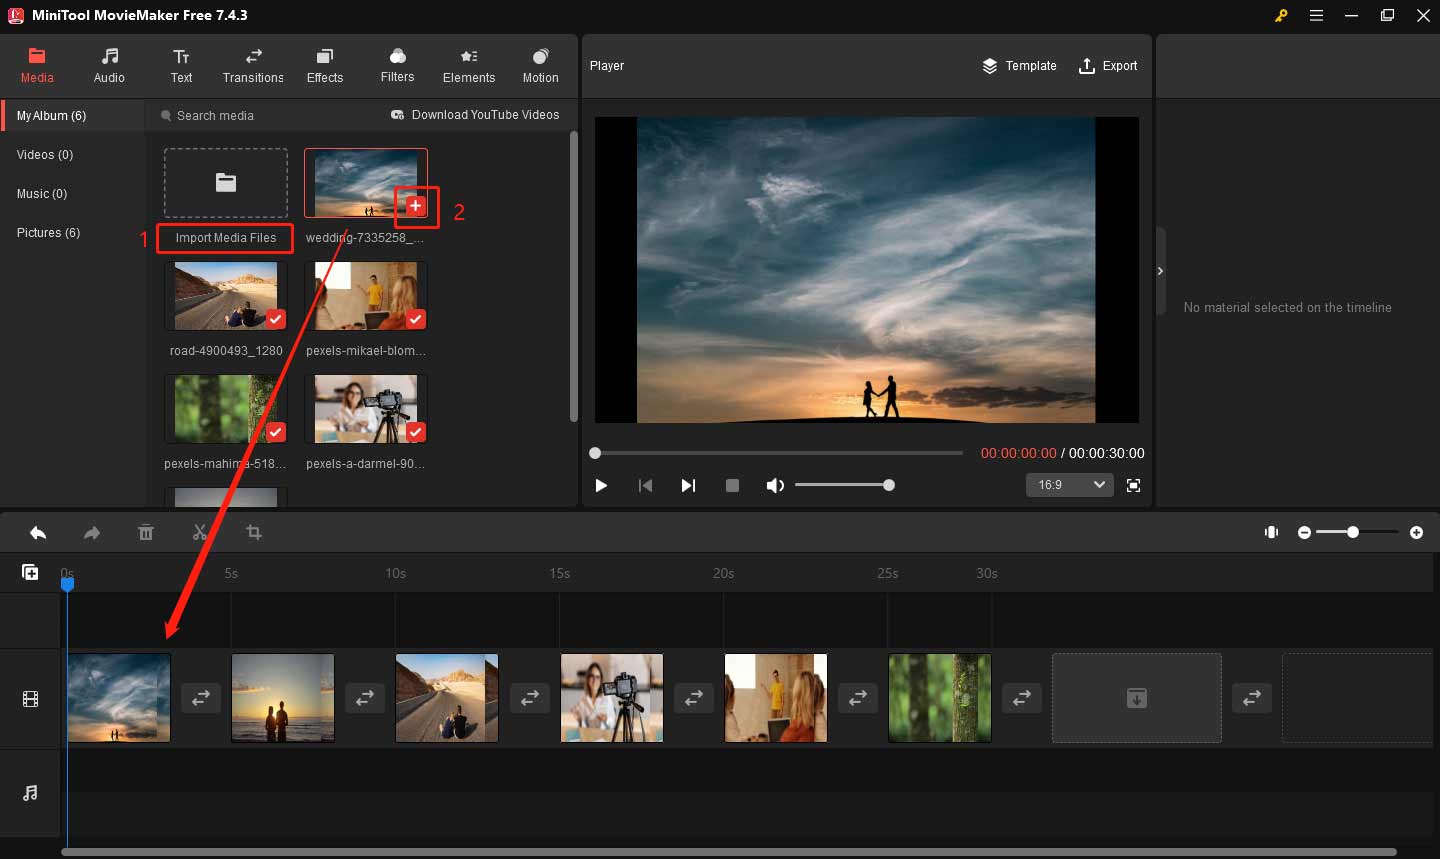
Step 2: Launch this software and close the promotion window. Click Import Media Files to import your images. Click the plus icon on the images or drag them to the timeline.

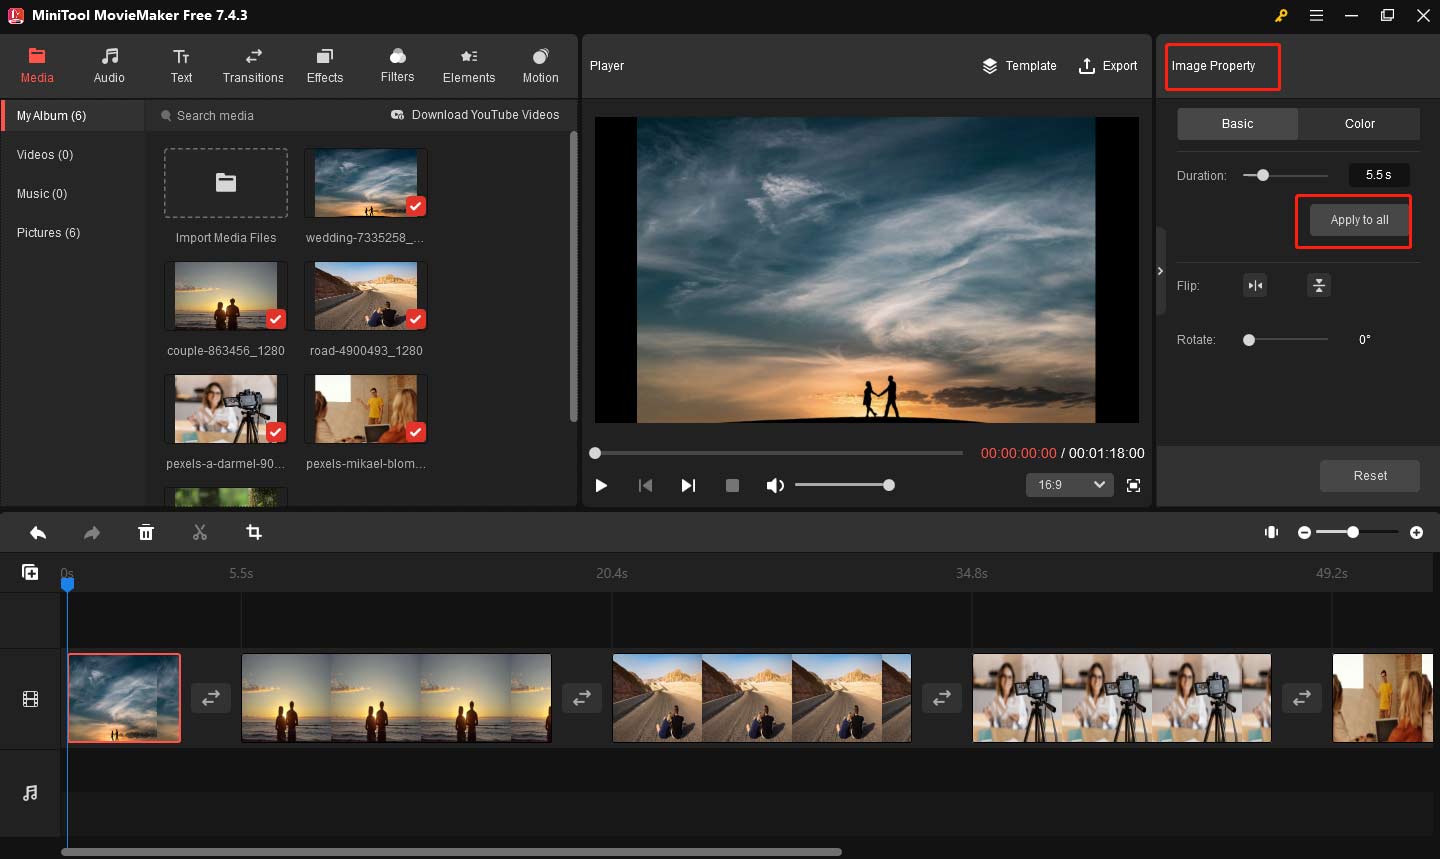
Step 3: If you want to change the image duration, you need to click one image to highlight it. In the Image Property window, drag the Duration slider to the appropriate place. You can click Apply to all to change the duration to the same for all images.

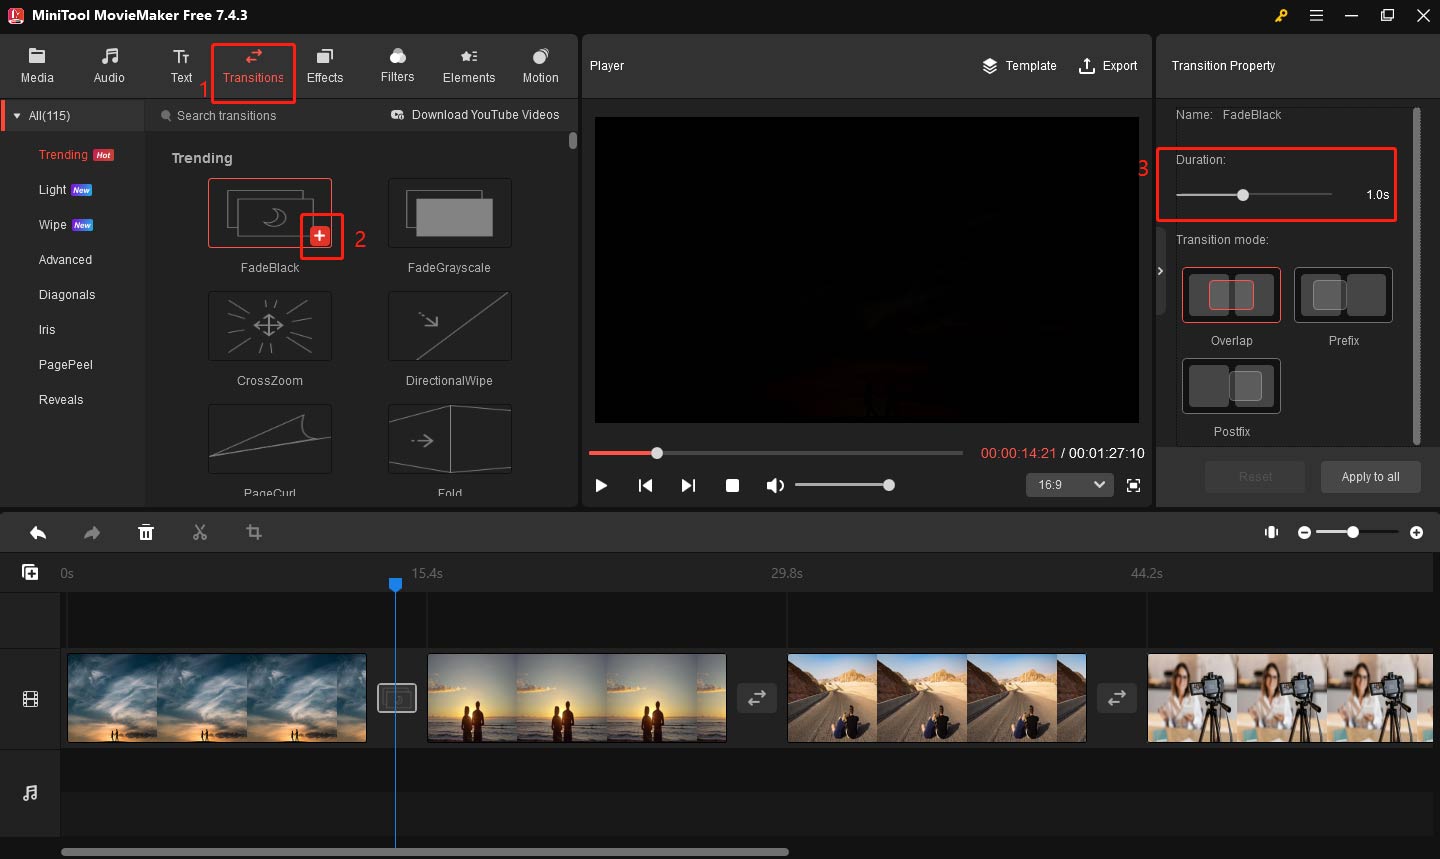
Step 4: Go to the Transitions tab, choose a desired transition effect, and download it. Click the plus icon on the target transition or drag it between two images. Go to Transition Property, you can change the transition duration by moving the Duration slider.

Step 5: Go to the Audio tab, choose an appropriate music, or import your own music from your computer.
Step 6: Click the Export button in the upper right. Enter the slideshow name, and set the file location, format, and resolution in the output window. Finally, click Export to save your work.
Bottom Line
Through the above steps, I believe you have understood how to make a slideshow in Premiere Pro. If you think the process of Premiere Pro is too complicated, you can also try MiniTool MovieMaker, which will bring you a satisfactory answer. Finally, I hope this tutorial can help you to create more wonderful works.


User Comments :