Are you wondering how to reduce the size of Teams recorded video? This post from MiniTool MovieMaker (a free video editor for screen recordings) will show you how to compress Teams recording effortlessly.
Microsoft Teams has a built-in recording feature that allows you to record meetings to reference later or share with others. You may often receive a large video recording file after a long meeting. Therefore, you need to compress your Teams recordings to save storage space and enhance sharing capabilities. Here are 2 effective ways to compress Teams recording for smaller file sizes.
Way 1: Compress Teams Recording with MiniTool MovieMaker
MiniTool MovieMaker is one of the best video editing and compression software for Microsoft Teams. It provides different options to reduce the file size of your recordings. Trim the video to remove unwanted parts at both ends, remove unnecessary parts in the middle of the recording, and lower the video resolution and quality when exporting.
Additionally, MiniTool MovieMaker enables you to crop your recordings, decorate your recordings with text, stickers, frames, arrows, shapes, and more, edit the clip’s color, add music, etc.
MiniTool MovieMaker is easy to use due to its user-friendly and well-organized interface. Besides, it supports exporting videos up to 4K or 1080P for free and without watermarks.
Follow the steps below to compress Teams recordings with this excellent video editor.
Step 1. Click the button below to download and install the video compressor on your computer.
MiniTool MovieMakerClick to Download100%Clean & Safe
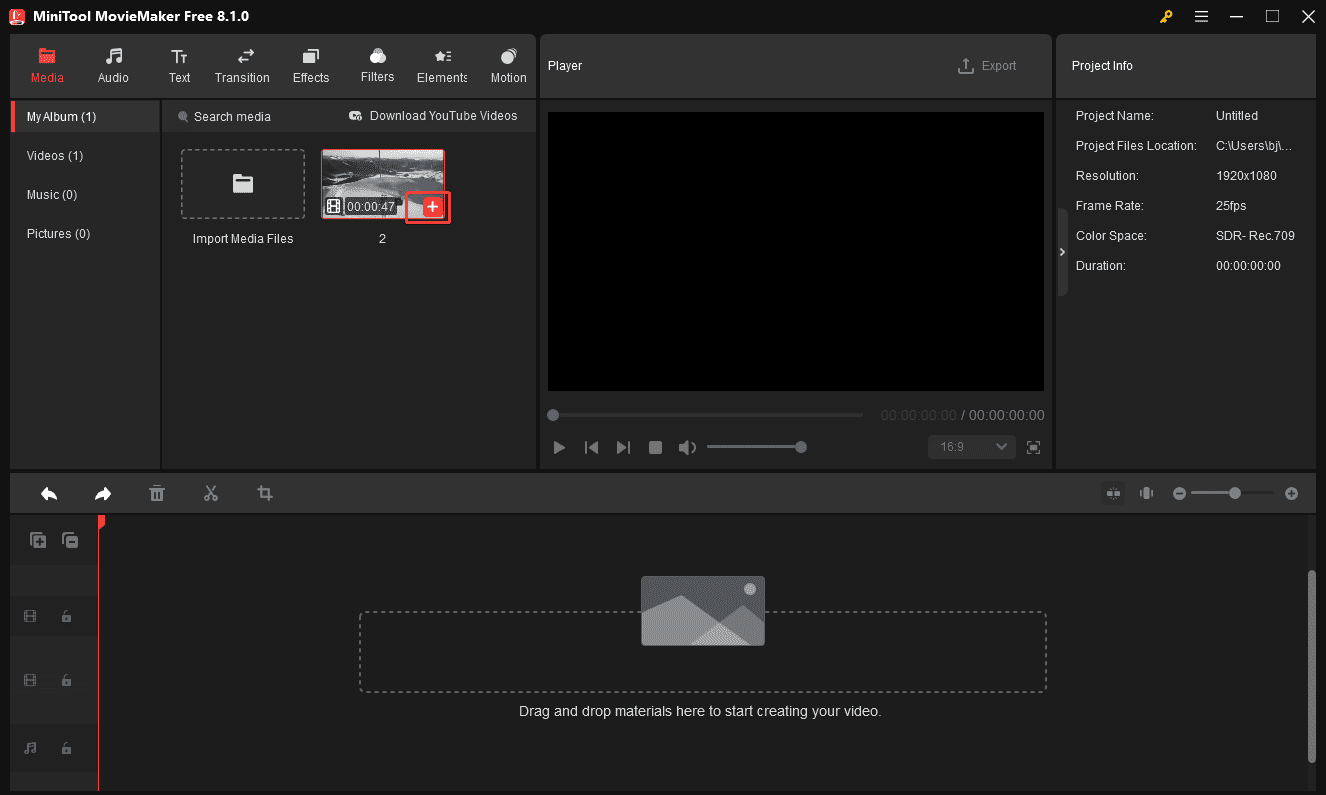
Step 2. Launch MiniTool MovieMaker and close the promotion window to enter the main interface. Then, click the Import Media Files button to open your Microsoft Teams recording and click the + icon on the clip to add it to the timeline.
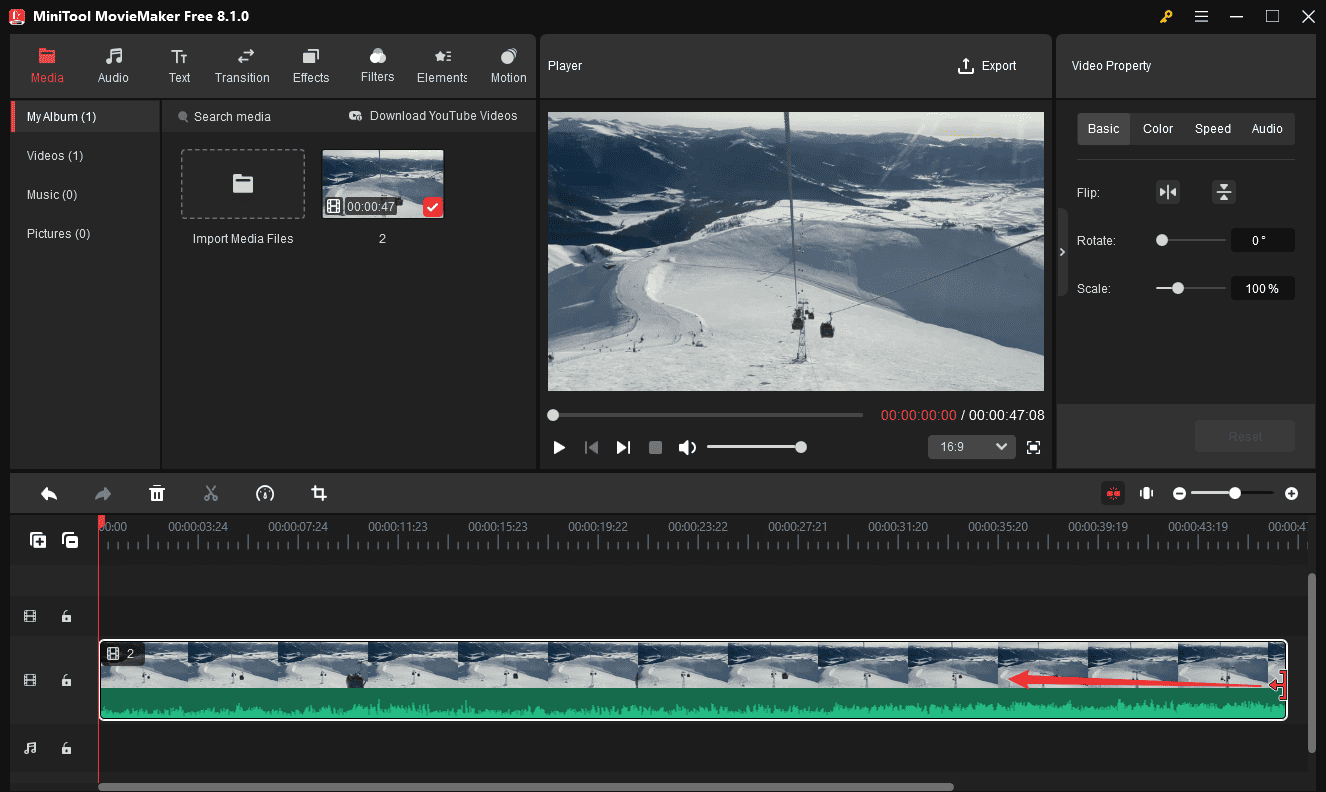
Step 3. To trim the recording, select it on the timeline, hover over the clip’s start or end point until a Trim icon appears, and click and drag the icon inwards to eliminate unwanted parts at the beginning or end of the video.
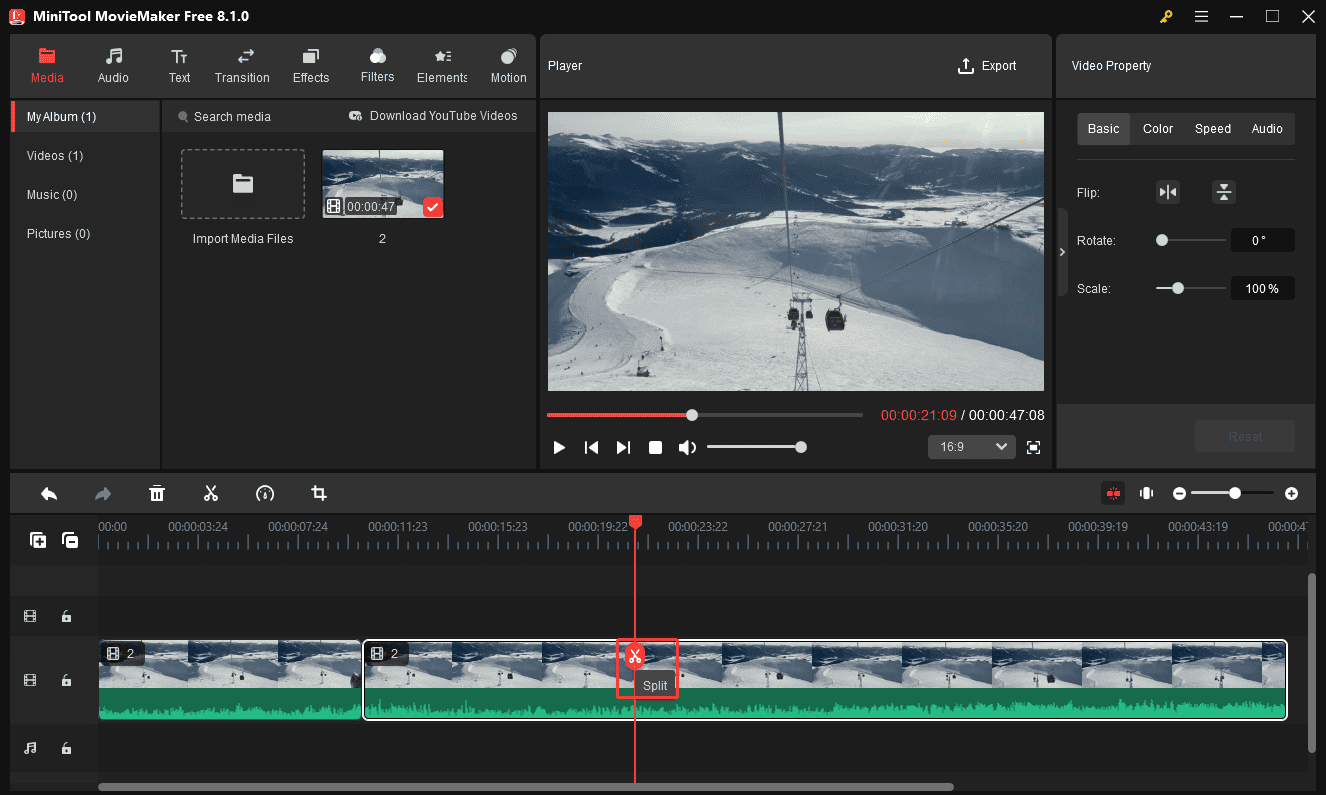
Step 4. To delete the middle part of the video, use the Split tool to separate the target segment, then remove it by right-clicking the clip and choose Delete. To split a video, drag the playhead to the beginning and end of the clip you want to delete, then click the Split (scissors) icon.
Step 5. Click the Export option and configure the output settings. By default, MiniTool MovieMaker saves rendered videos in the MP4 (H.264) format at 1080P resolution. Here, I recommend not changing the output format because currently, MP4 (H.264) is the smallest and most compatible video format.
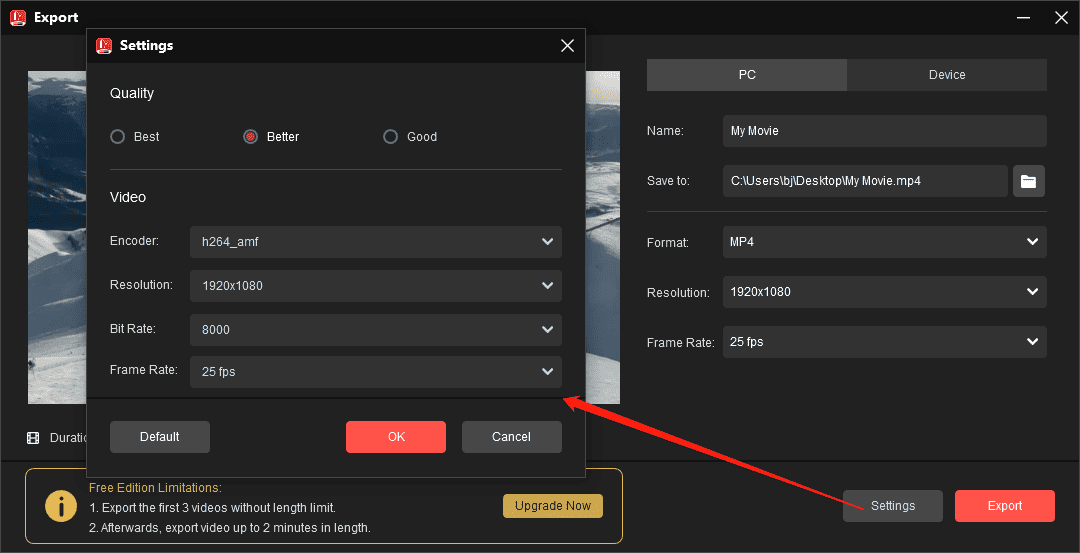
To shave down your Teams recording, select a lower resolution like 1280×720 (720P), lower the video quality, and reduce the video bitrate. Finally, save your changes and click the Export button to export the video.
Way 2: Compress Teams Recording with MiniTool Video Converter
MiniTool Video Converter is a free video compressor and converter that supports a wide range of video codecs and formats. If you need to compress Teams recordings without deleting some details, use this application to reduce the file size of your video by changing the video encoder and other parameters.
Apart from that, MiniTool Video Converter lets you record Microsoft Teams meetings and other activities on your computer for free without time limits and watermarks. Here’s how to reduce the size of Teams recorded video.
MiniTool Video ConverterClick to Download100%Clean & Safe
Step 1. Launch MiniTool Video Converter after completing the installation.
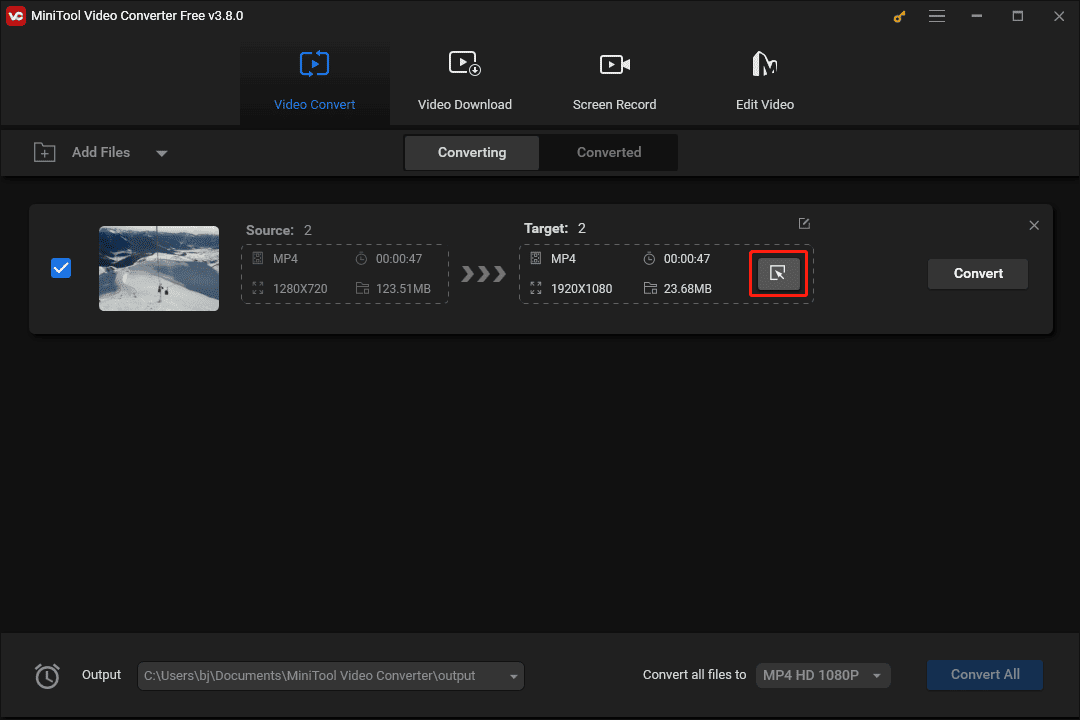
Step 2. Click the Add or Drag files here to start conversion area to import your Teams recording and click the diagonal arrow in the Target box.
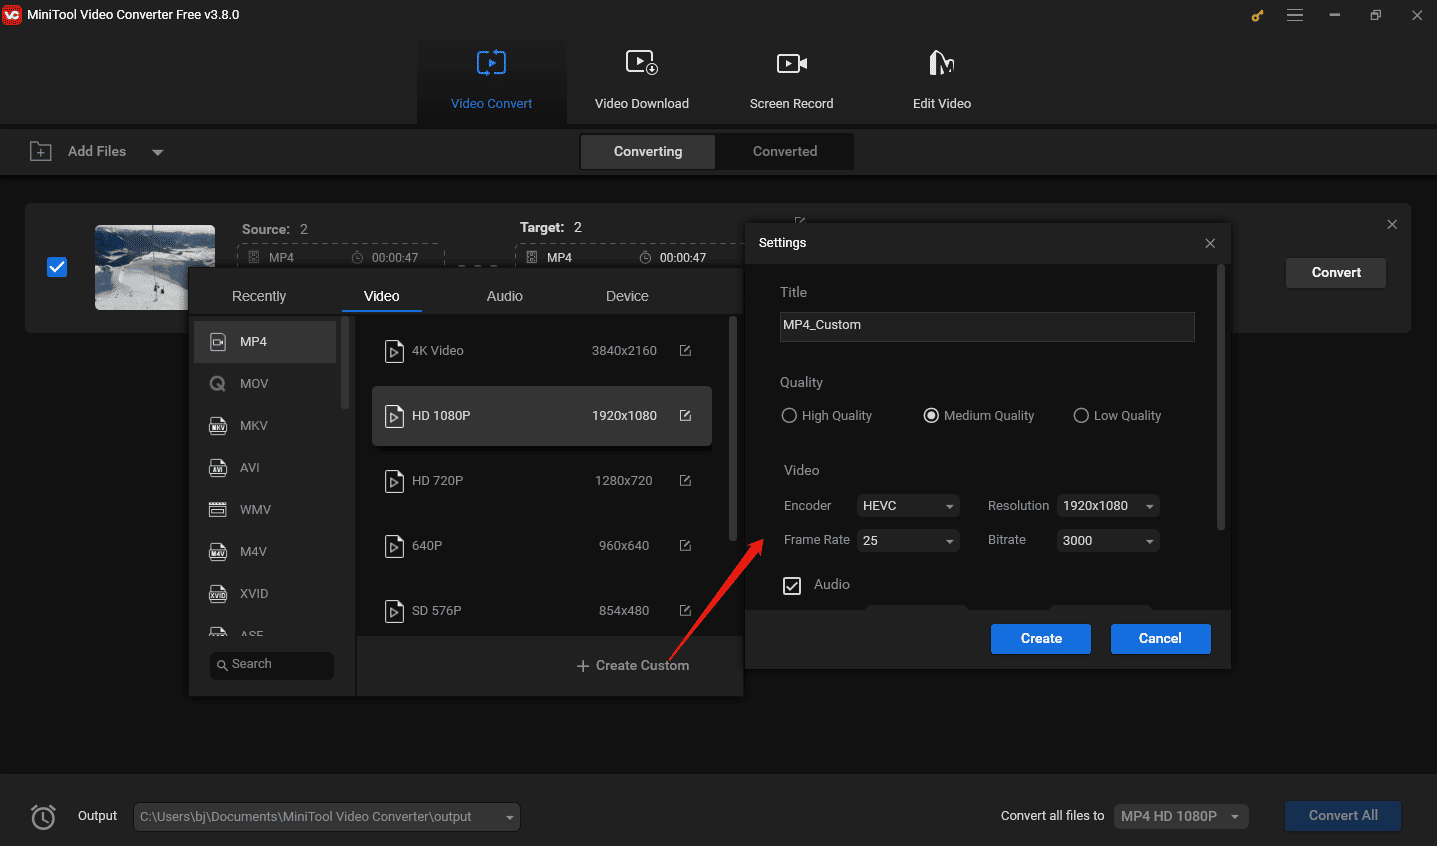
Step 3. Go to the Video tab and choose MP4 on the left sidebar. You can then choose a low-resolution profile and check the estimated file size. To compress the video more efficiently, convert it to an HEVC MP4 file, as HEVC (H.265) achieves higher compression efficiency than H.264.
To do this, select MP4 and click the + Create Custom button. On the Settings window, set Encoder to HEVC, and select the resolution, frame rate, and bitrate. Click Create to create a custom MP4 format. Then, set it as the output format.
Step 4. If you’re satisfied with the result, click the Convert button to start the compression task.

Conclusion
You can follow the steps above to compress Teams recording, thus saving your space and improving video accessibility for seamless sharing and management.
You may also like:
About The Author

Position: Columnist
Cora is a tech writer specializing in digital media workflows, with over six years of hands-on experience in video post-production, media transcoding, and screen capture. Her writing is always clear and practical. Cora also produces in-depth software reviews for users across skill levels to help them find the right tool and enjoy video editing.
User Comments :