Adding a fire effect to photos is a creative way to make your images more dynamic and visually striking. This guide will show you how to add a fire effect to photos using the free video editor MiniTool MovieMaker and the Windows video editor Microsoft Clipchamp.
How to Add Fire Effect to Photos on Windows
This section provides detailed steps on how to add a fire effect to a photo. Let’s take a closer look at each method.
Method 1: Add Fire Effect Using MiniTool MovieMaker
MiniTool MovieMaker is an all-in-one editing application for Windows that allows you to edit videos, images, and audio. With its intuitive interface and powerful features, you can easily create and edit projects, such as creating videos from images, adding content to media, and more.
To add fire effects to photo, MiniTool MovieMaker offers an extensive collection of elements and effects, including fire frames and fire stickers. You can adjust a sticker’s size, position, and rotation, allowing you to achieve your desired effect. Moreover, this application supports up to 9 tracks for photos, stickers, and other elements, making it easy to create stunning overlay effects.
In addition to adding fire effects, MiniTool MovieMaker can also crop images, add text, apply filters, and adjust image properties such as contrast, saturation, and brightness. It is a versatile video editor that strikes a good balance between ease of use and functionality.
Here is how to add fire effect to photos using MiniTool MovieMaker.
Step 1: Download and Install
Click the button below to download this photo editor. Then, follow the on-screen instructions to install it on your computer.
MiniTool MovieMakerClick to Download100%Clean & Safe
Step 2: Import Your Photo
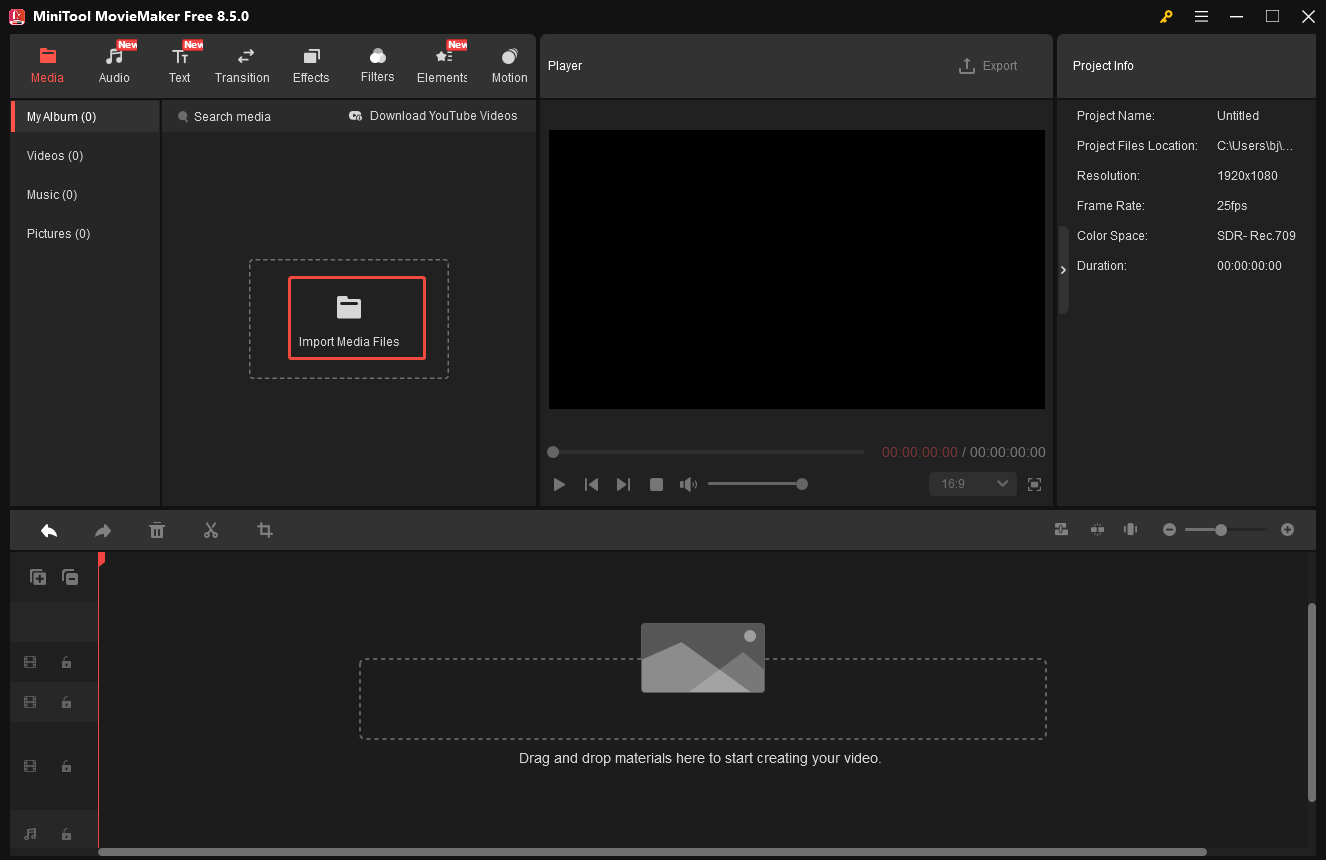
Launch MiniTool MovieMaker and close the pop-up project library window. Next, click the Import Media Files option under the Media tab to upload your photo. Then, drag it to the timeline.
Step 3: Add Fire Effect to Photo
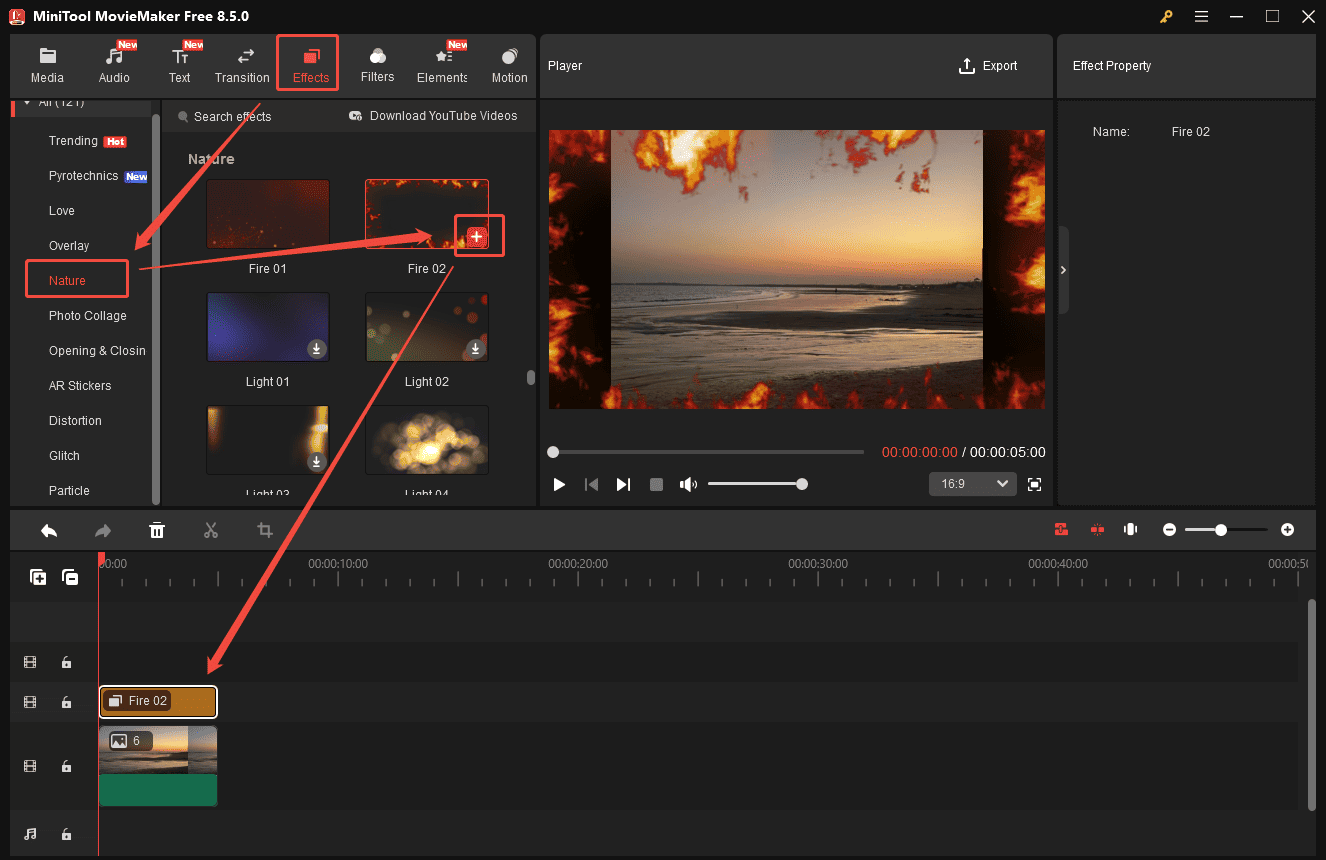
Click the Effects tab at the top of the menu. Scroll down to the Nature category to find your desired fire effects. Hover your cursor over its thumbnail to preview the animation. If you are satisfied with it, click the Download icon and drag it to the timeline.
Step 4: Add Fire Sticker to Photo
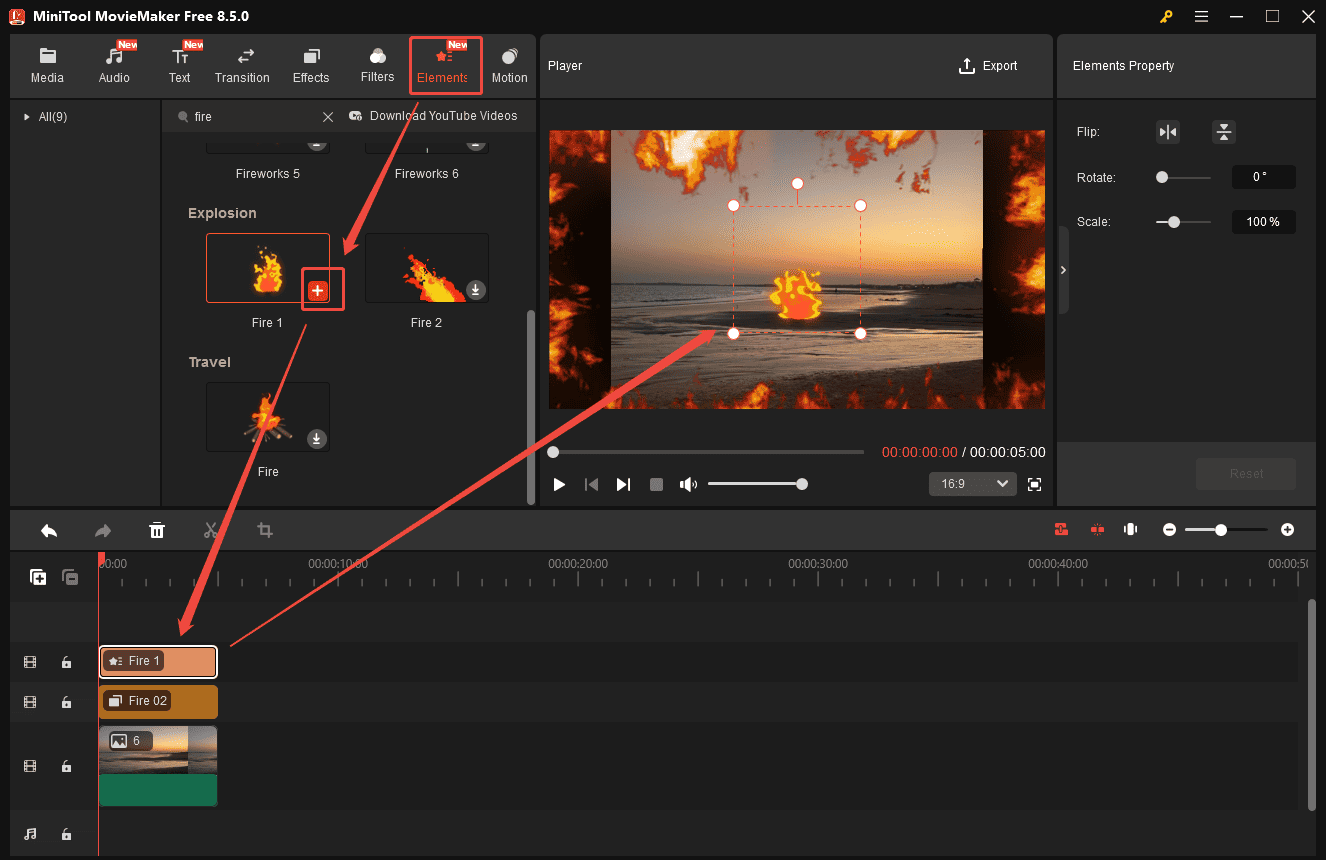
You can also add fire stickers to your photo. Switch to the Elements tab and type fire in the search bar to view all available fire stickers. Download your desired sticker and click the Plus icon to add it to your photo. You can reposition, resize, and rotate it directly in the player window.
Step 5: Save the Image with Fire Effect
Once editing is finished, click the Export option above the player window. Set the photo format to GIF.
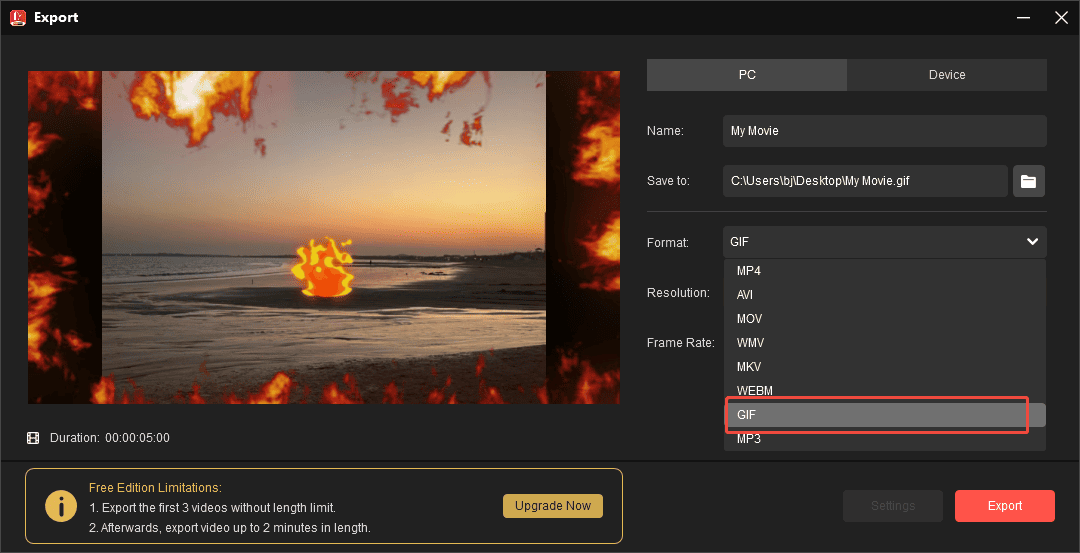
Then, click the Export icon at the bottom of the export window to save it to your computer. You can convert the GIF format to JPG or PNG formats based on your needs.
Method 2: Add Fire Effect Using Microsoft Clipchamp
Microsoft Clipchamp is a video editor and screen recorder that comes pre-installed with Windows 11. It provides a content library with a variety of resources such as music, stickers, backgrounds, frames, sound effects, and more. To add a fire effect to a photo, Microsoft Clipchamp offers fire backgrounds, fire overlays, and fire frames to enhance your images.
How to add fire effect to photos? Follow the steps below.
Step 1: Access Microsoft Clipchamp
Check if Microsoft Clipchamp is installed on your computer. If not, download and install it from the Microsoft Store. Launch Microsoft Clipchamp and click Create a new video to enter the main editing interface.
Step 2: Import Your Photo
Click Import media to upload your photo, then drag it to the timeline.
Step 3: Add Fire Effect to Photo
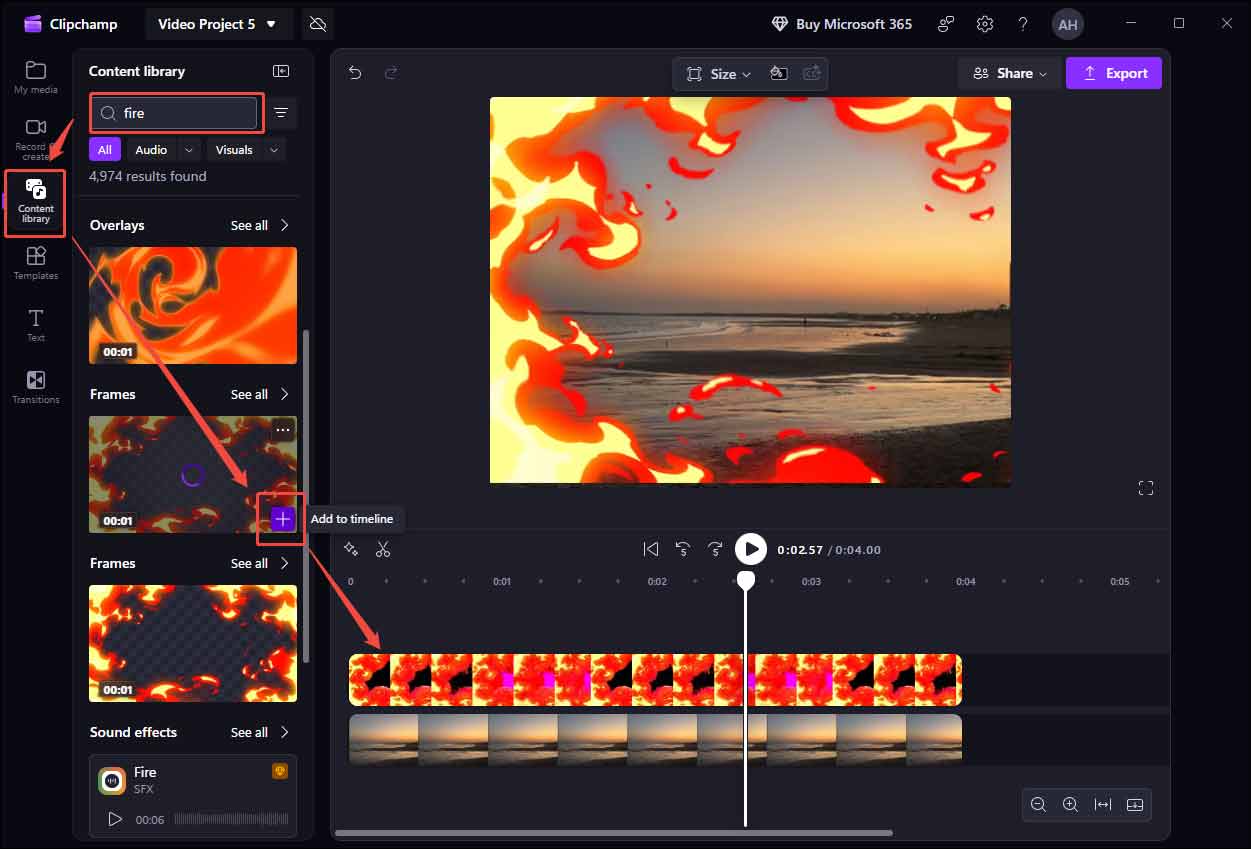
Click Content Library in the left toolbar. Type fire in the search bar to view all available fire effects. Select the desired visual element and drag it to the timeline.
Step 4: Export the Photo with Fire Effects
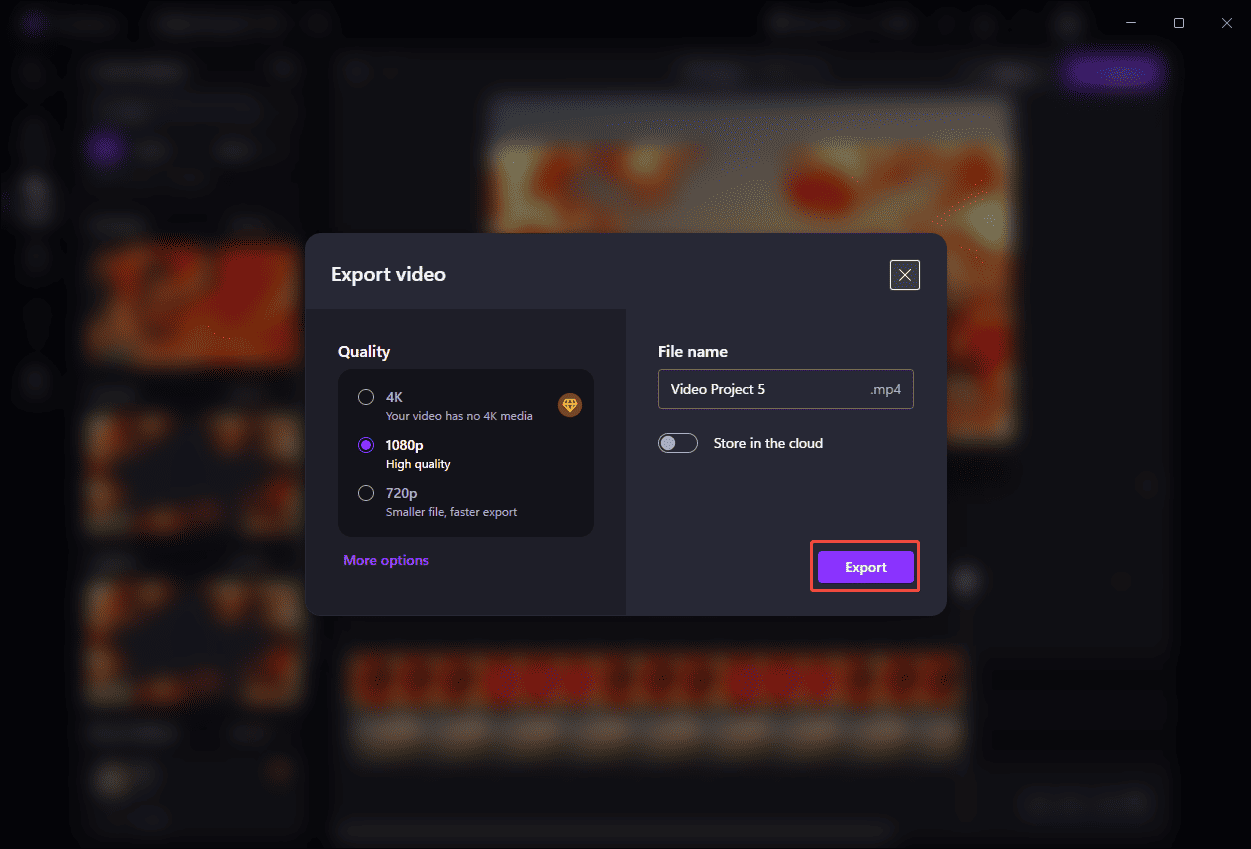
After editing, click Export in the upper-right corner. Select an appropriate quality and click Export again to save the video to your computer. You can also convert the exported MP4 video into PNG or other image formats.
![How to Add Fire Effect to Video on Windows [Solved]](https://images.minitool.com/moviemaker.minitool.com/images/uploads/2024/07/add-fire-effect-to-video-thumbnail.jpg)
Conclusion
This guide demonstrates how to add fire effect to photos on Windows. Whether you want to add fire stickers or frames, both MiniTool MovieMaker and Microsoft Clipchamp provide the resources to enhance your images. Both tools are easy to use, so you can choose the one that best suits your needs.
If you have any suggestions or encounter any problems when using MiniTool MovieMaker, please don’t hesitate to contact us via [email protected].
About The Author

Position: Columnist
Alice is a tech writer at MiniTool, specializing in tutorials and guides on video editing and screen recording. She stays up to date with the latest tools and techniques to ensure her content is accurate and easy to follow. By combining hands-on testing with continuous learning, Alice aims to help readers solve tech problems efficiently.
User Comments :