Montage is cinematic that can help you express something with the video montage beyond a single picture and image. Next, let’s firstly learn what is a montage, then master how to make a video montage on different platforms.
What Is a Montage
When it comes to montage, we can associate with the Hollywood film that has a smooth pace and quickly switch to the next shot. But what is a montage? Nowadays, montage definition has been widely spread in the daily life, not confined to the cinema industry, and a video montage can be applied to various occasions, like birthday party, celebration activity, new year eve, etc.
A montage means you can stitch a sequence of video clips into a meaningful video with the help of a montage maker. The following content will show you how to make a montage.
How to Make a Video Montage on Windows
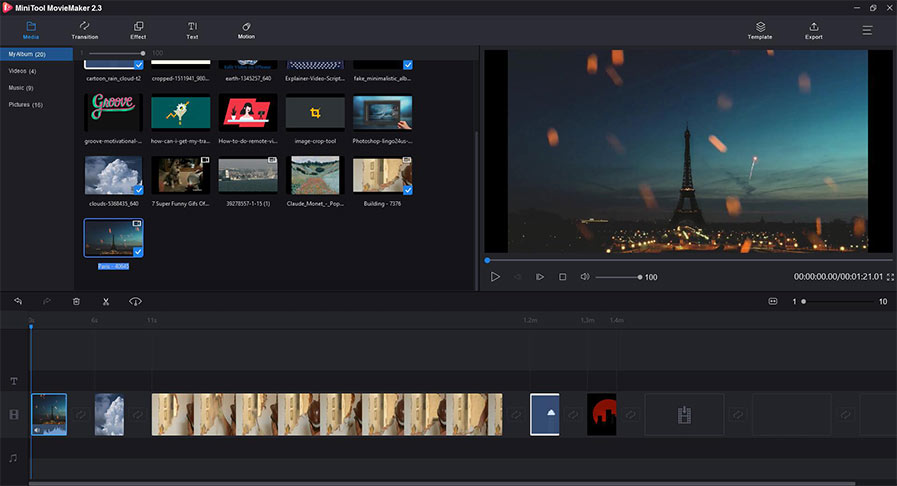
If you are looking for a free and easy-to-use montage maker on Windows, MiniTool MovieMaker is an ideal one. With it, you can make an impressive video montage with its many excellent features. What’s more, its intuitive interface can also help you make a video montage easily.
Unlike other video montage makers, MiniTool MovieMaker never attaches your video montage with watermark and you don’t need to pay for it. And it also supports importing various image, video and audio formats, and you can export the video montage in any format you want.
Here’s a step-by-step guide on how to make a video montage using this useful montage maker.
Step 1. Launch MiniTool MovieMaker and close the pop-up tutorial window to enter the main interface directly.
Step 2. Click the Import Media Files button to upload all your images and video footage.
Step 3. Click the + button in the right below corner to add them onto the timeline one by one.
Step 4. Drag and drop their position to make them in your desired order. You can edit every image and video clip, like trim, split, add some transitions and effects, set the duration of every clip, and so on.

Step 5. Click the Music tab to upload your background music. And add it to the audio track to align with the video montage, and trim audio.
Step 6. Click the Export button, and then choose the format, resolution to save on your PC.
You may be interested: Top 8 Video Editors without Watermark for PC
How to Make a Video Montage on Mac
For Mac users, iMovie – the free and built-in montage maker is the best choice. There are many video montage editing features for your options to create a special video montage. Let’s see how to make a video montage with iMovie.
Step 1. Open the iMovie and click the Project button to start. Then tap on the Photo Library tab.
Step 2. Upload all your material for a montage to the photo library, rearrange them in the timeline, and make some necessary edits.
Step 3. When everything has done, export your video montage.
How to Make a Video Montage Online
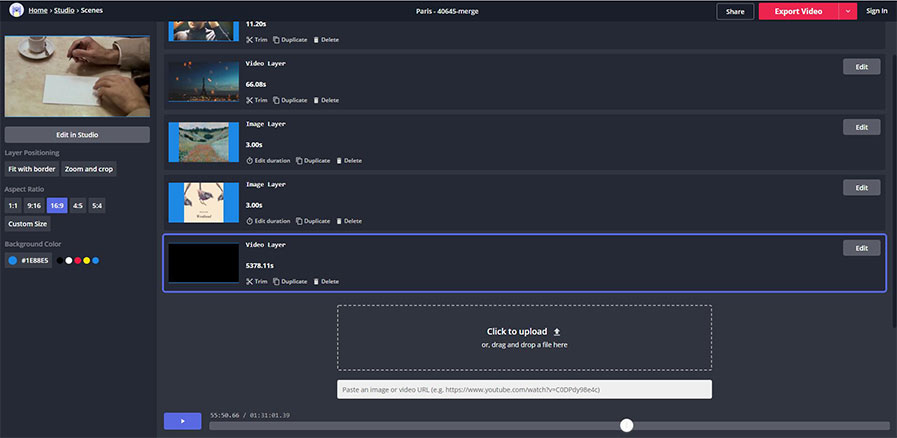
Making a video montage online is a good idea because you don’t need to download any software. As to online montage makers, Kawping is suitable for you. Its stylish interface and the multifunctional studio would give you a good experience, and it also allows you to add music, some video transitions, and text to your montage.
Step 1. Upload your pictures and video clips to the studio.
Step 2. Make some edits to every clip, such as apply effects, add a caption, etc. and make them in order.
Step 3. Click the Publish button or directly share it on social media.

Related article: 10 Best Photo Slideshow Makers (Windows and Mac Edition)
Bottom Line
Have you known what is a montage and how to make a montage? I guess your answer is sure. You can check this post anytime when you want to refer to relevant video montage makers. If you have any questions or suggestions about it, please feel free to contact us via [email protected] or leave your comments in the below section.


User Comments :