This post shows how to easily make a wonderful video and then publish it on YouTube. MiniTool MovieMaker is a wise choice for you because of its powerful functions as well as simple operations. With the best video editing software, you can easily and quickly make a YouTube video.
YouTube, originally created in 2005, is a free video-sharing website that makes it easy to watch online videos. As one of the most popular sites on the web, you can create and upload your own videos to share with others.
What Do You Need to Make a YouTube Video?
Before making a YouTube video, the first thing you need to know is the necessary things for creating a YouTube video. In general, you will need the following things.
- YouTube video-making and editing software.
- A device for making a YouTube video like a computer or a phone.
- The resources for creating a YouTube video include video clips, photos, audio files, etc.
As for which kind of hardware device you need to build a YouTube video, it depends on which video-creating program you choose. Some applications apply to desktop PCs, some tools are compatible with smartphones, and some apps support both kinds of platforms.
How to Make a YouTube Video on a Computer?
First of all, let’s see how to make a YouTube video for free on a computer.
Step 1. Download Free MiniTool MovieMaker
A lot of video editing programs are now made available in the market which can help you create your own videos. Among those YouTube video creators, we select MiniTool MovieMaker because it is powerful and easy to use.
MiniTool MovieMaker, a free video editing software released by MiniTool, can help you create and edit videos of various formats that can be submitted to YouTube, Instagram, TikTok, Facebook, Twitter, Vimeo, and Flickr. More importantly, the best free video editing software offers a wizard-like interface, thus even a new user can easily create a movie.
MiniTool MovieMakerClick to Download100%Clean & Safe
After downloading, you are supposed to install it on your PC and then launch it to create a YouTube video with videos, pictures, and music.
Step 2. Import Media Files for Your YouTube Video
How to make a YouTube video with pictures and music? The first step of making a YouTube video is to import images, videos, and songs into MiniTool MovieMaker!
Free MiniTool MovieMaker allows you to import songs, videos, and photos from your local storage in 3 ways:
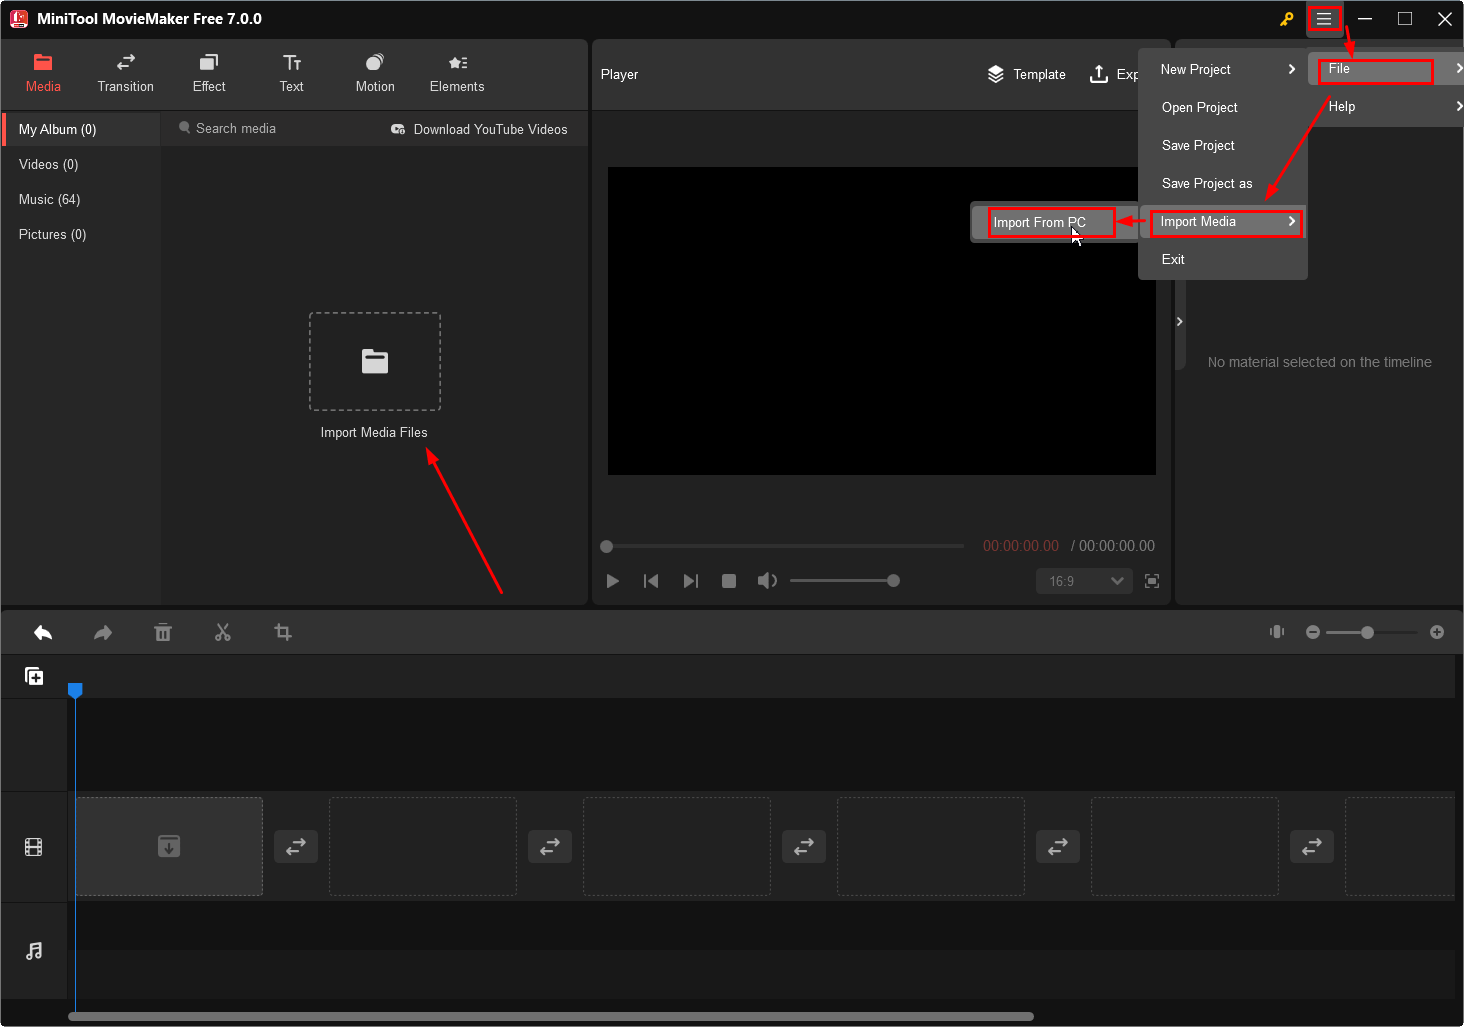
- Click the Import Media Files option under the Media tab.
- Directly drag and drop target files to the media library.
- Go to More > File > Import Media > Import From PC from the top right.
MiniTool MovieMaker supported input file types:
- Video Files: mp4, 3gp, mpg, wmv, mov, mkv, flv, avi, vob, rmvb, webm
- Audio Files: mp3, m4a, m4r, wav, flac, aac, amr, ape
- Image Files: png, jpg, jpeg, gif, bmp, ico, tif
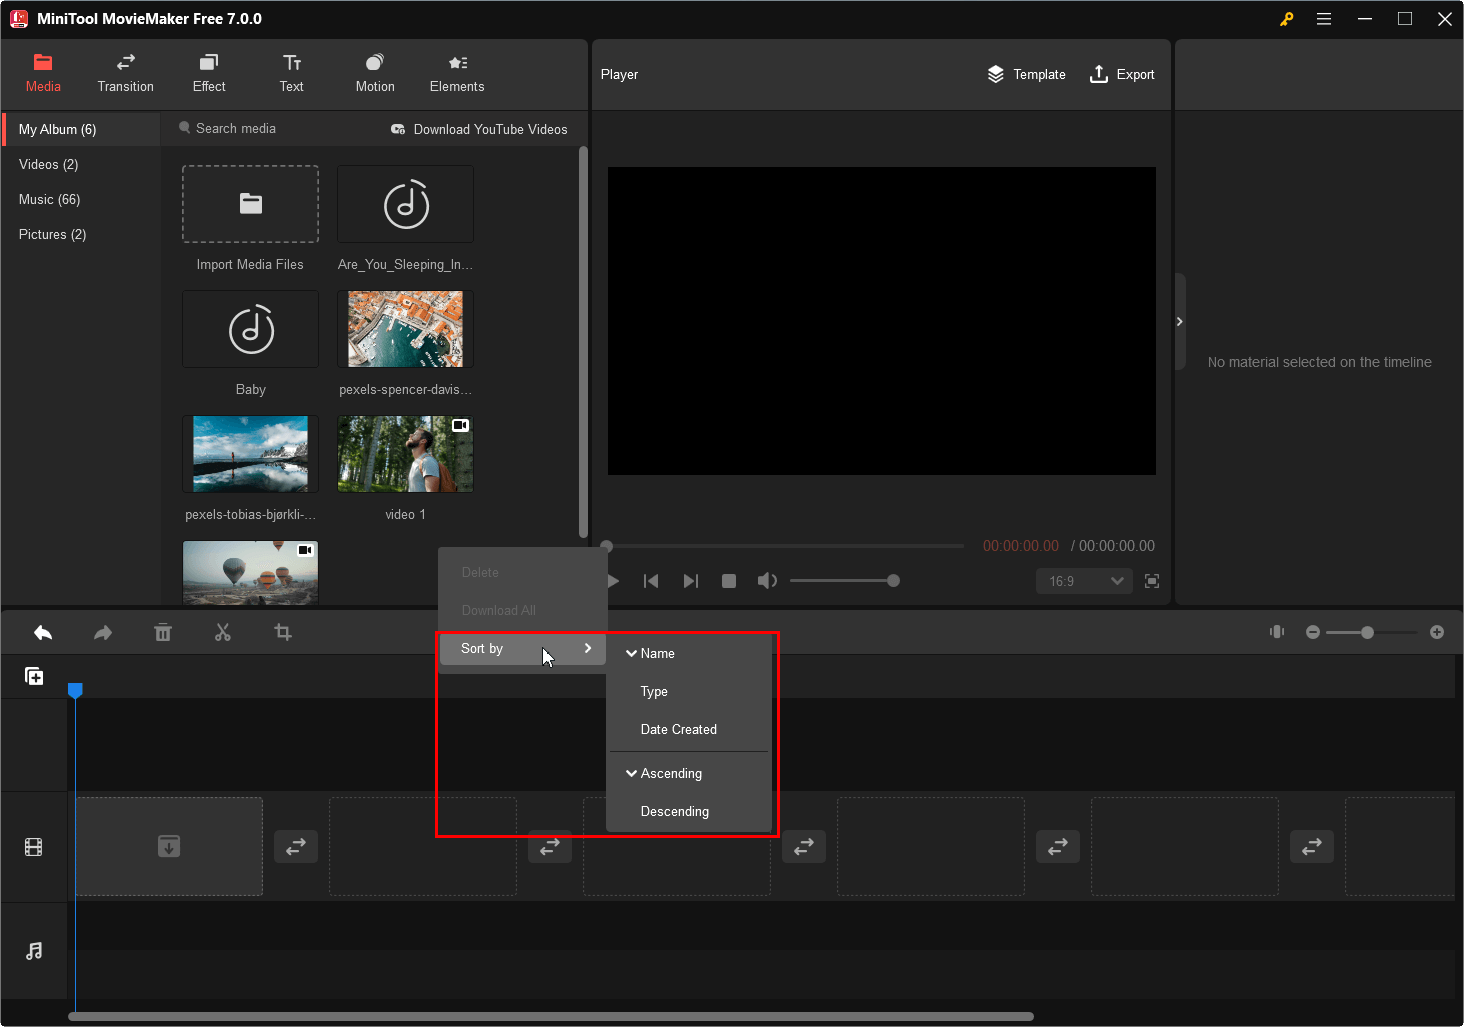
The imported media files will be saved in the media library of MiniTool MovieMaker. You can see them all in the My Album subtab. You may wonder how to distinguish them there. Well, the videos have a video icon, the songs have a music icon, while the photos have nothing. Or, just go to the corresponding subtab to view the uploaded media files.
You can sort the uploaded media files by name, type, or date created and display them by ascending or descending. Just right-click on any space within the media library and choose Sort by.
To quickly find a specific media file, just search its name in the upper Search media row.
Step 3. Add Some Special Effects to Make Your YouTube Video
Now, it is time to arrange and decorate your YouTube video.
To begin with, click the + icon on the media files to add them to the timeline. You need to add them one by one in an order you prefer. Or you can directly drag and drop them on the corresponding track on the timeline.
Then, let’s do some editing to the added media files.
#1. Split or Trim a Video
To divide up a long clip of footage, you can drag the playhead to the point where you want to split and then click on the scissors icon on the playhead or click the scissors icon on the timeline toolbar and select Quick Split. MiniTool MovieMaker will cut the clip at the exact time you’ve chosen.

You can also choose Full Split and make a precise splitting accurate to the frame.
After splitting, you can delete either part you don’t want or insert another file or add a transition between the two sections.
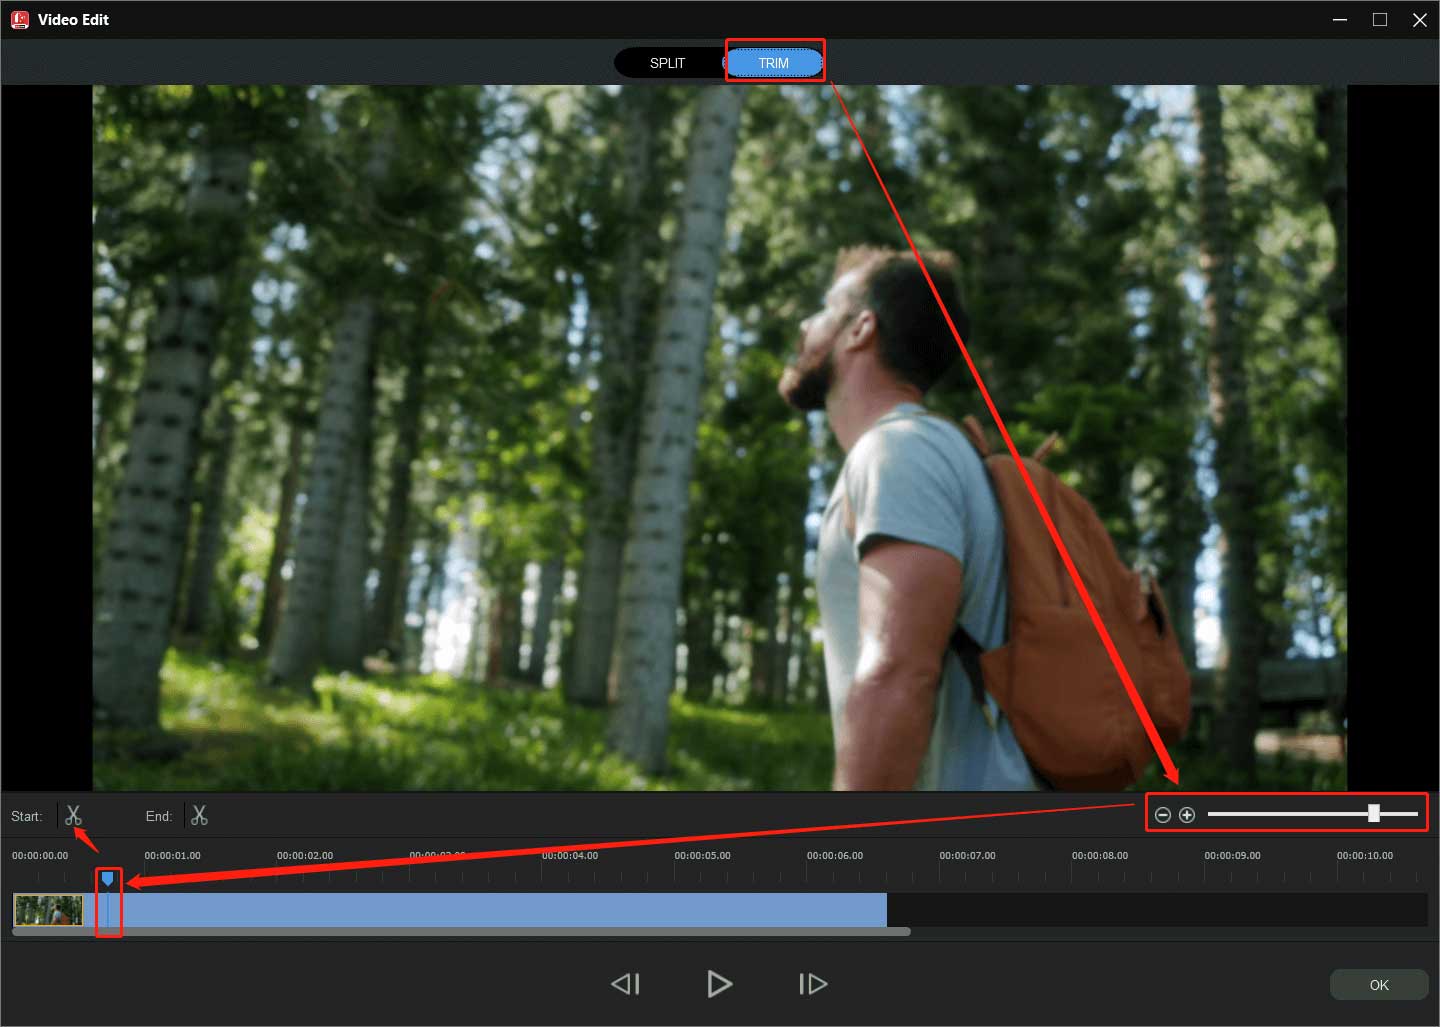
If you don’t want the start and end of a video clip, you need to split it twice and delete it twice, which is a little bit troublesome. Thus, MiniTool MovieMaker offers a shortcut – video trim, which can be accessed after choosing the Full Split option.
In the Video Edit window, switch to the TRIM tab and zoom in the video on the timeline to see each video frame clearly. Then, move the playhead to the beginning of the wanted part of the video and click the scissors icon behind the Start option on the timeline toolbar to cut off the unwanted head. Similarly, drag the playhead to the end of the wanted part and click the scissors icon to remove the unwanted tail. Finally, click OK to save the changes.
#2. Crop a Video or Image
Next, let’s see how to crop out unwanted parts of a photo to make your visitors focus on what you want them to see.
Click on the target picture on the timeline and click the Crop icon on the timeline toolbar.
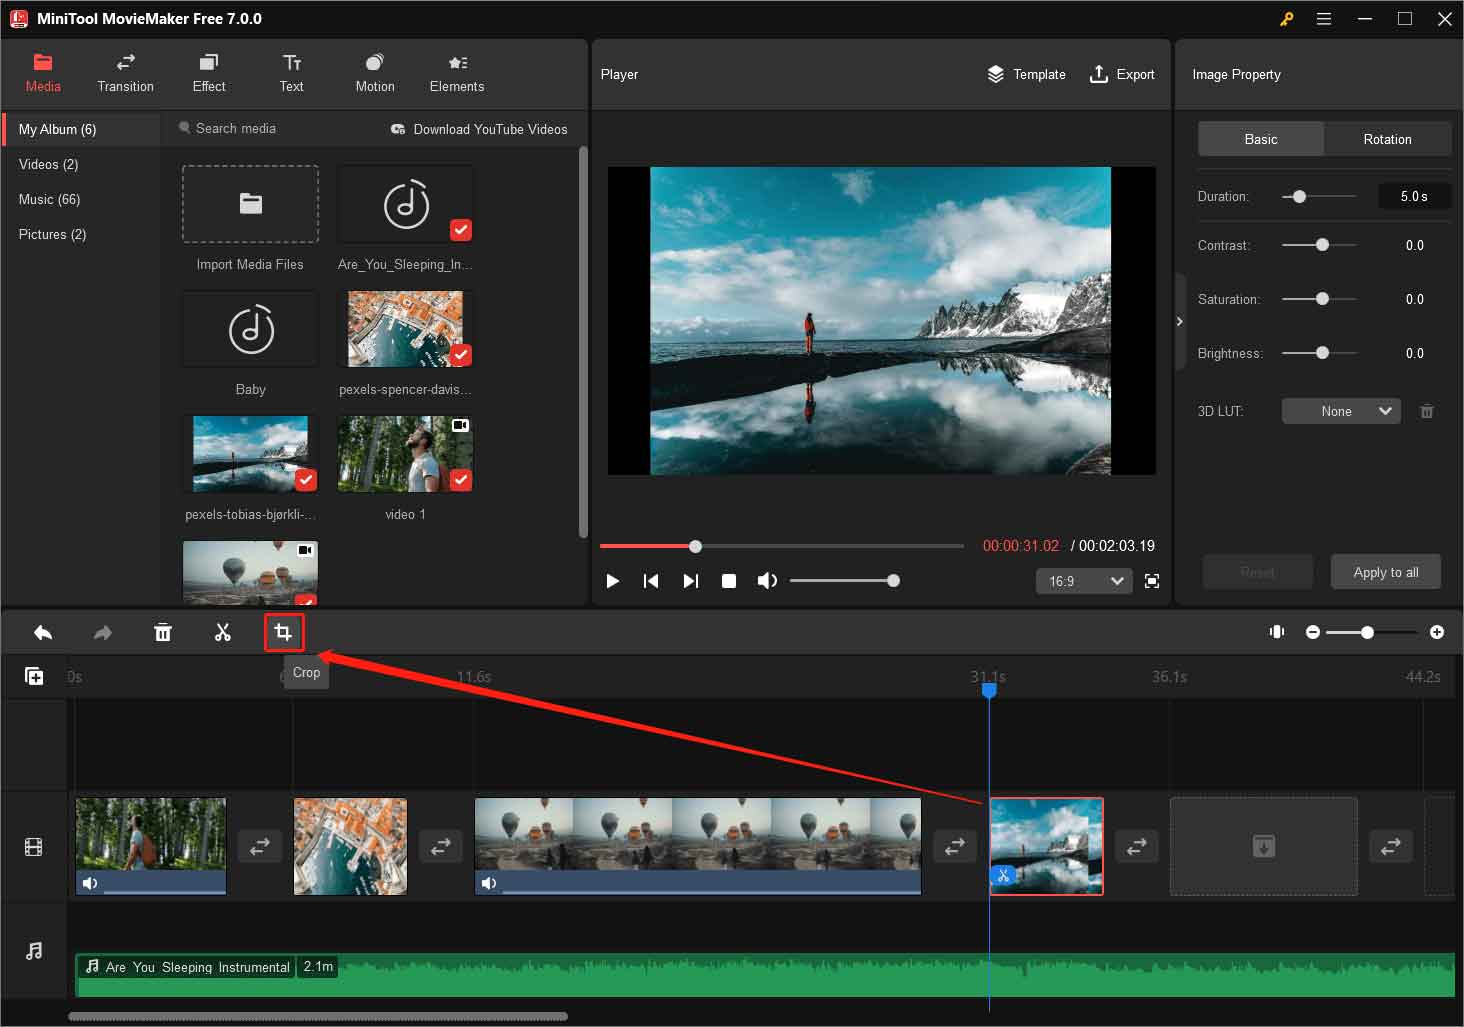
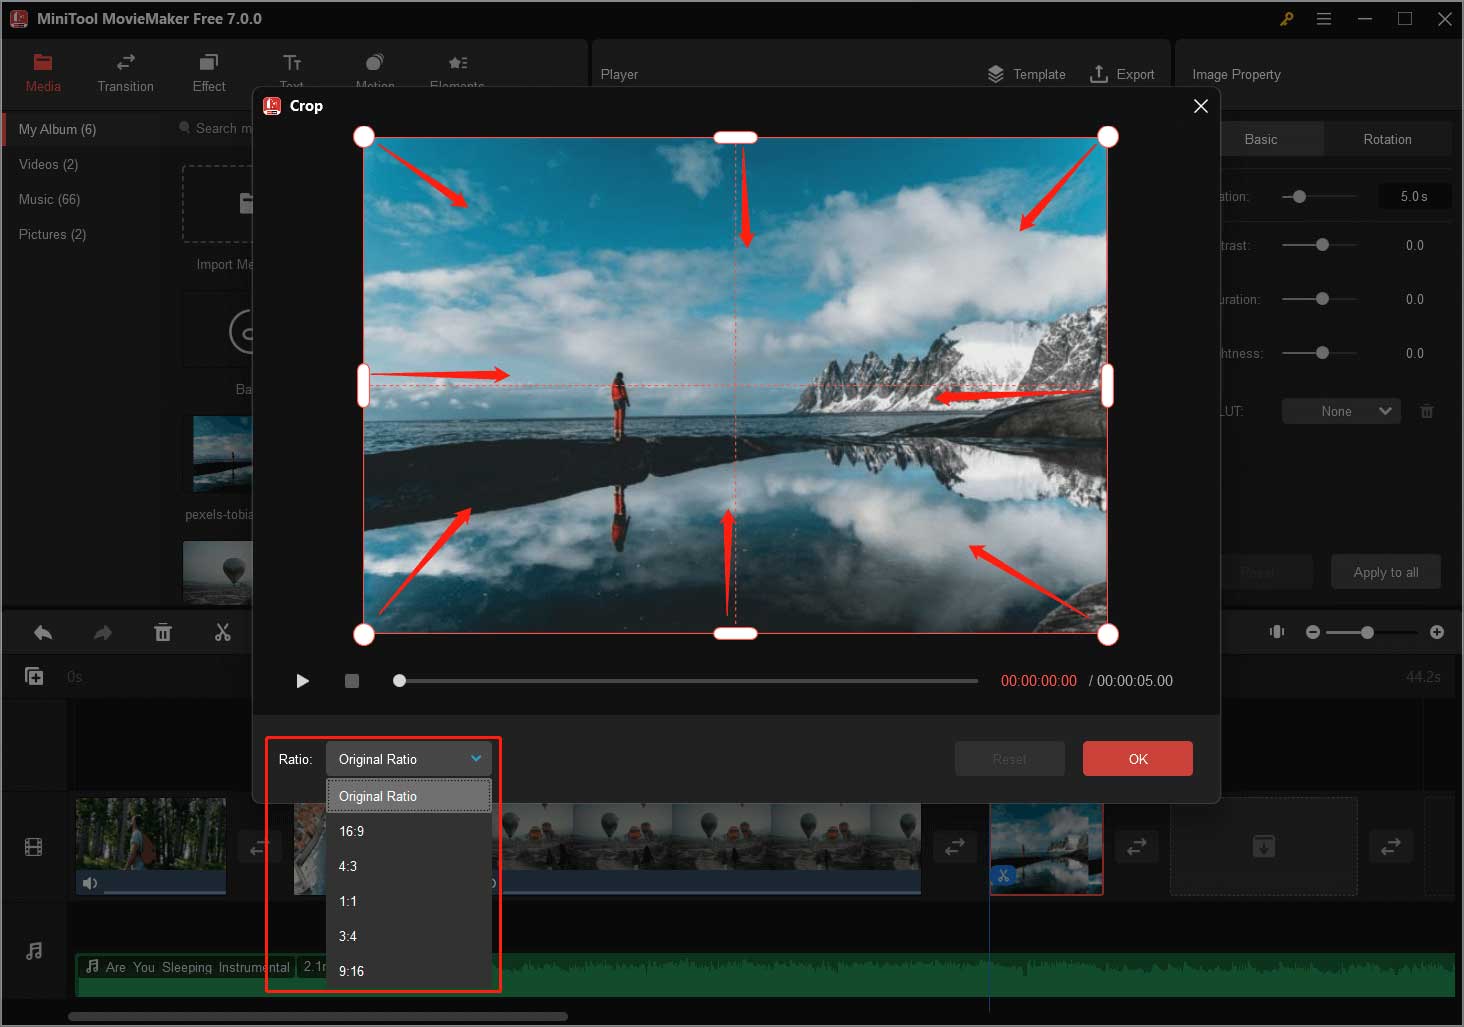
In the next window, you can manually resize the image in eight directions. Or you can select an aspect ratio to automatically crop your graphic file.
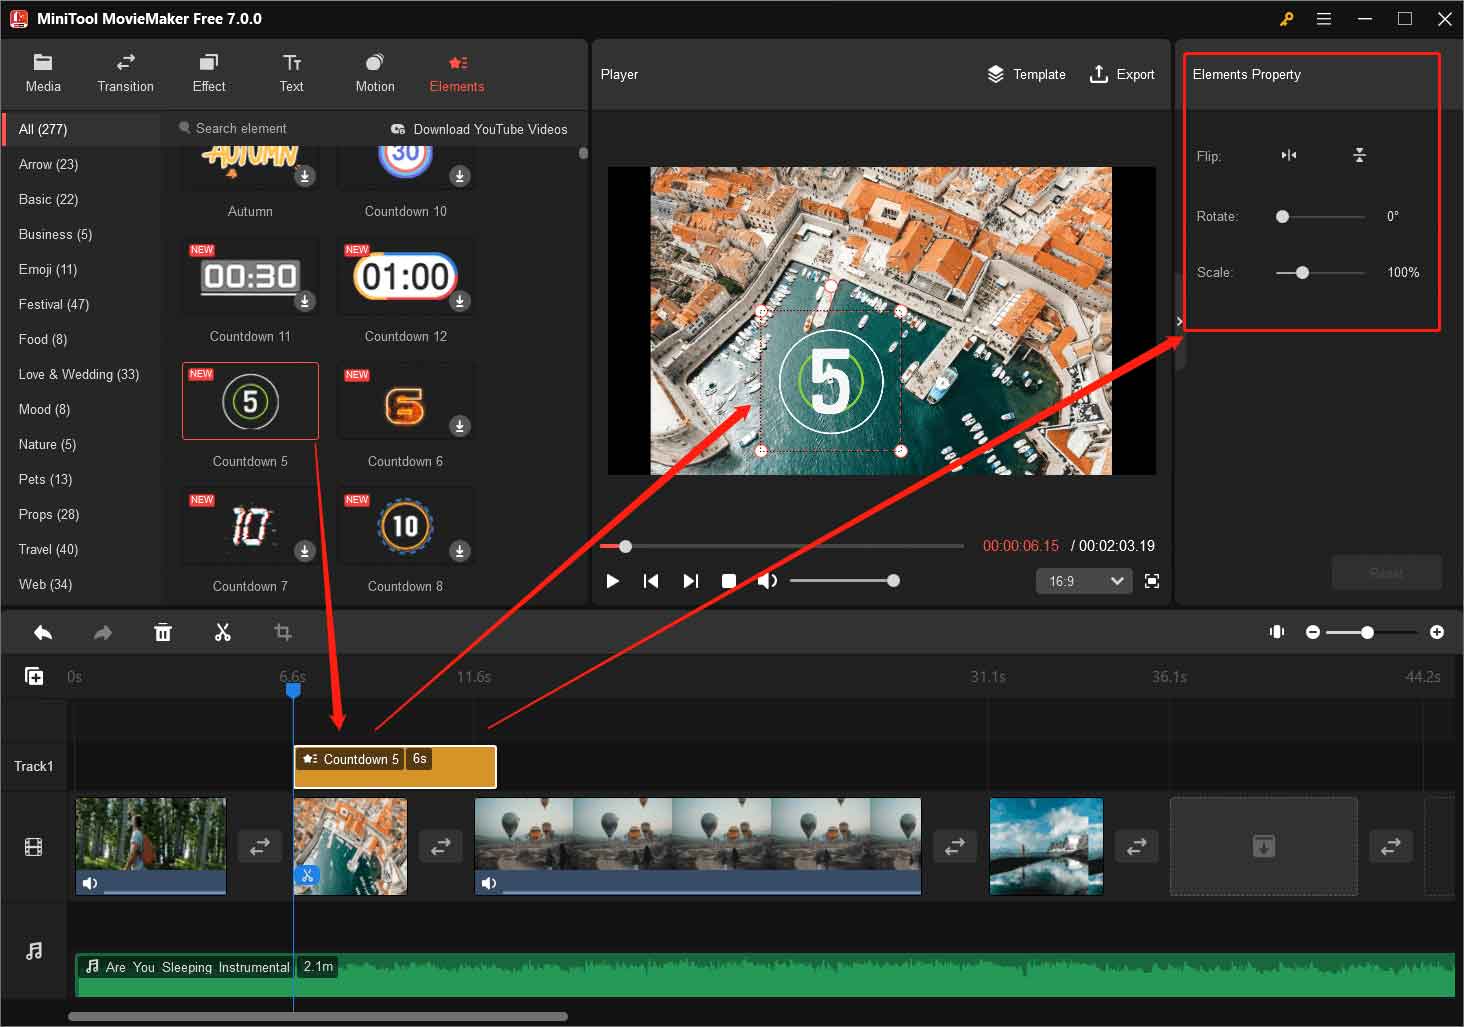
#3. Add Various Effects to the YouTube Video
Now, it’s time to decorate your video with beautiful effects like transitions, filters, texts, motions, and animated stickers. Here, it will take adding stickers for example to show you how to optimize your video to make it more interesting.
Still, click on the target video or photo clip on the timeline, go to the Elements tab from the top menu, get your favorite sticker, and add it to the desired clip. Moreover, you can edit the sticker with its size and location in the Player section as well as rotate or flip it in the Elements Property.
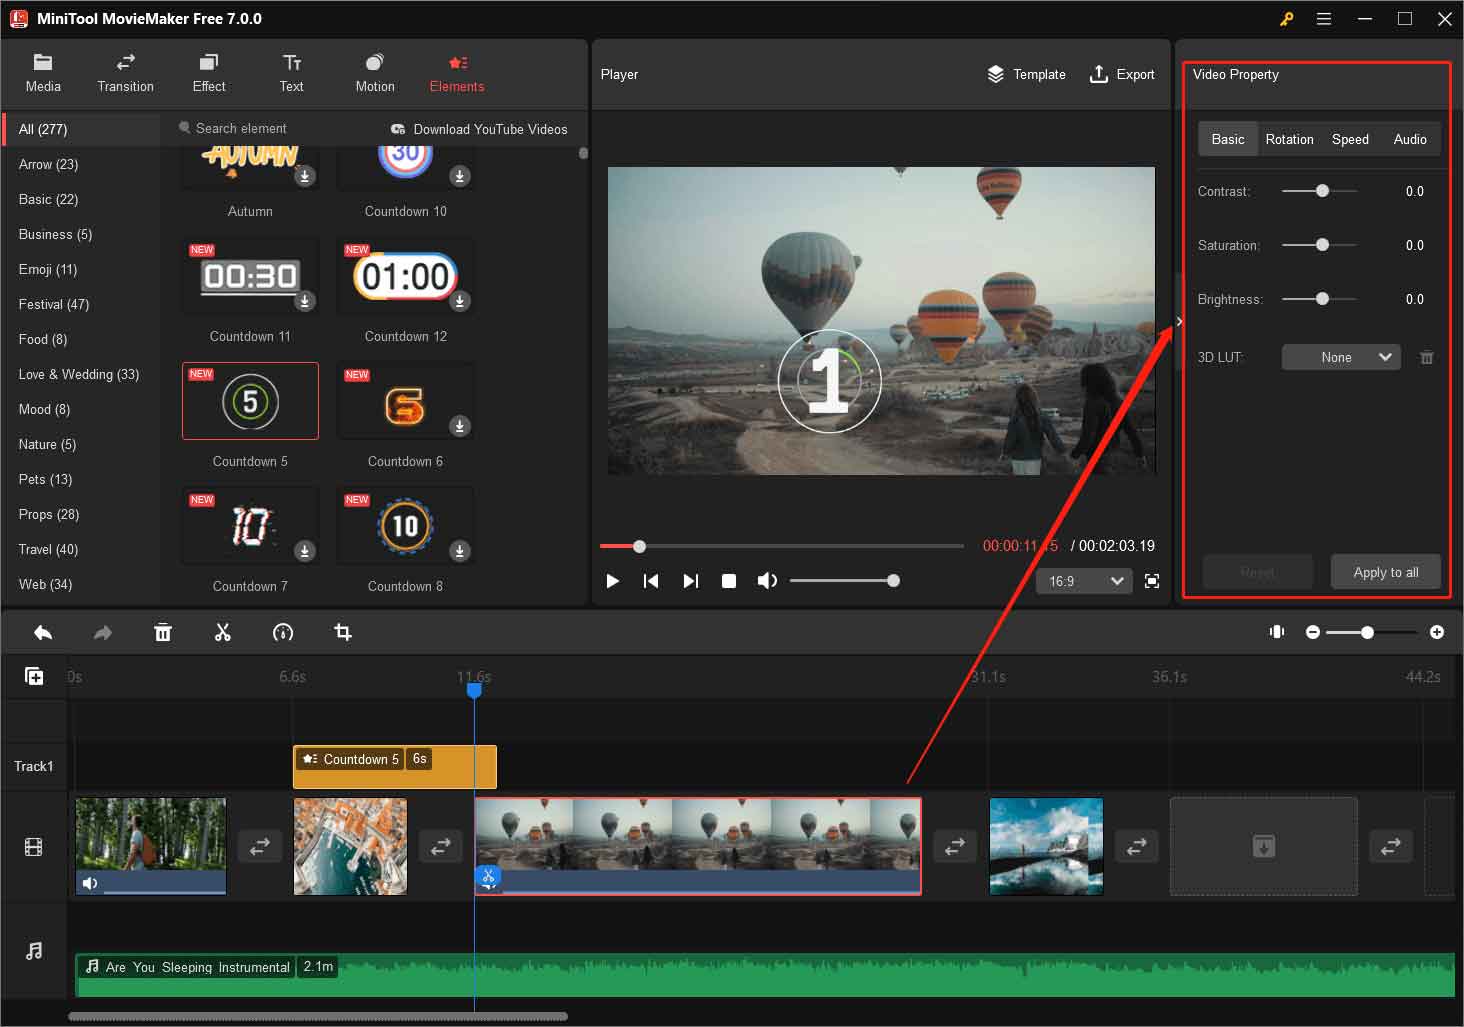
#4. Edit Videos, Music, and Images within Their Properties
Besides, you can edit the media files themselves in their properties respectively. For example, you are able to adjust the contrast, saturation, brightness, and speed of the video; apply 3D LUT to the video; rotate, flip, or reverse the video; as well as fade in, fade out, or change the volume of the audio embedded in the video.
#5. Save and Export Your YouTube Video
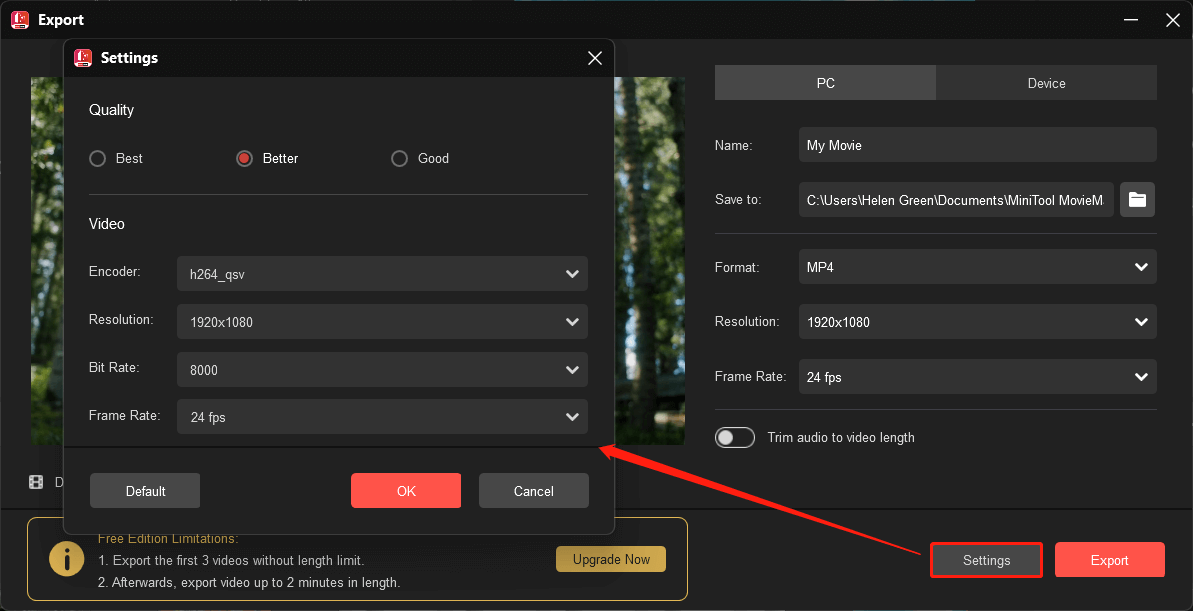
Eventually, when all settings are done, you can export the edited video to save it. Just click the Export option in the upper right. In the Export window, you can specify the name, save location, format, resolution, and frame rate of the video. To further determine the parameters of the video, just click the Settings button and customize the quality, bitrate, and encoder of the video.
MiniTool MovieMaker supported exporting video formats are MP4, AVI, MOV, WMV, MKV, WEBM, GIF, and MP3. Also, you can directly choose to export as a format that is compatible with the iPhone or Samsung Galaxy Note.
How to Make a YouTube Video on Your Phone?
After learning the way to create a YouTube video on a PC, you may ask how to make a video for YouTube on smartphones. Let’s take how to make a YouTube video on iPhone to show you the guide.
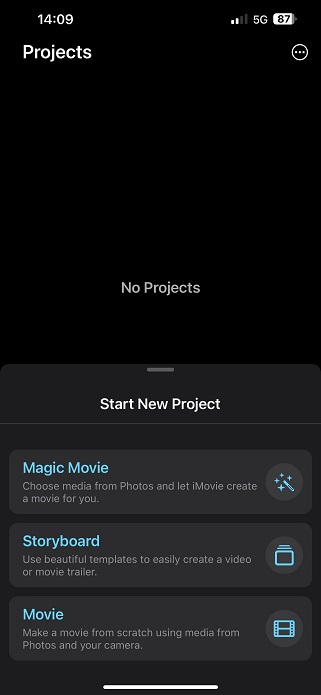
1. Open iMovie and start a new project. You can choose from Magic Movie, Storyboard, and Movie those 3 options. Here we take the Movie option for example.
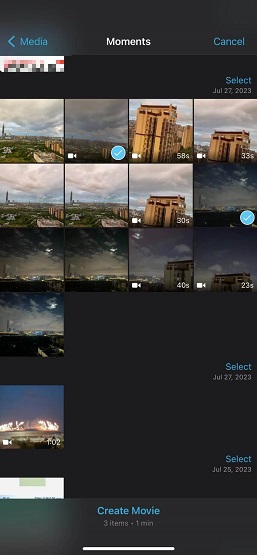
2. Select videos and photos from your phone’s media library and tap on the Create Movie option at the bottom of the screen.
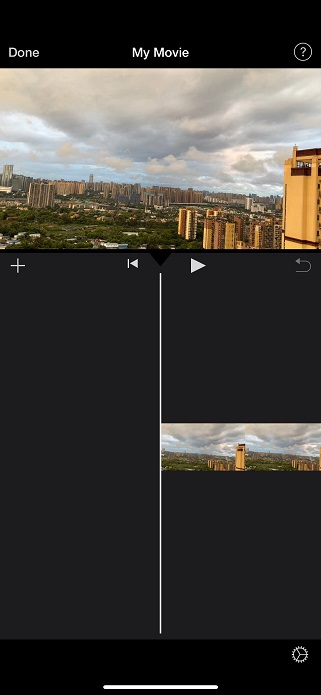
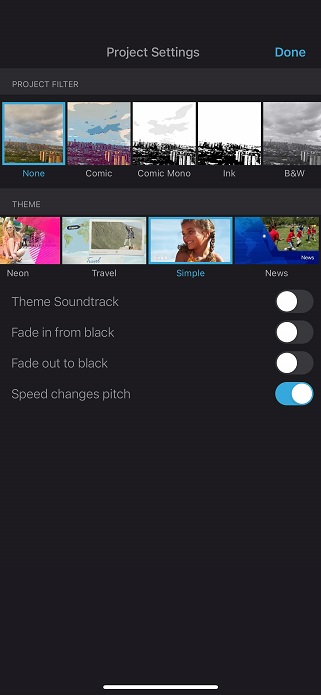
3. Then, it will automatically create a draft video for you. To further edit the video, click the settings icon (gear) at the bottom right corner.
4. On the next screen, you can add a filter, theme, and other effects to your YouTube video. After that, tap the Done option on the upper right.
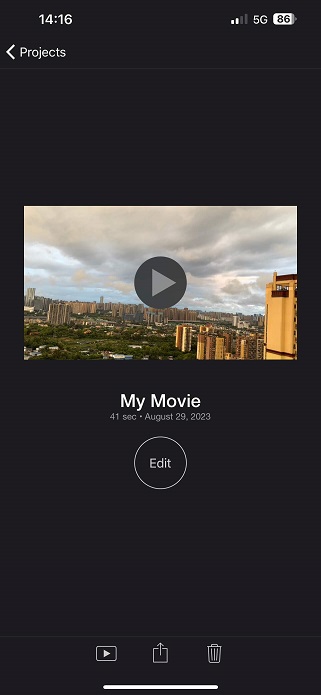
5. Next, you will be directed to the final video screen. There, you can click the Edit option in the center of the screen to continue editing your video if you forget something. You can click the video icon at the bottom to play the video; tap the share icon to share your video; or select the delete icon to delete the video if you are not satisfied with it.
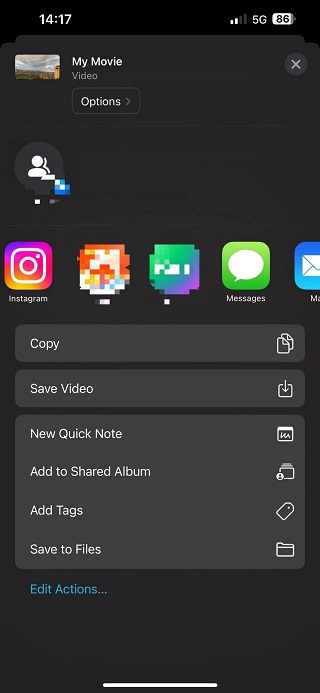
If you tap the share icon, you will get a share popup. Slide up the popup and you can share your new-created video to the apps you have installed on your cellphone like YouTube, Instagram, and Facebook. You can also share it via message or email.
If you want to keep the video on your device, you need to save it.
Before sharing or saving your video, you are able to customize the resolution of the video. 1080p and 4K are supported now. Yet, the higher the resolution, the larger the video file size is, the longer time it takes to save or share it, the more space it requires for storage, and the more bandwidth it needs to transfer online.


How to Upload a Video to YouTube?
Your YouTube video-making process is complete. Then, all you need to do is to publish your video on YouTube. Here are the steps:
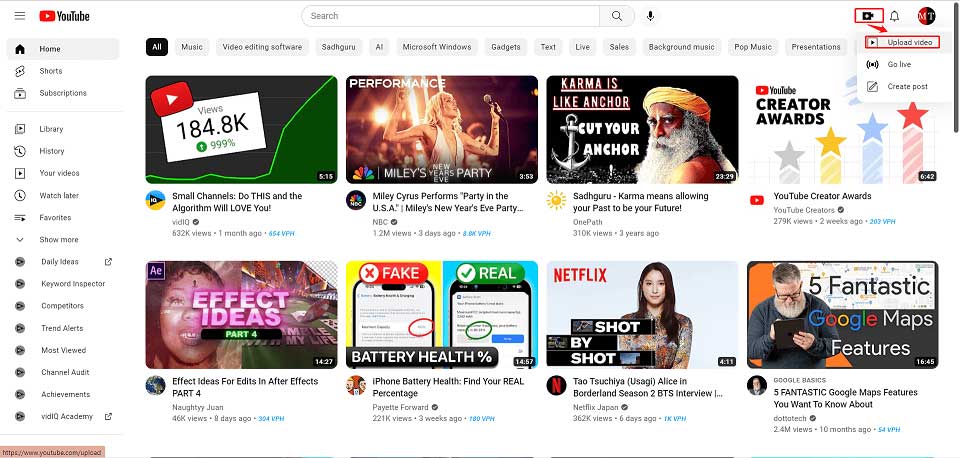
1. Go to youtube.com and sign into your YouTube account.
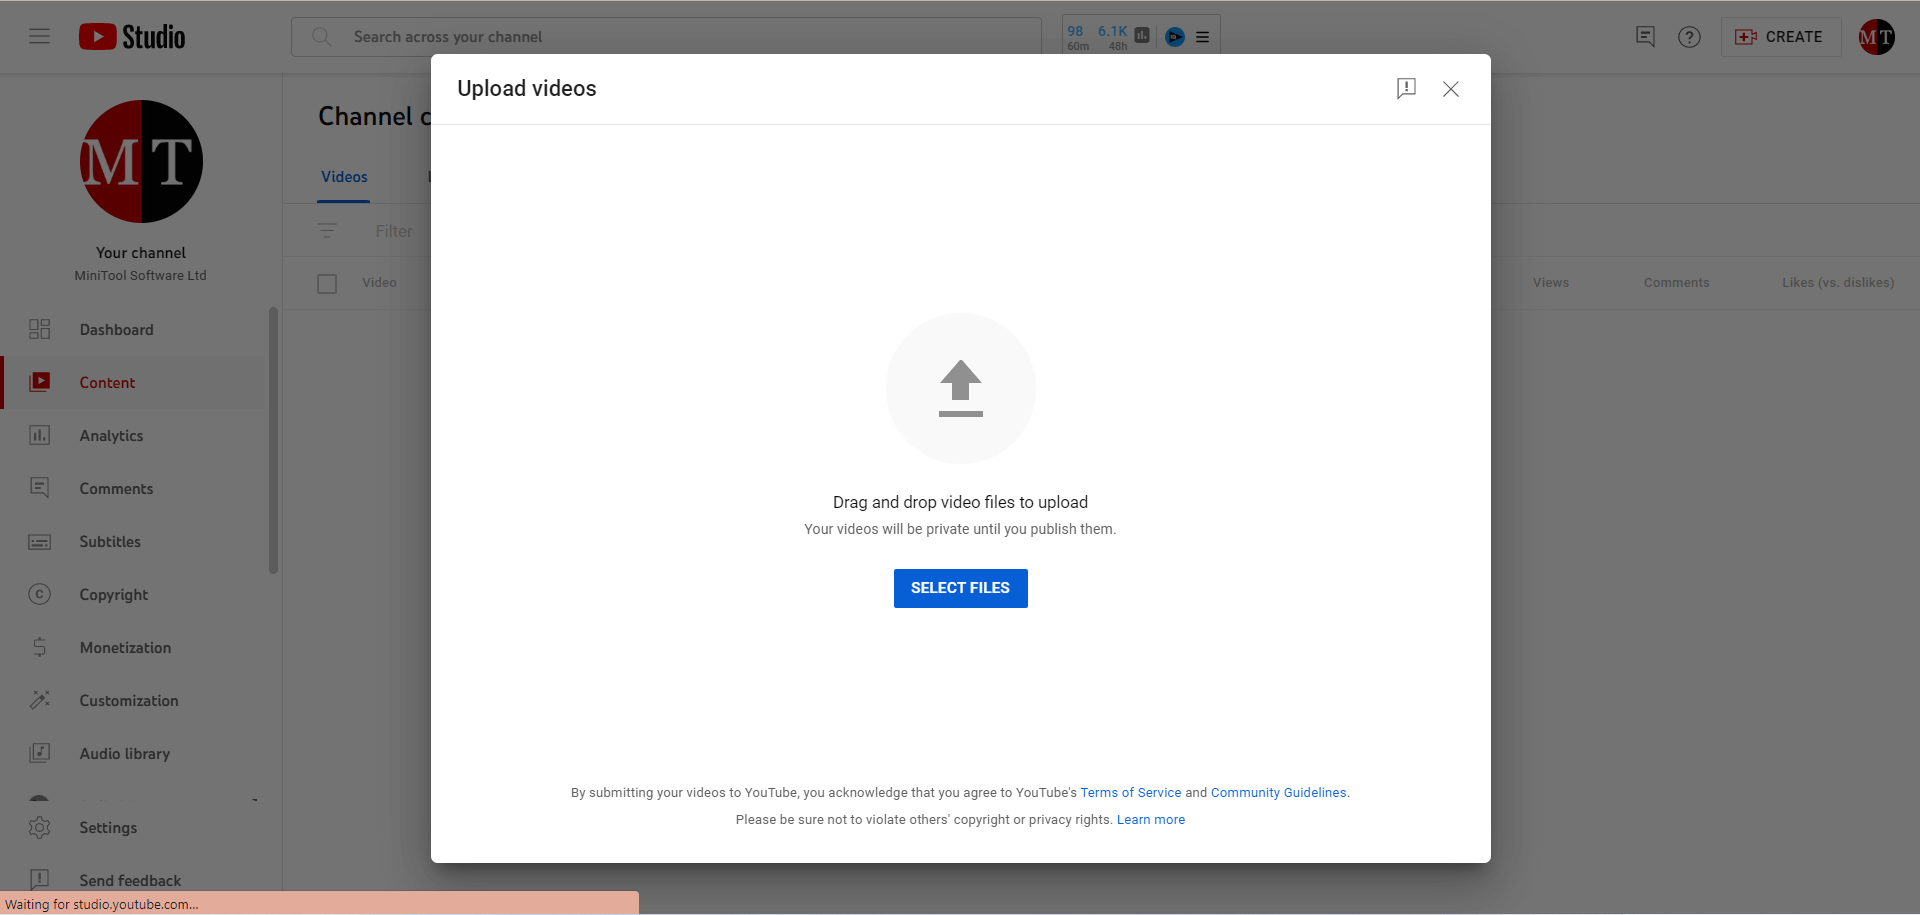
2. In the upper right, click on the Create icon (a recorder logo) and select Upload video.
3. Select the above-made YouTube video to upload.
4. Then, input the details of your video including title, description, tags, etc., and click Next.

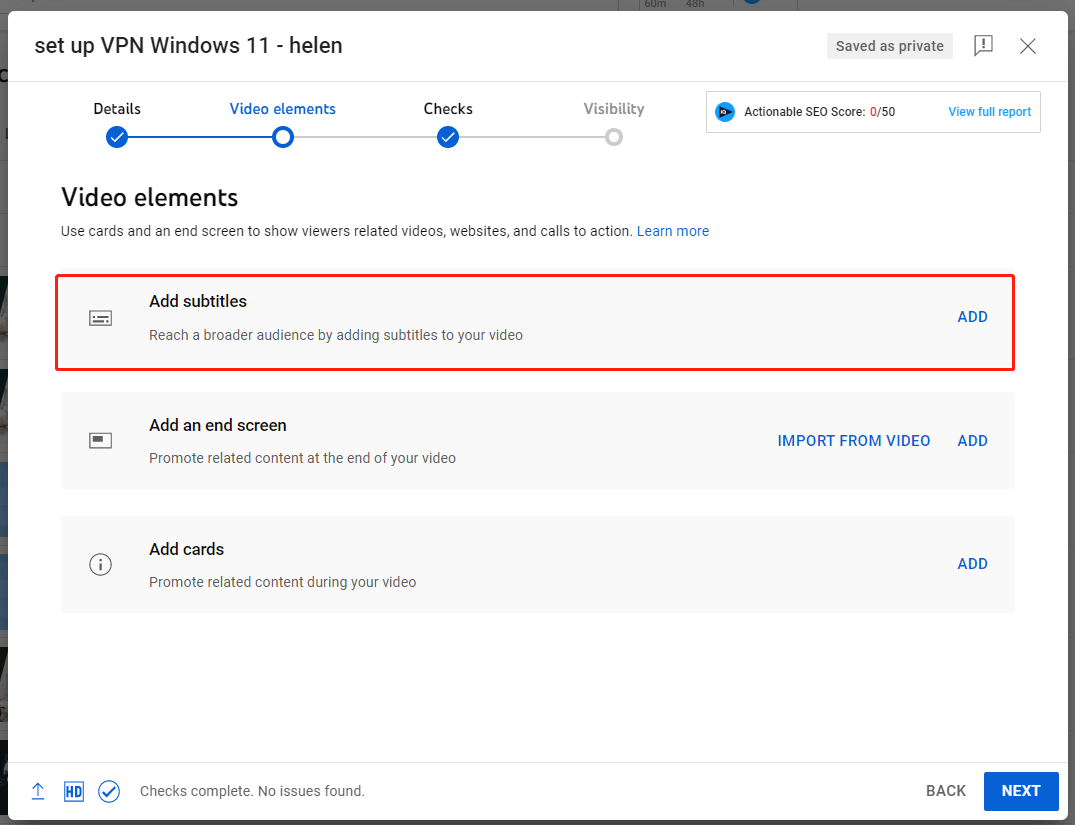
5. Next, add subtitles, end screen, and cards to your YouTube video.
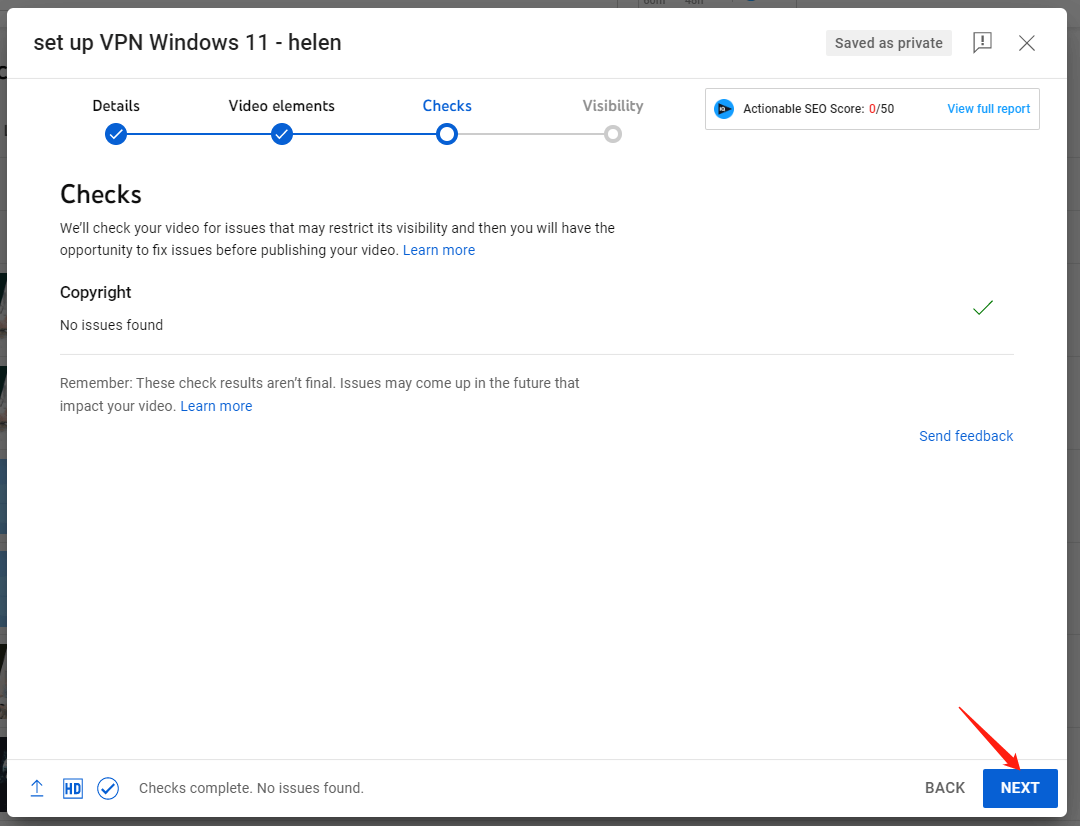
6. Then, it is time to check your uploaded video. After that, click the Next button.
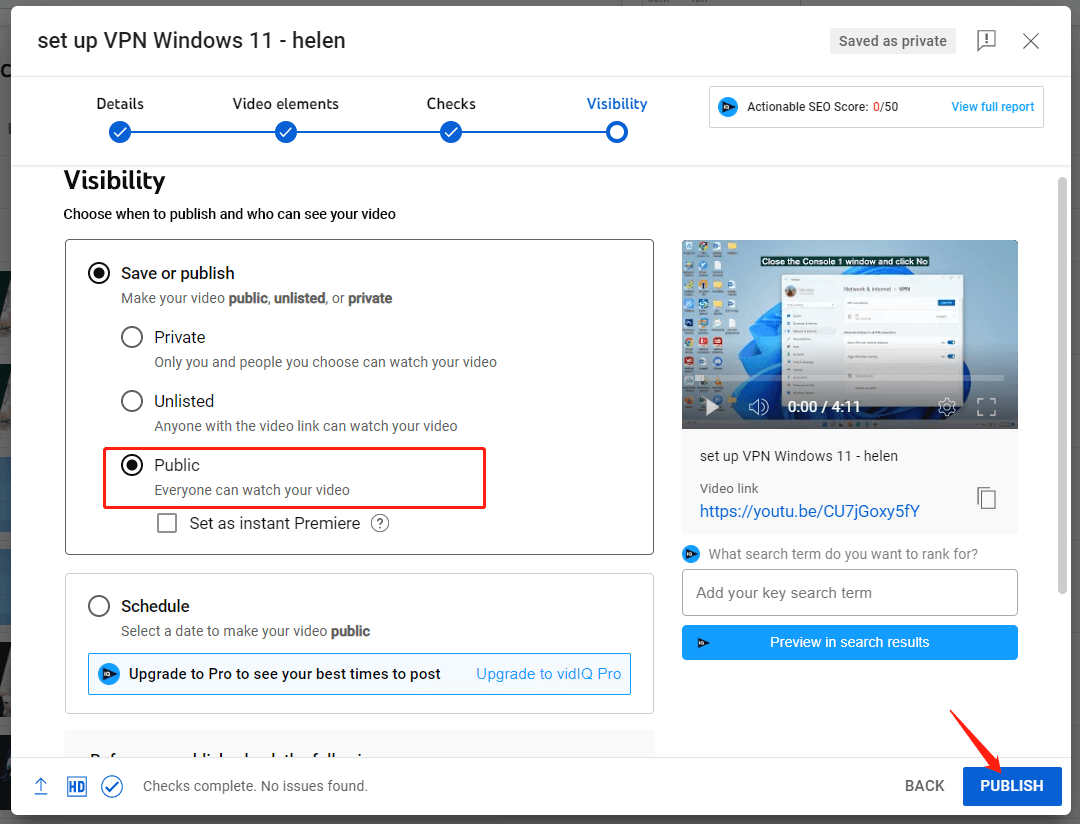
7. Finally, specify who can see your YouTube video. Usually, if you want more people to see your masterpiece or even go viral, you should set it Public. Don’t forget to click the PUBLISH button.
Conclusion
It is very easy to use MiniTool MovieMaker or iMovie to make a YouTube video from scratch, isn’t it? If you have any questions or suggestions about how to make a video and upload it to YouTube, please feel free to leave your comments below or contact us via [email protected].
About The Author

Position: Columnist
Helen is a tech writer with over 10 years of experience. She specializes in creating easy-to-follow guides for video editing, media file conversion, and computer performance. Helen doesn't just write—she tests every software herself and listens to feedback from users and experts. Her goal is to make complex programs simple so that everyone can solve their tech problems with confidence.
User Comments :