Adding video/audio clips to PowerPoint presentations is very popular. Is there a way to record audio narration in a PowerPoint presentation? The answer is yes. And this article details how to record audio narration on PowerPoint. If you need to add audio to the video, it is recommended to use MiniTool MovieMaker.
How to Record Audio on PowerPoint?
Here’re the steps on how to record and add audio narration to your PowerPoint presentation.
Step 1. Open your PowerPoint presentation and locate the slide where you’d like to record a voiceover narration.
Step 2. Click the Insert tab from the top menu and open the Audio drop-down arrow to select Record Audio.
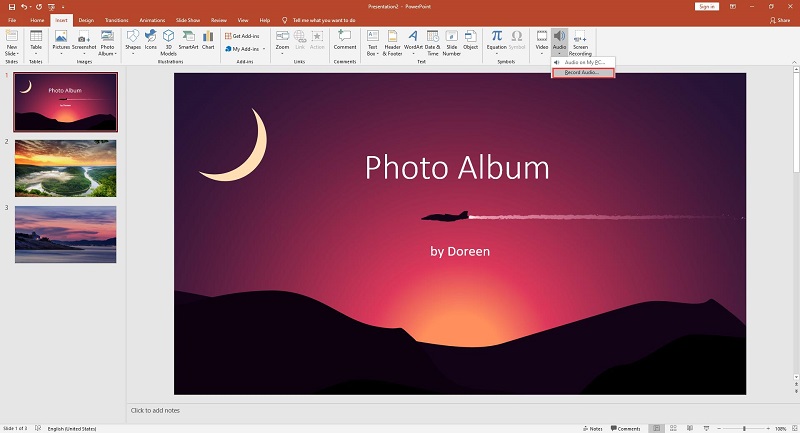
Step 3. Enter a name for the audio file you’re about to record.
Step 4. Press Record to start recording and then a timer will start which shows you the total length of the sound being recorded.
Step 5. Once you’re ready to stop recording, press the Stop button.
Step 6. To listen to play what you’ve recorded, you can click the Play icon.
Step 7. If you’re happy with what you’ve recorded, click OK to insert it into your presentation. Then select and drag the audio icon to where you want it on the slide.
Also read: Best MP3 Recorder – Capture Any Audio to MP3
How to Edit the Recorded Audio on PowerPoint?
After recording your narration, it’s time to edit it. Simply click the audio icon on the slide, and then A new tab, called Audio Tools, will appear on the toolbar.
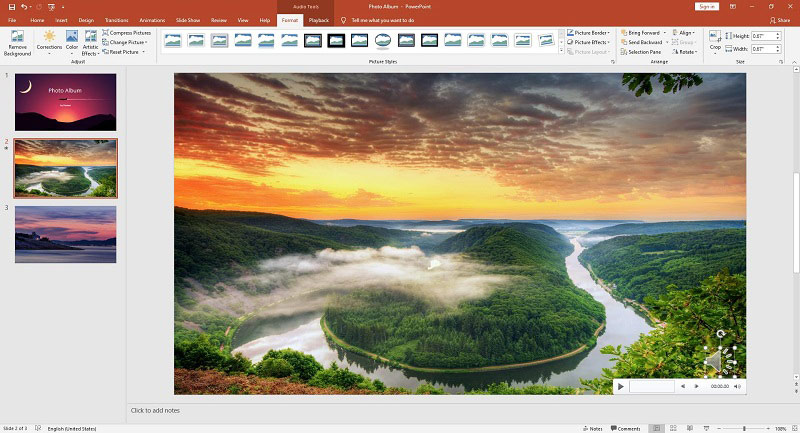
Option 1. Format
If you want to change or modify the standard audio file icon, use options under the Format tab, such as Change Picture, Picture Style, Picture Effects, and so on.
Option 2. Playback
1. Preview
Preview the recording with all the formatting changes you made.
2. Bookmarks
In the Bookmarks group, there is an Add Bookmark option, which will be visible in the timeline. These can be helpful if you want to quickly find the main points in your recording.
3. Editing
In the Editing group, there are multiple options, such as Trim Audio, Fade in and Fade out.
4. Audio Options
In the Audio Options group, you’ll find several advance options as follow:
- Volume: Set the volume of the recording.
- Start: Click the drop-down arrow to choose how you want the recording to start.
- Play Across Slides: Enable it and the recording will be played during the entire presentation.
- Loop until Stopped: Enable it and the recording won’t stop playing until you reach the end of the presentation.
- Hide During Show: Check this option if you want to hide the icon during playing the recording.
- Rewind after Playing: Check this option if you want the timer of the audio clip to go back to the beginning when it reaches the end.
5. Audio Styles
- No Style: Select it to reset the audio clip’s playback options.
- Play in Background: Enable it to set the audio clip to continuously play across your slides in the background.
Recommended post: Best Free Sound Recorder Windows 10
Bottom Line
A step-by-step guide on how to record audio on PowerPoint has been detailed above. If you have any questions or suggestions about it, please let us know via [email protected] or share them in the comments section below.
User Comments :