Behind-the-scenes videos are a popular type of content that shows the real process behind a project rather than just the final result. I enjoy watching them because they offer a closer look at the creative process, whether it’s filmmaking, content creation, or other types of projects. They highlight not just the final outcome, but also the real moments, collaboration, and challenges along the way, making the content feel more authentic and relatable.
In this post, I’ll walk through how to make a behind-the-scenes video step by step, from planning the narrative and capturing footage to editing the final result using MiniTool MovieMaker.
What Is a Behind-the-Scenes Video
A behind-the-scenes (BTS) video is a type of content that shows what happens during the production of a project. Instead of focusing only on the final result, it highlights the process, including how ideas are developed, how scenes are set up, and how different elements come together. This may include raw footage, team interactions, setup moments, and even mistakes along the way.
Because it is often natural and unfiltered, a behind-the-scenes video gives viewers a closer look at the effort, creativity, and challenges involved in production. For this reason, it is widely used in filmmaking, marketing, content creation, and social media.
In short, a behind-the-scenes video isn’t just about showing extra clips but telling the story behind the story and helping the audience connect with the creative process on a deeper level.
![How to Make a Skit Video: 4 Detailed Steps [Ultimate Guide]](https://images.minitool.com/moviemaker.minitool.com/images/uploads/2025/11/how-to-make-a-skit-video-thumbnail.png)
How to Make a Behind-the-Scenes Video
In the following section, I will explore 4 detailed steps on how to make a behind-the-scenes video, including planning the narrative, recording footage, capturing key shots, and editing the video.
Step 1: Plan the Narrative
Making a behind-the-scenes video is not just about merging different clips with background music. In fact, it is an opportunity to tell a story and strengthen the overall branding. Whether showing how a product is made, showcasing a team, or highlighting the effort behind a project, defining the story is essential.
First of all, before recording any footage, I need to have a clear idea of what story I want to tell, as this forms the foundation of the entire video. A well-defined direction helps ensure that the content feels purposeful rather than random.
Second, a behind-the-scenes video should still follow basic storytelling principles, including a beginning, middle, and end. I can structure the video by deciding which parts of the process to highlight, making the final result more engaging and easier to follow.
What’s more, it’s also helpful to consider the tone and style. Some behind-the-scenes videos are informative, while others are more casual or entertaining. Deciding this early on will guide how I capture footage later.
Step 2: Record Behind-the-Scenes Footage
Once I have a clear plan, the next step is to start recording the behind-the-scenes footage. At this stage, it’s important to capture as much relevant content as possible.
Moreover, I try to film from different angles and distances. This allows me to mix perspectives, such as wide shots, close-ups, and over-the-shoulder views, making the video more dynamic and visually interesting.
In addition, I make sure to document the key moments of the process. This includes preparation, setup, filming, and any important actions that move the project forward. Instead of only recording major scenes, I also capture smaller details, such as adjusting equipment, discussing ideas, or reviewing shots.
For example, when working on a product launch, I can show what happens during the planning and production stages. Sharing these behind-the-scenes details helps the audience better understand the process and makes the content more engaging.
Step 3: Capture Key Shots
In addition to capturing extensive footage, there are several essential shots that should be included to make a behind-the-scenes video more engaging and meaningful:
- Time-lapse shots: These are great for showing processes that take a long time, such as setting up equipment or preparing a scene. Time-lapses can quickly convey progress and add visual variety to the video.
- Interviews and reactions: Short interviews or real-time reactions from team members can add personality to the video. They help explain what’s happening and make the content feel more authentic.
- Team collaboration: Capturing how people work together, such as discussions, coordination, or problem-solving, can highlight the effort behind the project and make the video more dynamic.
- Candid moments: Spontaneous and unplanned moments, such as mistakes or funny interactions, often make behind-the-scenes videos more relatable and entertaining.

Step 4: Edit the Video
After capturing all the footage, it’s time to turn those clips into a cohesive behind-the-scenes video through editing. At this stage, the goal is to organize the content and shape it into a clear and engaging story.
To improve editing efficiency and achieve a more polished result, using an easy-to-use and versatile video editor can be very helpful. Here, I use MiniTool MovieMaker as an example. It is a beginner-friendly video editor that makes it easier to create a polished behind-the-scenes video.
MiniTool MovieMaker strikes a balance between powerful editing features and ease of use. With a clean and straightforward interface, I can easily navigate the tools and get started without much effort.
MiniTool MovieMaker allows me to trim, split, crop, flip, and rotate videos with ease. In addition to these basic editing tools, it also supports more advanced features, such as creating picture-in-picture effects, adding video collages, and editing 4K footage smoothly. These features are useful when I want to make the behind-the-scenes video more visually professional.
Furthermore, MiniTool MovieMaker offers a wide range of built-in resources, including smooth transitions, trendy effects, creative elements, and royalty-free music. These help enhance the overall quality of the video without needing additional assets.
One of the most practical strengths is that MiniTool MovieMaker allows me to export videos in various formats with customizable settings, such as resolution, frame rate, encoder, and bitrate. In addition, it supports exporting videos in up to 4K resolution for free, making it a practical choice for high-quality video creation.
How to make a behind-the-scenes video using MiniTool MovieMaker? Here is the step-by-step guide.
Step 1: Download and Install
First, make sure MiniTool MovieMaker is downloaded and installed on the computer.
MiniTool MovieMakerClick to Download100%Clean & Safe
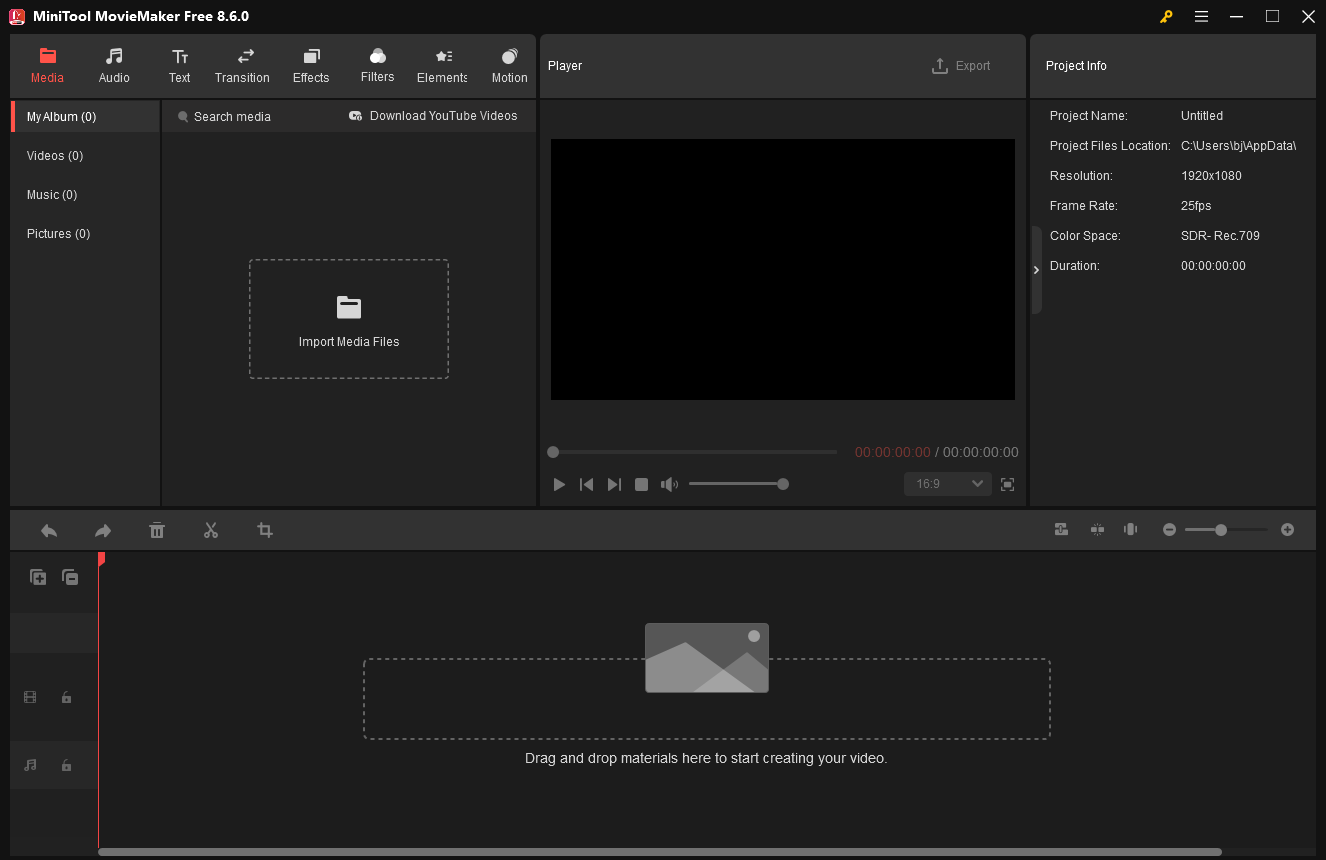
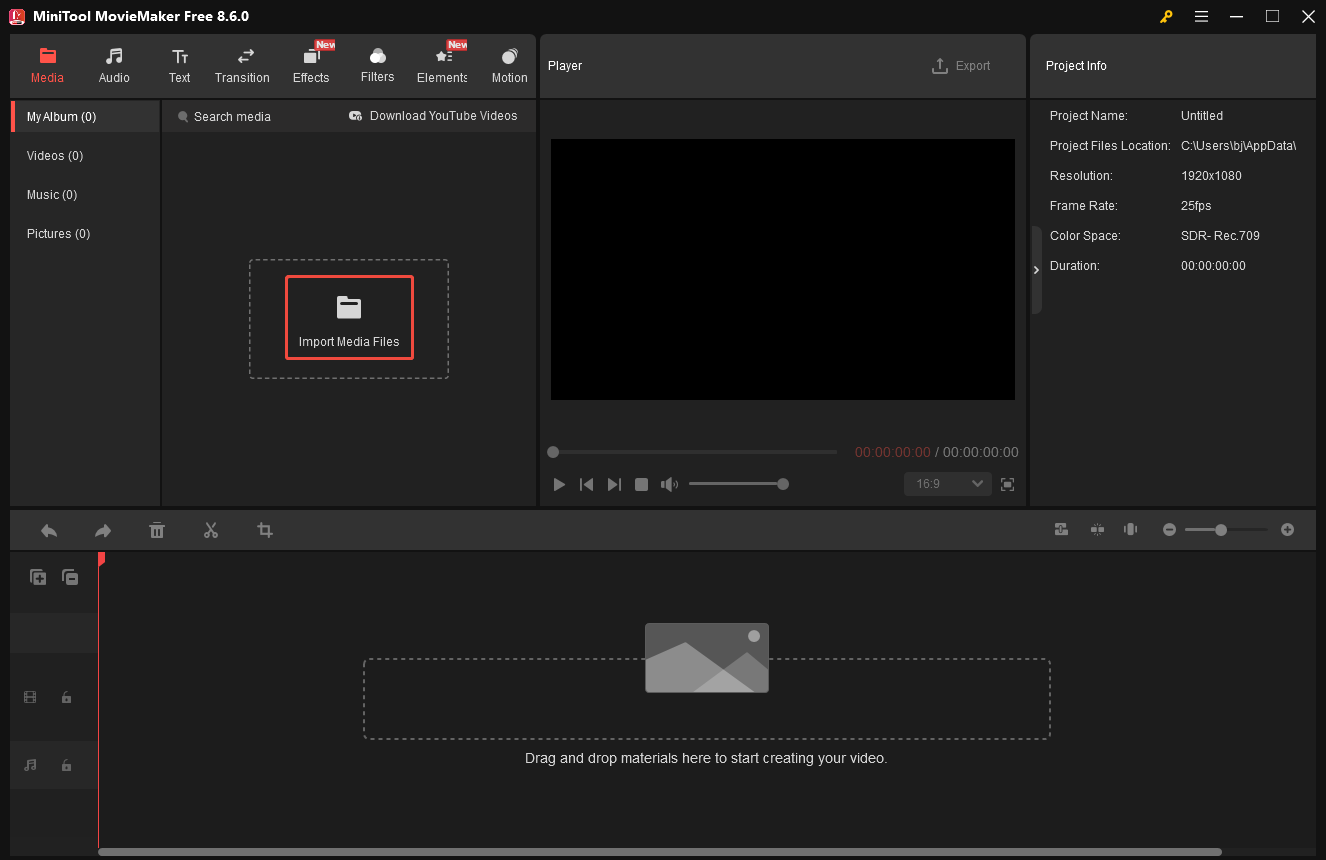
Step 2: Import the Media
Open MiniTool MovieMaker and click New Project to enter the main editing interface. Next, click Import Media Files to upload the video footage from the computer. Then, click the Plus icon on the video to add it to the timeline.
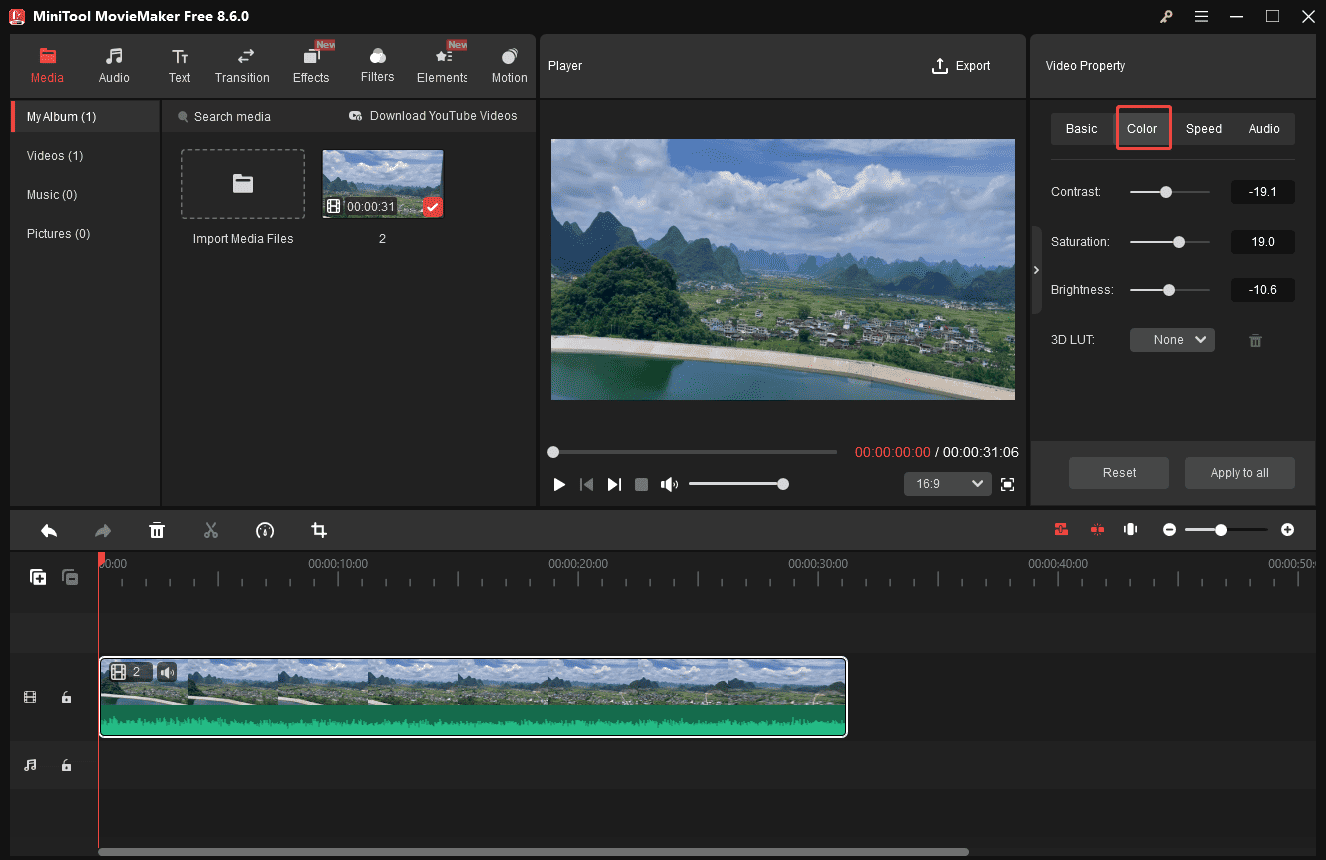
Step 3: Adjust the Video Properties
Click the video on the timeline to activate the Video Property window. In the Video Property panel, I can flip, scale, and rotate the video, as well as adjust the playback speed. In addition, I can enhance the visual quality by adjusting the Contrast, Saturation, and Brightness using the sliders in the Color tab. All changes can be previewed in real time in the Player window.
Step 4: Organize and Rearrange the Clips
As a logical flow makes the video easier to follow, it is important to organize and rearrange the clips. Before doing that, I first remove any unnecessary sections.
To trim unwanted parts at the beginning or end of a clip, I hover the mouse cursor over the edge of the clip until the Trim icon appears. Then, I drag it inward to remove the unwanted portion.
To remove a section from the middle of a clip, I use the Split tool. I move the playhead to the start of the unwanted section and click the Split icon. Then, I drag the playhead to the end of the section and click Split again. After that, I can simply select the unwanted segment and click the Delete icon to remove it.
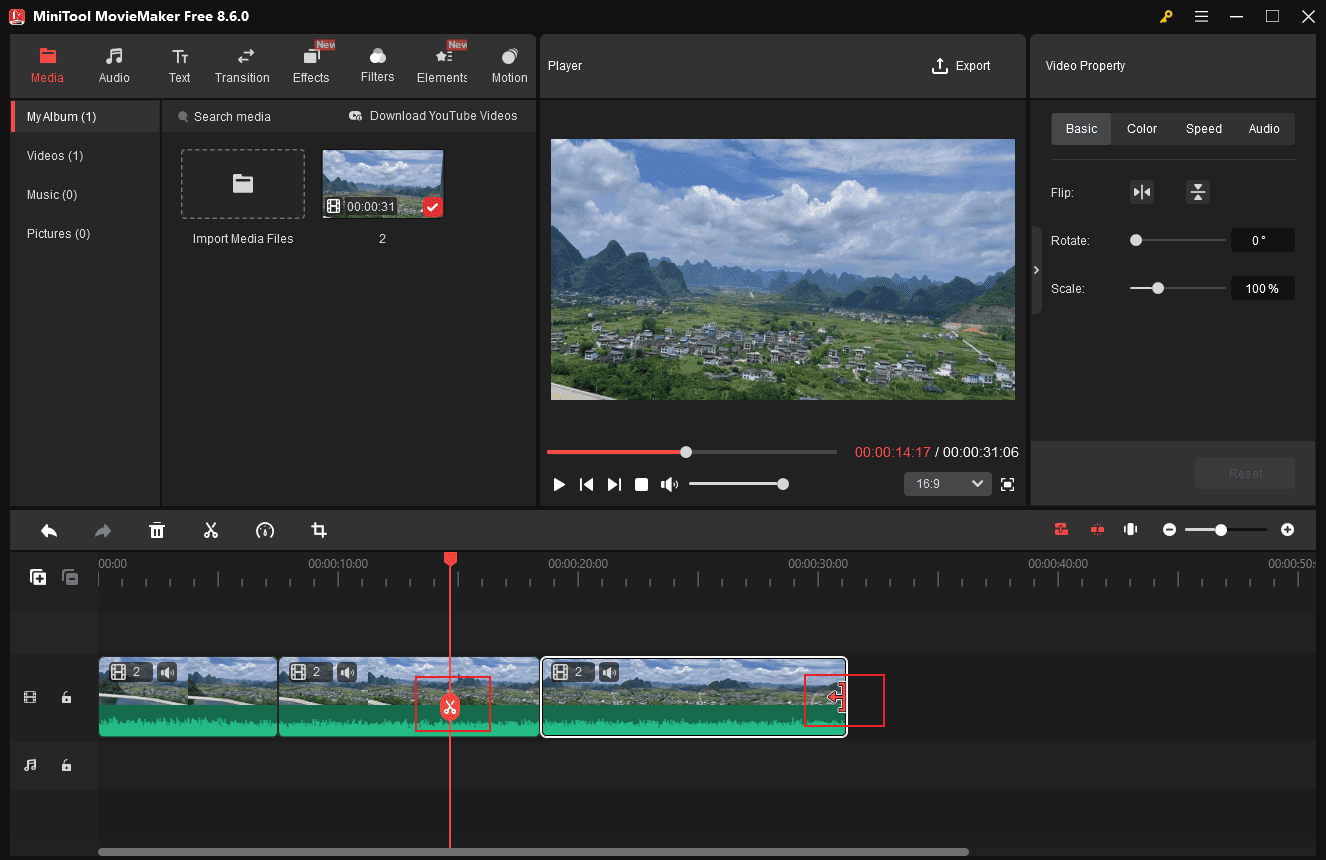
Finally, I drag and rearrange the clips on the timeline to create a smooth and logical sequence.
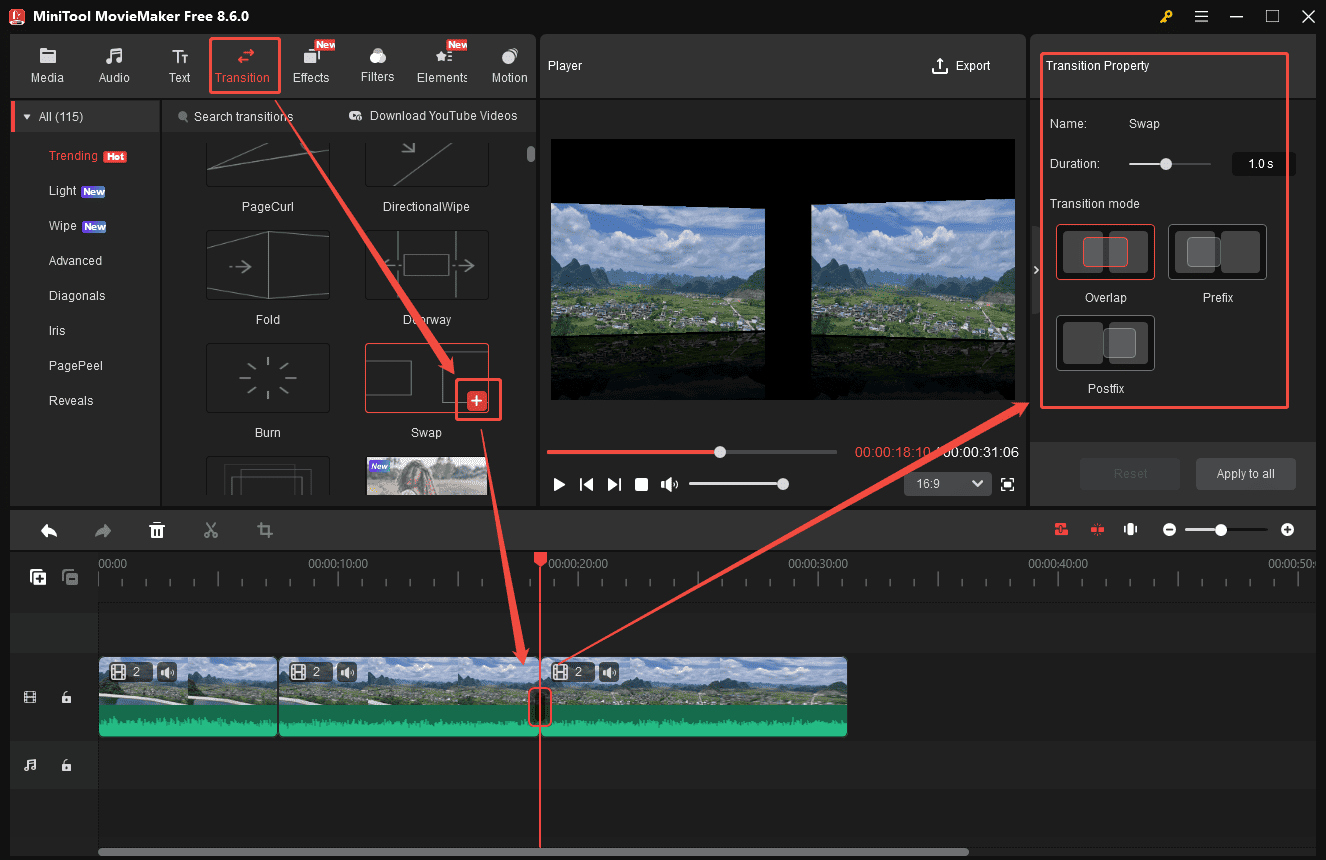
Step 5: Add Transitions to Clips
To make the separated clips harmonious or highlight the essential clip, adding transitions to the behind-the-scenes clips is a great choice. Select the Transitions tab at the top of the menu and scroll down to pick the desired one. Click the Plus icon to add it to the clips.
In the right Transition Property panel, adjust its duration by moving the slider. The maximum duration for a transition is 2 seconds, and it won’t affect the overall length of the video. Additionally, I can also change the transition mode, including overlap, prefix, and postfix options.
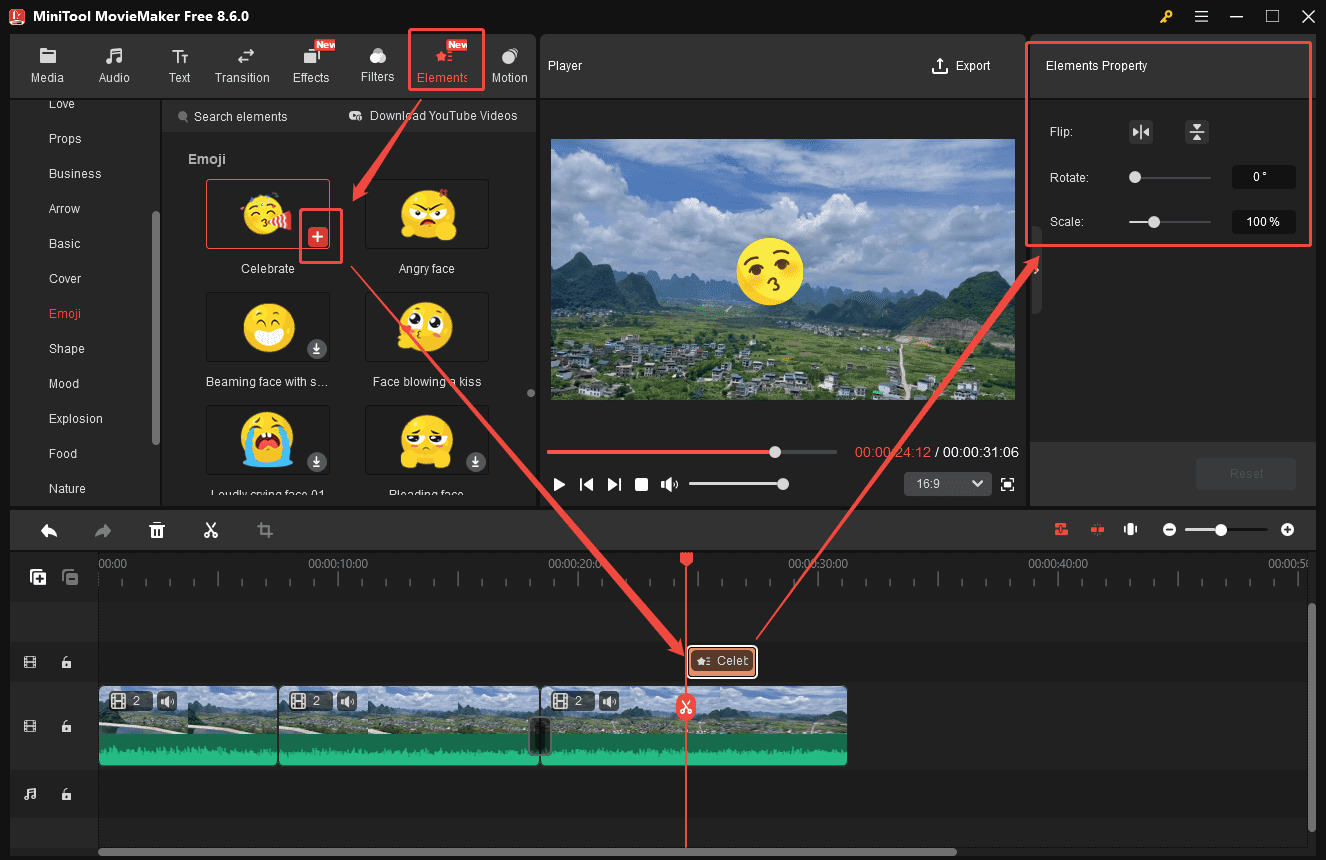
Step 6: Add Stickers to Video
Elements can spice up the behind-the-scenes video and add a fun touch to it.
Click the Elements tab at the top of the menu. Scroll down to find an appropriate sticker. Hover over it to preview its animation. Then, download it and click the Plus icon to add it to the timeline. Drag the edge of the sticker layer on the timeline to set its duration. In the right Elements Property panel, resize or rotate it by moving the sliders.
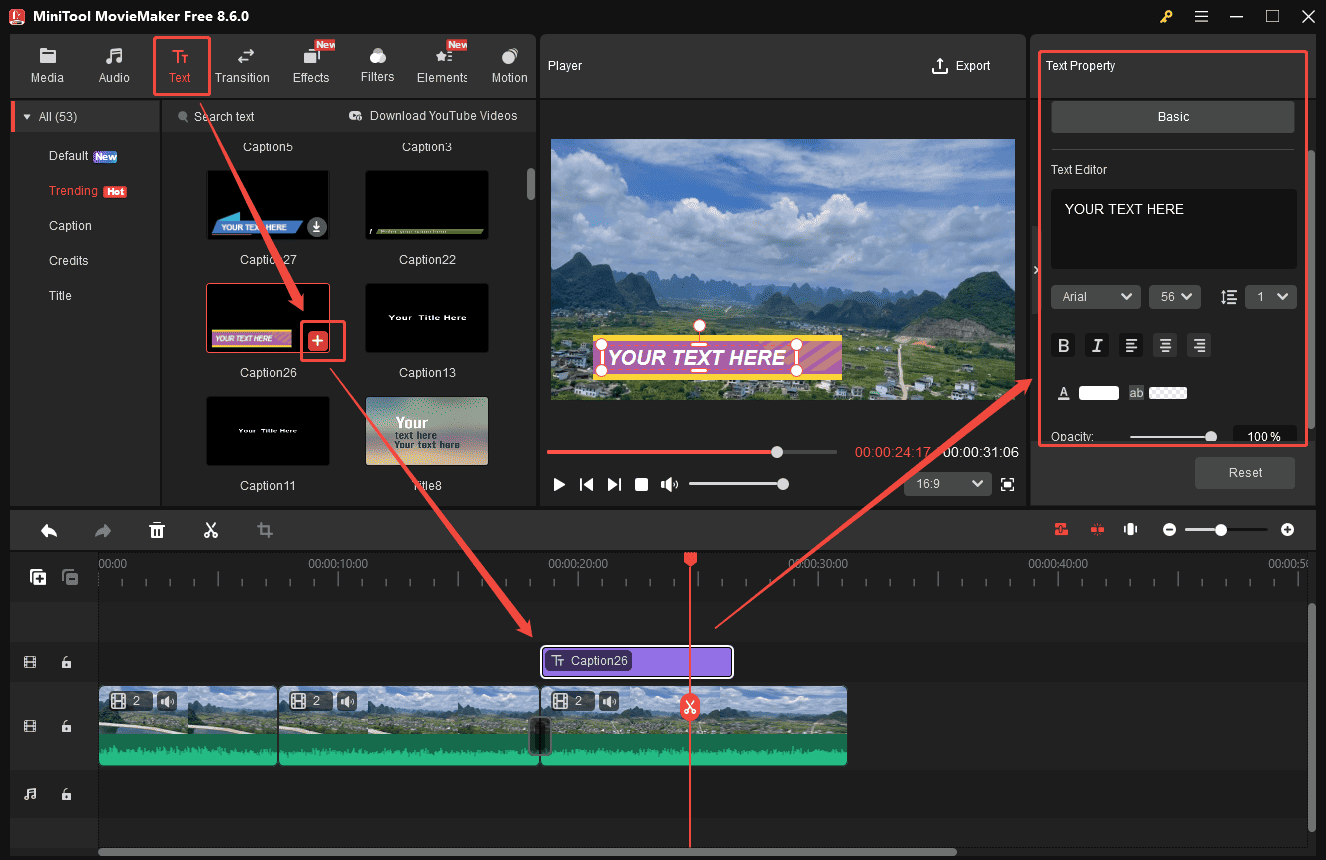
Step 7: Add Text to Video
Adding text to a behind-the-scenes video can make the content clearer and easier to understand. I can use text to highlight key information, explain certain scenes, or add context where needed.
To do this, I go to the Text tab and browse through different text templates. After selecting a preferred template, I drag it directly onto the timeline. Then, I enter the text and customize its font, color, size, and other styles in the Text Property panel. Moreover, to adjust the duration of the text, I simply drag the edge of the text layer on the timeline.
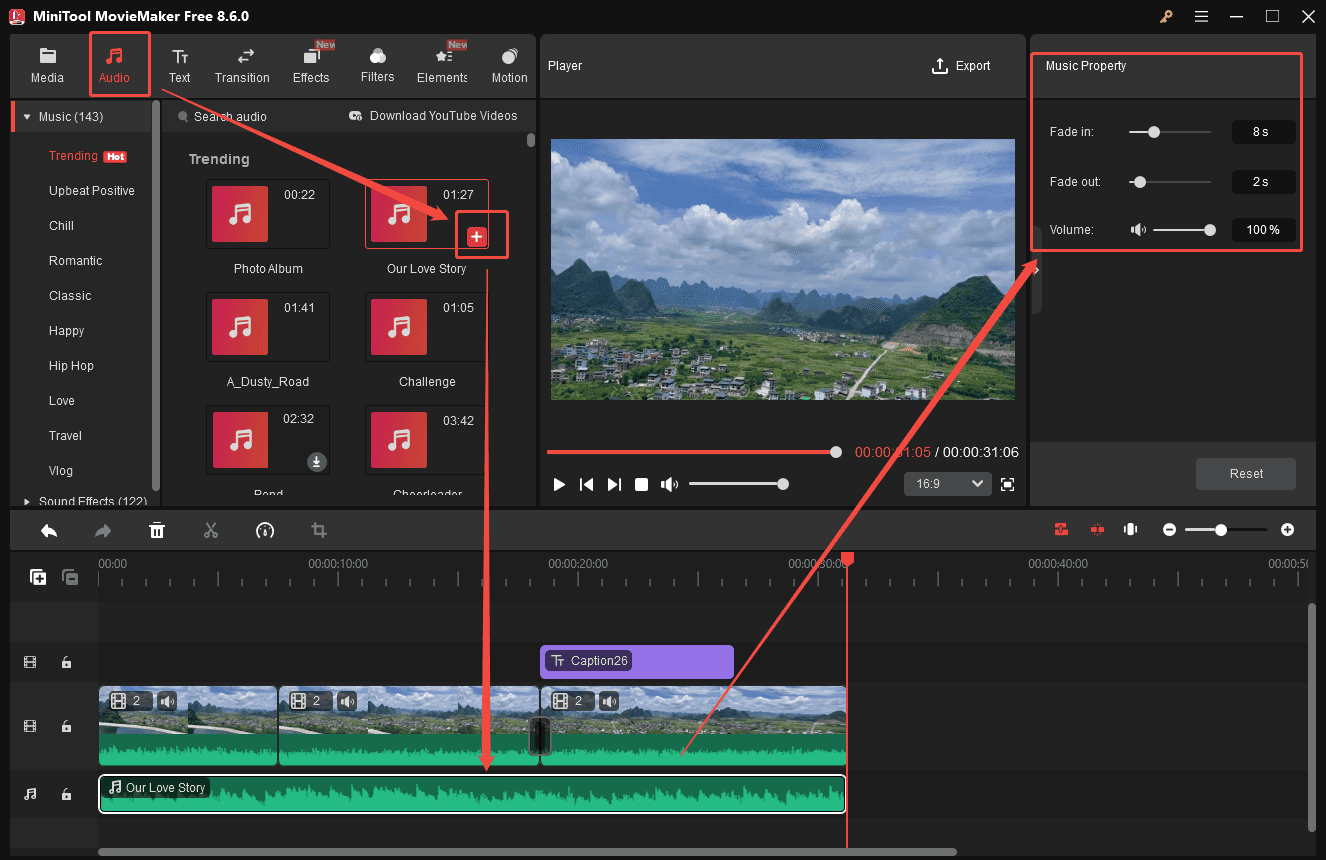
Step 8: Add Music to Video
Music enhances the mood and atmosphere of the video, making it more immersive and dynamic. Click Audio to access the music and sound library. Browse the categories and choose the preferred music. Then, click the Download icon and drag it to the timeline.
I can trim the audio track to match the length of the behind-the-scenes video. In the Music Property panel, I can apply the fade-in/out effects or adjust the volume by moving the sliders.
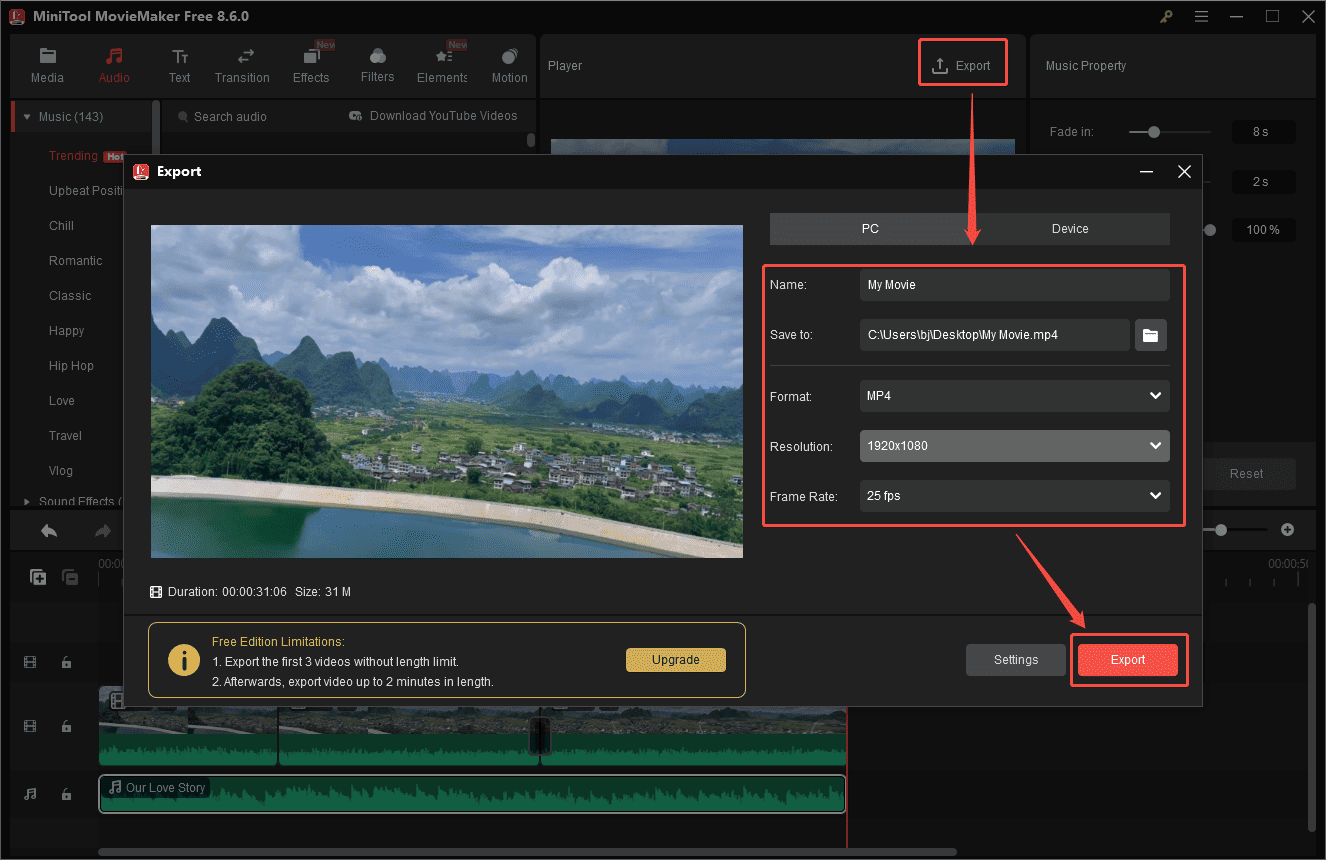
Step 9: Export the Final Video
Once editing is complete, click Export above the player window. In the Export window, rename the behind-the-scenes video, select a save location, and adjust the resolution, frame rate, and bitrate. Next, click Export at the bottom to save the video to the computer.
Now that you understand how to make a behind-the-scenes video, the next step is to put these ideas into practice and start creating.
Conclusion
Behind-the-scenes videos are a powerful way to showcase the process behind a project and build a stronger connection with the audience. This post walks through how to make a behind-the-scenes video in four steps, from planning the narrative and recording footage to capturing key moments and editing the final result. Each step plays an important role in shaping a compelling story.
With a beginner-friendly tool like MiniTool MovieMaker, creating a behind-the-scenes video doesn’t have to be complicated. Now it’s your turn to give it a try and create your own polished behind-the-scenes video.
Finally, if you encounter problems while using MiniTool MovieMaker, send an email to [email protected] for help.
About The Author

Position: Columnist
Alice is a tech writer at MiniTool, specializing in tutorials and guides on video editing and screen recording. She stays up to date with the latest tools and techniques to ensure her content is accurate and easy to follow. By combining hands-on testing with continuous learning, Alice aims to help readers solve tech problems efficiently.
User Comments :