What Are Lower Thirds
In video production, the lower third is the text that appears in the bottom third of the video and sometimes also contains graphics and animation elements. It is mainly used to display important information, such as name, title, location, etc.
This subtitle form can effectively convey background information without interfering with the video’s main content. Lower thirds are widely used in news reports, interview programs, documentaries, etc. Simple text and clear typography can enhance the video’s professionalism and strengthen the viewer’s viewing experience.
How to Add Lower Third to Video
For many video creators, mastering how to add lower third in a desktop video editor is an important step to improve the video quality. I recommend you use MiniTool MovieMaker to edit your video because it has an intuitive interface and powerful functions, and even a beginner can get started easily. Here I will show you how to add lower third to video using MiniTool MovieMaker.
Step 1: Download and install MiniTool MovieMaker
Firstly, you should download free video editor. Just click the button below and follow the on-screen instructions to complete the installation process. Once installed, launch the program to begin your project.
MiniTool MovieMakerClick to Download100%Clean & Safe
Step 2: Import your video
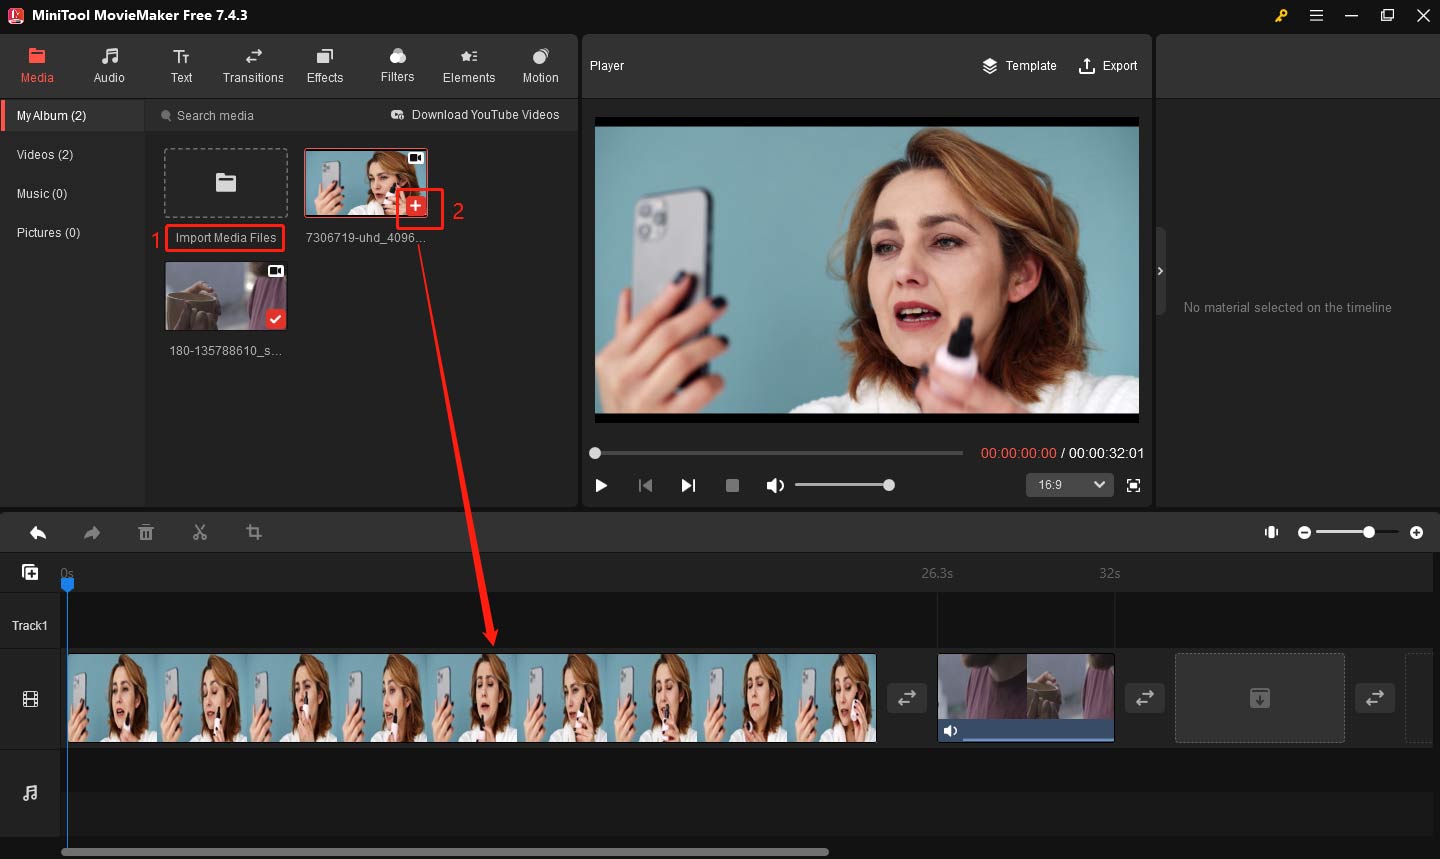
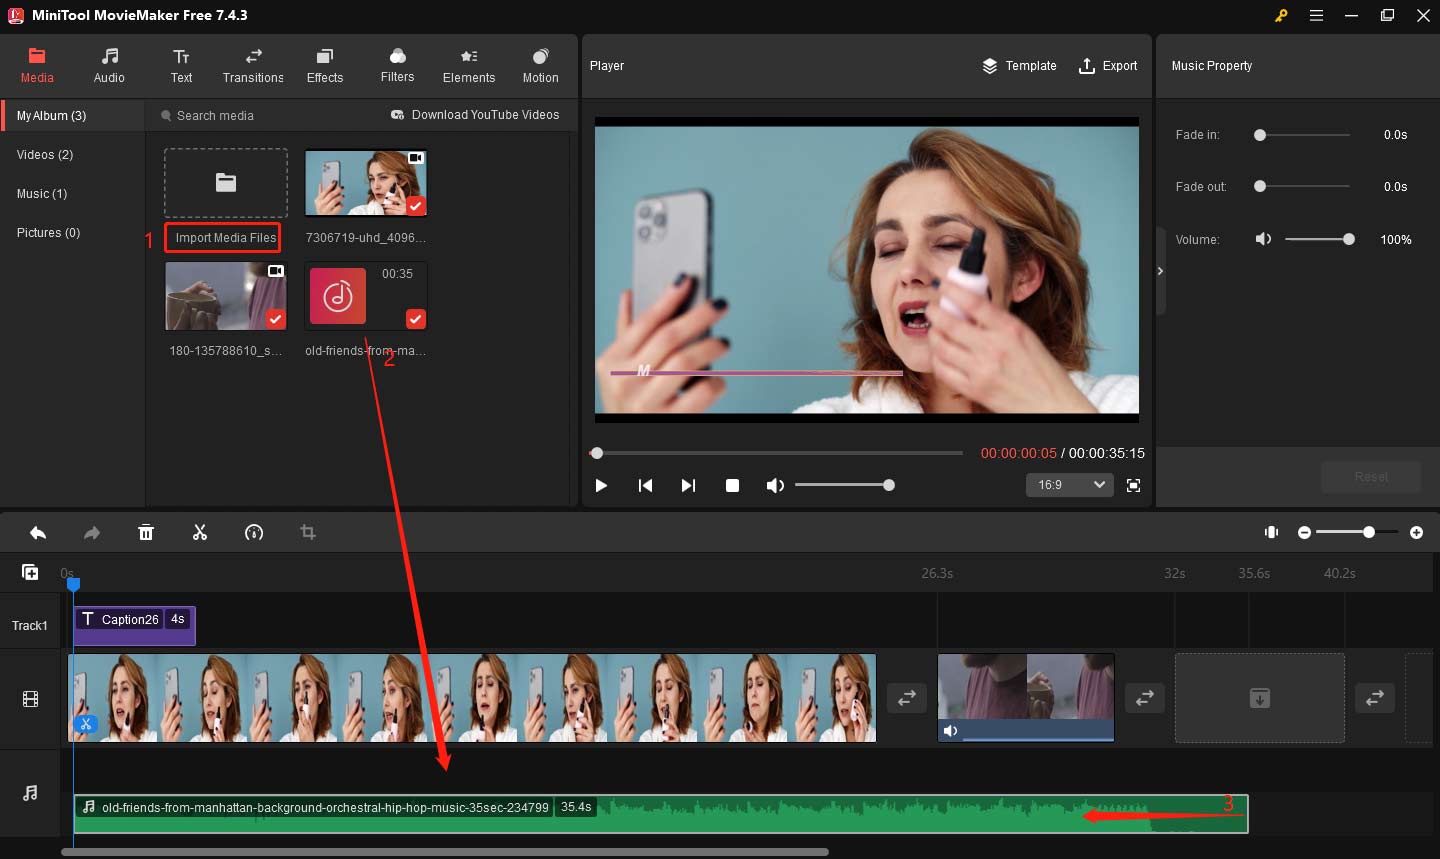
After opening MiniTool MovieMaker, click Import Media Files to import the video you want to edit. Click the plus icon on the video or drag and drop the video to the timeline to begin editing.
Step 3: Add a lower third
There are two ways you can add lower third to video:
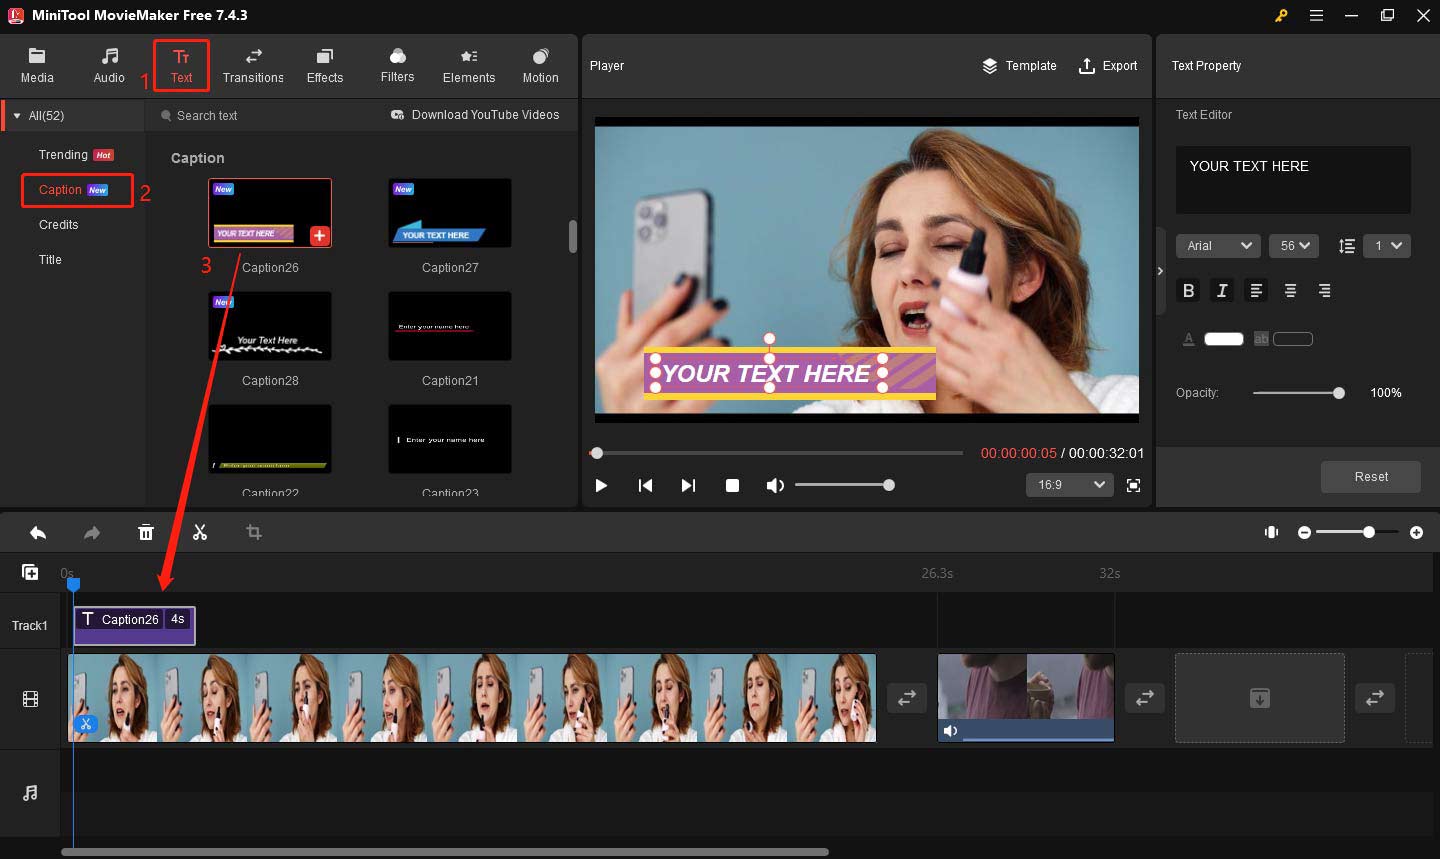
Apply a lower third template: Click the Text tab at the top left of the screen and choose Caption. Here you will find a variety of pre-designed text templates, including the lower third templates. The lower third templates that can be used directly here are Caption 6, Caption 9, Caption 14, Caption 15, Caption 26, Caption 27. Choose a lower third style and drag it to the timeline. You can adjust the duration of the lower third by dragging the edges of the text layer in the timeline.
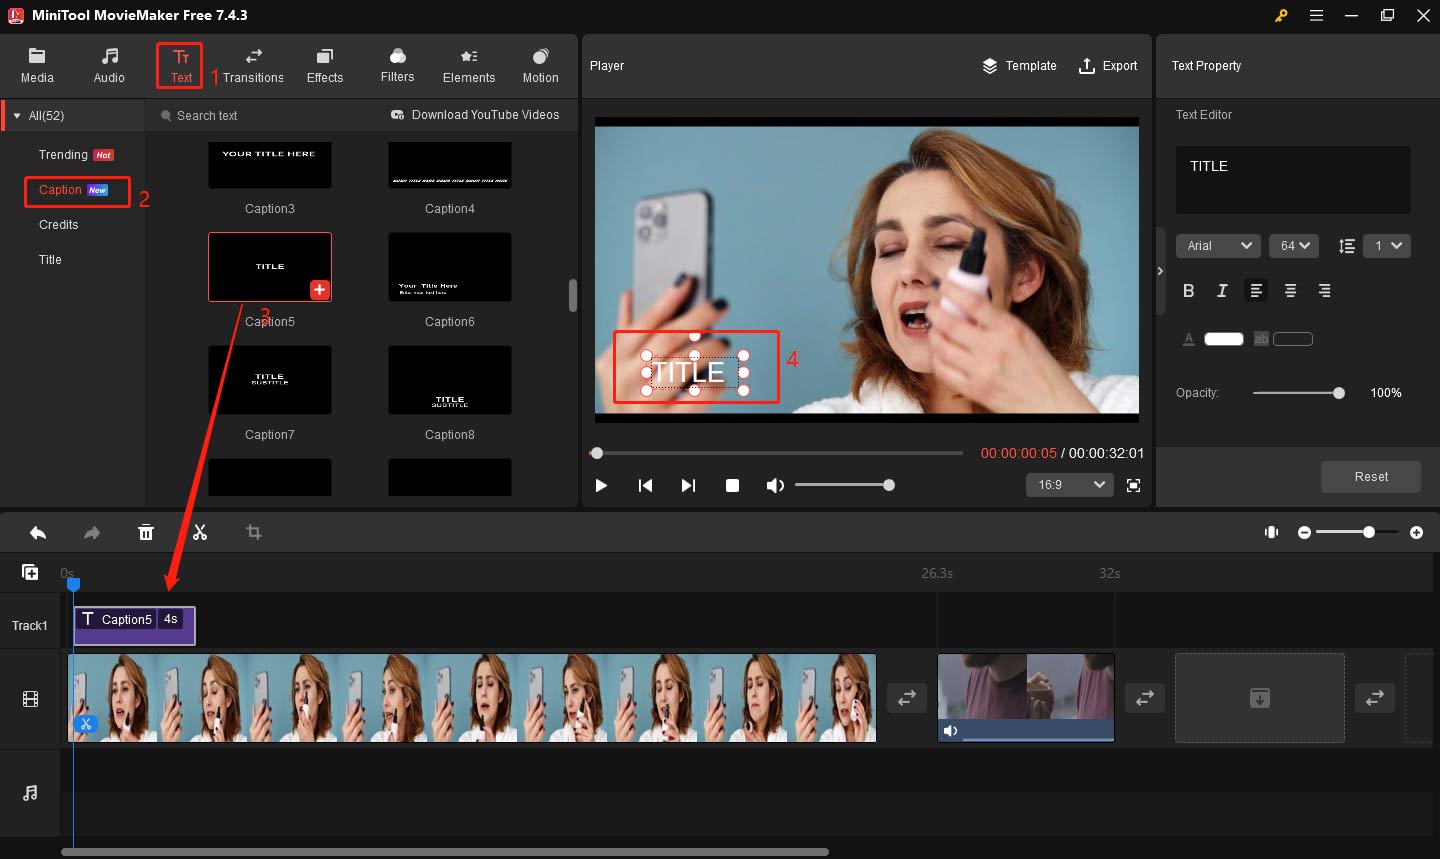
Manually create a lower third: If you want to customize the appearance more extensively, you can manually create your own lower third. Click the Text tab and select Caption. Drag any caption template to the timeline. To create a lower third, resize the text box and place it in the lower left third of the preview window.
Step 4: Edit the lower third
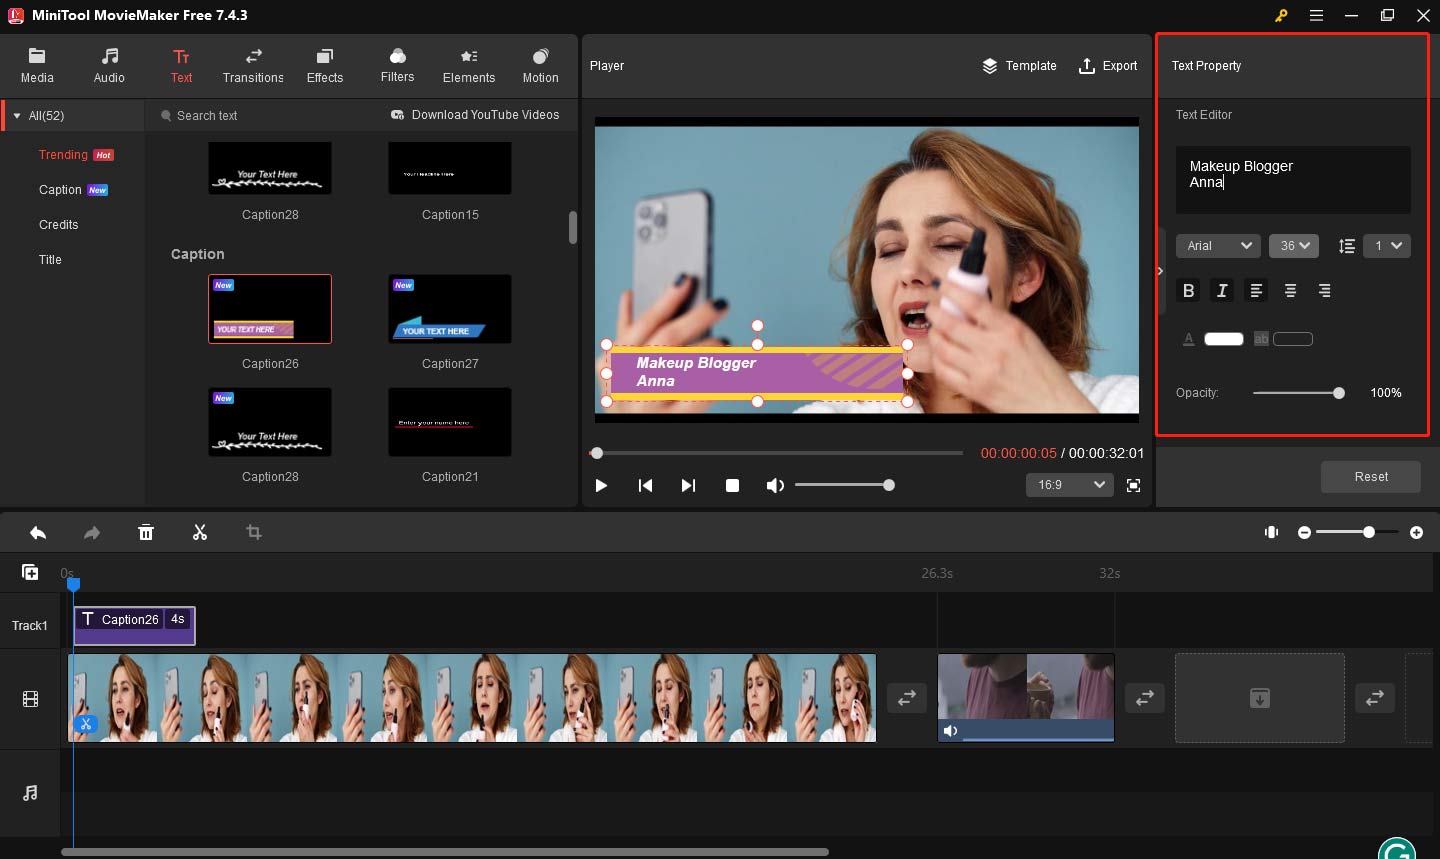
Once the lower third is added, go to the Text Property window. In the Text Editor box, enter your desired information, such as the person’s name, job title, or any other details as needed. You can also adjust the font style, size, color, and opacity to match your video’s aesthetic.
Step 5: Add background music
To make your video more engaging, you can add background music. Click Import Media Files again, but this time, select the audio file you want to use from your computer. Drag the audio file to the audio track in the timeline. Adjust the music’s length to match your video by dragging the edges of the audio clip. If you don’t have the right audio, you can also apply the built-in audio. Go to Audio, find your favorite music, download it, and click the plus icon on the audio file to apply it.
Step 6: Adjust the music effect
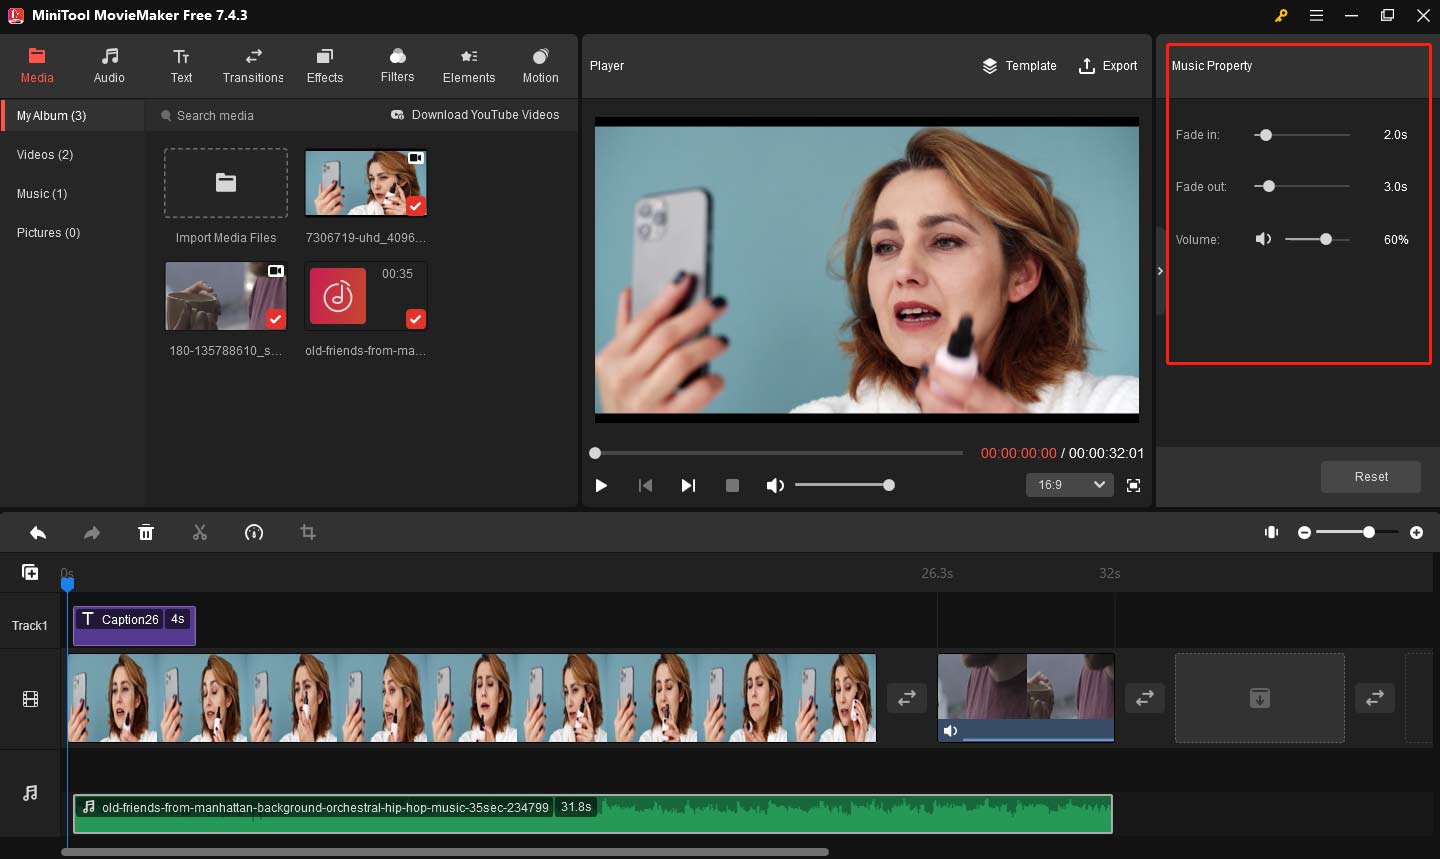
Go to Music Property, and adjust the audio volume by dragging the Volume slider, balancing the volume so that it does not exceed the voice of the video. To make the music blend more smoothly with your video, you can also add fade-in and fade-out effects. Slide the Fade in or Fade out slider to the right or left until you get the desired effect.
Step 7: Export your video
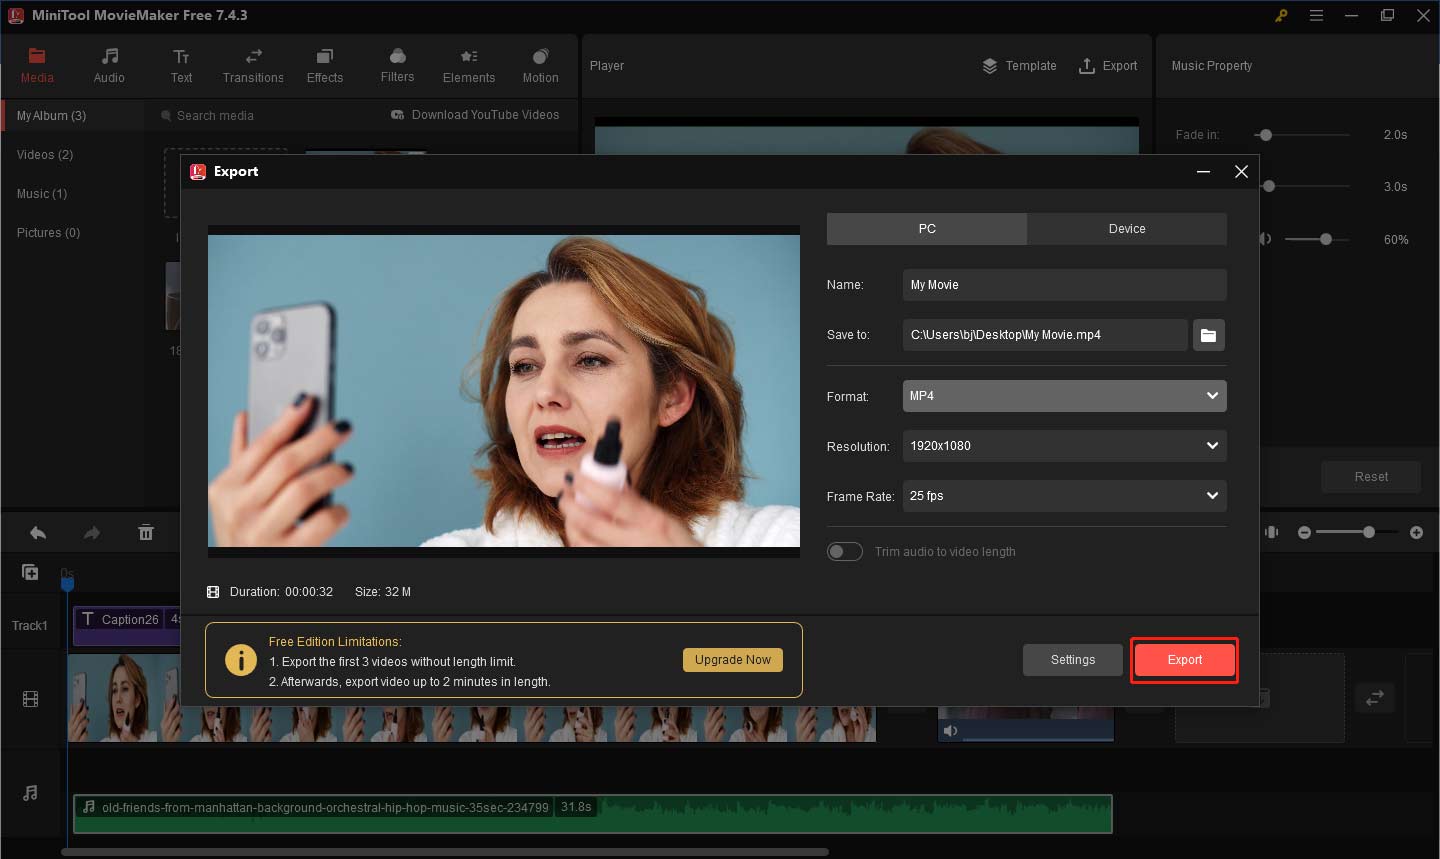
After you’re happy with your video, it’s time to export your project. Click the Export button at the top right corner. Choose your desired export format, such as MP4, AVI, or MOV, and set the video resolution according to your preferences. Select an output folder to save the exported file. Finally, click Export to start rendering your video.
In addition to the above-mentioned operations, MiniTool MovieMaker has many other features that can realize your various creative ideas.
- It provides the functions of cutting, cropping, splitting, and trimming videos, so you can remove unwanted parts easily.
- It provides a variety of transition effects that allow you to switch between clips smoothly.
- It has rich built-in video effects, filters, and elements, so you can add creative visual effects to the video as needed.
- It supports combining multiple video clips into one.
- It is a photo video maker, so you can create video from images.
Bottom Line
Adding the lower third to a video can enhance the visual impact, as well as convey information effectively, making it easier for viewers to focus on key content. Using the lower third correctly can make the video more professional and easier to understand. By following the steps above, you can quickly add lower third to video.
In conclusion, the clever use of the lower third can make your videos more attractive and professional. If you have some problems editing videos with MiniTool MovieMaker, please feel free to contact us via [email protected] for help.


User Comments :