This post demonstrates how to trim WAV files using MiniTool MovieMaker, Audacity, and Clideo. Effortlessly remove unwanted sections and optimize your audio for any project.
WAV, short for Waveform Audio File Format, is a popular audio format, mainly used to store uncompressed, lossless audio data. This format is widely used in professional recording, music production, and editing.
Sometimes you may need to trim WAV files to make them shorter or remove unwanted parts from the beginning or end. Therefore, this post explains two simple solutions for you.
How to Trim WAV File with MiniTool MovieMaker
MiniTool MovieMaker is an easy-to-use video editor without watermark designed for everyone to create stunning videos in minutes. Additionally, it also functions as a simple audio editor that allows you to trim, split, reverse audio, adjust playback speed, apply fade-in/out effects, extract audio from various video files, and merge multiple audio clips, etc.
When you desire to trim WAV files quickly on your computer, MiniTool MovieMaker is worth a try. How to trim a WAV file with this application? Here’s the guide.
Step 1: Download and Install
Click the button below to download and install the WAV trimmer on your computer. Then, install the program.
MiniTool MovieMakerClick to Download100%Clean & Safe
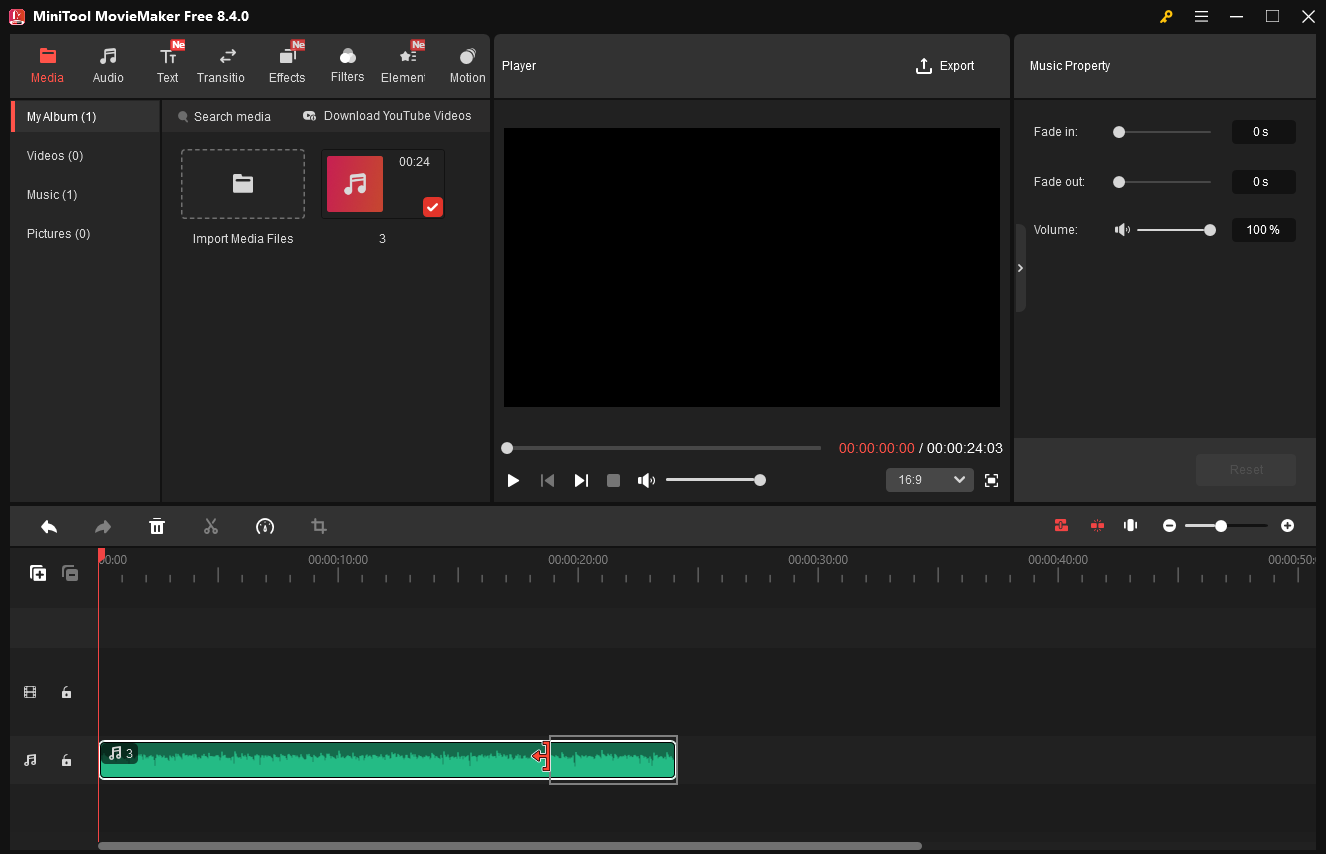
Step 2: Upload Your WAV File
After launching the software, click the New Project option to access the main interface. Click Import Media Files to import your WAV file and drag it to the timeline.
Step 3: Trim the WAV File
Place your mouse cursor at the beginning or end of the clip on the timeline. When the Trim icon appears, click and drag it inward, then release to delete the section beyond that point.
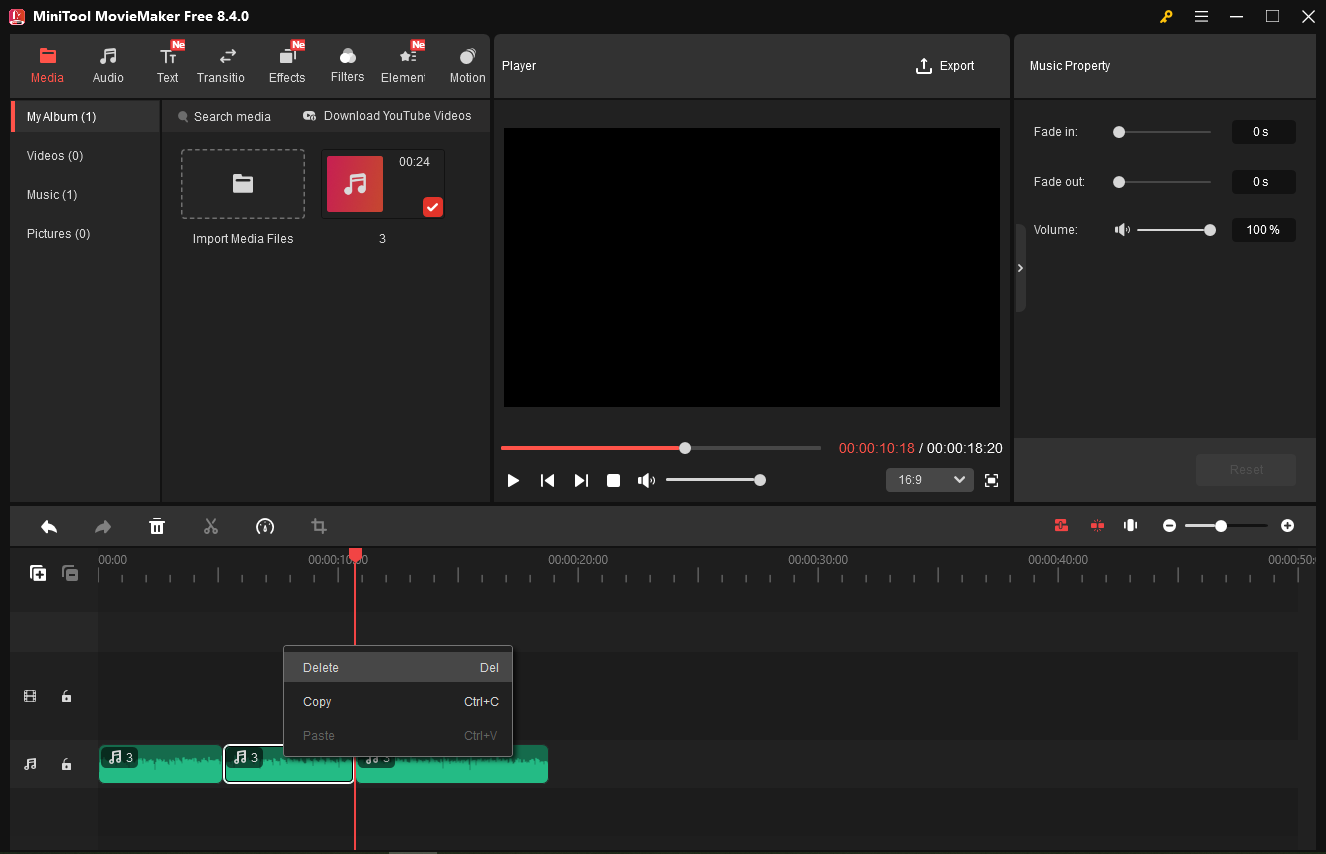
If you need to remove the middle part of the audio, use the Split tool to separate the segment and delete it. Drag the playhead to the start point of the unwanted segment, and click the Split icon. Continue dragging the playhead to the end of the unwanted segment, and click the Split icon again. Then, right-click the segment and choose Delete.
Step 4: Save the Audio
Click Export in the top right corner. In the Export Window, expand the Format menu and choose MP3 from the dropdown. Click Export again to save the audio to your computer.
MiniTool Video ConverterClick to Download100%Clean & Safe
How to Trim WAV File with Audacity
Audacity is a free, open-source, multi-track audio editor and recorder for Windows. It allows you to capture both the microphone and system audio. As an audio editor, it lets you cut, copy, paste, mix, and splice audio tracks. Additionally, it enables you to apply effects, change the pitch, and visualize audio. Don’t miss Audacity when you’re seeking a free WAV trimmer.
Here’s how to trim a WAV file using Audacity.
Step 1: Install the Application
Go to the Audacity download website (https://www.audacityteam.org/download/windows/) to install the software on your PC.
Step 2: Open Your WAV File
Run the software and select File > Open to select your WAV file from your PC.
Step 3: Trim WAV File
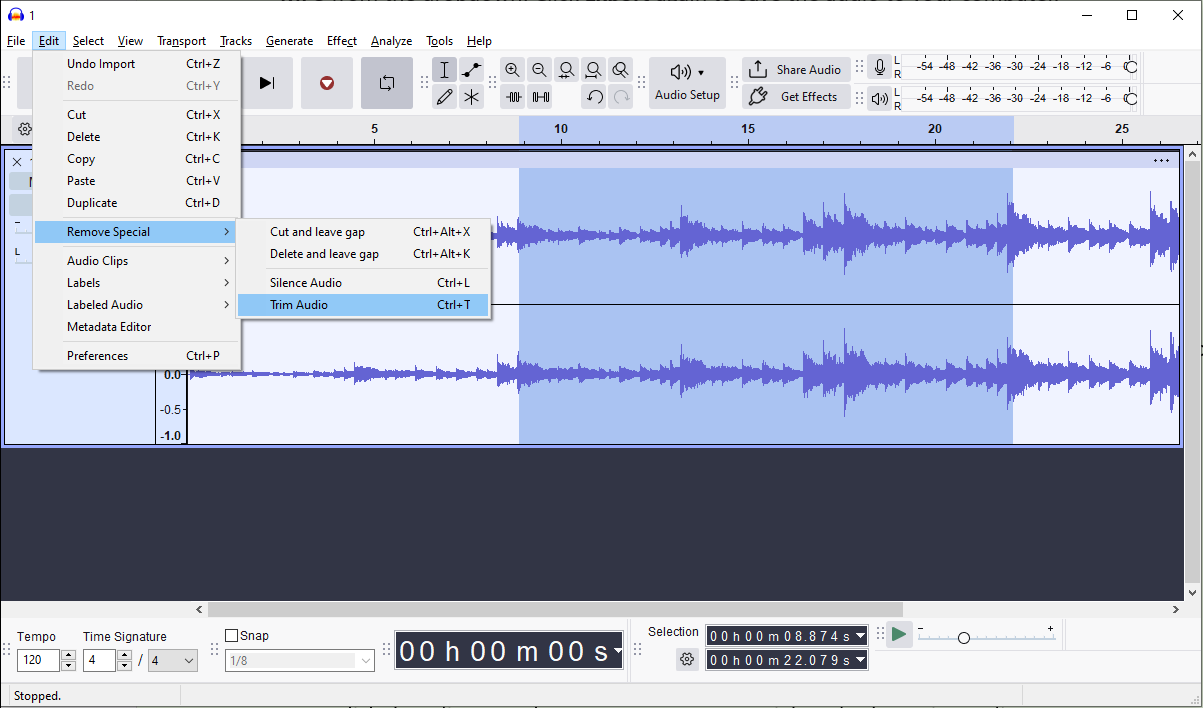
Double-click the start of the audio you want to keep, and a black line appears immediately. Then, drag the mouse to highlight the portion of the audio you want to preserve. Next, click the Edit menu, hover over Remove Special, and select Trim Audio. Then, the unselected sections at both ends will be deleted simultaneously.
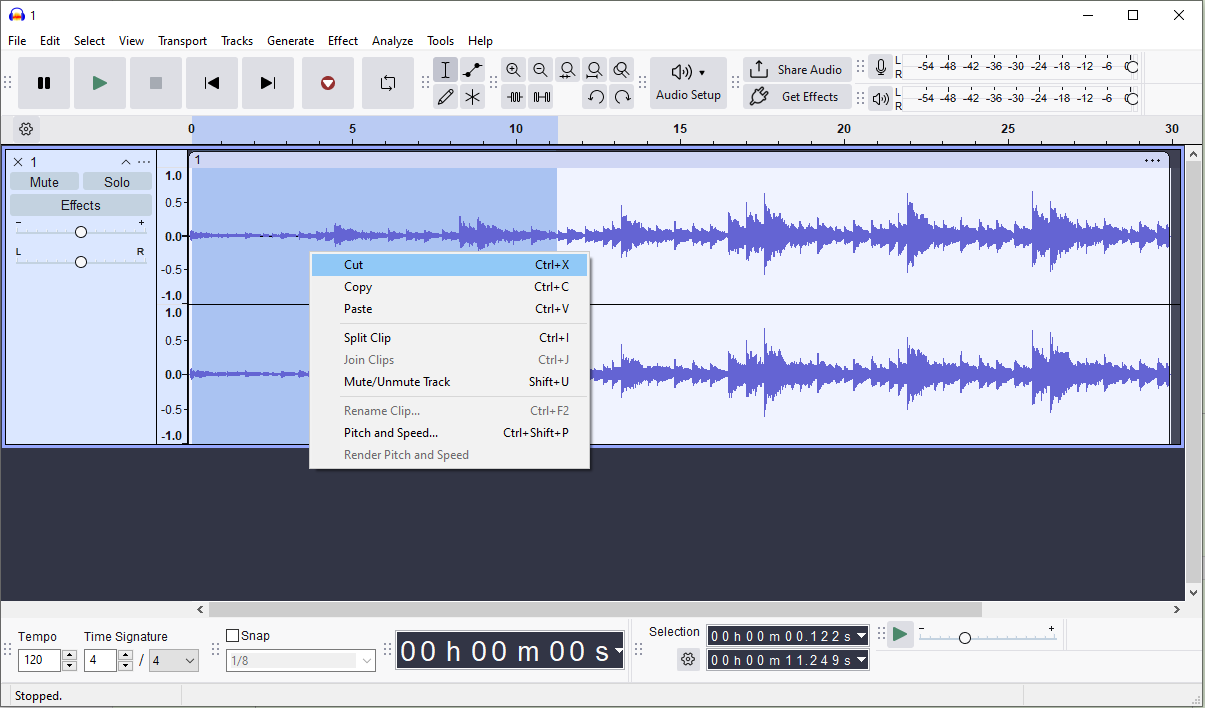
If you only want to delete the unwanted parts at the beginning or end of the audio, select and highlight the portion, right-click on the part, and choose Cut.
Step 4: Save the Audio
Go to the File menu and choose Export Audio from the dropdown. Then, choose the output format, sample rate, and other settings. Click Export to save the audio.
How to Trim WAV File with Clideo
If you want to trim WAV files online, Clideo is a good option. This platform has an intuitive interface and easy-to-use tools, and it allows you to save the trimmed audio in WAV, AIFF, FLAC, M4A, and other formats.
Step 1: Upload Your WAV File to Clideo
Visit Clideo’s online audio cutter (https://clideo.com/cut-audio) in your browser. Click Choose file to open your WAV audio.
Step 2: Trim the WAV Audio
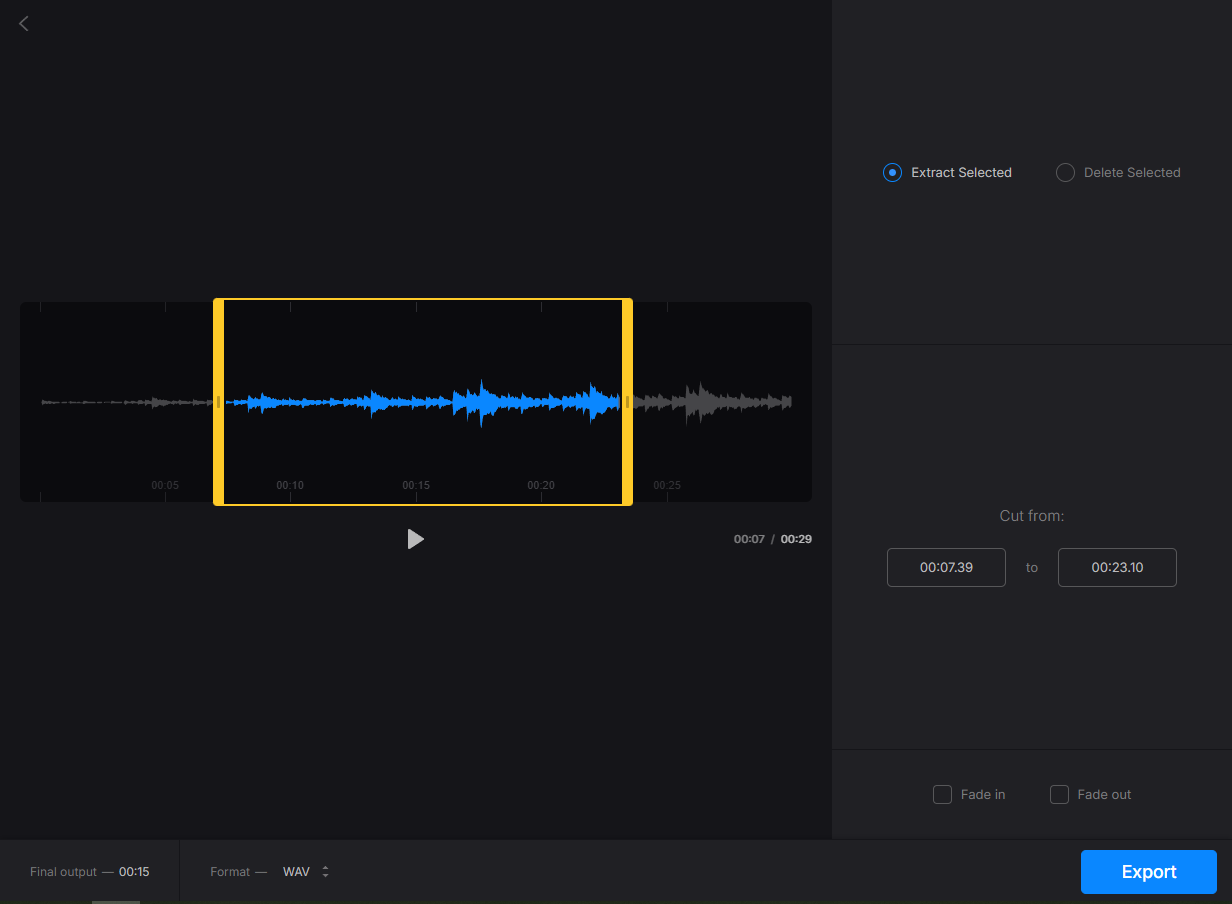
Once uploaded, a yellow trim handle appears on the audio waveform. Drag the slider to choose the portion of the audio you want to preserve or delete. If the Extract Selected option is checked, your chosen audio will be saved. If the Deleted Selection option is checked, your chosen audio will be deleted, and the clip on both sides will be kept.
Step 3: Save Your Audio
Choose your preferred audio format at the bottom and click Export to save your audio file.
Conclusion
This post explains three quick methods to trim WAV files. You can follow the steps above to remove unwanted parts from your audio and enhance your audio experience.
About The Author

Position: Columnist
Cora is a tech writer specializing in digital media workflows, with over six years of hands-on experience in video post-production, media transcoding, and screen capture. Her writing is always clear and practical. Cora also produces in-depth software reviews for users across skill levels to help them find the right tool and enjoy video editing.
User Comments :