In this post from MiniTool MovieMaker (a free and widely used movie maker), you will learn about the Snapseed unblur, the common causes of blurred images, and how to use Snapseed to unblur step-by-step.
About Snapseed Unblur
Snapseed is a robust and professional-level image editing application developed by Google. It provides a range of tools that enable you to fine-tune photos directly from your smartphone. Snapseed does not offer a dedicated “unblur” option. However, it does have several functions that can help decrease the appearance of blurriness and sharpen details, making images appear clearer.
The most important tools in Snapseed that can help you fix blurry images are the following:
- Details – The tool includes two basic functions which are Structure and Sharpening. Structure improves the contrast of textures inside the photo, making it appear more detailed, and Sharpening enhances overall clarity and edge definition.
- Tune Image – You can change ambiance, brightness, and contrast from the tool to bring out the details in a blurry photo.
- Selective – The tool enables users to accurately control the focus and clarity of specific parts of a picture. It is ideal for selectively sharpening the most significant areas of the image.
You can greatly reduce the impact of a blurry photo with Snapseed’s combination of those tools. Read on for information on how to unblur an image on Snapseed.
Common Causes of Blurry Pictures
Before finding out how to unblur on Snapseed, it is vital to know the popular reasons for blurry images. You can avoid similar problems in the future by understanding why an image is blurry.
Subject Motion
When the subject you are shooting is in motion too fast, it can result in motion blur, in which portions of the picture appear to be blurred or out of focus. This is often the case in action shots or while shooting kids or pets.
Camera Shake
Camera shake is one of the most common causes of blurry pictures. It is difficult for the camera to focus properly if your hand moves during shooting, particularly in low-light conditions. This leads to shaky and blurry photos.
Low-Light Situations
In low-light situations, the camera usually slows down the shutter speed to catch enough light for a suitable exposure. The longer the shutter is open, the greater the opportunity for blur caused by movement or camera shake.
Wrong Focus
Today’s smartphones and cameras utilize autofocus technology, but it does not always focus properly. When your camera is focusing on the incorrect portion of the scenario, the subject you are trying to capture may come out blurry.
Dirty Lens
Sometimes, a dirty lens is as simple as the reason for a blurry picture. Fingerprints, dust, or smudges on the lens of your camera can cause photos to be out of focus or blurry.

Now that you know what’s leading to blurry pictures, let’s see how to use Snapseed to unblur.
Step-by-Step Guide to Snapseed Unblur
Refer to the easy steps below to unblur an image with Snapseed:
Step 1. Run Snapseed and Import an Image
Open Snapseed on your mobile phone, tap on the + icon and choose the blurry image you would like to edit from your photo library.
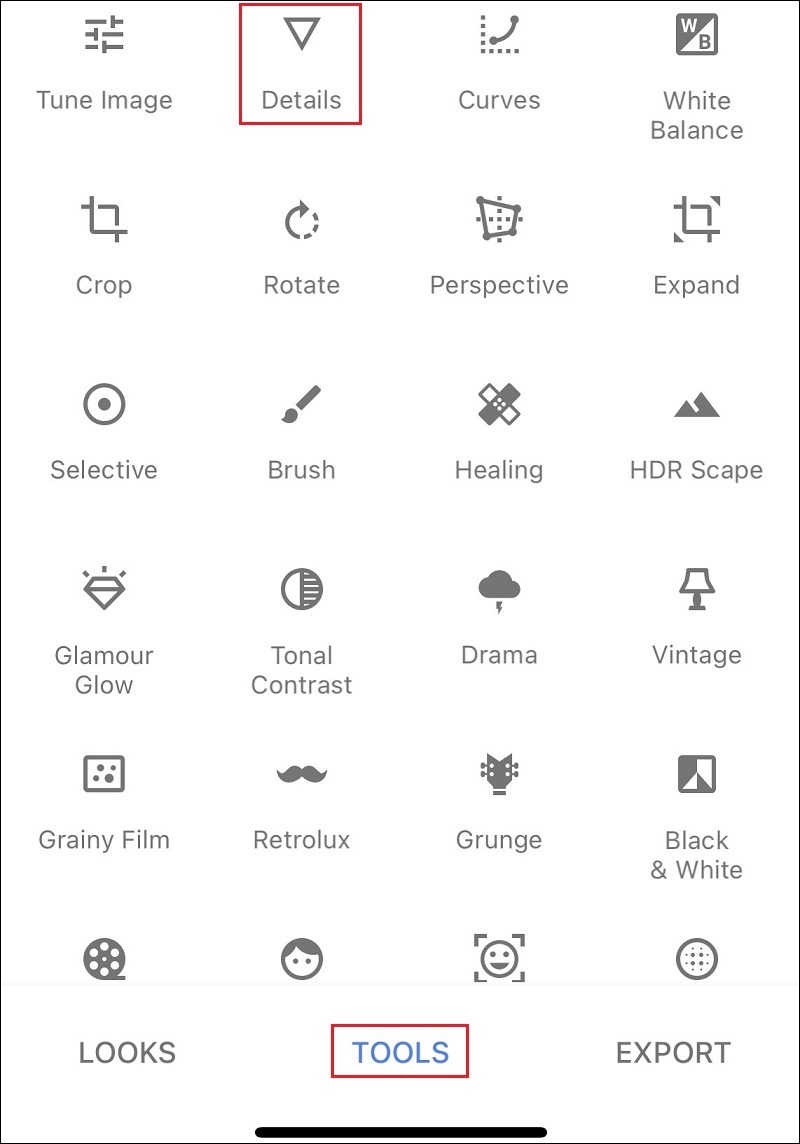
Step 2. Select the Details Tool
Head to the Tools tab at the bottom of the interface and tap Details. From there, you will discover two options: Structure and Sharpening.
To bring out the textures and fine details in the photo, raise the Structure slider. Begin with about 25% to 50% and modify depending on how much texture you would like to recover.
Then, increase the Sharpening slider to further enhance the clarity of the image. Be careful with sharpening, since excessive sharpening can cause noise and an unnatural look to the photo. Target sharpening level between 20% and 40%.
Step 3. Tune the Picture
After you sharpen your image, tap on Tune Image from the Tools tab. Change contrast and brightness levels to add depth and definition to the picture. If the image appears dull, raising the ambiance can help improve overall details.
Step 4. Select the Selective Tool
To focus on specific parts of the image, select the Selective tool to add sharpening and clarity just where required. This is particularly useful for portrait shots where you would like to sharpen the face or eyes of the subject yet let the background be slightly blurred for an artistic effect.
Step 5. Export the Photo
If you’re satisfied with the changes, tap on the checkmark to apply the adjustments. Lastly, export the picture by tapping the Export tab and choosing the desired save way.
MiniTool MovieMakerClick to Download100%Clean & Safe
Conclusion
These are some of the useful information about Snapseed unblur. Hopefully, this post helps you a lot.
User Comments :