This post explains how to trim a video in Dropbox. It also provides more information about the Dropbox video editor and demonstrates how to trim a video before uploading it to the platform.
Dropbox is a popular cloud storage and file-sharing service that lets users securely store files, documents, videos, and photos online, syncing them across all their devices. It’s also one of my commonly used services for storing videos and turning large files into links for easier sharing.
There was a time when I uploaded a video to Dropbox, and I wanted to delete irrelevant parts at either end to make it more polished. Thus, I wondered if I could and how to trim a video in Dropbox. Later, I discovered that Dropbox includes a built-in video editor with basic features, such as trimming.
How to Trim Video in Dropbox
In this section, I will demonstrate, based on my own experience, how to trim a video in Dropbox in a desktop browser.
Step 1: Find the Target Video in Dropbox
Navigate to the Dropbox website in a browser and sign in. Go to the folder that contains the desired video or locate it in the All Files section.
Step 2: Access the Dropbox Video Editor
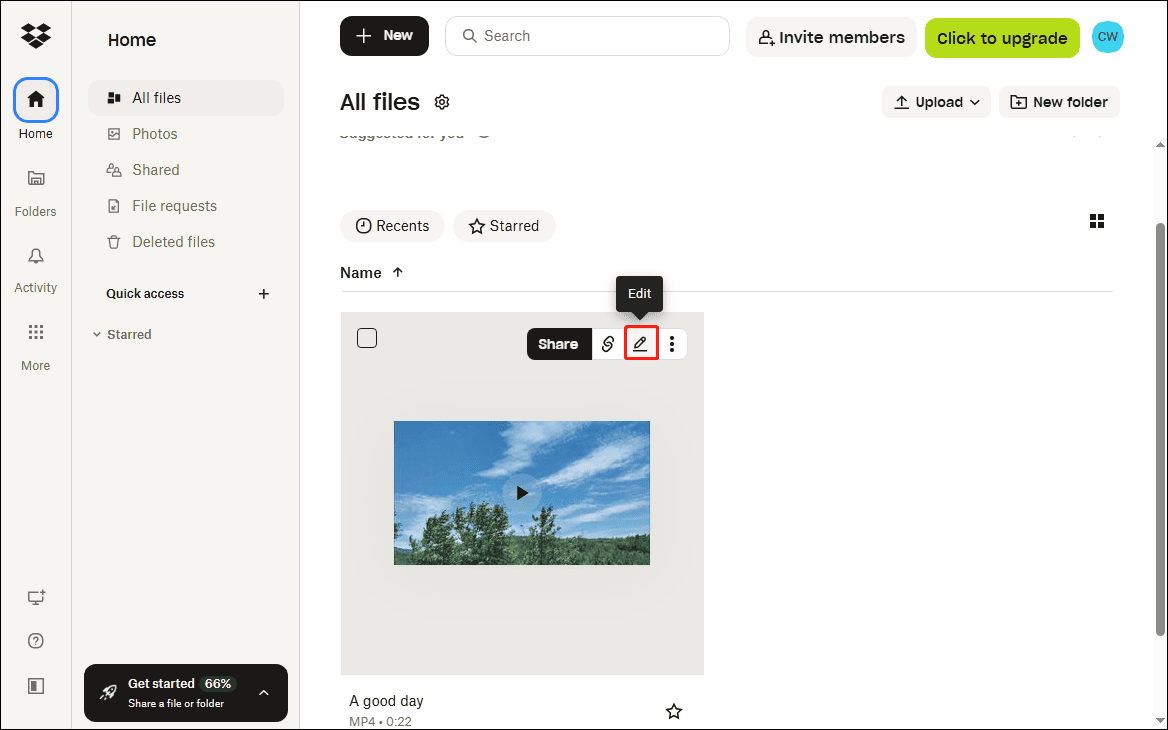
Hover the mouse cursor over the thumbnail of the target video and click the Edit icon. Then the Dropbox video editor page will open in a new tab.
Step 3: Trim the Video
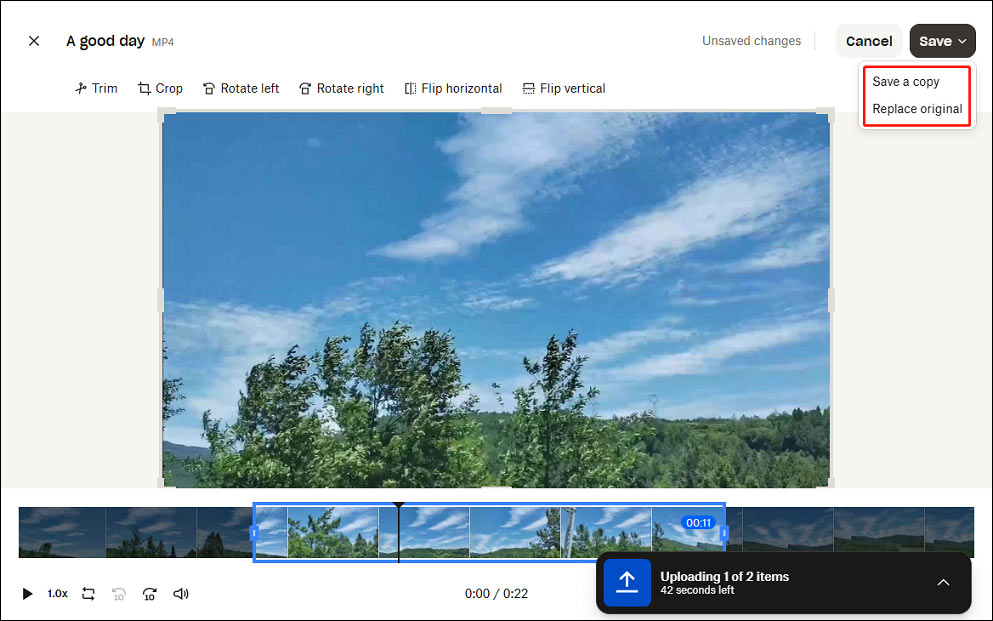
Then, I found the video would be automatically highlighted in blue on the timeline at the bottom of the screen. To trim the video, I put the mouse cursor over either end of the video until a double-headed arrow appears.
Next, drag and drop the arrow inward to choose the part of the video to be saved. The highlighted middle section will be preserved, and the beginning or end part of the video will be removed later.

Step 4: Save the Trimmed Video
Click the Save option in the upper-right corner. Next, click Save a copy to save the trimmed video separately. Click Replace original and select the option again to overwrite the current file.
More About the Dropbox Video Editor
In addition to trimming videos, the Dropbox video editor also allows me to crop the video freely, rotate it left or right, and flip it horizontally or vertically. Furthermore, I also find that I can change the video playback speed in the lower-left corner and adjust the volume.
All in all, Dropbox’s online video editor is a very simple and lightweight tool designed for quick edits. Personally, editing a video before sharing it on the platform is always better, as professional video editing applications come with more features.
Therefore, I searched the internet for an easy-to-use and feature-rich video editor for Dropbox. After my research, I found MiniTool MovieMaker is an excellent tool for editing videos before uploading them to Dropbox.
The software allows me to trim, crop, split, rotate, flip, and scale videos, add text, stickers, and overlays, change the aspect ratio, apply filters and effects, create picture-in-picture (PIP) effects, make video collages, and more.
I think the best thing about MiniTool MovieMaker is that it supports exporting videos up to 4K for free, without a watermark.

How to Trim a Video Before Uploading it to Dropbox
In this section, I’ll explain how to trim a video using MiniTool MovieMaker before uploading it to Dropbox.
Step 1: Download and Install
Click the button below to download and install the video trimmer on the computer.
MiniTool MovieMakerClick to Download100%Clean & Safe
Step 2: Import the Target Video
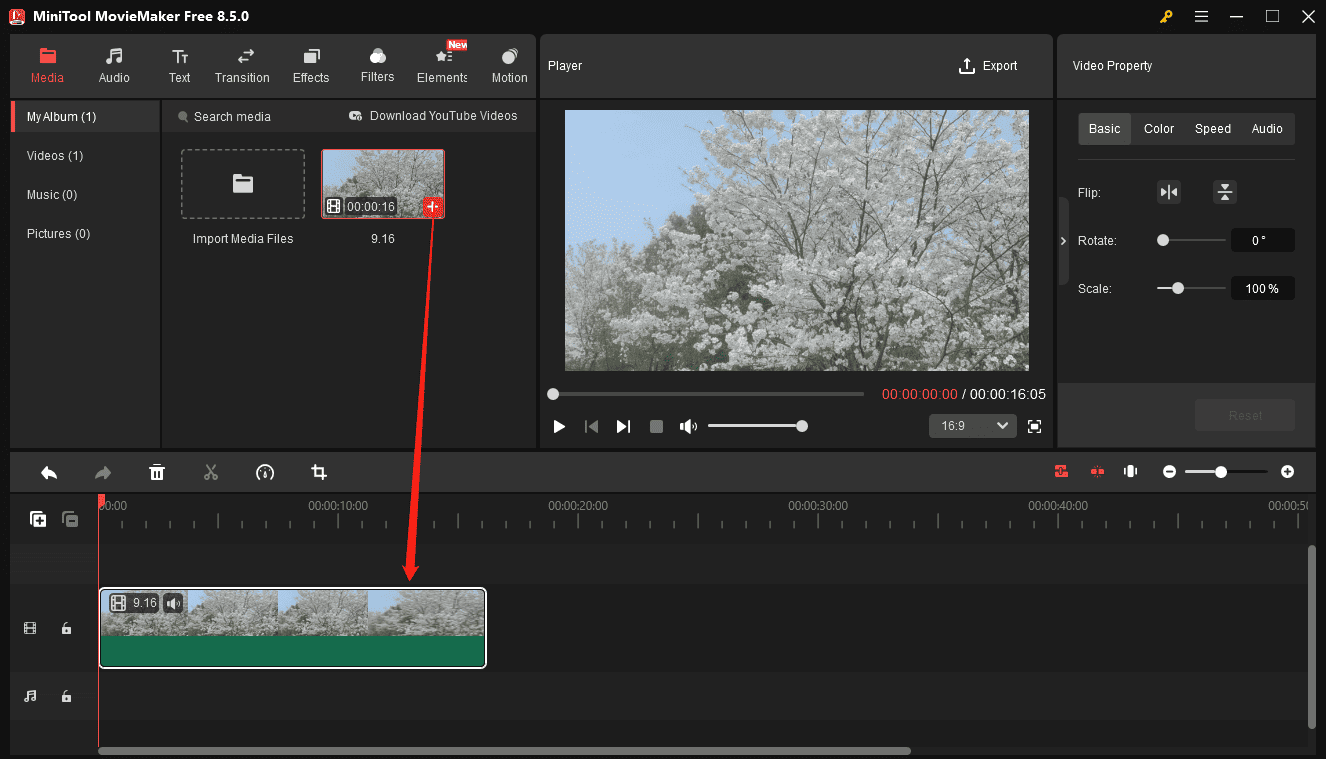
Launch the software and click New Project to access the main user interface. Click the Import Media Files area in the upper left of the interface to upload a video. Next, click the + icon on the video or drag it from the media library to the timeline.
Step 3: Trim the Video
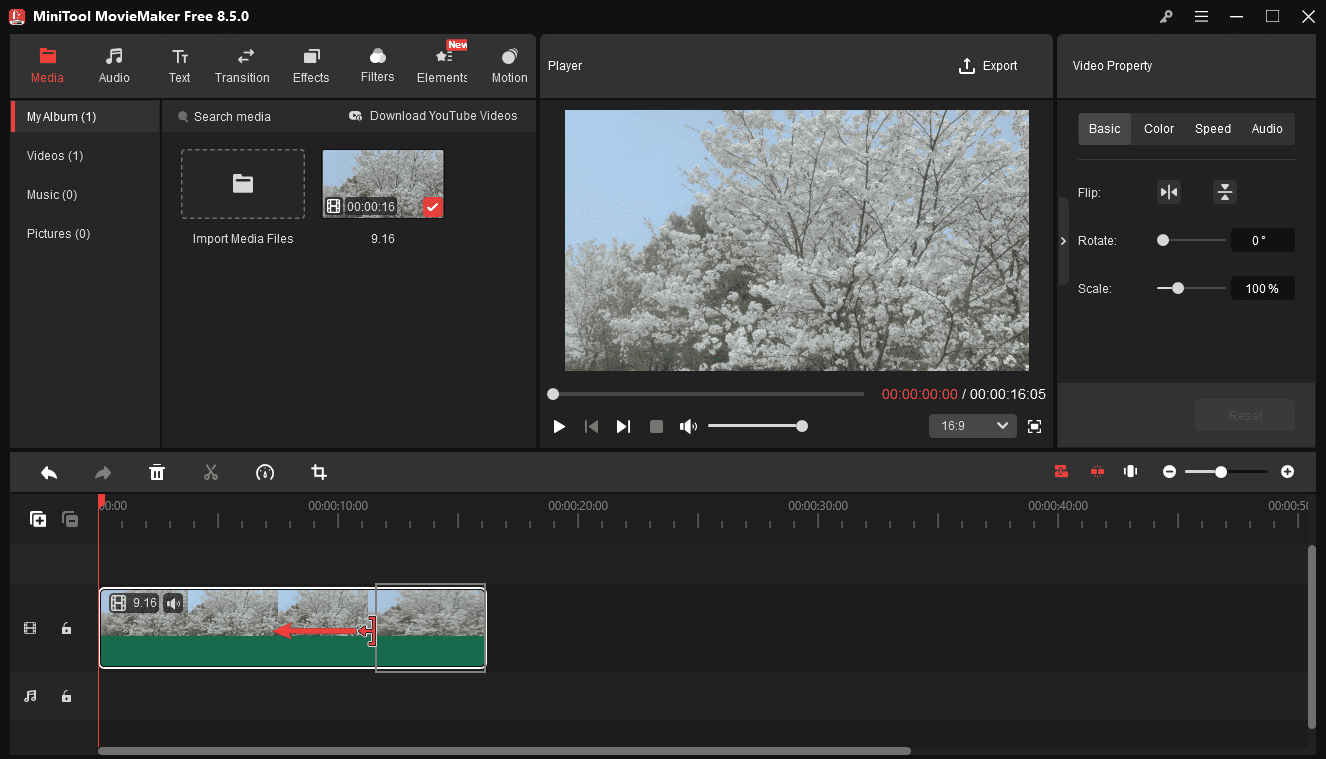
Hover the mouse cursor over the start or end of the video on the timeline, and the Trim icon appears. Drag the icon inward, and the beginning or end part of the video will be deleted instantly when I release the mouse.
If you want to remove the middle part of the video, extract the target segment using the Split tool. Drag the playhead to the start of the clip you don’t want, click the Split icon, then drag the playhead to the end of the unwanted clip, and click the Split icon again.
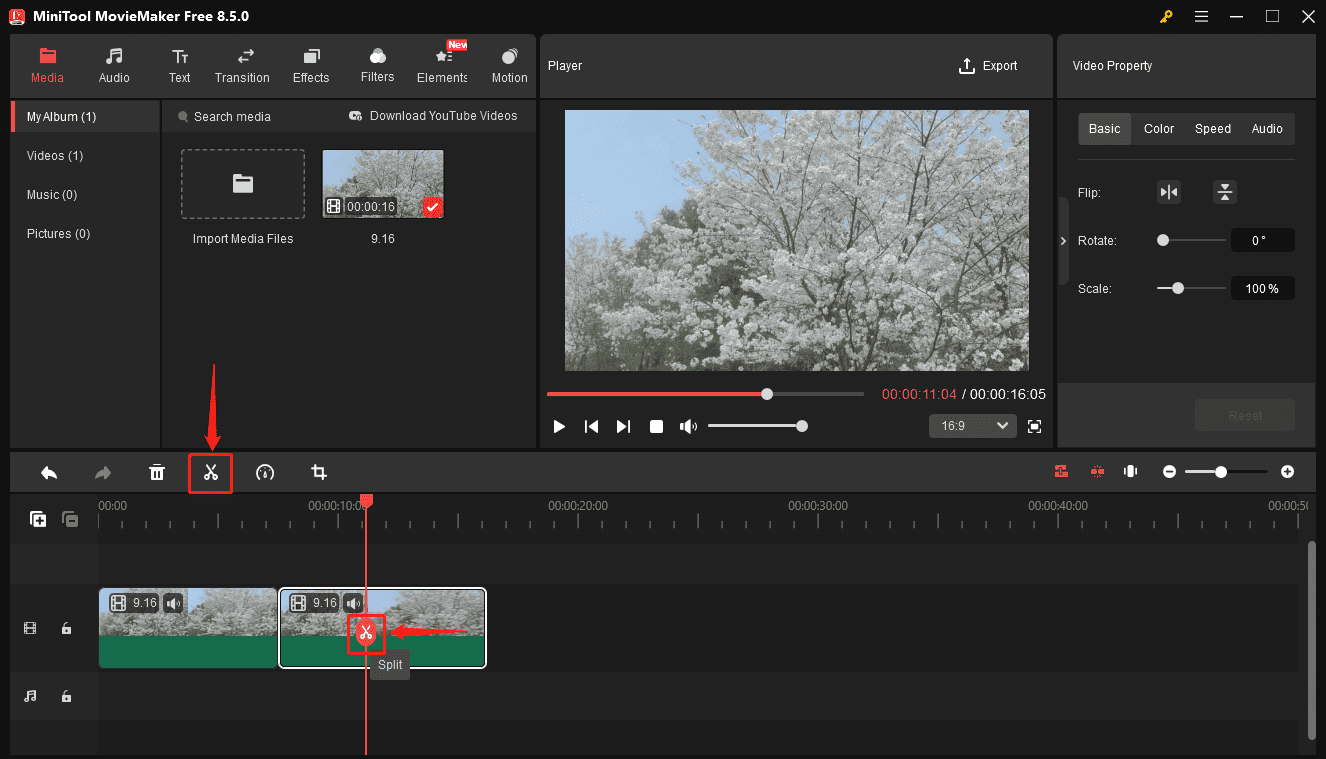
Next, right-click the middle part and select Delete to remove it from the original video.
Step 4: Export the Video
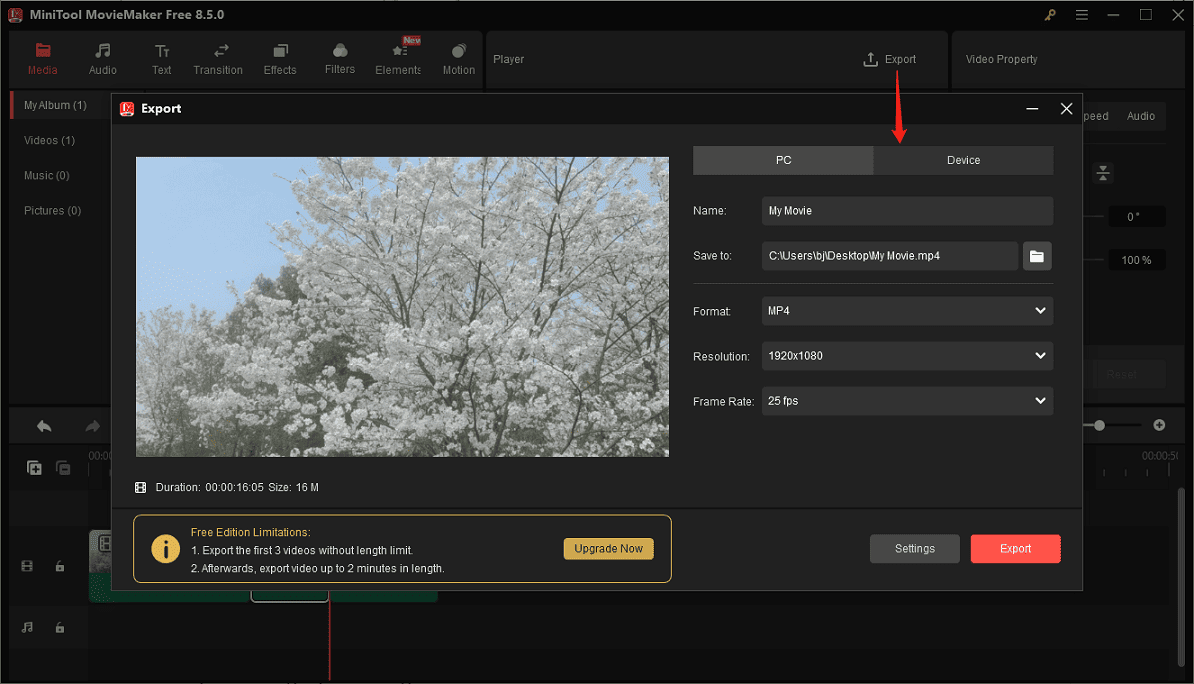
Click Export in the upper right to open the Export window. Choose a location to save the video and click Export to begin processing the video.
Once done, go to the Dropbox website and upload the video I just edited.
Conclusion
Now, I believe you won’t be confused about how to trim video in Dropbox. Based on my experience, trimming a video in Dropbox is a straightforward process to refine the content within the platform. However, the built-in video editor has limited functions. Therefore, I recommend using its alternative, MiniTool MovieMaker, to polish videos in advance.
About The Author

Position: Columnist
Cora is a tech writer specializing in digital media workflows, with over six years of hands-on experience in video post-production, media transcoding, and screen capture. Her writing is always clear and practical. Cora also produces in-depth software reviews for users across skill levels to help them find the right tool and enjoy video editing.
User Comments :