Every crew member is crucial because without them a film would be impossible to finish. That’s why the end credits are a portion of each motion photo ever made since the early days of Hollywood. Creating the opening or closing credits is a relatively simple job. However, formatting this text can be a tedious process. In this post from MiniTool MovieMaker, we will show you how to make rolling credits in Premiere Pro in a few different ways.
How to Create Rolling Credits in Premiere Pro?
A few years ago, Premiere Pro’s Title panel was replaced by the Essential Graphics panel. The latest updates to this video editing software, released in 2018, brought more robust tools for filmmakers to make end credits. In addition to the Essential Graphics panel, Premiere Pro also provides several fast and simple methods to add text at the start or the end of a video. So, let’s look at how to make rolling credits in Premiere Pro.
#1. Use the Text Tool
The text layers you make using the Text tool can be edited or animated from the Essential Graphic Panel. Just click the Text tool icon in the editor’s toolbar and then position the text layer(s) on the screen.
Add and format the text and go to the Essential Graphic Panel’s Edit tab. To access the Start Off-screen and End Off-screen options, click the Roll checkbox. Make sure that these options are enabled, preview the credits in case further modifications are needed, and this is the first method of how to do rolling credits in Premiere Pro.
#2. Use the Credits Packages in the Essential Graphics Panel
Remember that you need to prepare the text you’ll use in the video in Notepad or another text editor before you begin making a rolling credit.
Once you’ve got the footage ready, open the project you’re working on, navigate to the Window menu, and make sure the Essential Graphics option is selected. The Essential Graphics panel will appear in the Premiere Pro’s layout, so you simply need to click the Browse button at the top of the panel.
Click the Credits folder, select the credit roll option you want most, and drag and drop it to the exact position on the timeline where you desire the credits to be displayed in your video. The credit you inserted will include the placeholder text, and to change it, you have to return to the Essential Graphics panel.
To add the new text or change its size and font, click the Edit button next to the Browse button. After finishing formatting the text, ensure that all text layers are deselected, so you can access the Responsive Design options.
Under the Intro and Outro Duration properties, you’re going to spot the Roll checkbox, so simply hit it to enable it. Then, you can select if you desire the credits to start and end off-screen, change the Preroll and Postroll settings, and Ease In or Ease Out the credits. By just dragging one of the ends of the object, you can increase or decrease a credit roll’s duration on the timeline.

#3. Animate a Still Image
Video editors who wish to have full creative control over the process of creating the end credits can use Photoshop to design them. If you choose to use this means of making the rolling credits you have to ensure that the file is saved in the PNG format.
When the image is ready, import it into Adobe Premiere Pro and add it to the timeline. Move one of its ends to change the duration of the credit roll and put the playhead at the beginning. Drag the image shown in the preview panel off the screen, and then set a keyframe. Move the image up, until its bottom edge appears on the screen, then set another keyframe.
Put the playhead at the beginning of the still image and hit play to see if you successfully animated it. The best part about this way of making the credit roll is that you can use it in any version of Premiere Pro.
Bonus Tip: Add Rolling Credits to Your Videos with Another Powerful Video Editor
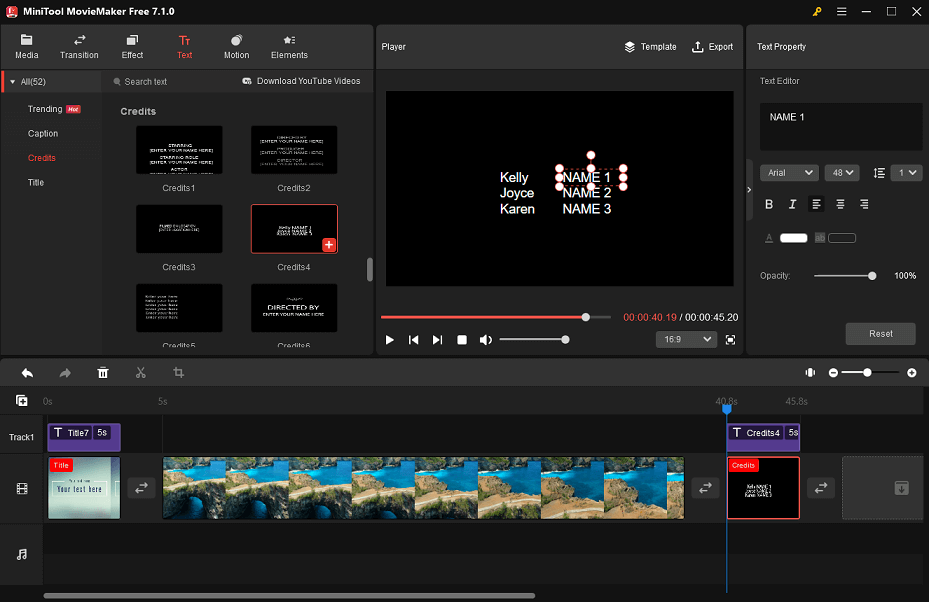
If you would like to add rolling credits to your videos in a simple way with the help of another powerful video editor, then MiniTool MovieMaker is highly recommended.
It comes with dozens of text styles, including titles, captions, and end credits. You can visit the Text tab at the top of the MiniTool MovieMaker main interface to find the text style you want. After adding the desired rolling credits template, you can customize the content and change its font, size, line spacing, opacity, and more.
MiniTool MovieMakerClick to Download100%Clean & Safe
Conclusion
These are the three ways to learn how to make rolling credits in Premiere Pro. Which is the method that you would most like to use? Comment below and tell us.

User Comments :