Premiere Pro is a multi-purpose video editing software for all your projects. One stunning feature is the capability to apply dramatic effects. One of them is a fade to black in Premiere Pro, applied to the end of a video segment. In this post, we will teach you how to fade to black in Premiere Pro quickly. Alternatively, you can try fading the video to black using another versatile Windows movie maker - MiniTool MovieMaker.
How to Add Fade to Black in Premiere Pro?
When you work in Premiere Pro, you will usually be using unedited clips. By applying a fade to black in the software, you will close footage with a subtle dramatic effect. Let’s see how to fade to black in Premiere Pro. It just takes a couple of quick steps.
Step 1. Add a Video Segment to the Timeline
To learn how to fade video to black in Premiere Pro, you’ll first need to select a clip to work with. Then, find the Timeline. It is instantly under the Program Monitor, the big video preview section. The Timeline displays how multimedia suits your project. It controls layering, sequence, timing, etc.
To add a segment, browse to a saved video file on your PC. Drag and drop it onto your Timeline. You’ll see it appear when you put it on the V1 track.

Step 2. Open Effects Panel
A Premiere Pro fade to black is a visual effect. You can find the effects in the Effects panel of the software. It may not, however, always be visible by default. You’ll want to open the Effects panel to fade to black in Premiere Pro.
To carry out this, locate the Window menu button at the top of the interface. Hit to open it. Next, select Effects in the list of options on the menu drop-down. When you select Effects, you’ll see a new sidebar come up on the right of the software.
Step 3. Add Fade to Black in Premiere Pro
Select the clip in the Timeline. With it clicked on, go to the Effects sidebar. Note that there are several folders available. Video Transitions is the one to use. To expand the contents within, click the drop-down arrow.
After that, open the Dissolve subfolder. Several effects are listed within. To achieve the fade to black task, select the effect Dip to Black.
To add it to the clip, hit and drag Dip to Black over the video clip in the Timeline. Place your mouse pointer over the end of the clip, and drop the effect into location. That’s it! You’ll find it added!
Now, when playing a preview of your video, you’ll see a smooth fade to black near the end. This is a subtle effect, but a dramatic one! It looks a lot better than just cutting off the clip without fading.

How to Fade a Video to Black in MiniTool MovieMaker?
If you want to learn how to make a video fade to black on your Windows PC using a free and easy-to-use video editor, MiniTool MovieMaker is an option you shouldn’t overlook. Packed with a range of cool effects and powerful editing tools, it is ideal for beginners and professionals alike.
MiniTool MovieMakerClick to Download100%Clean & Safe
Check out the guide below to learn how to fade a video to black using MiniTool MovieMaker:
Step 1: Click the download button above to download and install MiniTool MovieMaker on your Windows PC.
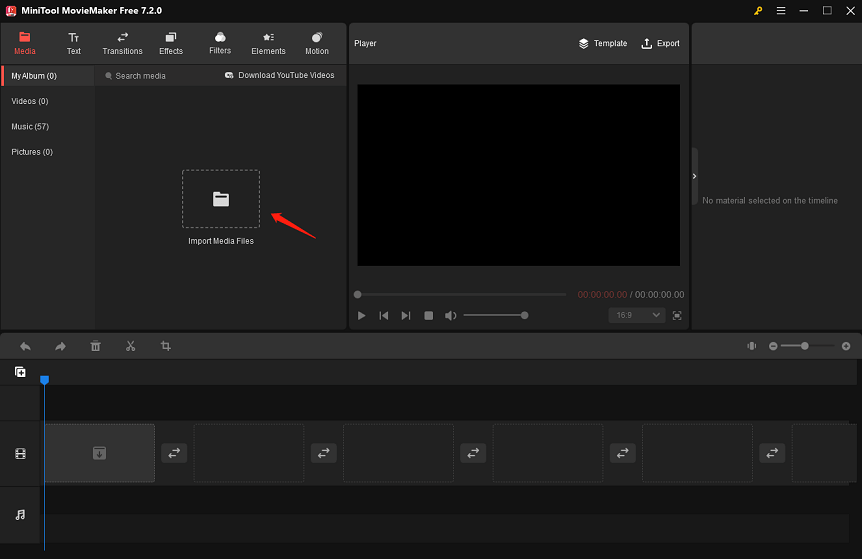
Step 2: Open the Windows movie maker and close the promotion window to access the main user interface.
Step 3: Click Import Media Files to import the original video to which you want to add the fade to black effect.
Step 4: Drag and drop the imported raw footage onto the video track on the timeline.
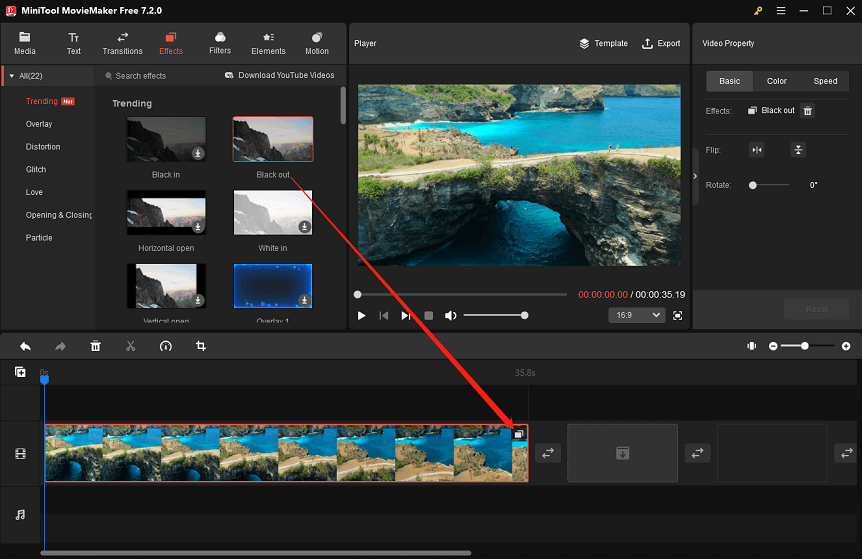
Step 5: Highlight the clip by clicking on it in the timeline. Next, go to the Effects tab at the top of the interface and select the Opening & Closing sub-tab on the left.
Step 6: Here, you’ll find the Black out effect, which lets you make your video fade to black. To do this, first click the Download icon on the effect to get it, then click the + icon to add it to the video.
Step 7: You will see a sleek fade to black near the end when clicking the Play icon in the lower-left corner of the Player area to preview.
Step 8: When you’re happy with how it looks, click Export to do some output settings and save the edited video to your Windows PC.

Conclusion
Now, with the step-by-step guide above, you know how to fade to black in Premiere Pro. Plus, you can easily fade a video to black using another video editing app called MiniTool MovieMaker. Hope you enjoy it!
User Comments :