Traditional film photography can be costly and requires long waiting times for scans. Fortunately, achieving a film-like aesthetic in digital photos is much simpler through editing. This post provides a clear tutorial on how to edit photos to look like film using Canva and Photoshop, helping you recreate the nostalgic, vintage charm that real film delivers.
Although digital cameras dominate our lives with their high resolution and accurate color, many people still prefer film photography. Editing digital photos to mimic film effects offers a practical way to enjoy the film aesthetic without the cost and time of shooting on actual film. This post shows you how to edit photos to look like film using 2 effective methods.
Before diving into editing techniques, it’s helpful to understand what makes film photography unique.
Learn About the Film Camera
A film camera captures images on photographic film rather than digital sensors. Unlike digital cameras, which offer instant previews, film cameras require a chemical development process before the final image can be viewed. The developed film often needs to be scanned for digital use.
What sets film cameras apart is their distinctive aesthetic: organic grain, soft tonal transitions, dynamic highlights, and natural imperfections. Besides, each type of film stock carries its own visual personality—some producing warm, nostalgic tones, while others create cooler, more cinematic moods. This variation gives creators a wide and expressive visual palette.
In short, film photography stands out for its grainy textures, characteristic hues, and pronounced contrasts, which make it distinct from digital photography. The next section will explore how to edit photos to look like film using Canva and Photoshop.
How to Edit Photos to Look Like Film: 2 Methods
If you are looking for quick edits, the online tool Canva is a great option. However, for more precise and professional editing tasks, it is highly recommended to use Photoshop. Let’s start with Canva.
Method 1: Edit Photos to Look Like Film Using Canva
Canva is a popular online design platform that offers a wide range of tools for photo editing, graphic design, and content creation. It provides an accessible and beginner-friendly workflow for users to edit photos to look like film. Its adjustable color grading options, grain effects, and vignette controls make it easy to recreate the soft tones and nostalgic textures of film photography.
Here is how to edit photos to look like film using Canva.
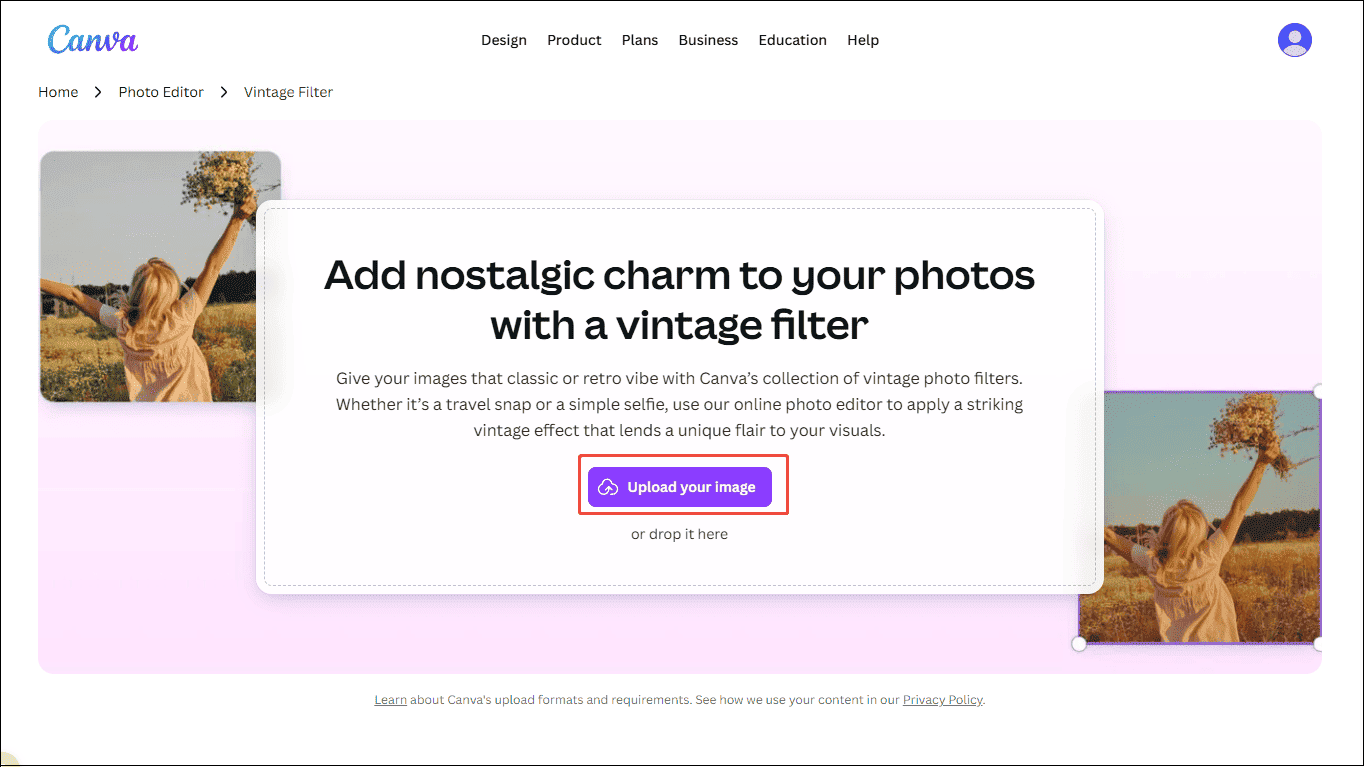
Step 1: Navigate the Official Website
Visit the official website of Canva’s vintage filter (https://www.canva.com/features/vintage-filter/) in your browser.
Step 2: Upload Your Photo
Click Upload your image to import your photo.
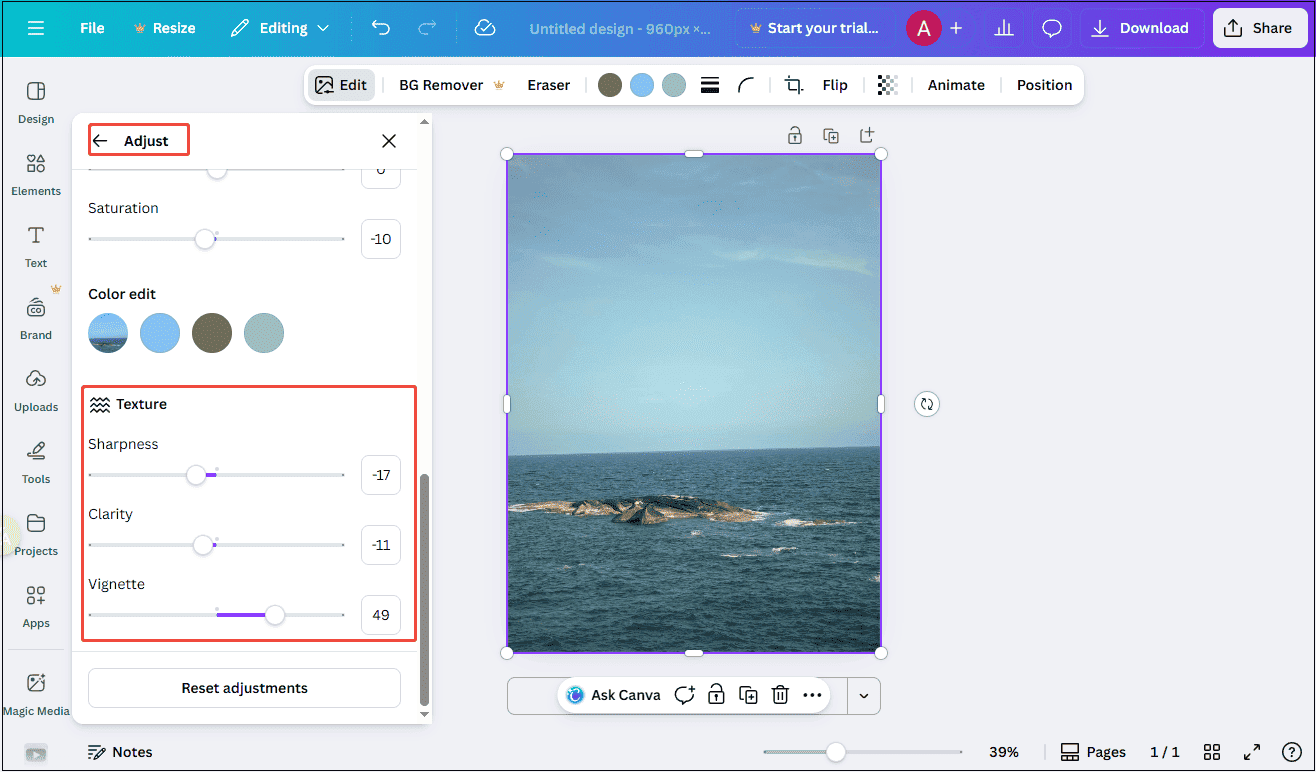
Step 3: Adjust the Image Property
Increase the Temperature value to create a warmer tone, as film photos typically carry a soft yellow warmth. Then, lower the Saturation to give the image a more vintage feel. Next, reduce Sharpness and Clarity in the Texture settings to soften the overall look. Finally, increase the Vignette value to add subtle darkening around the edges, enhancing the classic film aesthetic.
Step 4: Export the Final Photo
Click Download at the top of the menu to save the photo to your computer.

Method 2: Edit Photos to Look Like Film Using Photoshop
Photoshop is a professional-grade photo editing software widely used by photographers, designers, and digital artists. Photoshop provides exceptional control and flexibility to edit photos to look like film. Its advanced color-grading tools allow you to precisely adjust tones. It also supports adding grain and vignettes, helping replicate the natural imperfections of film cameras.
Here is how to edit photos to look like film using Photoshop.
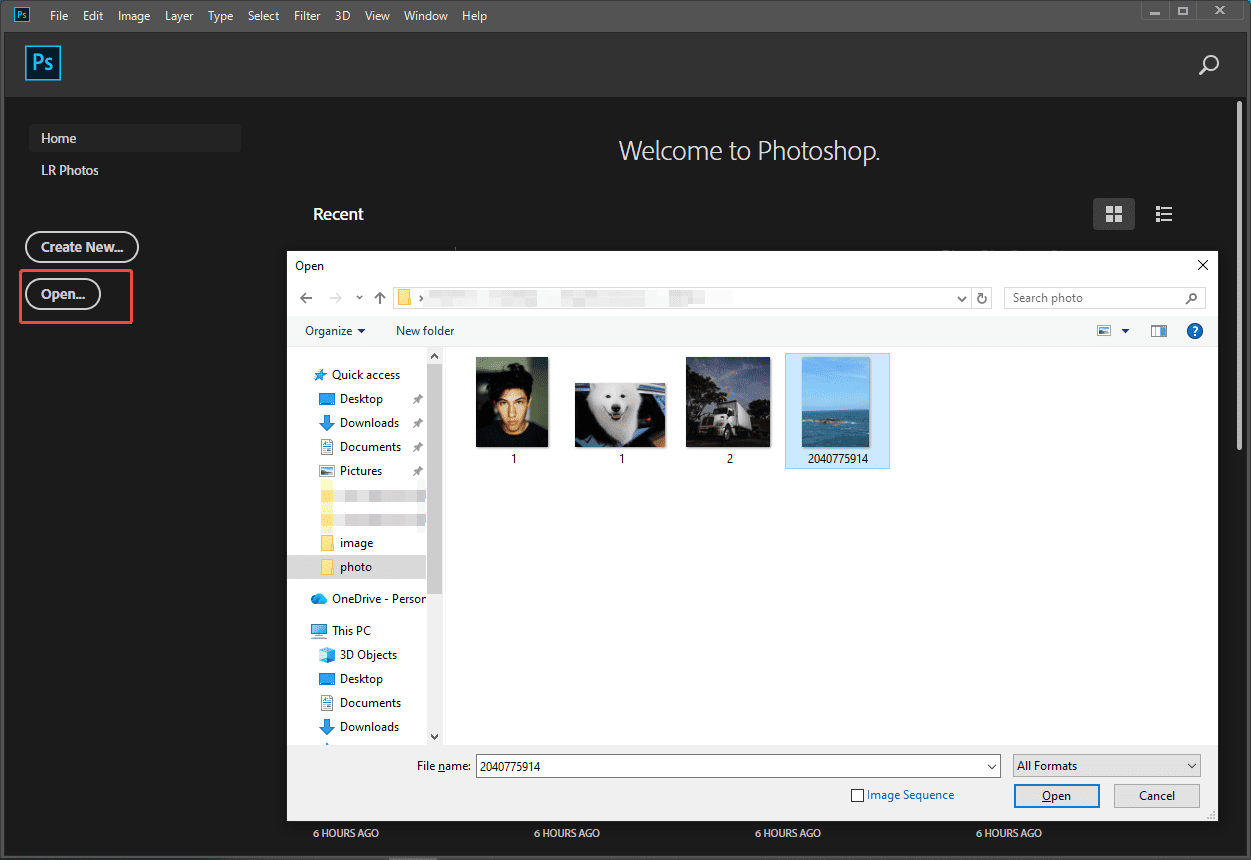
Step 1: Import Your Photo
Launch Photoshop and click Open… to upload your photo.
Step 2: Adjust the Basic Image Property
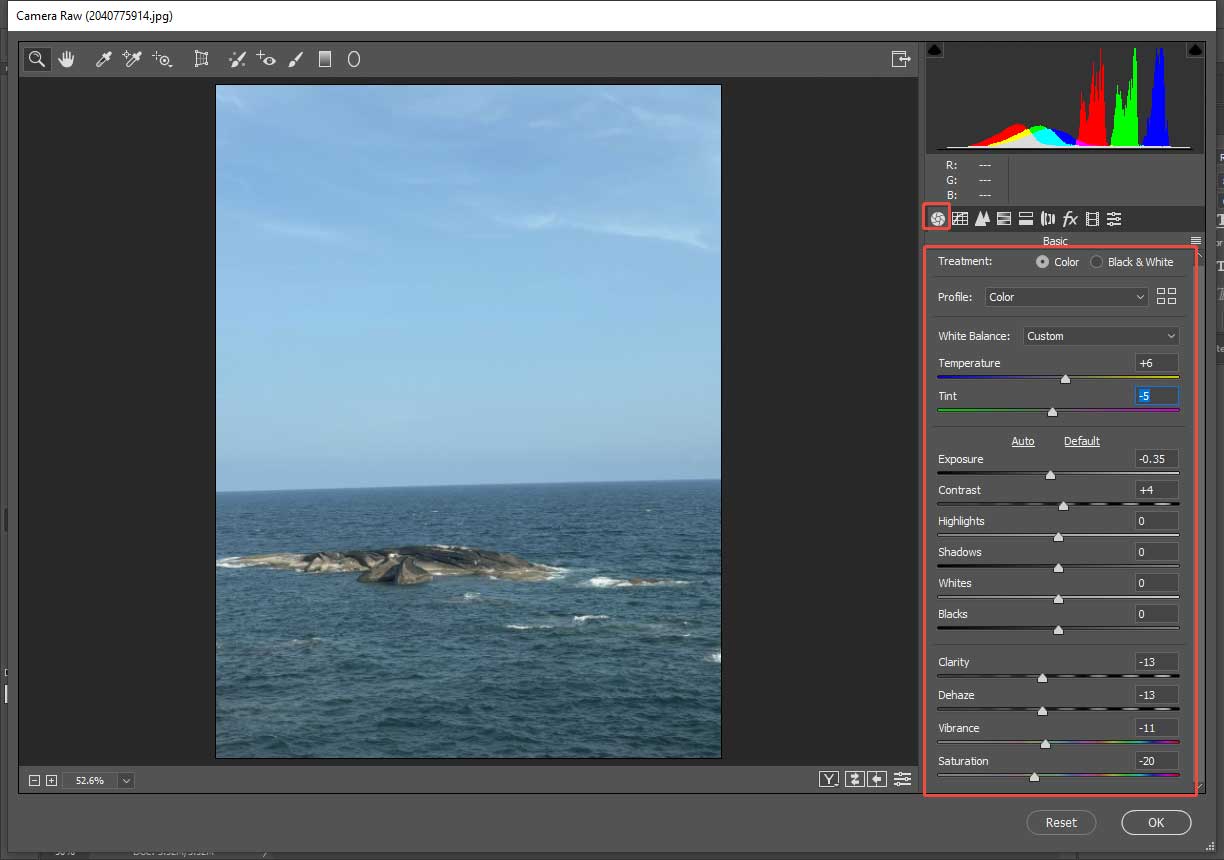
Click Filter and select Camera Raw Filter….
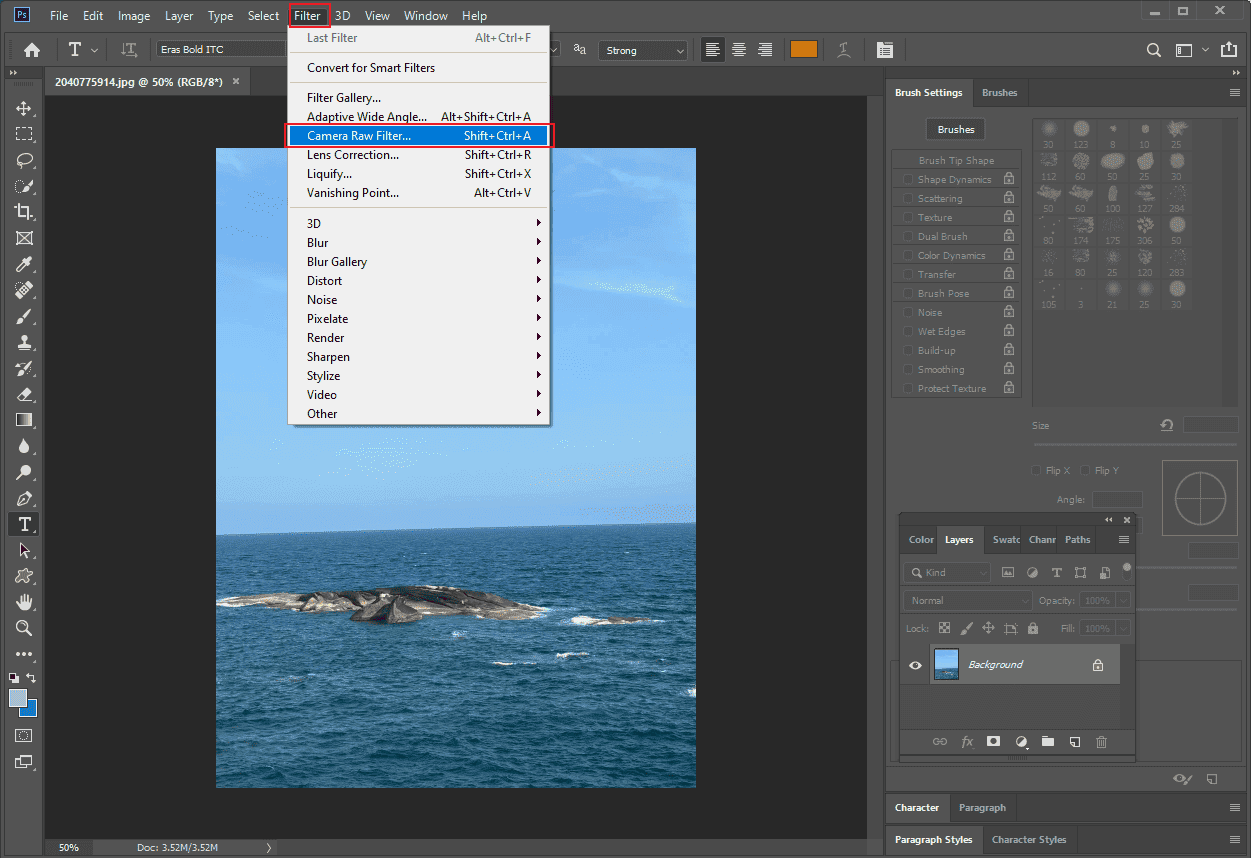
Here, you need to decrease the Clarity, Saturation values and increase the Temperature value. You can also adjust other options to make the image tone harmonious.
Step 3: Adjust the Vignette Value
Click Filter and select Lens Correction….
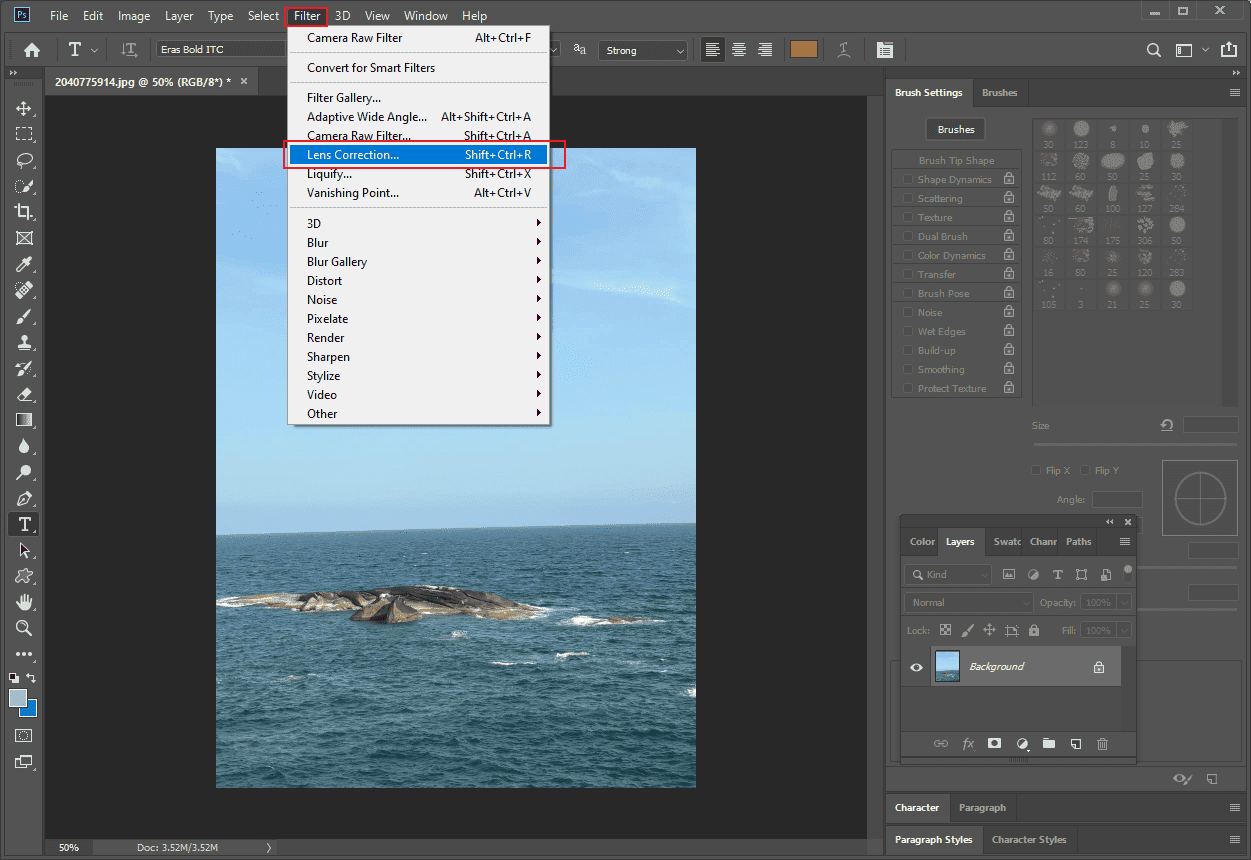
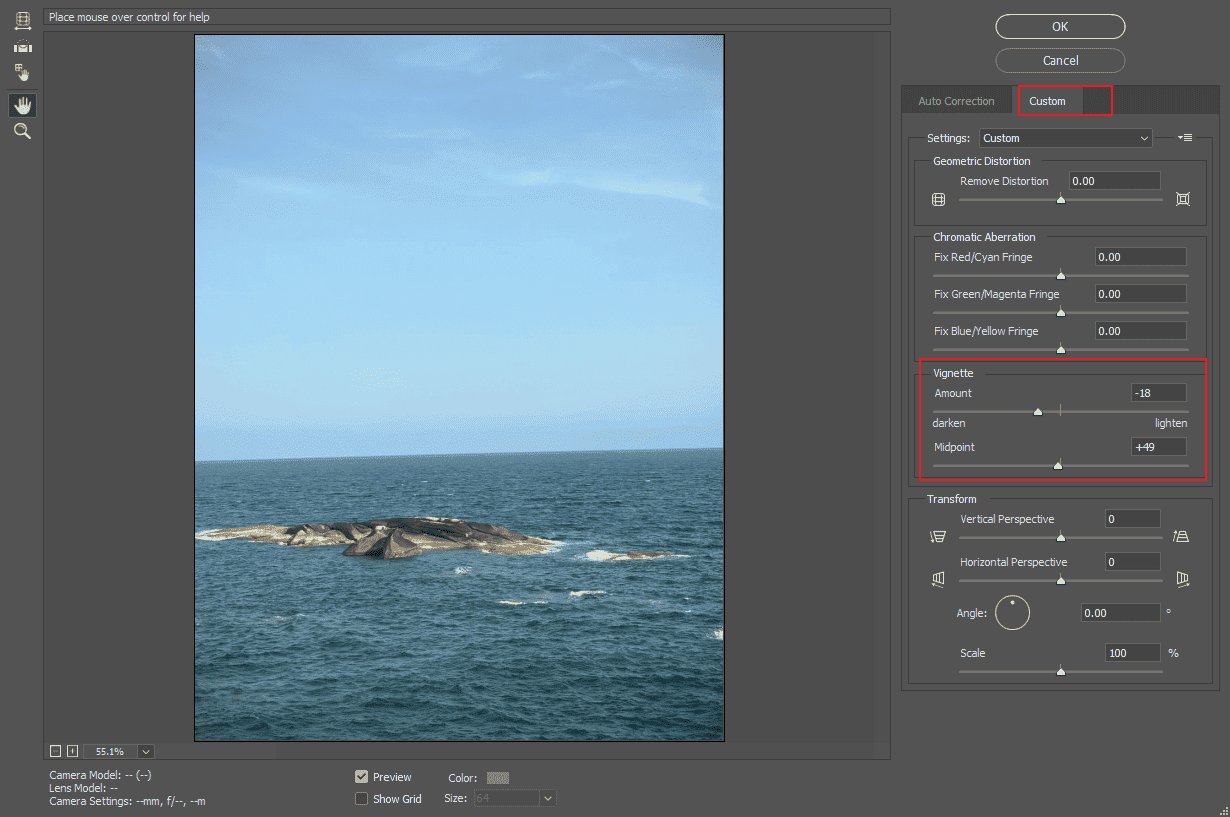
Click Custom and decrease the Vignette amount. Click OK to save the adjustments.
Step 4: Export the Final Photo
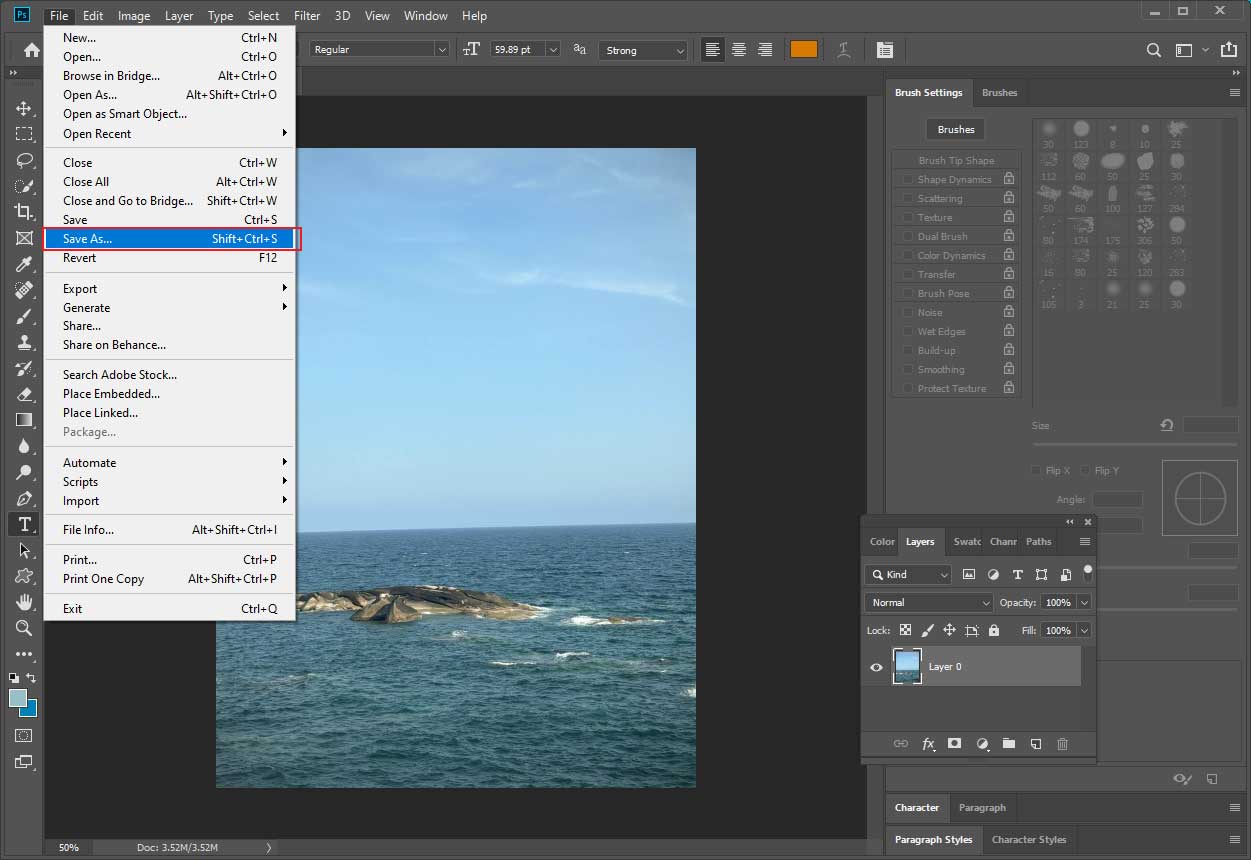
Click File and select Save As to export the photo to your computer.
Conclusion
Overall, this post demonstrates how to edit photos to look like film using two effective methods, helping you bring the timeless warmth, texture, and character of film photography into your digital creations with ease. Hope you find this guide helpful!
About The Author

Position: Columnist
Alice is a tech writer at MiniTool, specializing in tutorials and guides on video editing and screen recording. She stays up to date with the latest tools and techniques to ensure her content is accurate and easy to follow. By combining hands-on testing with continuous learning, Alice aims to help readers solve tech problems efficiently.
User Comments :