Creating a reflection is an effective way to enhance the visual realism of photos. This post provides a step-by-step guide on how to create a reflection in Photoshop.
Adding a reflection is an effective way to elevate your images and give them a more premium, high-quality look. With the leading photo editing software, Photoshop, it is easier and more convenient to create a reflection in post-production. This post shows you how to create a reflection in Photoshop.
What Is Reflection
Reflection is a visual effect that mirrors a subject across a polished surface, such as water and glass. Adding a reflection effect to photos mimics how light behaves in the real world. This effect is widely applied in design tasks, including logos, products, and text, enhancing the visual realism and depth of the photos.
Compared with making a mirror image of a photo, creating a reflection effect is more complex. It not only involves flipping images, but also contains adjusting opacity, adding blur filters, and more. Let’s see how to create a reflection effect in Photoshop.
How to Create a Reflection in Photoshop
To create a simple reflection in Photoshop, follow the detailed steps below.
Step 1: Upload Your Image
Launch Photoshop and click Open… to import your image.
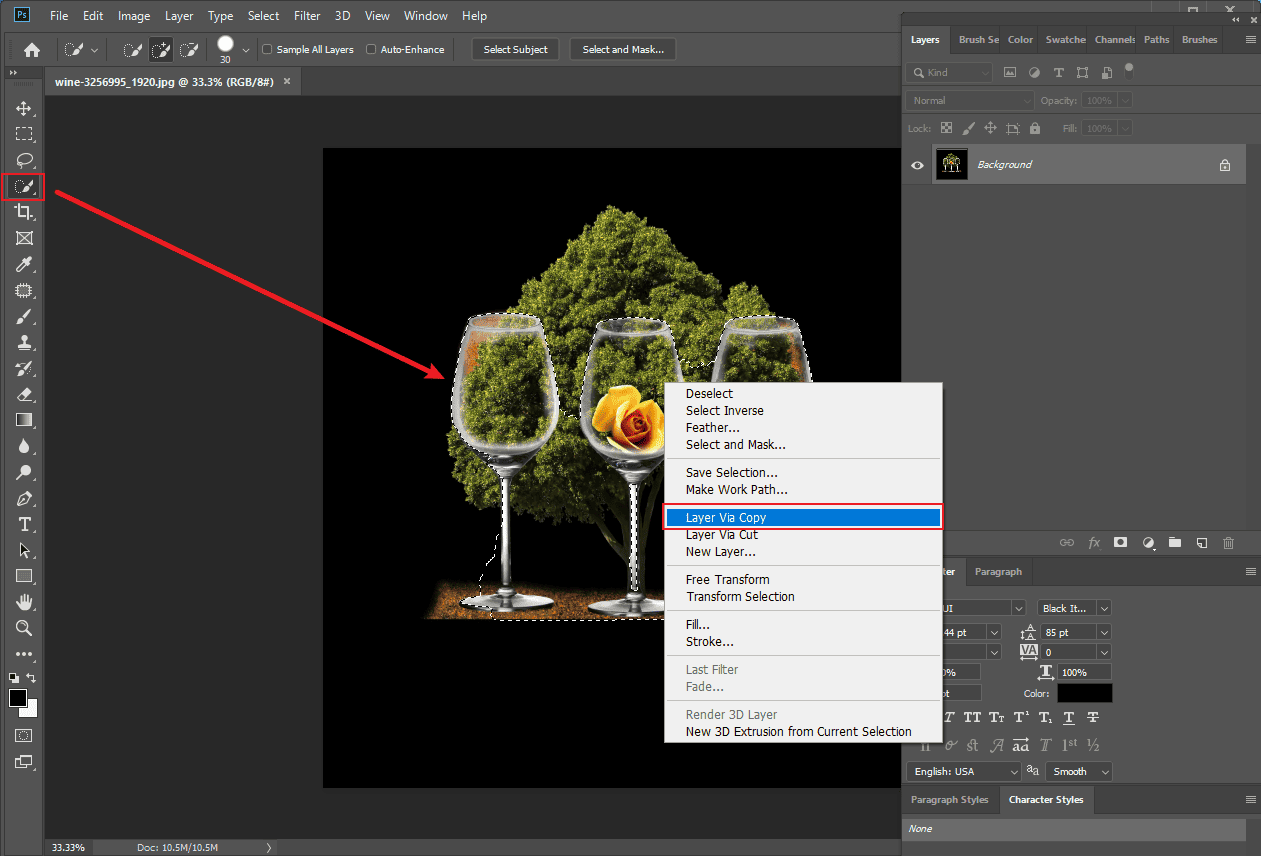
Step 2: Select the Subject
Click Quick Selection Tool in the side toolbar and circle the main subject. Then, right-click it and select Layer Via Copy to duplicate the subject.
Step 3: Flip the Subject
Select the duplicated layer and press Ctrl + T to go into free transform. Right-click the image and choose Flip Vertical.
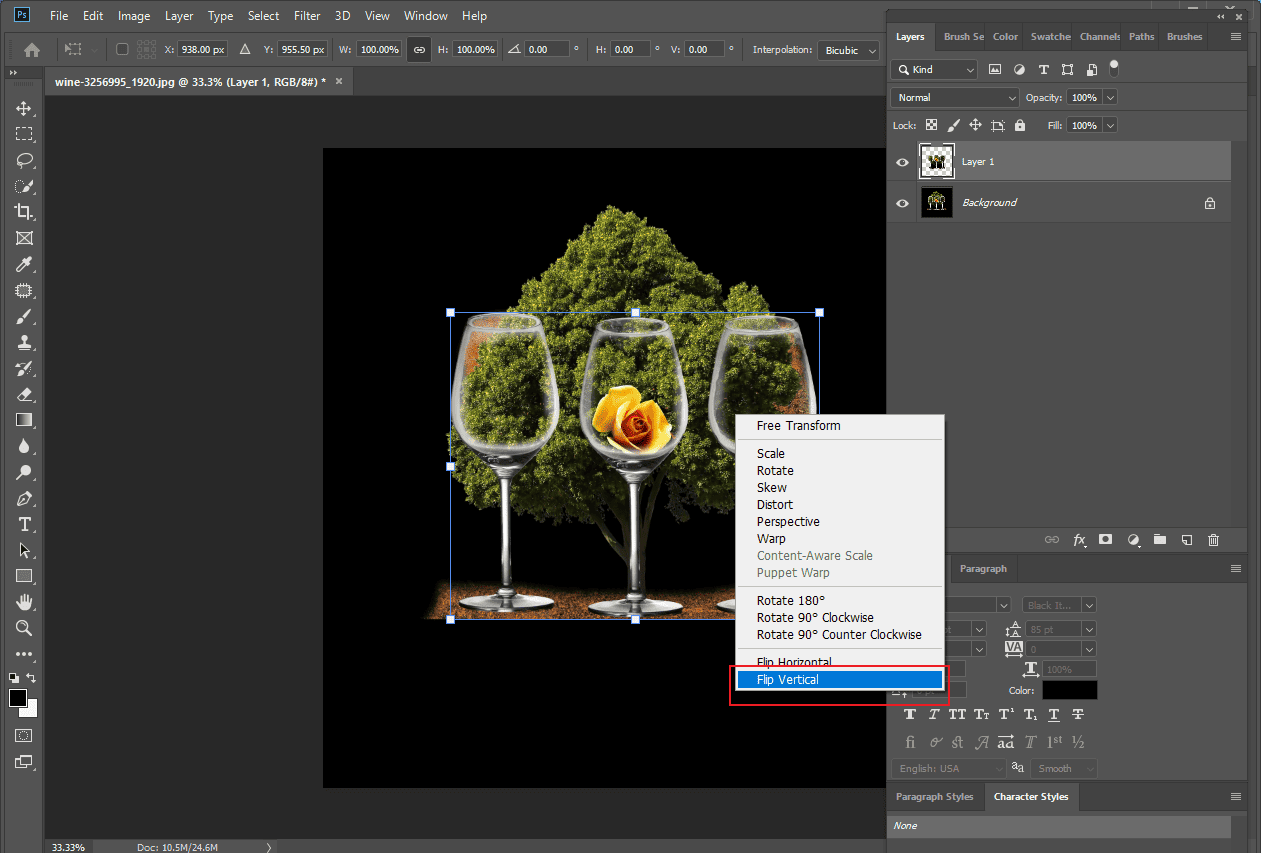
Then, drag the inverted subject image and align it with the bottom of the original object, making it look like a mirror image of the subject.
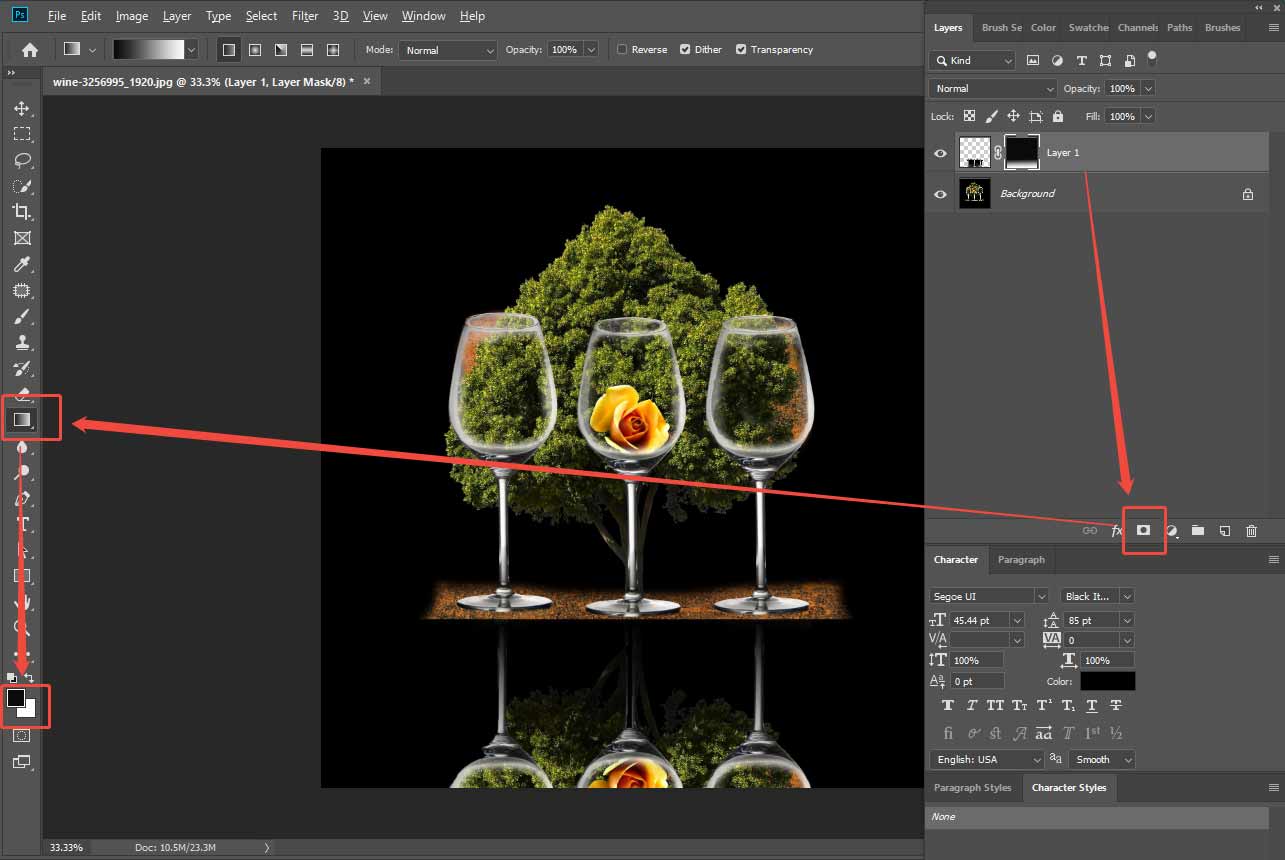
Step 4: Mask the Image
As reflections are usually darker than the original image, it is a good way to use a mask and the Gradient tool to make the reflection image look natural.
Select the inverted layer and click the Add a Mask icon at the bottom of your layers panel. Next, click the Gradient option in the sidebar. Set black as your foreground color and white as your background color. Then, drag the cursor in the middle of the image to apply the mask to your reflection.
Step 5: Optional Editing
Besides, you can also adjust the opacity of the inverted subject to make it more realistic. Select the duplicated layer and click Opacity in the layer panel. Then, drag the slider to decrease the value until it meets your expectation.
Moreover, applying blur is also a useful way to add a natural touch to the photo. Click Filter and select Gaussian Blur from the Blur dropdown list. Adjust the blur radius slider to reach the best result in the pop-up setting window. Click OK to save it.
Step 6: Save the Image
Once editing is completed, click File and select Save As to save the image to your computer.
It is much simpler than you think to create a reflection effect in Photoshop, right? Now that you have mastered the basic reflection effect, it is time to learn the advanced version. The following part will explain how to create a reflection with water in Photoshop.
How to Create a Reflection with Water in Photoshop
After repeating the flipping steps above, follow the steps below to add a reflection with water.
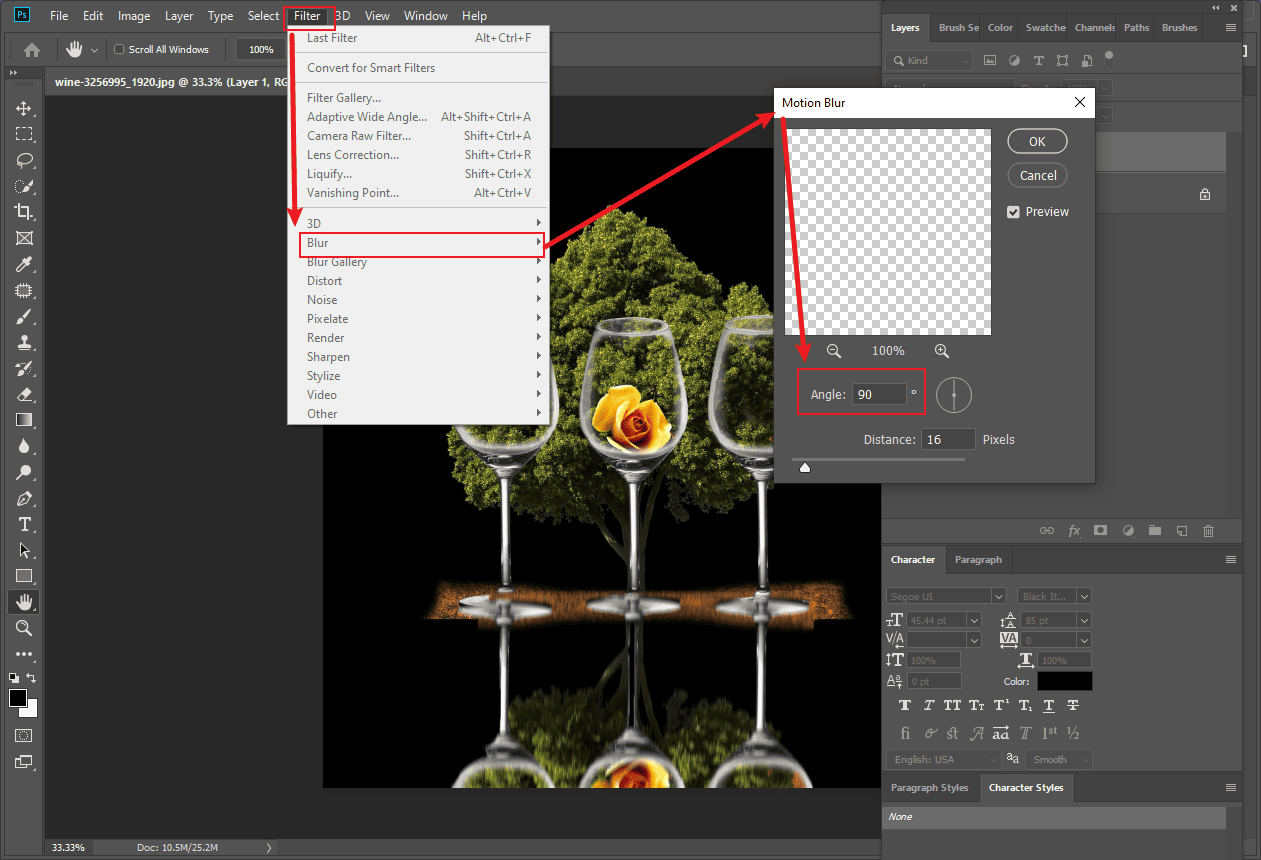
Step 1: Add Motion Blur
After flipping the image, click Filter and select Motion Blur from the Blur dropdown list. Set the angle to 90 degrees and set a proper distance.
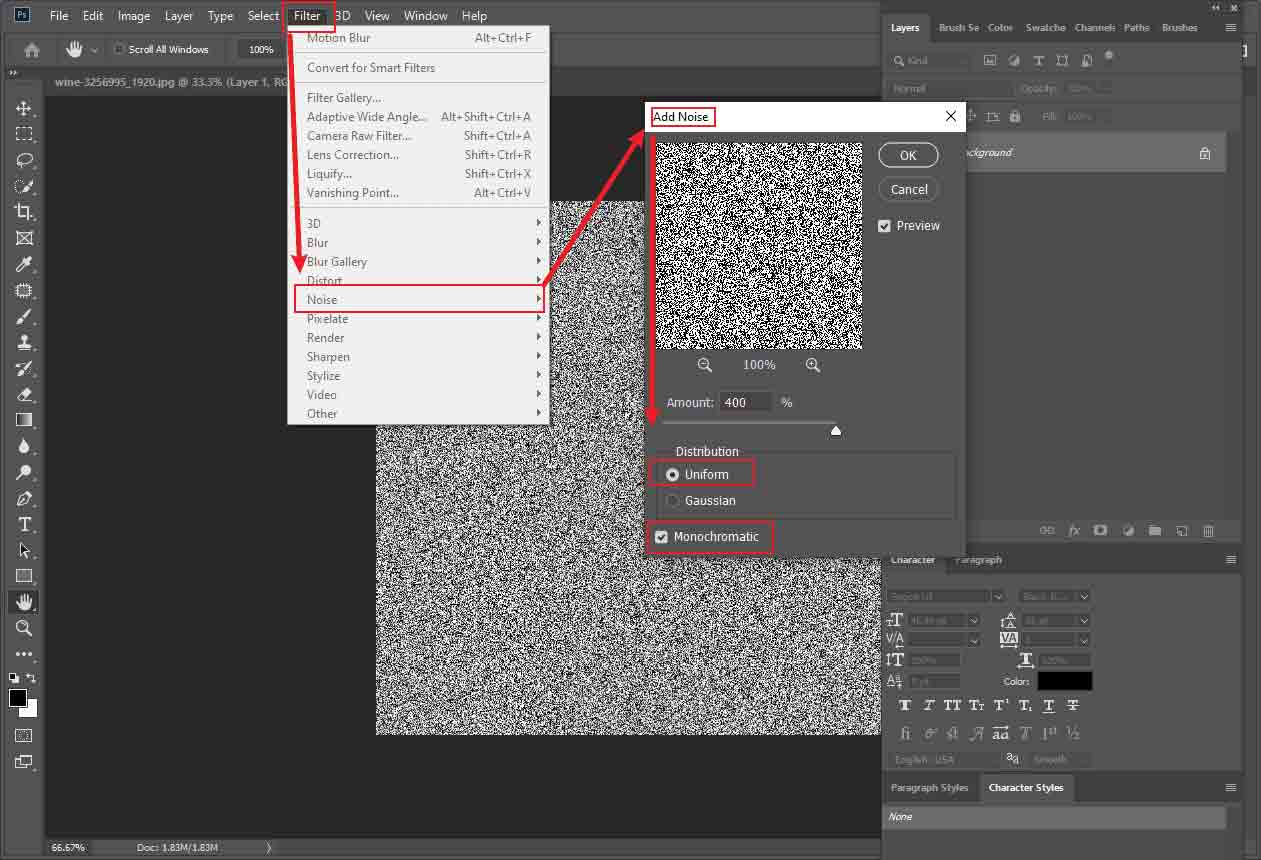
Step 2: Customize a Water Effect
Click File and select New to open an 800 ×800 pixels canvas. Then, click Filter, select Noise, and choose Add Noise. Set a proper amount and pick Uniform and Monochromatic. Then, click OK to save changes.
Click Filter again and select Gaussian Blur from the Blur option. Set an appropriate radius and click OK to save it.
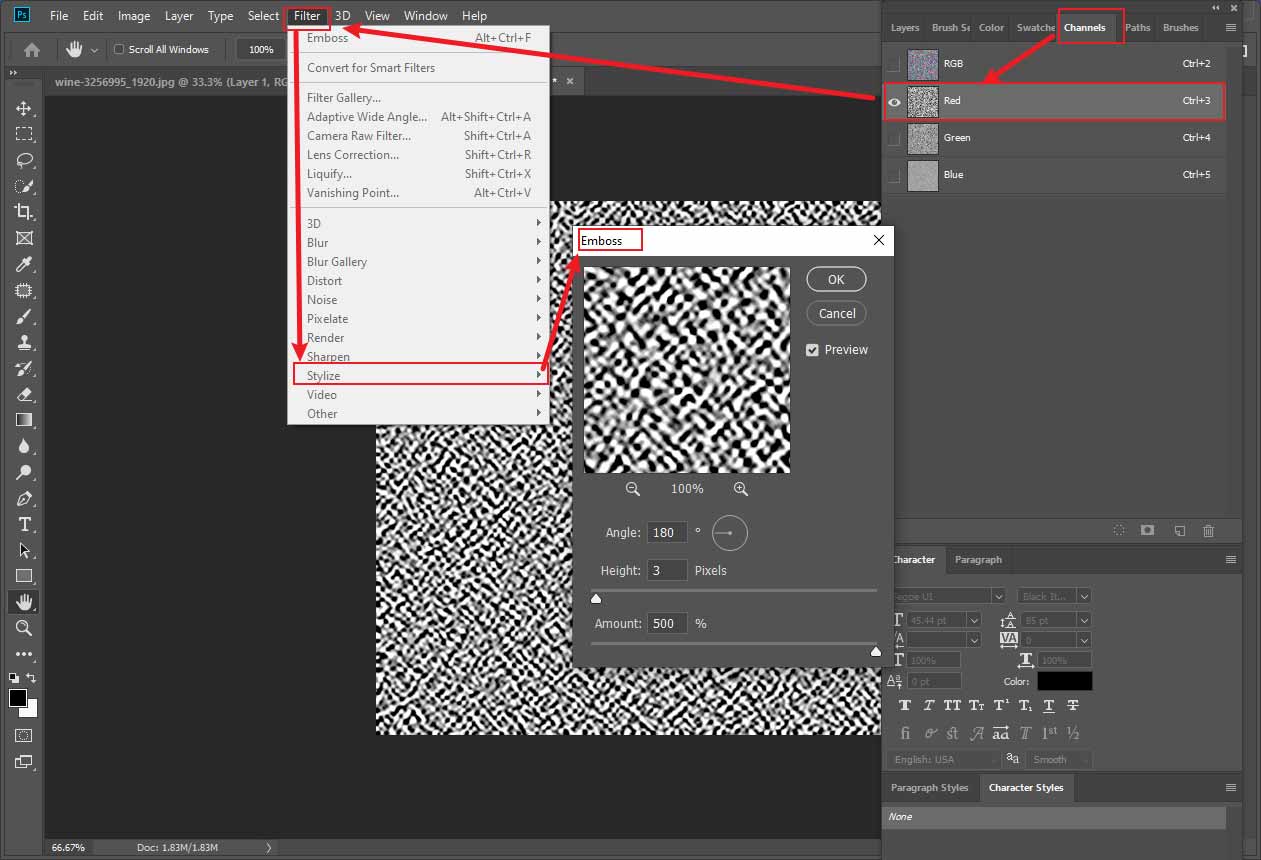
Click Channels in the right panel and click Red. Then, click Filter, select Stylize, and choose Emboss.Set the angle to 180 and customize the height and amount. Add a proper emboss effect to the green color.
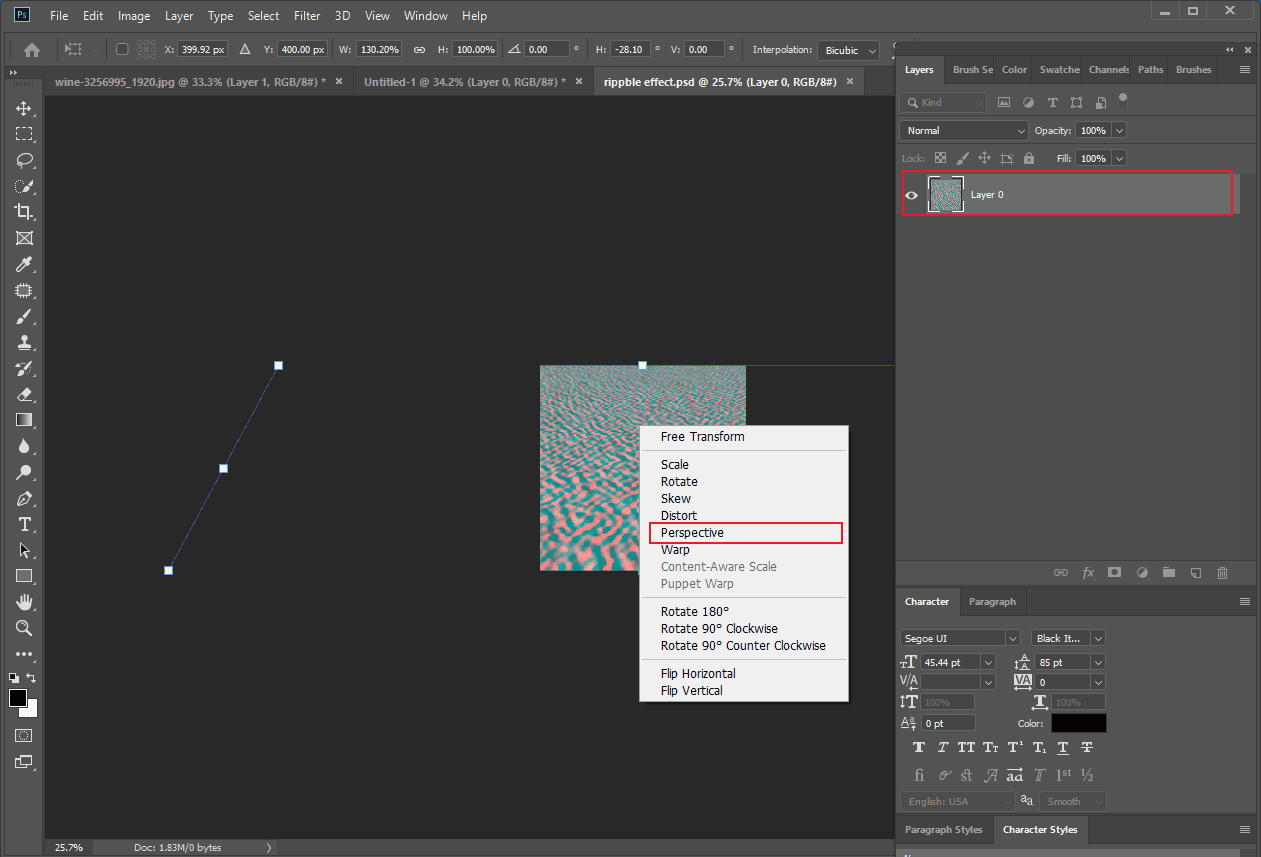
Then, press Ctrl + T and right-click the layer to select Perspective. Drag the corners to make it look like a water surface.
Then, click File and select Save to save it to your computer.
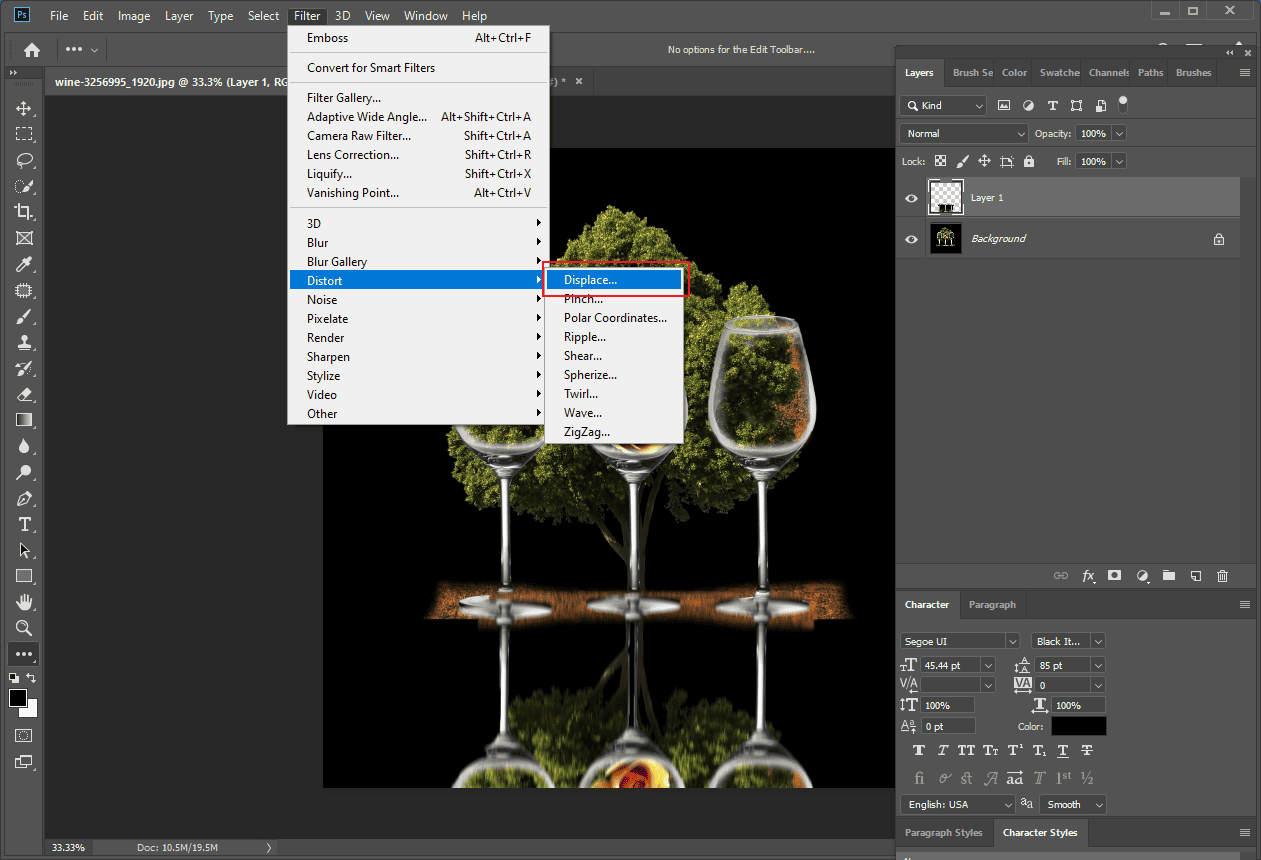
Step 3: Apply the Water Effect to the Image
Click Filter, select Distort, and choose Displace. Then, select your saved water effect to use it.
Conclusion
This post explains how to create a reflection in Photoshop and create an advanced water reflection. Follow the steps above to give it a try! Hope you found this post helpful and learned something new.
About The Author

Position: Columnist
Alice is a tech writer at MiniTool, specializing in tutorials and guides on video editing and screen recording. She stays up to date with the latest tools and techniques to ensure her content is accurate and easy to follow. By combining hands-on testing with continuous learning, Alice aims to help readers solve tech problems efficiently.
User Comments :