Why Blur License Plates
Blurring a license plate in photos or videos is an effective way to protect privacy. An exposed plate number can be misused, for example, copied to create fake plates for stolen vehicles—a practice known as vehicle cloning. In addition, when I share images on social media platforms, blurring license plates is often recommended or required to comply with platform guidelines and avoid potential risks.
How to Blur License Plate in Photos on Windows
In this part, I have organized 3 useful methods to blur license plates in photos on Windows, including using blur effects, pixelation, and shapes. These methods are easy to follow and suitable for different editing needs.
Method 1: Use Blur Effect
A blur effect is a common digital editing technique used to reduce image sharpness, making edges appear soft or out of focus. Many photo editing tools, including desktop software and online platforms, offer this feature. I often use it to hide sensitive details, such as faces, watermarks, or license plates. Here, I take the online tool OnlineTools as an example.
Step 1: Access OnlineTools
Go to the official website of OnlineTools and search for the blur a license plate in an image tool (https://onlinetools.com/image/blur-license-plate-in-image).
Step 2: Upload the Image
Hit the Click to load an image option to upload the photo. I can also drag and drop or paste the image directly into the platform.
Step 3: Blur the License Plate
Adjust the size of the selection box to fully cover the license plate. Then, enter an appropriate value to control the blur intensity. The result will be displayed in real time in the right panel.
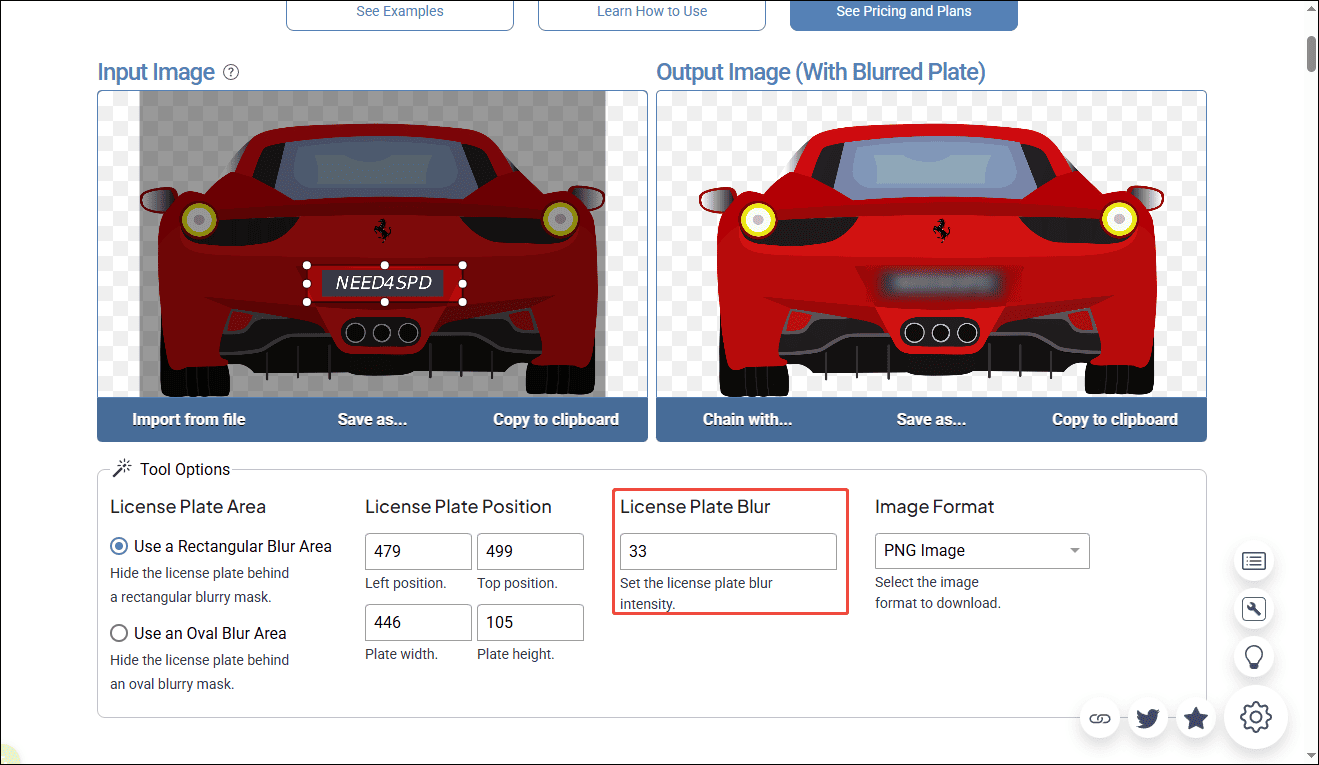
Step 4: Download the Image
Click Save as… and choose Download to save the blurred image to the computer.
Method 2: Use Pixelation
Compared with a standard blur effect, pixelation offers a more noticeable way to conceal details. Instead of simply softening the image, it breaks the selected area into large square blocks, making the original content almost impossible to recognize.
I find this method especially useful when I want to clearly indicate that certain information is intentionally hidden, such as license plates or ID numbers. In most editing tools, this feature is often labeled as Mosaic or Pixelate. Here, I’ll use IMAGY.APP as an example.
Step 1: Go to IMAGY.APP
Visit the official website of IMAGY.APP and open its Pixelate Image Online page(https://imagy.app/pixelate-image/).
Step 2: Upload the Image
Click Select Files to upload the image.
Step 3: Apply Pixelation to the License Plate
Scroll down and choose Select Areas as the Application Mode. Then, select Rectangle as the Selection Mode. Adjust the Block Size slider to control the pixelation intensity. After that, drag the cursor to cover the license plate area and preview the effect.
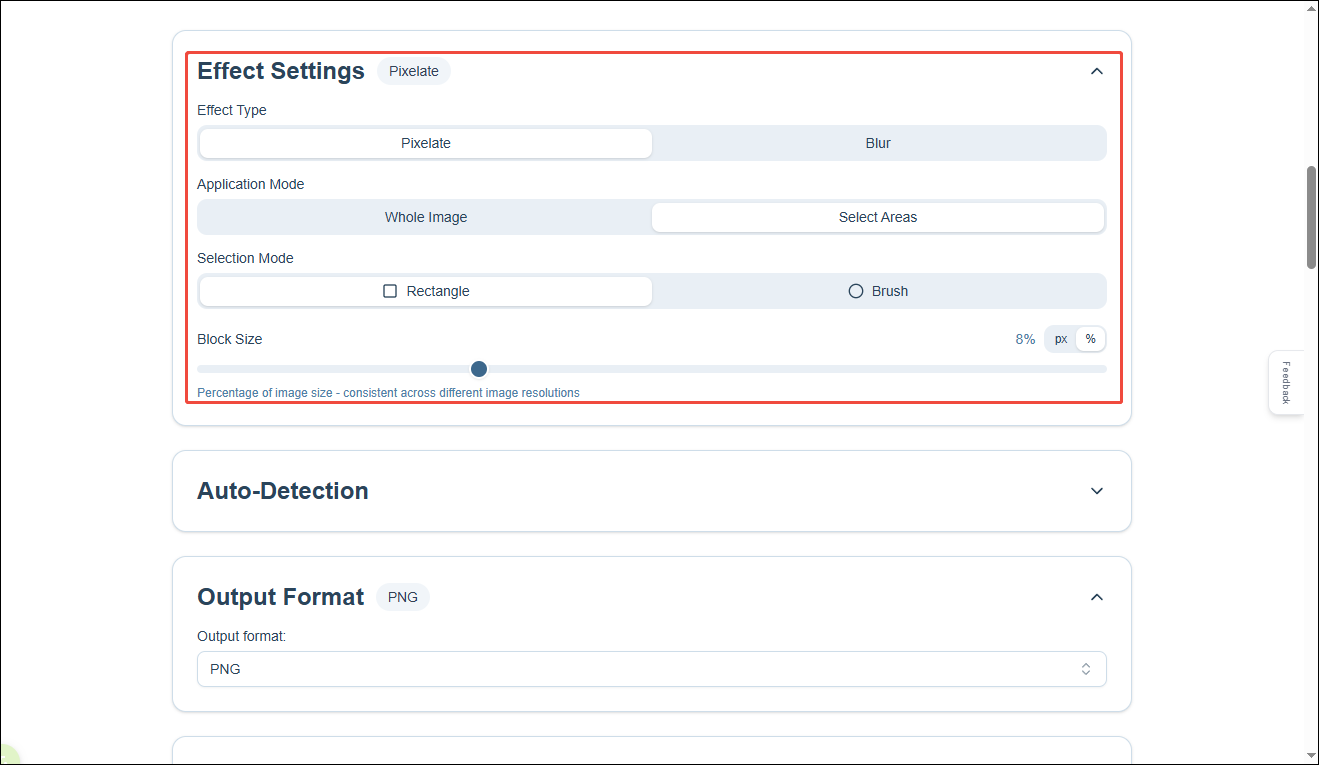
Step 4: Save the Image
Click Download this image to save the pixelated image to the computer.
Method 3: Use Shape
Besides blur and pixelation, I sometimes prefer using shapes or stickers to cover a license plate. This method is more flexible and even adds a bit of visual style, especially when I’m editing images for social media. Instead of hiding the plate subtly, it allows me to mask it in a more creative way. Here, I’ll use Pixlr Express as an example.
Step 1: Open Pixlr Express
Go to the Pixlr website and launch Pixlr Express (https://pixlr.com/express/) to get started.
Step 2: Upload the Image
Click Open image to import the photo.
Step 3: Add a Shape to Cover the License Plate
Switch to the Elements tab on the left toolbar. Choose Shape, then browse and select a desired style. Click it to add it to the canvas, and drag it over the license plate. I can resize and reposition it freely to ensure the plate is fully covered.
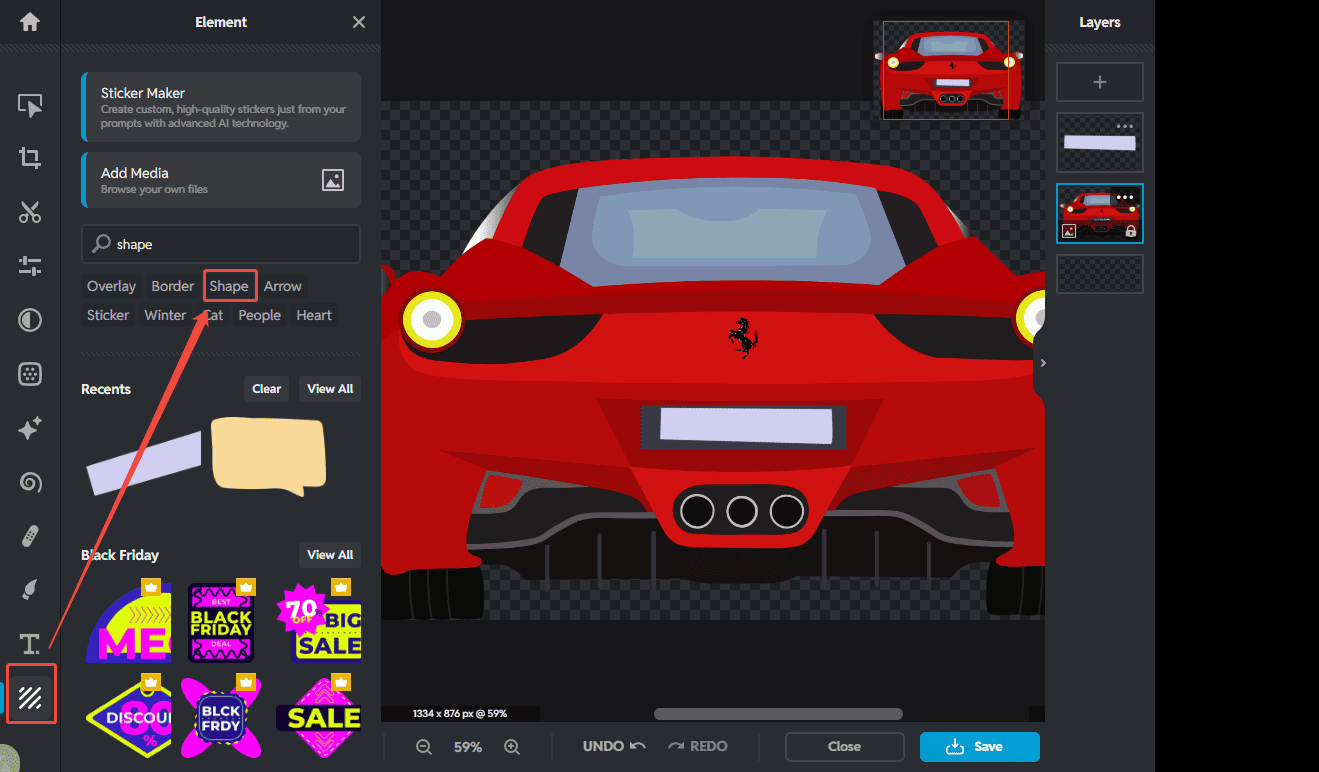
Step 4: Download the Image
Once everything looks good, click Save, choose the desired format, and download the edited image to my computer.
Bonus: Blur License Plate in Video
In addition to photos, videos can also expose license plates. Blurring them is just as important, especially when sharing content online.
Blurring license plates in videos requires a reliable video editing tool with mosaic or blur tracking features. Based on my experience, choosing the right software can make the process much easier and more precise. I recommend MiniTool MovieMaker for this task, especially when I need a simple yet effective solution on Windows.
MiniTool MovieMakerClick to Download100%Clean & Safe
With MiniTool MovieMaker, I can apply mosaic effects to specific areas in a video and adjust the intensity as needed. It also supports frame-by-frame editing, which helps me blur moving license plates more accurately.
Conclusion
In this post, I explored three simple ways to blur a license plate in photos, including using a blur effect, pixelation, and shapes or stickers. Choose the methods that best fits your needs and give it a try!
About The Author

Position: Columnist
Alice is a tech writer at MiniTool, specializing in tutorials and guides on video editing and screen recording. She stays up to date with the latest tools and techniques to ensure her content is accurate and easy to follow. By combining hands-on testing with continuous learning, Alice aims to help readers solve tech problems efficiently.
User Comments :