Taking beautiful and high-quality photos is easier than ever, thanks to the rapid development of smartphone cameras and professional digital cameras or DSLRs. Photos have become the easiest yet most meaningful way to capture everyday moments. Like many others, I also enjoy shooting to preserve the moments of everyday life.
Sometimes when I look at the bright, warm, and crystal-clear photos taken by modern devices, I wonder what the picture would look like if it were taken in the early 1900s to the 1990s. How to make a photo look vintage? In the post, I’ll share three methods to achieve a classic aesthetic for modern photos effortlessly.
How to Make a Photo Look Vintage
Follow me and look at the simple methods to give a photo an old-fashioned look.
Method 1: Color Adjustment
Vintage aesthetics are about giving modern digital photos a sense of age and a retro feel. Speaking of this, I must mention the differences in color between old and digital photos.
Typically, old photos tend to feature lower saturation, a softer contrast curve that preserves highlight and shadow detail naturally, and noticeable color shifts. Generally speaking, they convey a sense of warmth, nostalgia, and timeless storytelling. In contrast, digital photos strive for color accuracy and white balance neutrality, offering high saturation and sharp contrast.
Therefore, creating a vintage feel for a digital picture can be achieved by lowering saturation (to mute colors to make a photo look older), increasing warmth slightly for a sepia look or cooling it down for a faded 90s look, reducing contrast, etc.
These color adjustments can be quickly and easily made using the Windows Photos app, which provides a set of light and color tools for setting the mood and quality of photos. Here’s how to make a photo look vintage using the Windows Photos app.
Step 1: Open the Target Photo with the Photos App
Right-click the desired photo, hover over the Open with option from the dropdown list, and select Photos.
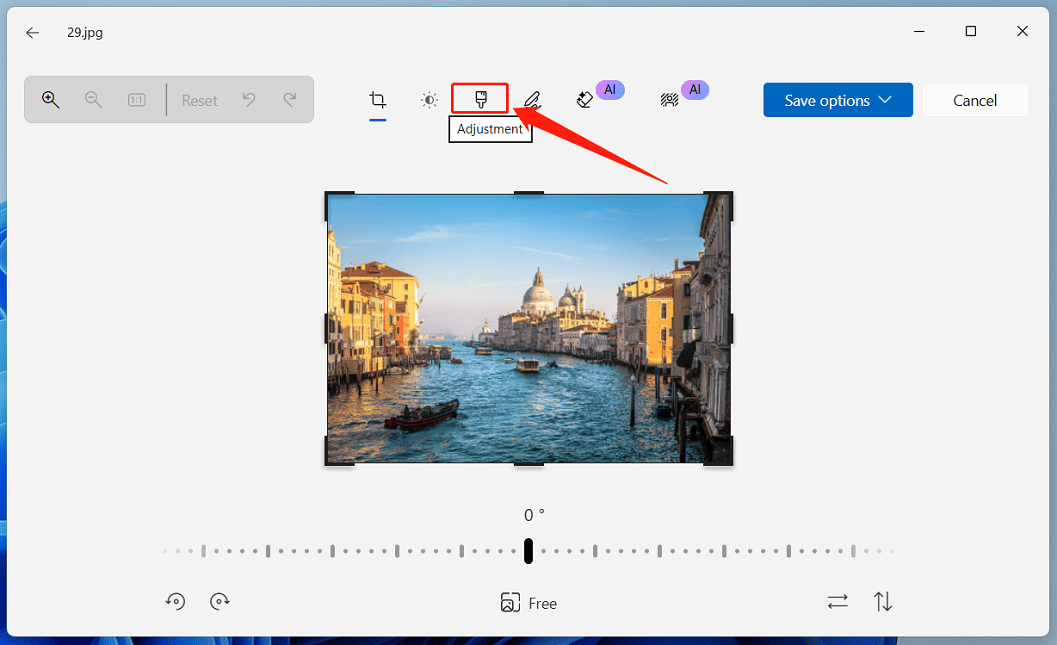
Step 2: Enable the Adjustment Tool
In the preview window, click Edit in the upper left corner to open the editing window. Next, click the Adjustment icon at the top toolbar.
Step 3: Make the Photo Look Vintage
In the Light section, drag the Exposure, Contrast, and Highlights sliders to the left slightly. In the Color section below, drag the Saturation slider to the left and the Warmth slider to the right.
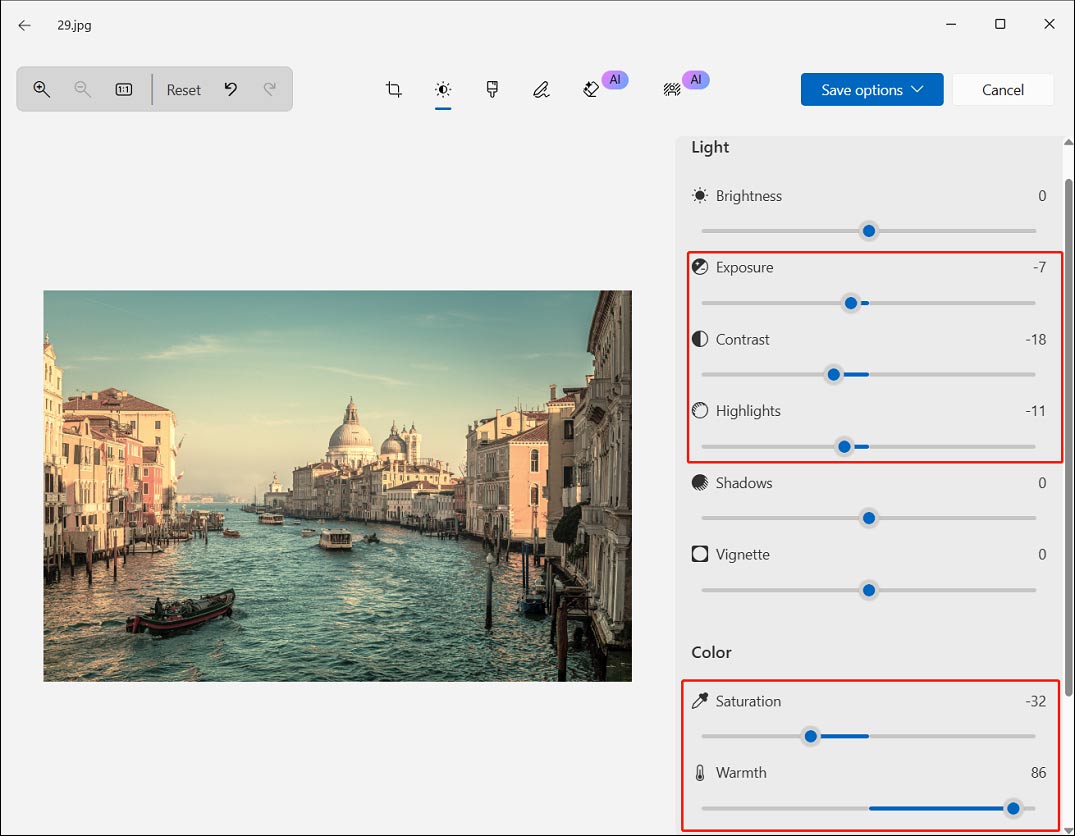
Additionally, I will also adjust other settings, such as shadows, vignette (darken or lighten the corners and edges of a photo), and sharpness to make the vintage photo appear natural.
Step 4: Save the Vintage Photo
Click the Save options in the upper right and select Save as copy or Save to save the vintage photo to my computer.
Method 2: Apply an Old Photo Filter
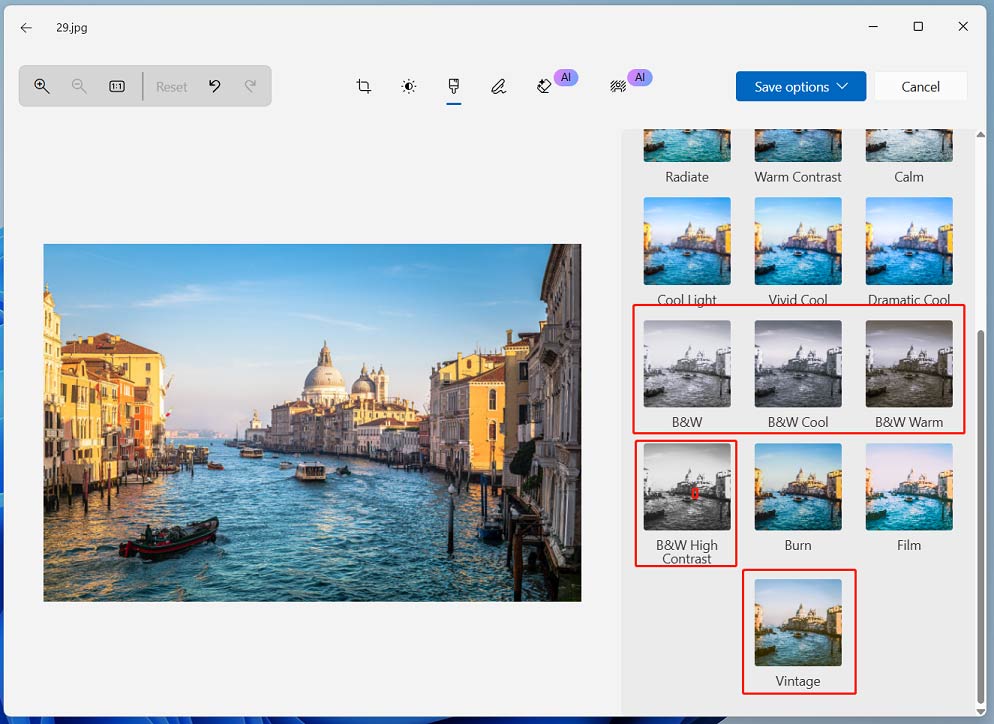
While the Photos app offers a variety of adjustment tools for giving a photo an antique appearance, it’s not easy to achieve a perfect vintage effect, especially for beginners who don’t know how to balance these settings. Luckily, the Photos app provides several old photo filters that allow users to create a photo a vintage look with one click.
After opening a photo in Photos, click Edit, and select the Filter icon next to the Adjustment icon. On the right side, click the B&W, B&W Cool, B&W Warm, B&W Contrast, or Vintage to make the photo black and white or apply a preset vintage filter instantly.
Method 3: Add Grain
Additionally, grain is also a typical characteristic of an old-fashioned picture. Adding grain to photos simulates the texture of analog film and can eliminate the artificial smoothness of digital images. Therefore, applying grain is an effective way to create a vintage effect for photos.
In this section, I’ll explain how to make a photo look old by adding grain in Fotor.
Step 1: Upload a Photo to Fotor
Navigate to the Fotor website and click Upload Image to open the target picture.
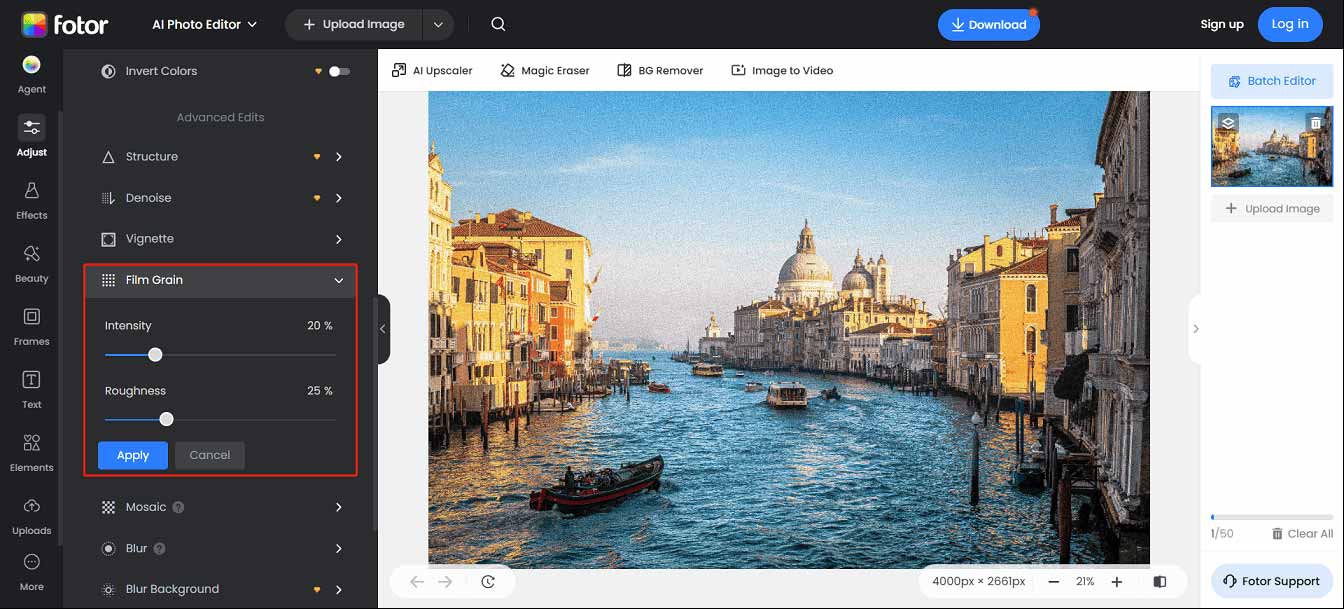
Step 2: Add Film Grain
From the left sidebar, click Adjust, scroll down to the Advanced Edits section, and click Film Grain to apply the effect. Next, drag the sliders to adjust the intensity and roughness of the film grain effect, and click Apply to save changes.
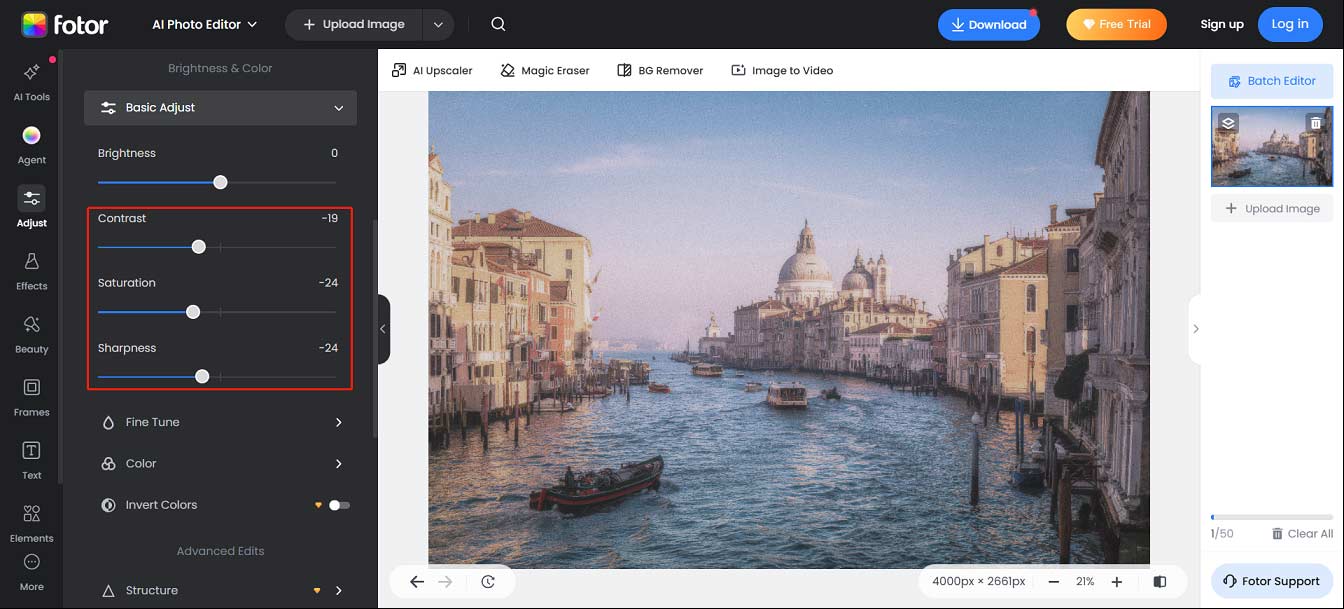
Step 3: Make Other Basic Adjustments
Fotor also offers some basic adjustment tools to make a perfect vintage photo. Swipe up to the Brightness & Color section, and click Basic Adjust. Next, reduce Contrast, Saturation, and Sharpness slightly by dragging the sliders to the left.
Step 4: Save the Vintage Photo
Click Download at the top and choose a format to download the photo to the computer.
![How to Make a Video Look Like VHS [A Beginner’s Guide]](https://images.minitool.com/moviemaker.minitool.com/images/uploads/2025/02/how-to-make-a-video-look-like-vhs-thumbnail.jpg)
Conclusion
How to make a photo look vintage? I’ve shared three simple methods and reliable tools for completing this task. Follow my steps and easily create a nostalgic feel and a distinct artistic mood for pictures.
About The Author

Position: Columnist
Cora is a tech writer specializing in digital media workflows, with over six years of hands-on experience in video post-production, media transcoding, and screen capture. Her writing is always clear and practical. Cora also produces in-depth software reviews for users across skill levels to help them find the right tool and enjoy video editing.
User Comments :