Adding rain effects can enhance the mood and atmosphere of an image. To help you save time and reduce shooting costs, this post shares how to add rain effects to photos on Windows using MiniTool MovieMaker and Photoshop.
Although capturing photos in the rain can be challenging, realistic rain effects can be achieved through post-editing. This post explores 2 practical ways to add rain effects to photos with ease. Let’s dive in and get started.
Add Rain Effects to Photos in MiniTool MovieMaker
MiniTool MovieMaker is a versatile editing software program that supports editing videos, audio, and photos. It features an extensive element library that allows you to apply effects such as snow, rain, and lightning to videos and photos, creating a natural and visually authentic look.
In addition to visual effects, MiniTool MovieMaker also offers other photo editing tools. For example, it allows you to add borders, frames, stickers, and text, creating an engaging touch to your photos. Moreover, it also allows you to remove watermarks from photos.
Here is how to add rain effects to photos on Windows using MiniTool MovieMaker.
Step 1: Install and Download
Click the button below to download MiniTool MovieMaker. Follow the instructions to complete the installation.
MiniTool MovieMakerClick to Download100%Clean & Safe
Step 2: Import Your Photo
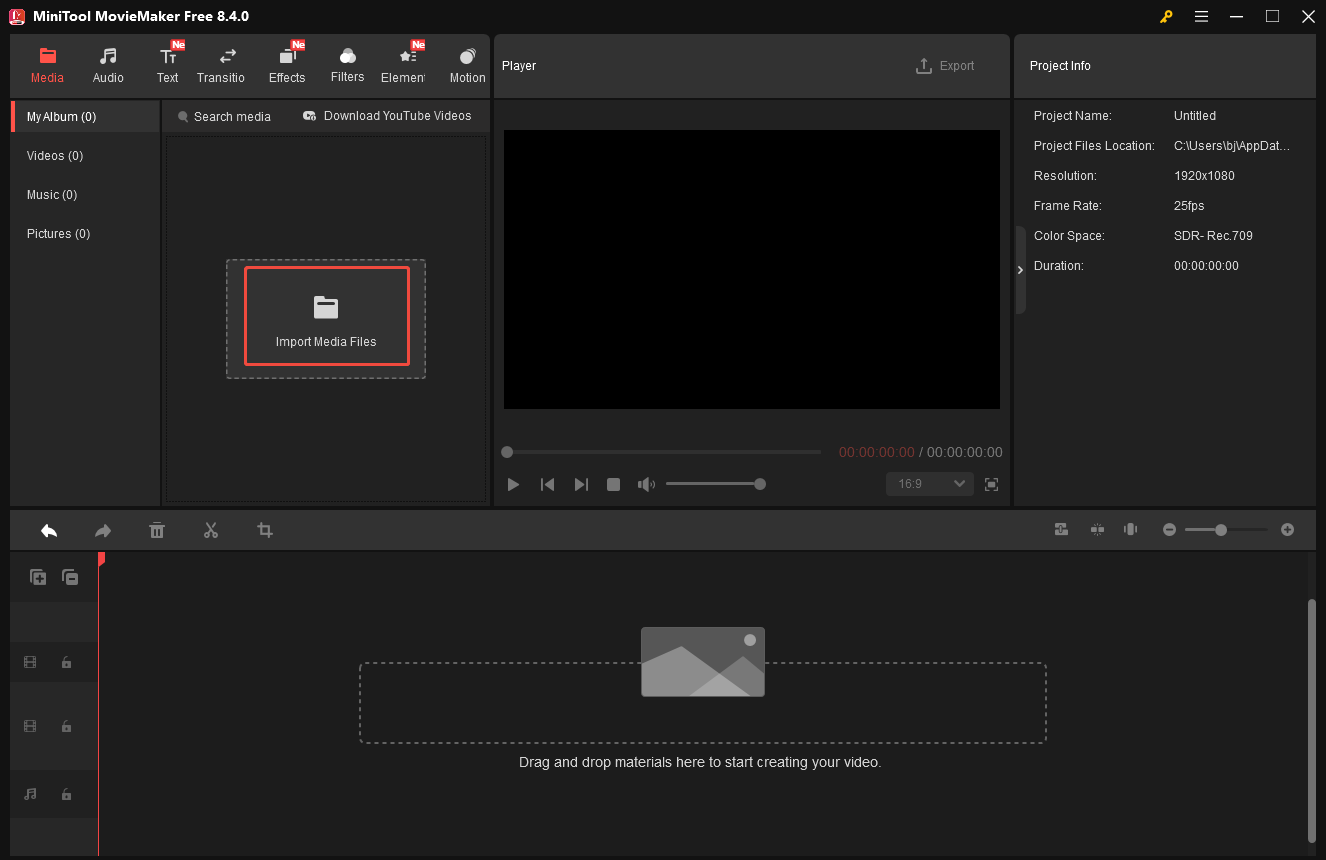
Open MiniTool MovieMaker and close the project history window to enter the editing interface. Click Import Media Files to upload your photo. Then, click the Plus icon to add it to the timeline, or directly drag it to the timeline.
Step 3: Add Rain Effect to Photo
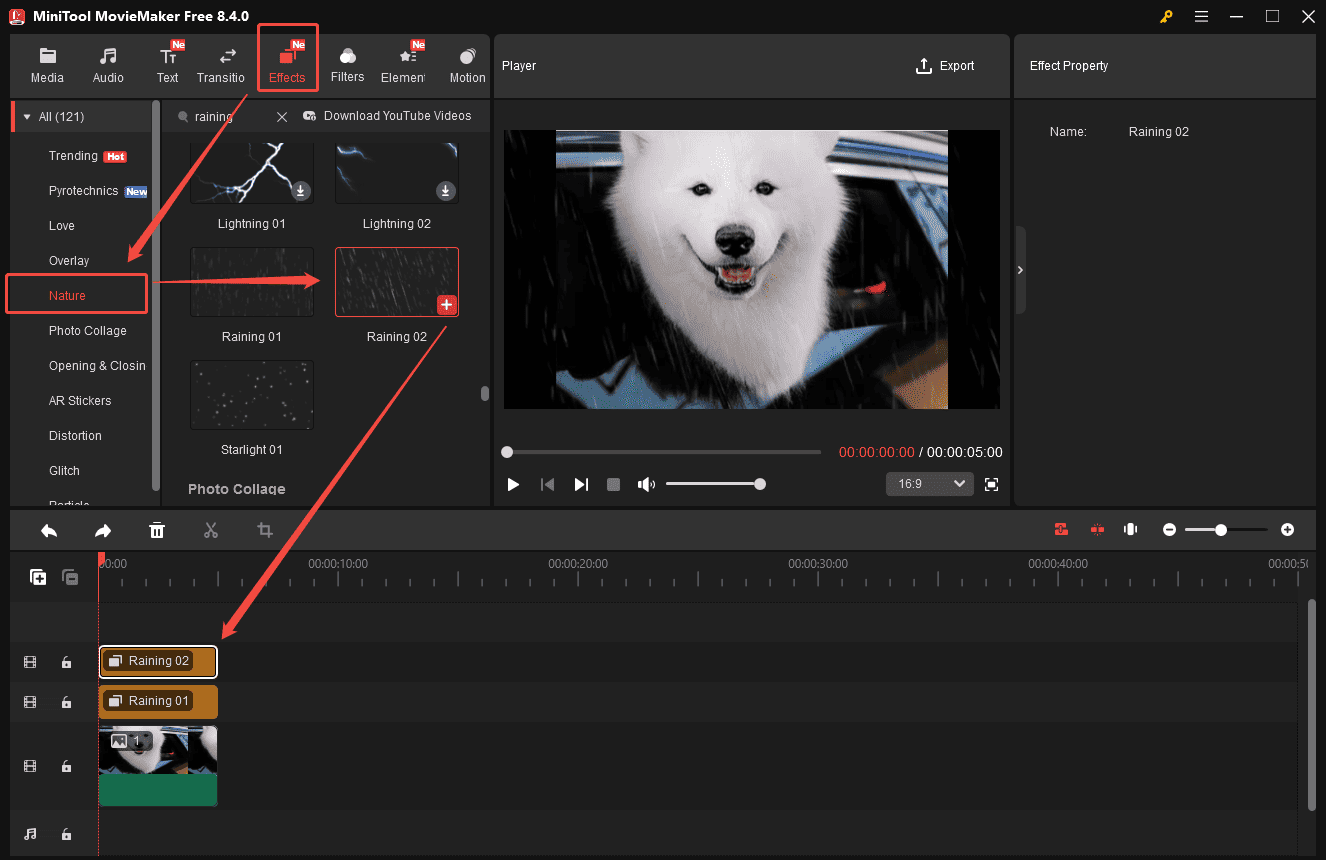
Click Effects at the top of the menu and scroll down to the Nature category. Or you can enter Raining in the search bar to find the effects precisely. Next, hover your cursor on the desired raining effect for a quick preview. If you are satisfied with it, click the Download icon and drag it to the timeline. You can preview the photo with the rain effect on the player section.
Step 4: Export the Final Photo
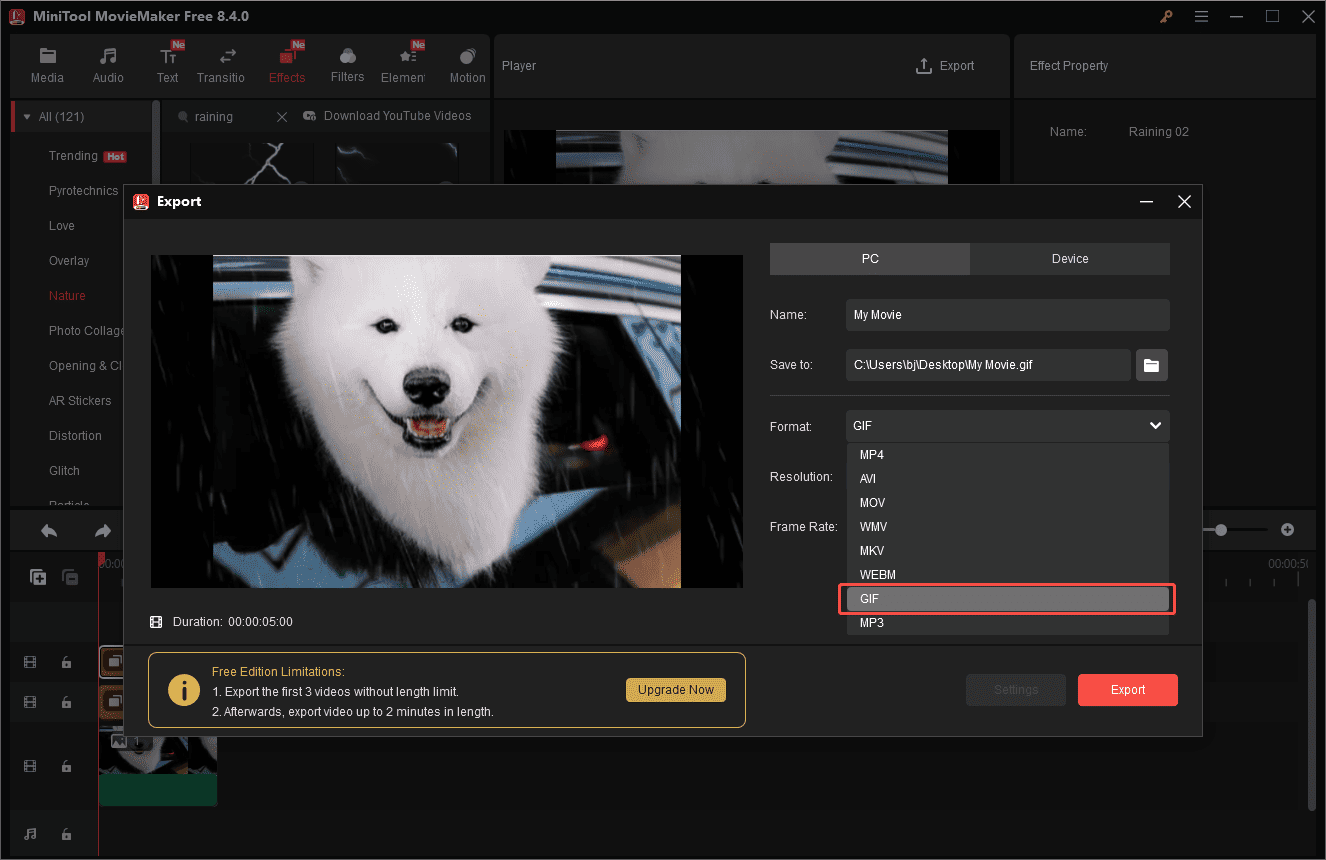
Once editing is done, click the Export icon to enter the export setting window. Set the photo format to GIF. Next, click Export at the bottom of the window to save it to your computer. To better display and use the photo, you can convert the GIF format to PNG or JPG photo formats.
Now you know how to add rain effects using MiniTool MovieMaker. It is easier than you think, right?
Add Rain Effects to Photos in Photoshop
Photoshop is a leading photo editor and graphic design software. Known for its powerful layer system and advanced tools, Photoshop is ideal for professionals to create a wide range of effects.
When it comes to adding rain effects to photos, Photoshop provides a variety of flexible tools, such as Noise, Blur, Transform, and others, making it easy to create realistic and customizable rain effects.
How to add rain effects to photos? Here is the detailed guide.
Step 1: Download and Install
Navigate to Adobe Photoshop’s official website to subscribe and install it on your computer.
Step 2: Import Your Photo
Launch Photoshop and click the Open option to upload your photo.
Step 3: Add Rain Effect to Photo
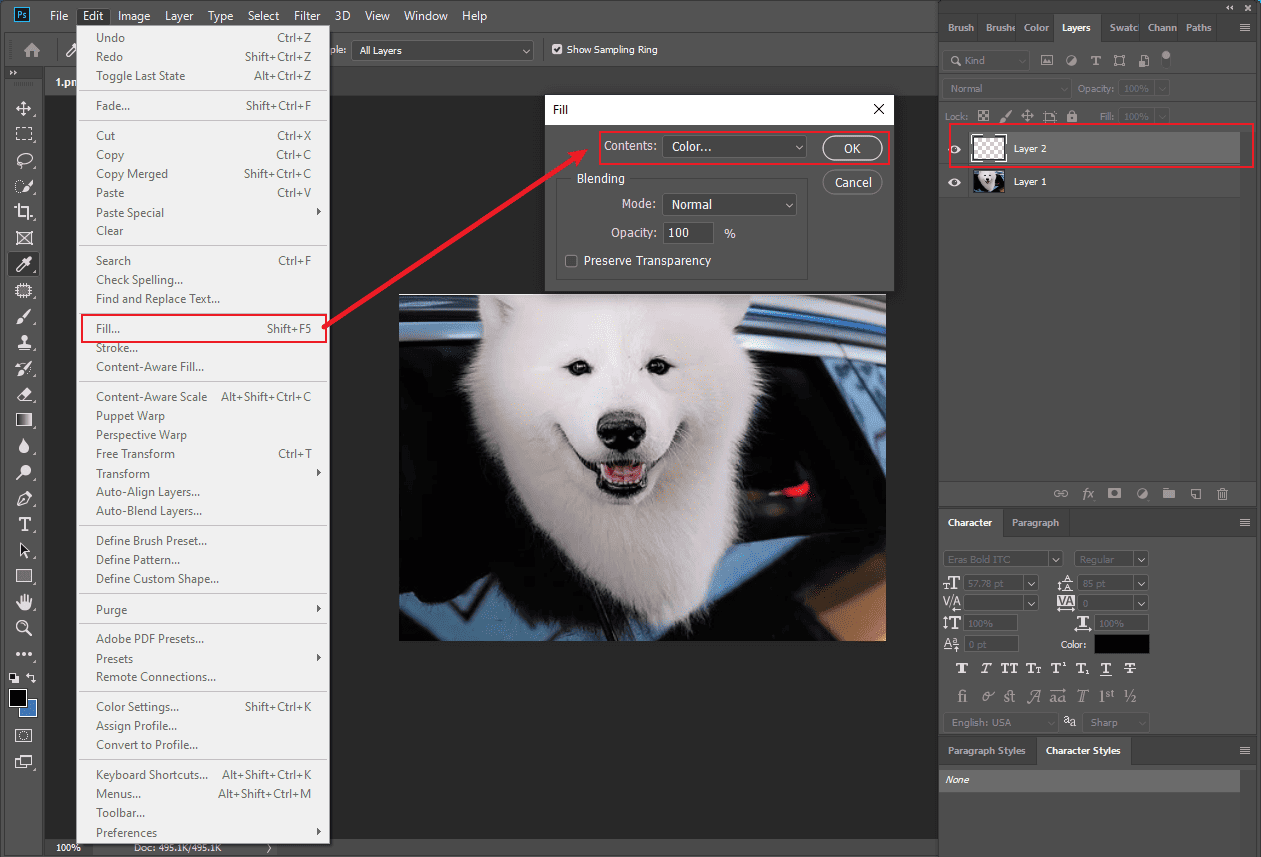
Click the Add New Layer icon in the layer panel to insert a new layer. Click Edit in the top toolbar and select Fill to insert black color to the new layer.
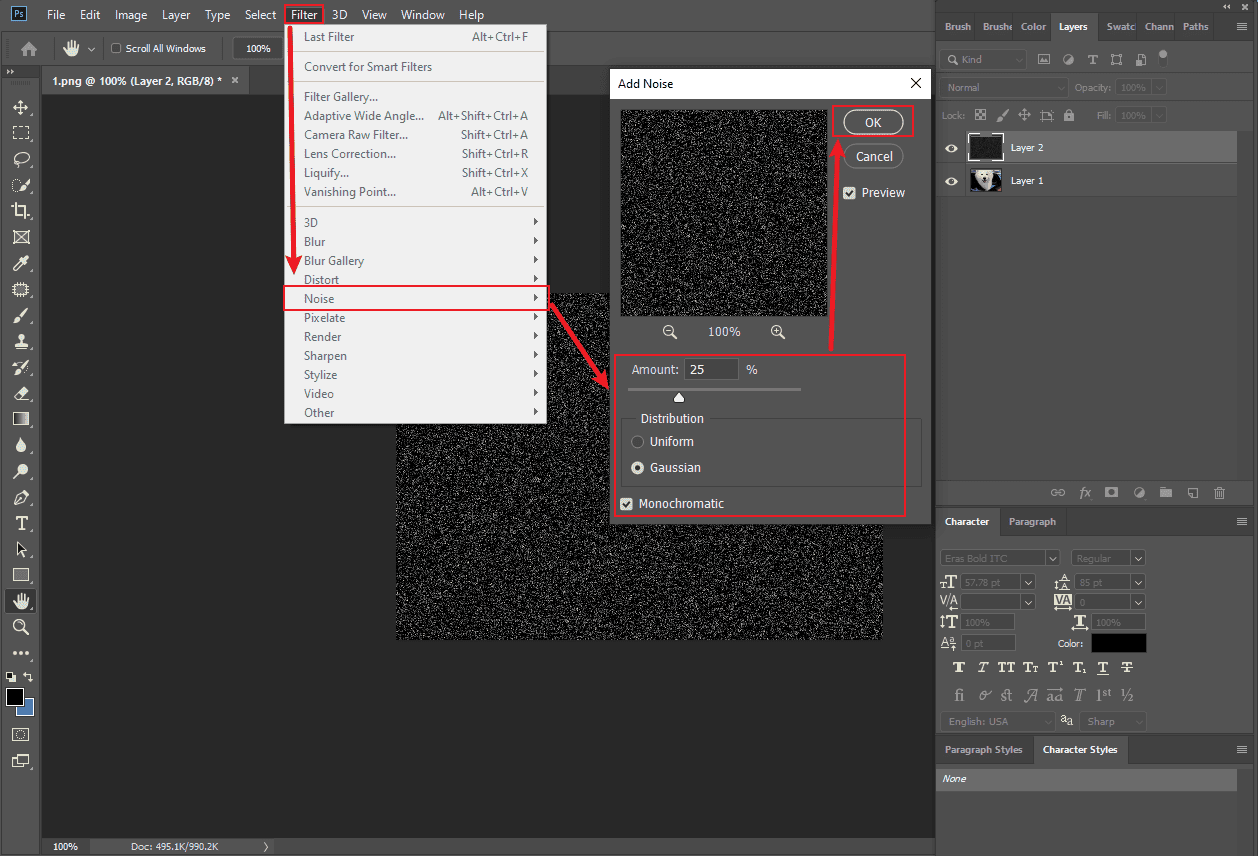
Click the Filter tab in the top toolbar and choose Noise. Select Add Noise in the dropdown list. Enter a precise amount, choose the Gaussian option, and check the Monochromatic box. Then, click OK.
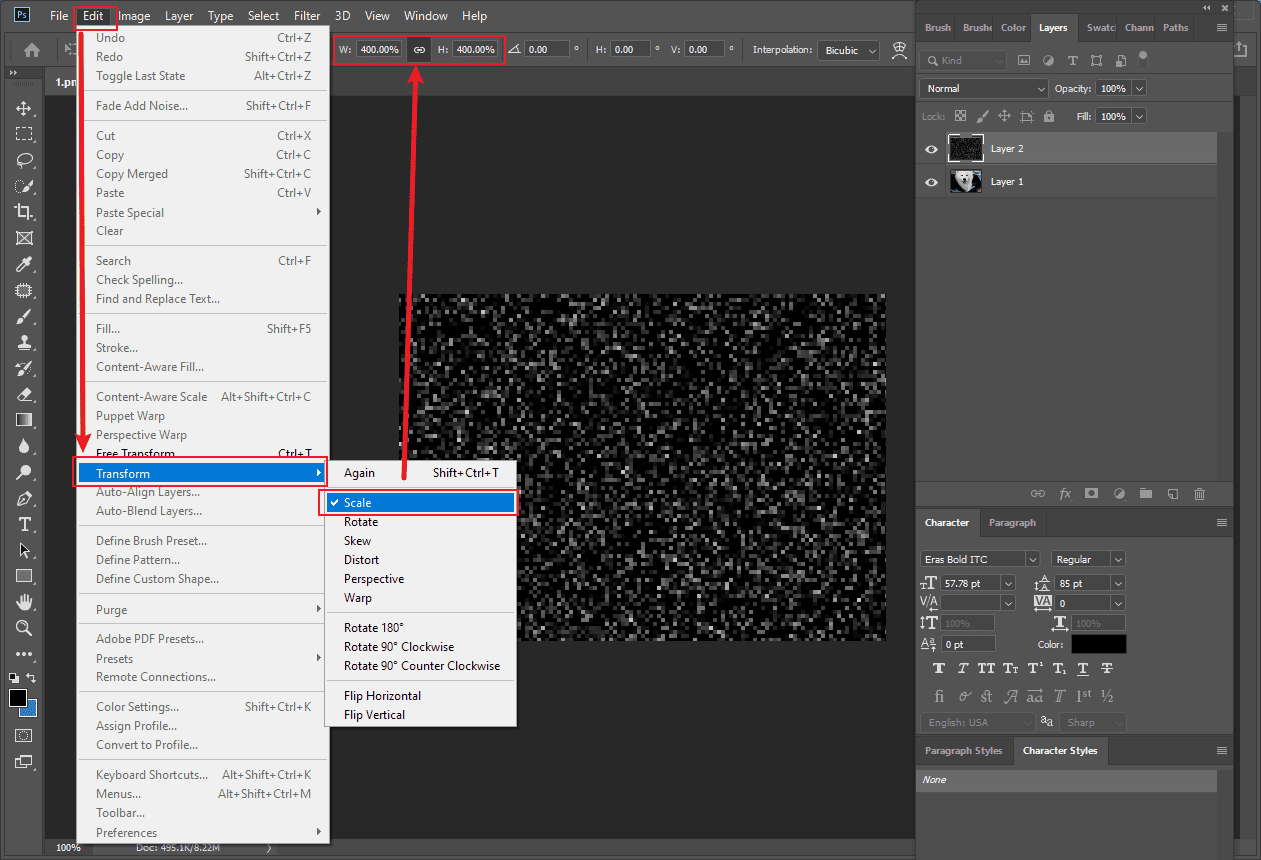
To make the noise bigger like a raindrop, scaling the noise is essential. Click Edit in the top toolbar, choose Transform, and select Scale in the dropdown list. Customize the height (H) and width (W) to the preferred value and click the check mark to save.
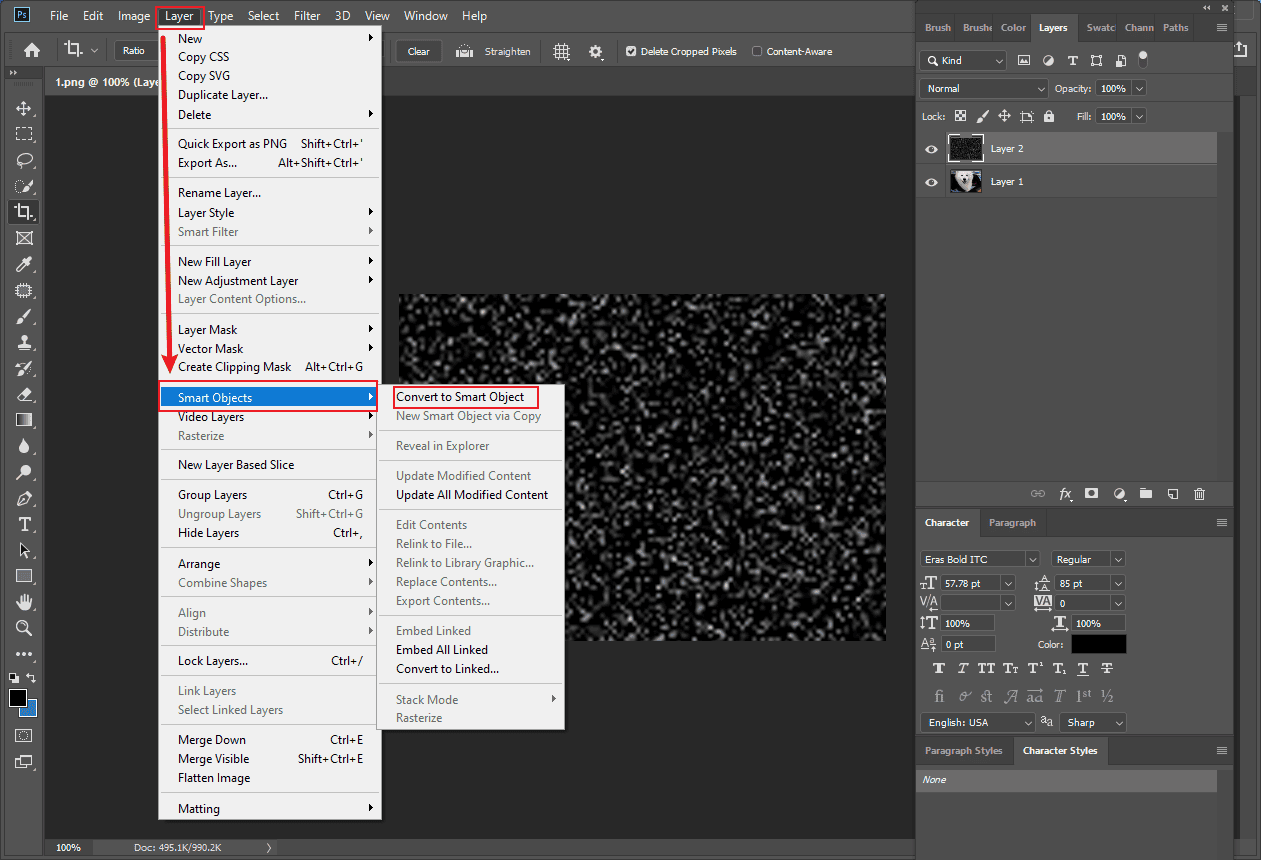
Click the Crop icon on the right toolbar to remove the noise outside of the canvas space in the rain layer. Then, click Layer in the top toolbar, choose Smart Objects, and select Convert to Smart Object in the dropdown list.
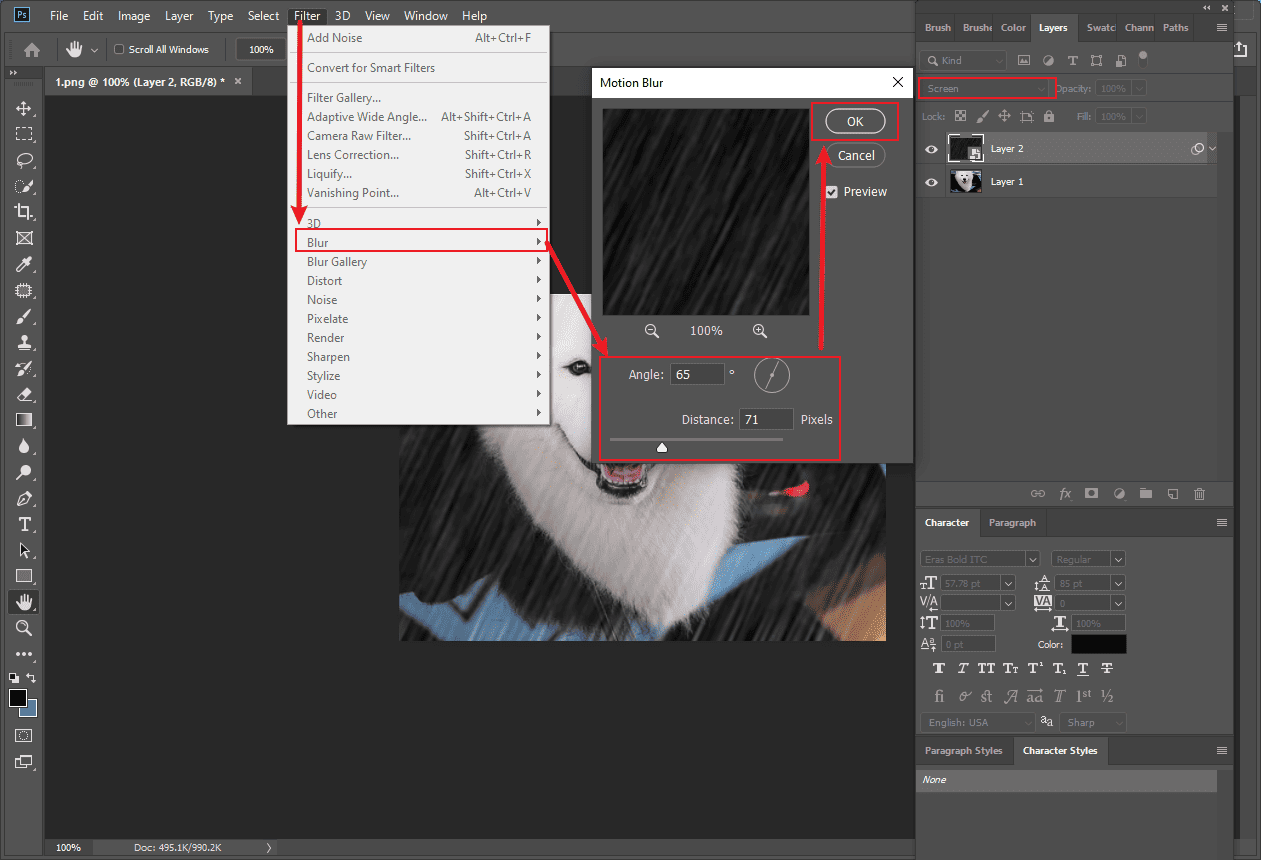
Change the layer’s mode from Normal to Screen. Select the rain layer and click Filter on the top toolbar. Choose Blur and click Motion Blur. Customize the Angle and Distance values. Then, click OK to save the settings.
Step 4: Export the Final Photo
Click the File tab and select Save As to save the photo with the rain effect to your computer.
Conclusion
It is not difficult to add rain effects to photos as long as you choose the right tool. MiniTool MovieMaker and Photoshop are both easy to use and powerful enough to cover your needs. Select the one that best suits your preference and create your stunning photos. Hope this article helps you a lot.
About The Author

Position: Columnist
Alice is a tech writer at MiniTool, specializing in tutorials and guides on video editing and screen recording. She stays up to date with the latest tools and techniques to ensure her content is accurate and easy to follow. By combining hands-on testing with continuous learning, Alice aims to help readers solve tech problems efficiently.
User Comments :