Light leaks have become a popular visual trend for adding a vintage touch to your digital photos. This post explores 2 practical methods to add light leaks to photos: using BeFunky and Photoshop, helping you transform mundane photos into vintage-inspired masterpieces.
Light leaks are an aesthetic effect to add warmth and vintage charm to your photos. This post introduces two practical methods to add light leaks to photos, giving your digital photos a raw and artistic feel in minutes.
Before diving into the step-by-step instructions, let’s first understand what light leaks are.
What Are Light Leaks
Light leaks occur when your camera or roll of film is exposed to light. They usually appear as a streak of light that shows an orange, yellow, or red tint in your image.
As a stylish artistic element, light leaks can instantly add a warm and nostalgic film-like touch to digital photos. With the help of modern editing tools that mimic the manual process of film photography, adding light leaks to photos can be quick and effective.
How to Add Light Leaks to Photos on Windows
Here are two methods available for adding light leaks to photos on Windows. If you are seeking quick edits, the online BeFunky can satisfy your needs. However, for more demanding and professional edits, it is recommended to use Photoshop.
Method 1: Add Light Leaks to Photos Using BeFunky
BeFunky is an online photo editor and graphic design tool suitable for users with all levels of experience. With the creative editing tool, BeFunky enables you to remove background, resize photos, batch edit photos, and more.
When it comes to adding light leaks to photos, BeFunky offers built-in Darkroom and Texture tools that provide several natural and film-inspired light leak effects. It allows you to adjust the effect intensity, phase, hue shift, contrast, and other settings, giving you full control over how the light interacts with the image.
Here is how to add light leaks to photos using BeFunky.
Step 1: Visit the Official Website
Navigate to the BeFunky website (https://www.befunky.com/create/) in your browser.
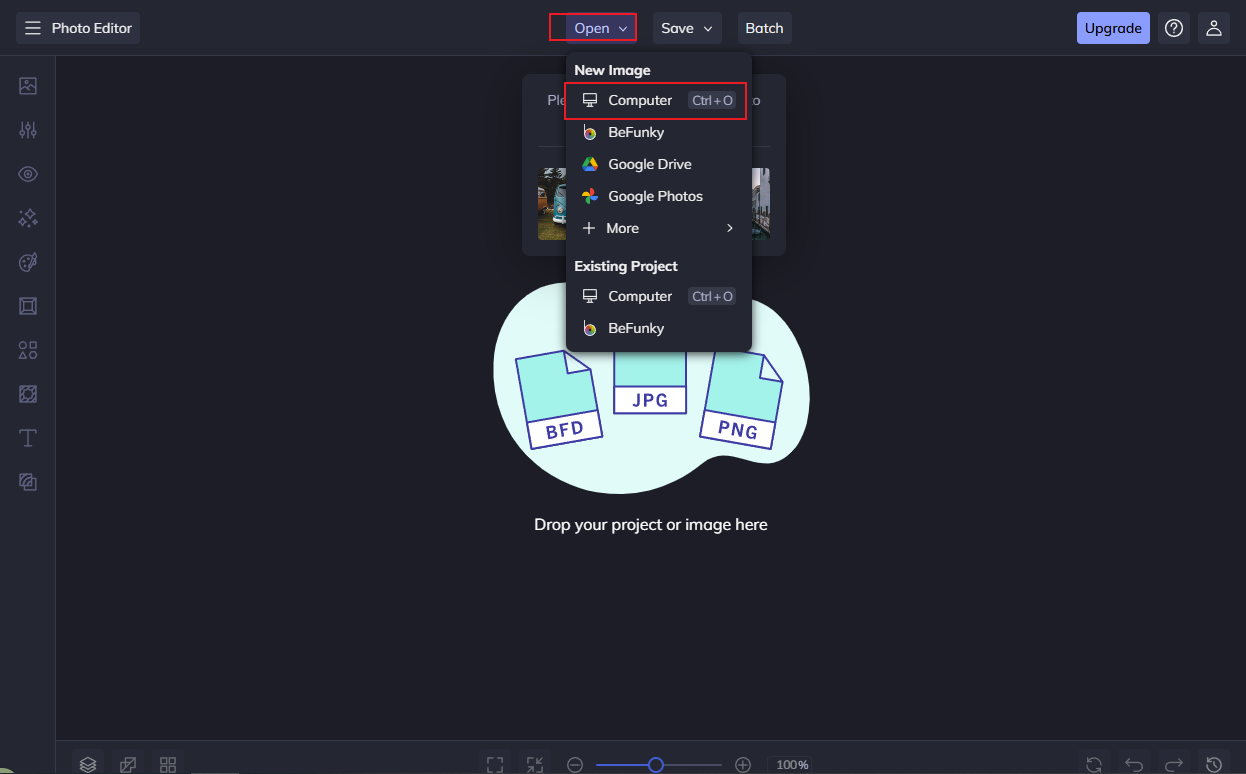
Step 2: Import Your Photo
Click the Open tab at the top of the menu and select Computer from the New Image category. Or you can directly drag your photo to the interface to upload.
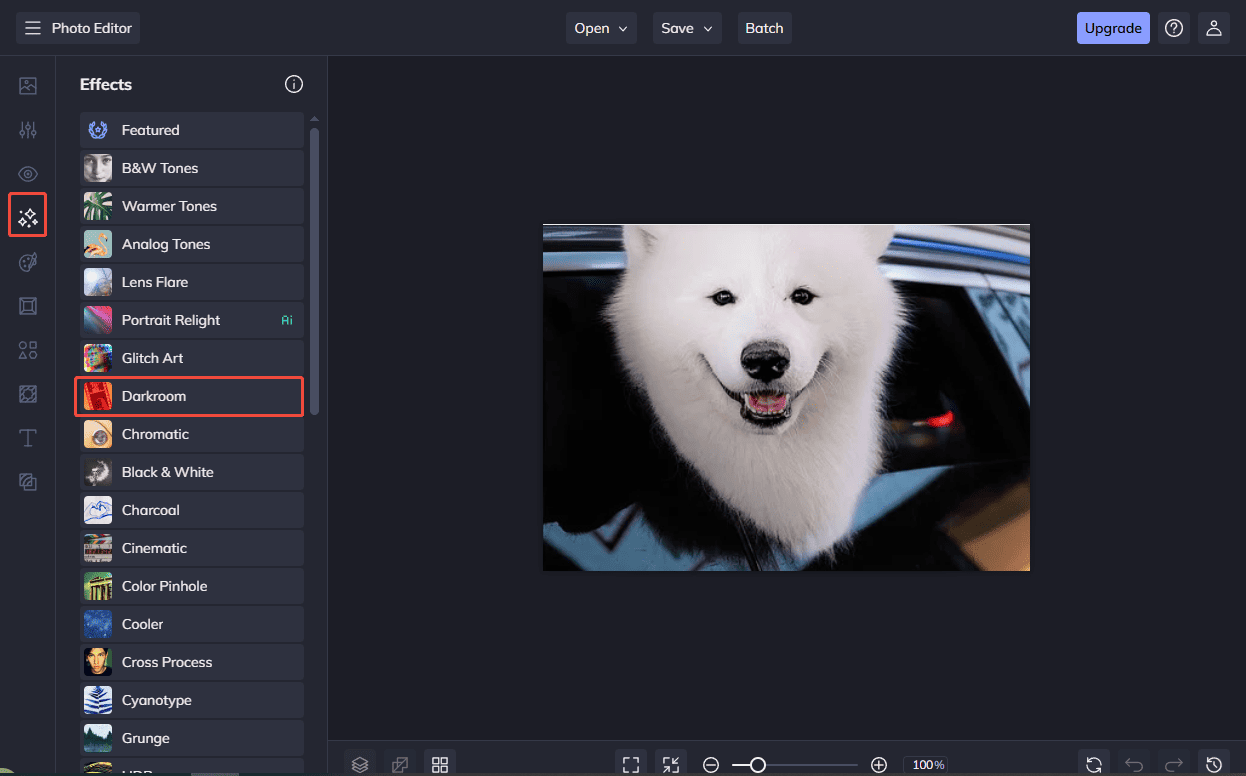
Step 3: Add Light Leaks to Photo
Click the Effects tab on the left toolbar and scroll down to select the Darkroom category.
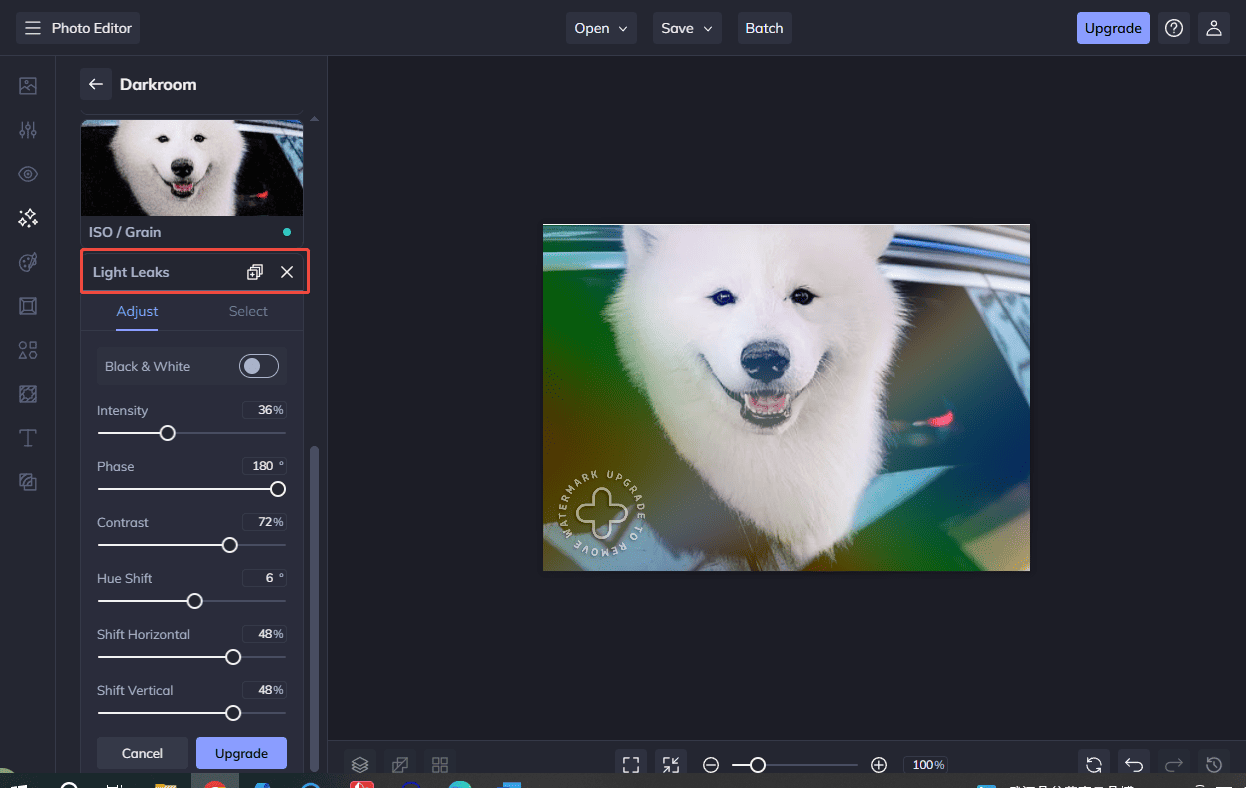
Then, select Light Leaks and click the Settings icon to adjust its Intensity, Phase, Contrast, Hue Shift, Shift Horizontal, and Shift Vertical values.
Besides, you can also click Textures on the left toolbar and select Light Leaks to see more color and shape options. Also, select the desired one and adjust it to apply to your photos.

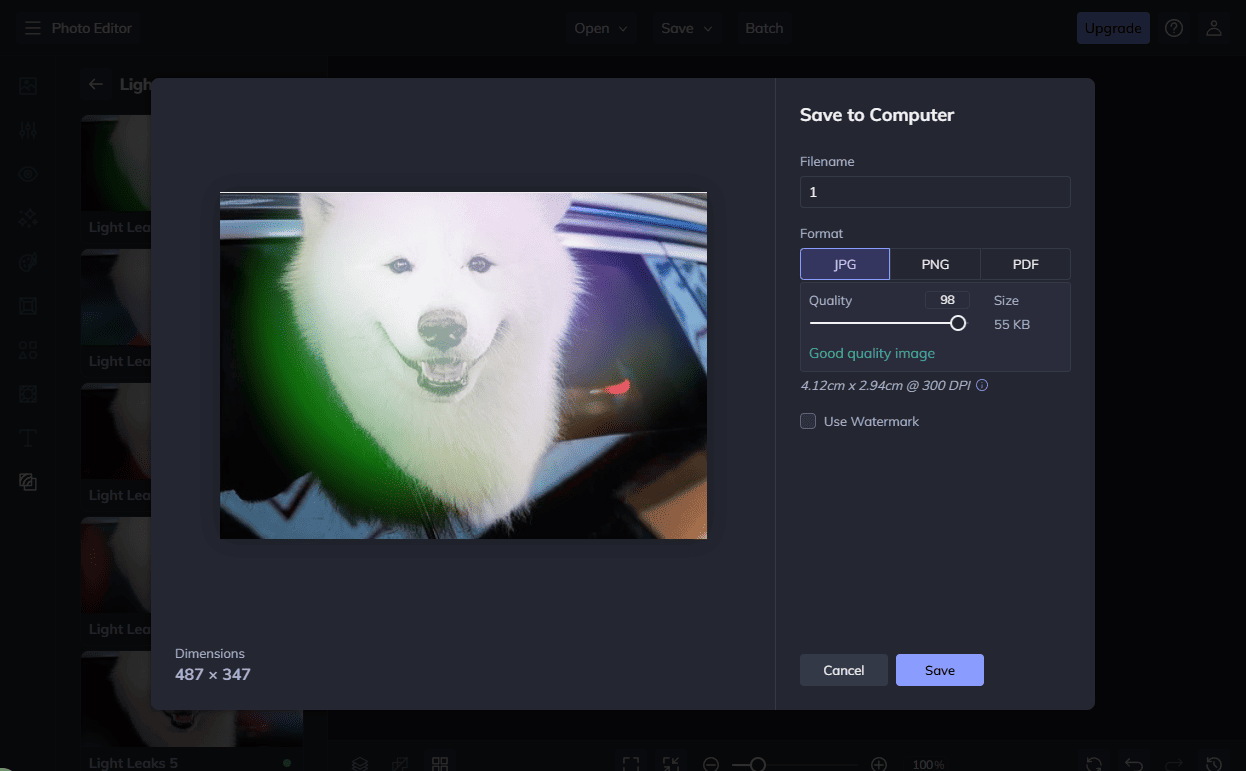
Step 4: Export the Final Photo
Once everything is ready, click the Save tab at the top of the menu and select Computer. Then, you can customize the photo format and quality to save it to your computer.
Method 2: Add Light Leaks to Photos Using Photoshop
Photoshop is a leading professional photo editing software known for its precision and versatility. It provides powerful tools and an advanced layer system for designers to create and edit images.
Photoshop offers more flexible and precise options for you to add light leaks to photos. It allows you to customize the light colors, shapes, and intensity through the built-in powerful editing tools, making it easy to fine-tune the glow and integrate it into the original photos.
How to add light leaks to photos? Follow the steps below.
Step 1: Download and Install
Go to Adobe Photoshop’s official website to subscribe and install it on your computer.
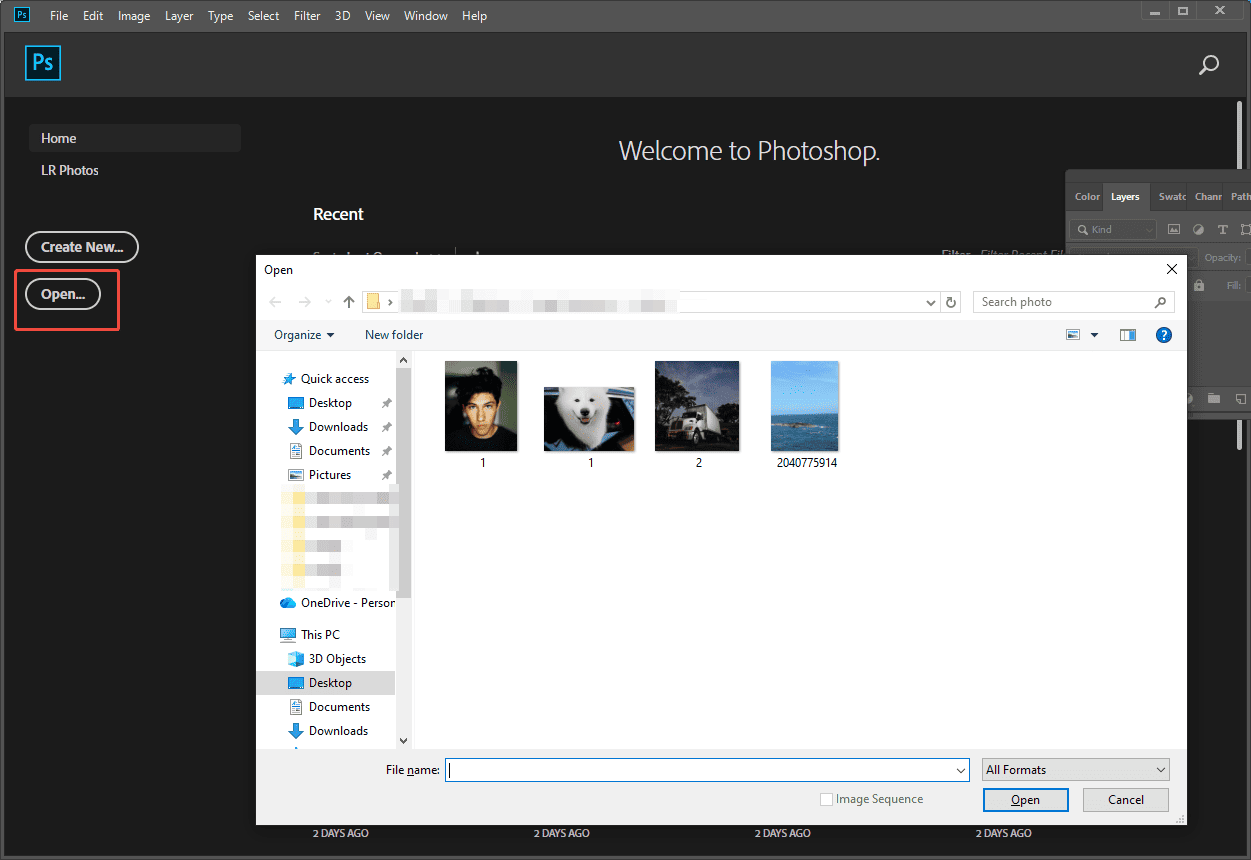
Step 2: Import Your Photo
Launch Photoshop and click the Open option to upload your photos.
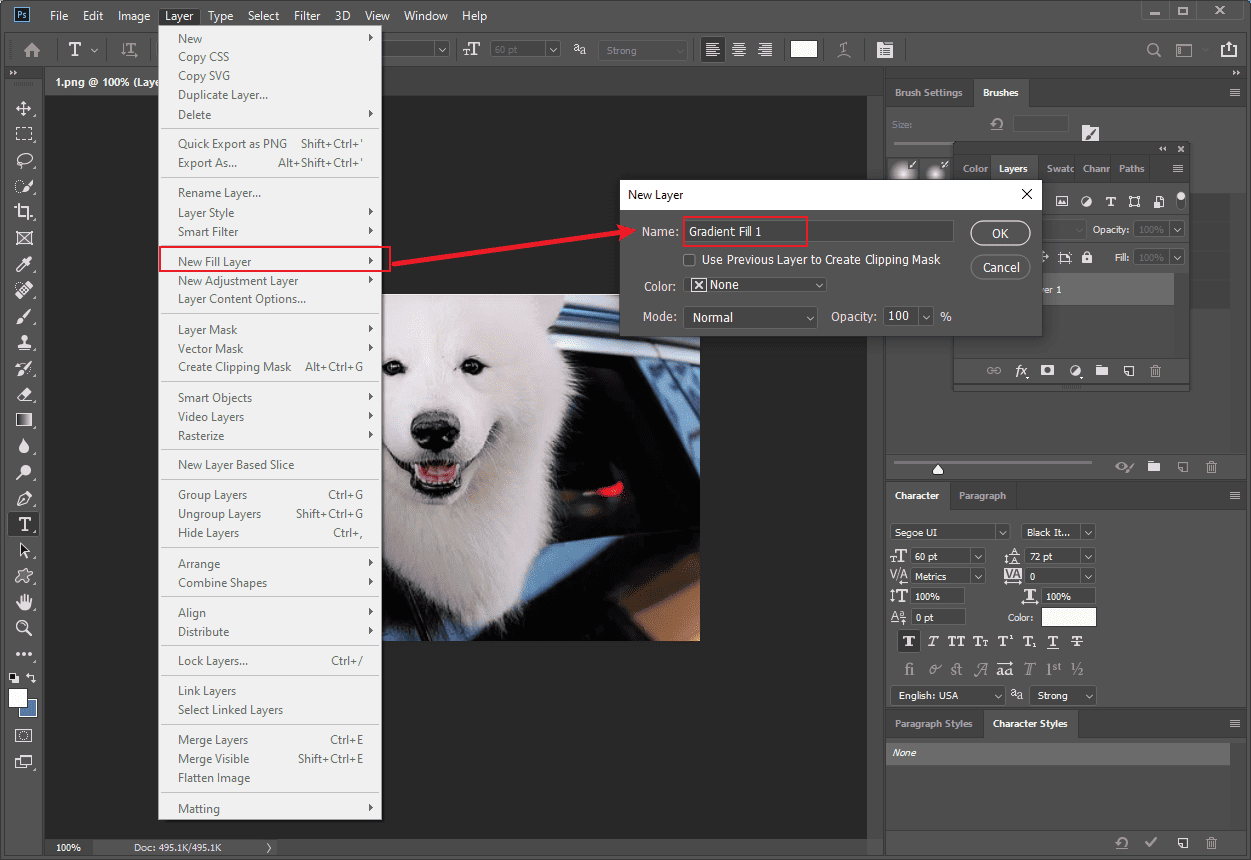
Step 3: Add Light Leaks to Photos
Click Layer, select New Fill Layer, and click Gradient. Then, click OK to enter the Gradient Fill window.
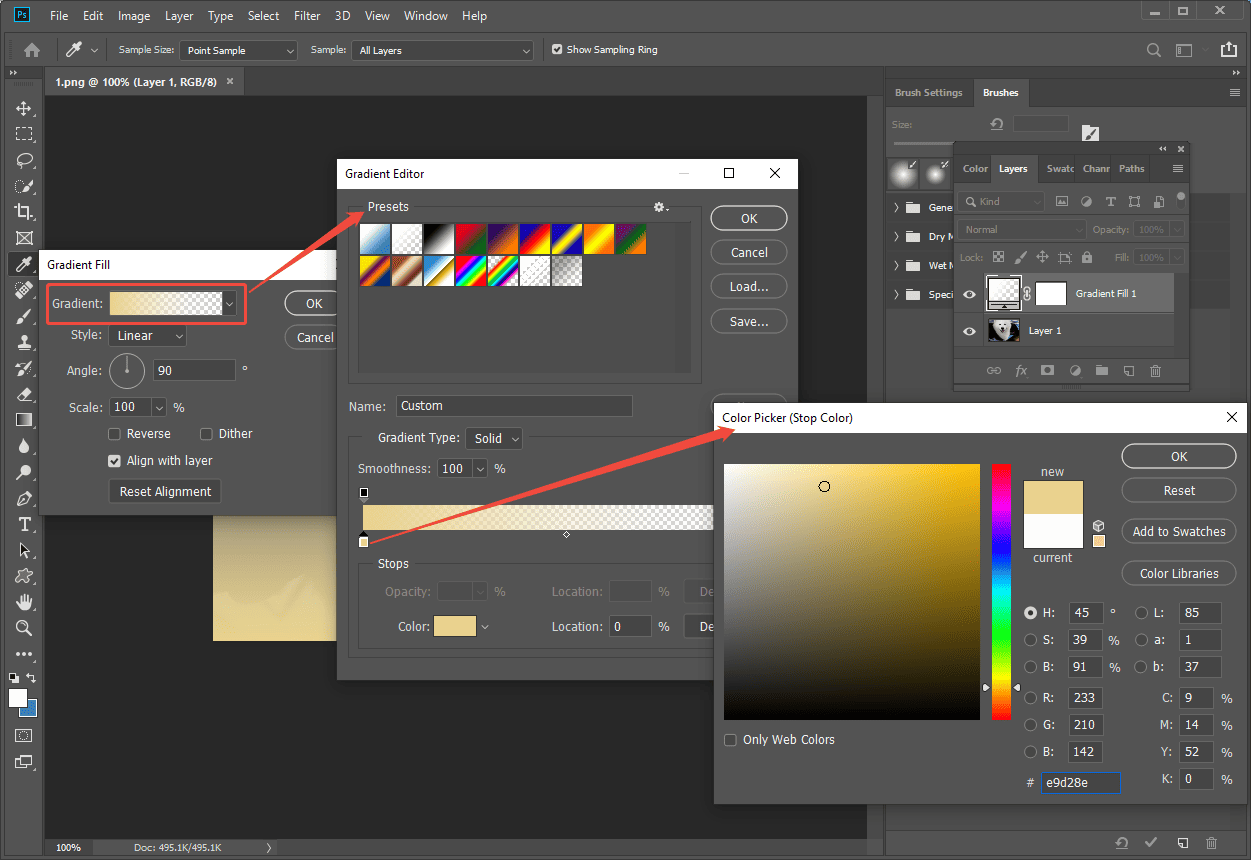
Click the Gradient in the Gradient Fill window to enter the new Gradient Editor window. Then, double-click the color to pick your desired color. Then, click OK to save the settings.
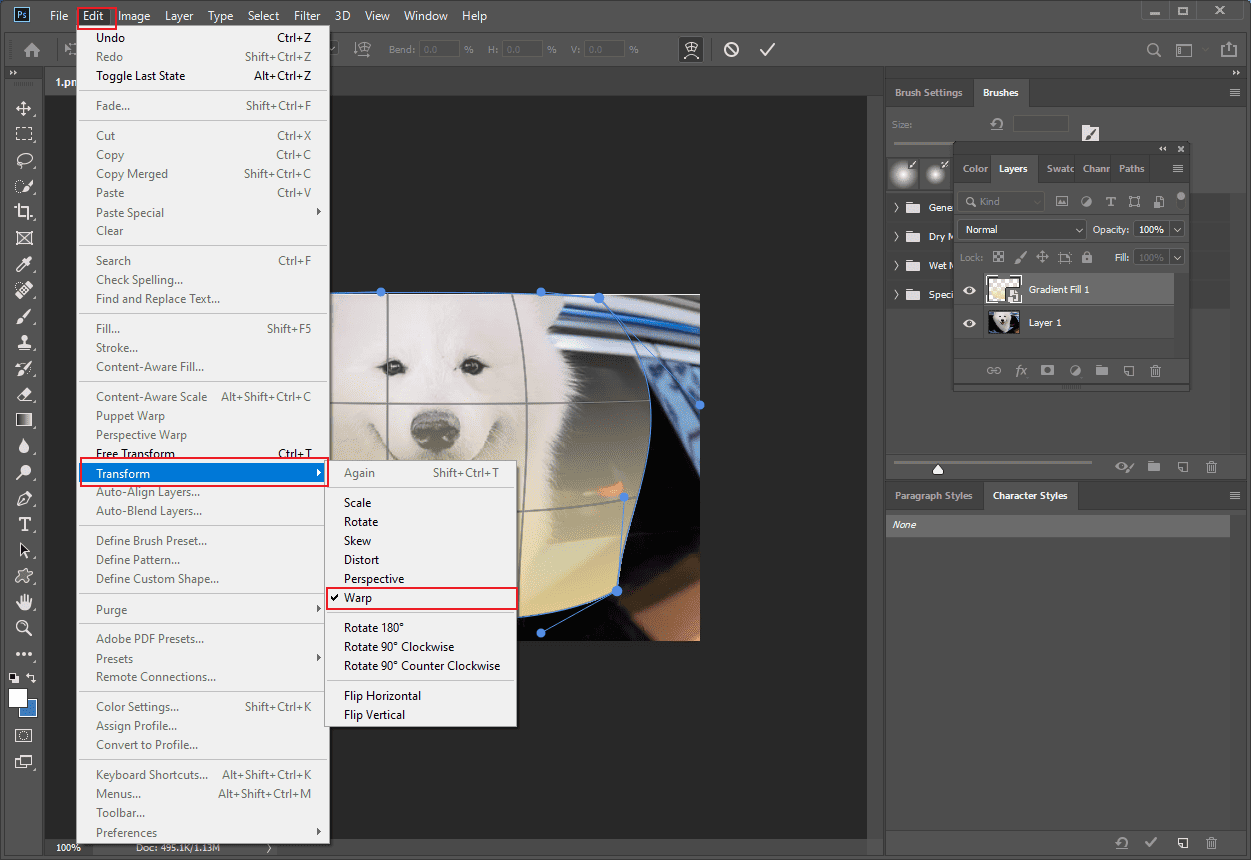
Click Layer, select Smart Objects, and click the Convert to Smart Object option. Then, press Ctrl + T on your keyboard to resize the gradient layer. Next, click Edit and select Transform to click Warp. Then, you can customize the shape of the light leaks.
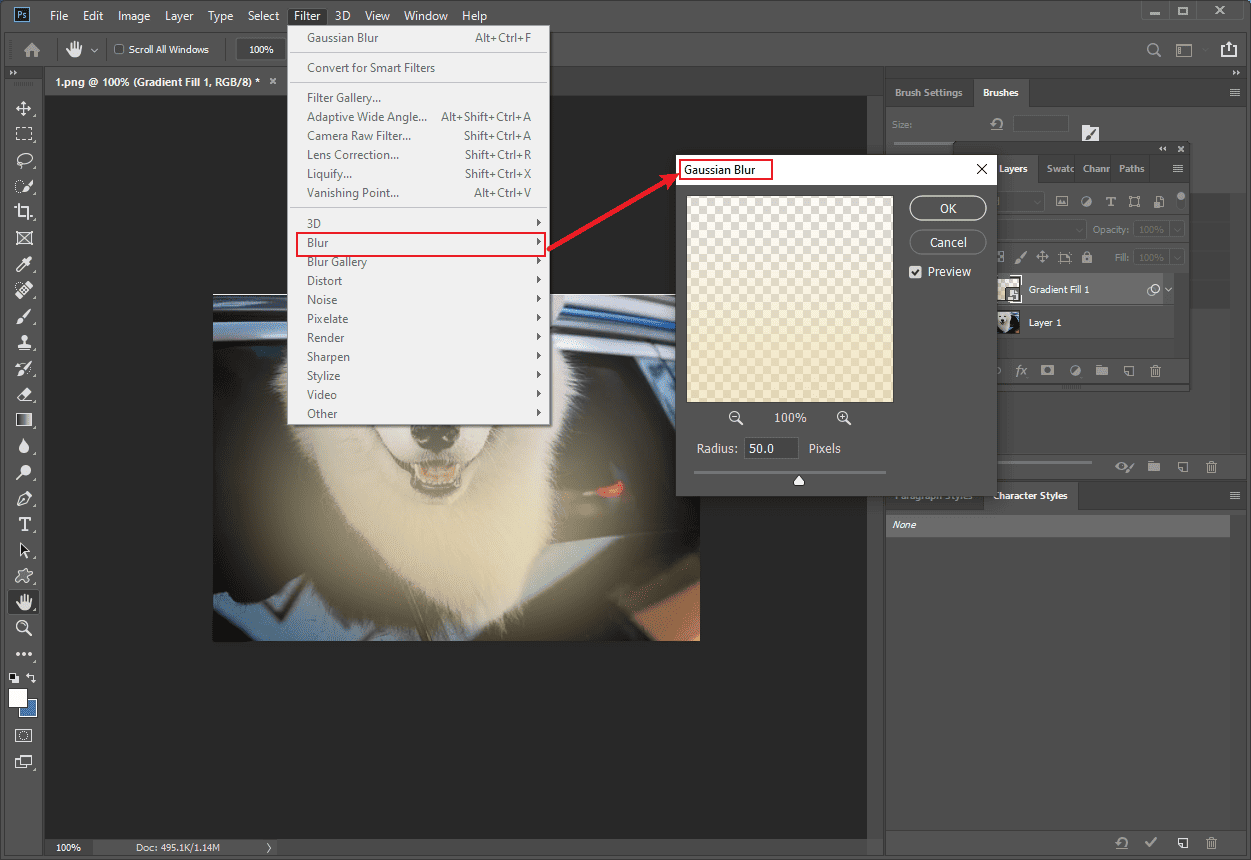
Then, click the Filter tab and select Blur to click Gaussian Blur. Adjust the Radius according to your needs.
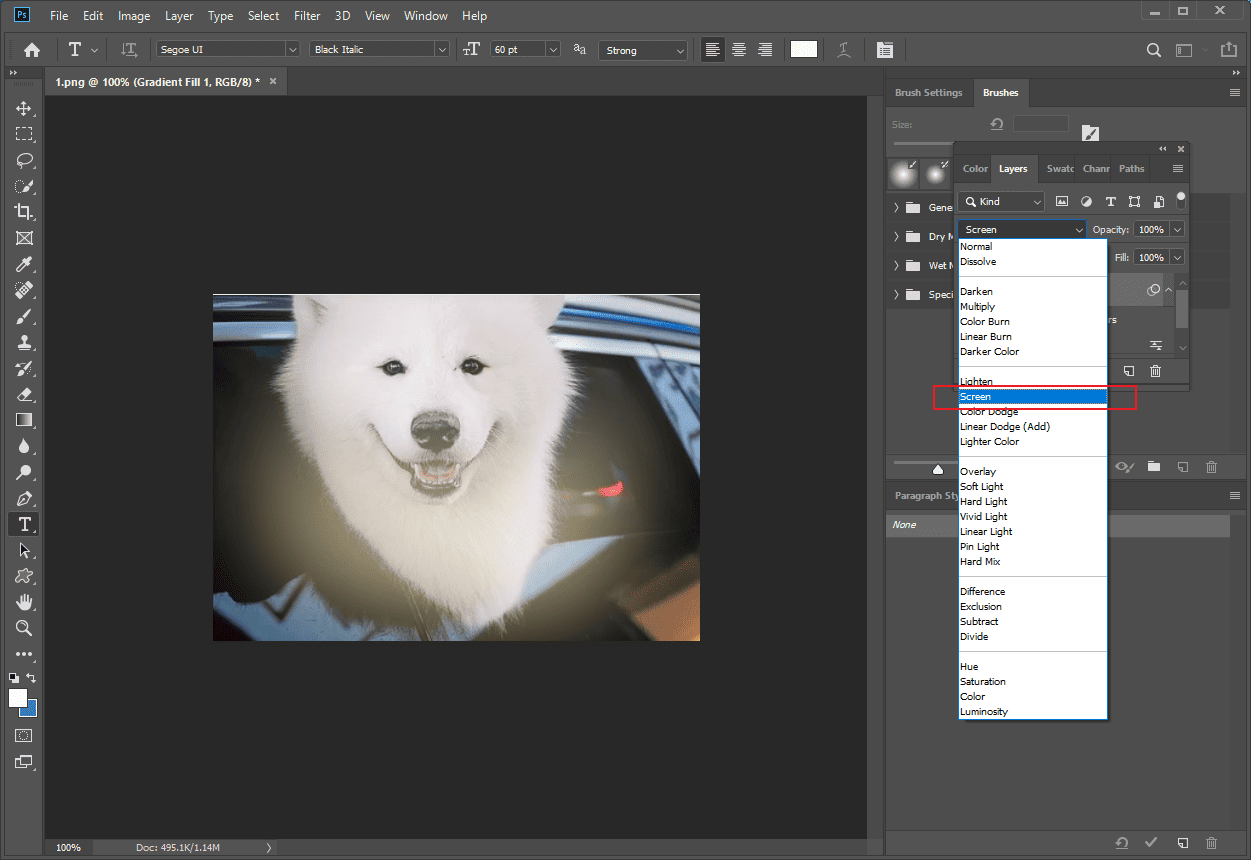
Then, change the Blend Mode to Screen to make the light leaks more natural.
Step 4: Export the Photo
Click the File tab and select Save As to save the photo to your computer.
Conclusion
This post demonstrates how to add light leaks to photos on Windows using BeFunky and Photoshop. Both of them are easy to use and cover your needs. Select the one that best suits your preference and make your photos more charming. Hope this post helps you a lot.
About The Author

Position: Columnist
Alice is a tech writer at MiniTool, specializing in tutorials and guides on video editing and screen recording. She stays up to date with the latest tools and techniques to ensure her content is accurate and easy to follow. By combining hands-on testing with continuous learning, Alice aims to help readers solve tech problems efficiently.
User Comments :