A glass effect can instantly enhance the visual appeal of your photos. This post shows you how to add a glass effect to photos using MagicPattern and Adobe Photoshop, allowing you to craft impressive glass-style images with ease.
The glass effect has become a popular design trend in modern visuals for its clean, translucent style, which adds an elegant feel to photos. It is widely used in social media posts, commercial advertisements, and professional designs to grab viewers’ attention.
This guide explores what the glass effect is and shows you two practical methods to add a glass effect to photos using both online and professional tools. No matter your skill level, you can create a polished and modern image in just a few steps.
What Is a Glass Effect
A glass effect is a style that makes your photo look as if it’s being viewed through a piece of glass. There are various kinds of glass effects, involving reeded glass photo effect, fractal glass photo effect, glass effect action, warped glass photo effect, and others. This effect is widely used in digital design because it helps separate foreground elements from the background while maintaining a cohesive, modern feel.
Whether you want to highlight text, enhance a background, or simply give your photo a more refined look, it is a good option to add a glass effect to photos to make them more stunning. To help you create a photo with a glass effect more effortlessly, we’ll walk you through two simple methods to edit it.
How to Add a Glass Effect to Photos: 2 Ways
There are mainly two ways to add a glass effect to photos available. If you are looking for quick edits, the online tool MagicPattern is easier and quicker to create. However, for more complex and precise tasks, it is highly recommended to use the professional photo editor, Photoshop.
Method 1: Add a Glass Effect to Photos Using MagicPattern
MagicPattern is an online graphic design toolkit that helps users quickly generate visually appealing design elements such as shapes, backgrounds, patterns, and other creative assets. It provides an easy-to-use interface and a collection of customizable generators, making it popular among content creators. MagicPattern offers two kinds of glass effects: the fractal glass effect and the frosted glass effect.
Firstly, let’s see how to add a glass effect to photos using the online MagicPattern.
Step 1: Navigate the Official Website
Visit the official website of the MagicPattern’s fractal glass effect generator (https://www.magicpattern.design/tools/fractal-glass-effect) in your browser.
Step 2: Upload Your Photo
Click Upload Image to import your photo to MagicPattern.

Step 3: Customize a Glass Effect to the Photo
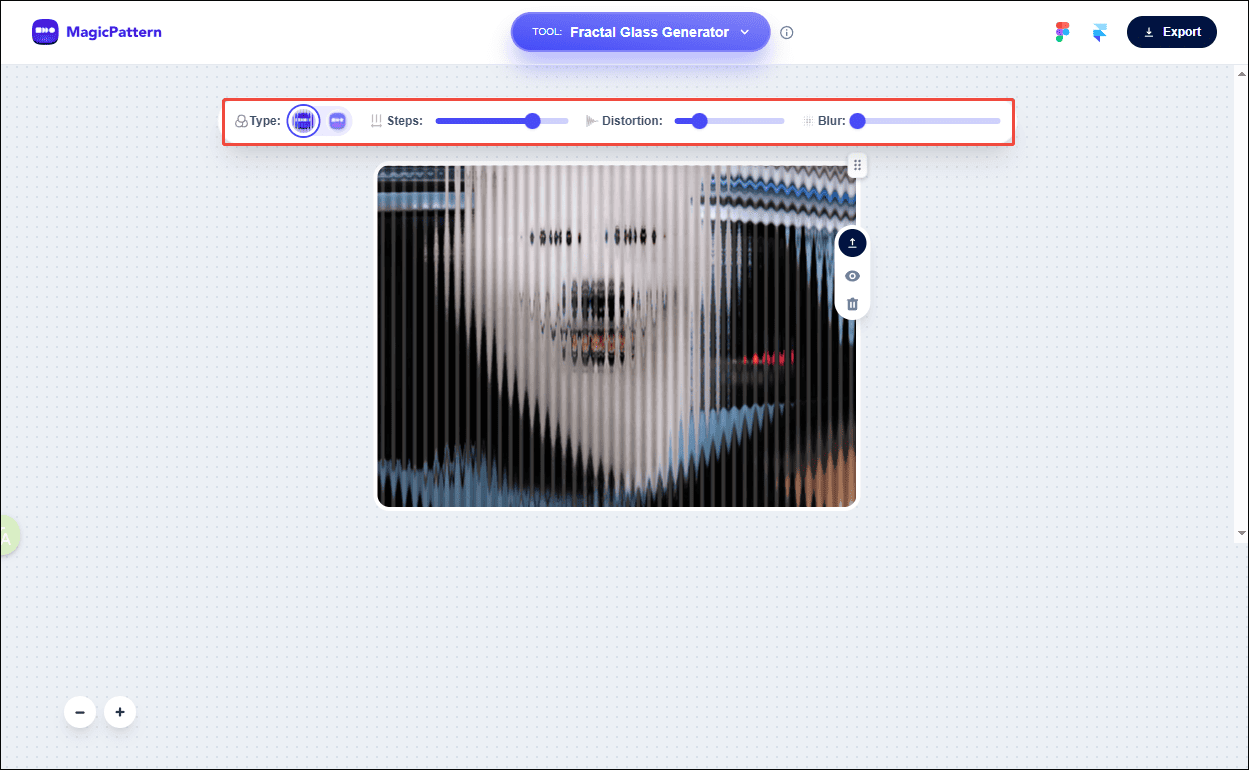
Click the Fractal Glass Effect icon and move the Steps, Distortion, and Blur sliders to customize the glass effect. You can preview the final effect in the player window.
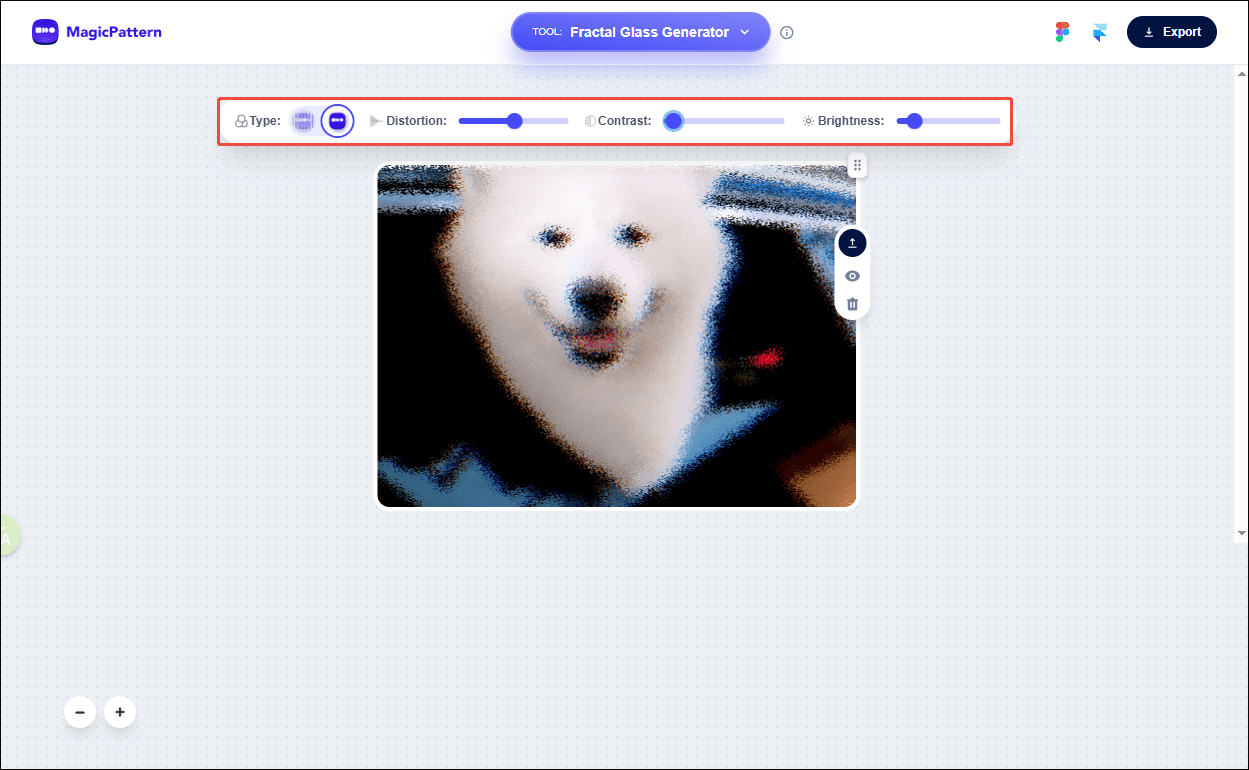
If you want a Frosted Glass Effect, click it and drag the Distortion, Contrast, and Brightness sliders to set it.
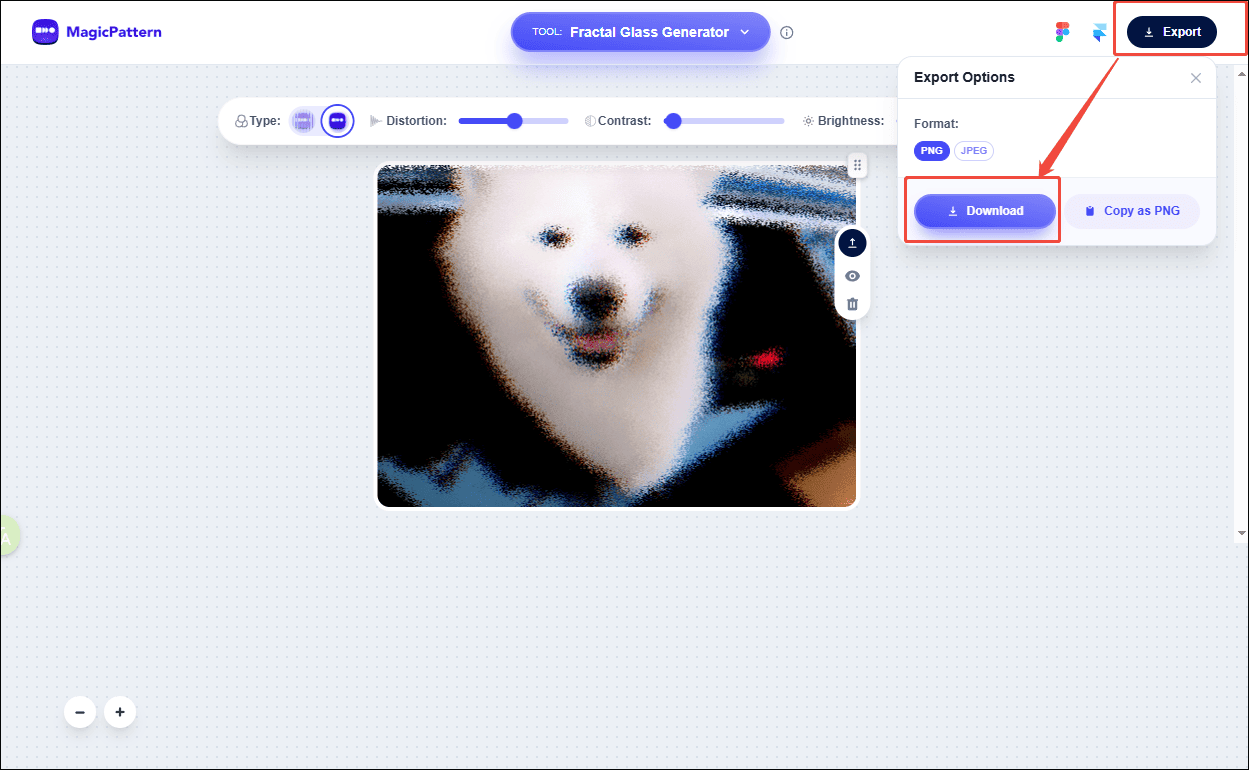
Step 4: Export the Final Photo
Once the editing is completed, click the Export icon at the top of the menu. Then, select the desired photo format and click the Download icon again to save the photo with a glass effect to your computer.
Method 2: Add a Glass Effect to Photos Using Adobe Photoshop
Adobe Photoshop is a professional image editing software widely used for photo retouching, graphic design, digital art, and compositing. It offers powerful tools for manipulating images, such as adjusting colors, creating visual effects, and designing graphics for both print and digital media.
Here are the detailed steps on how to add a glass effect to photos using Adobe Photoshop.
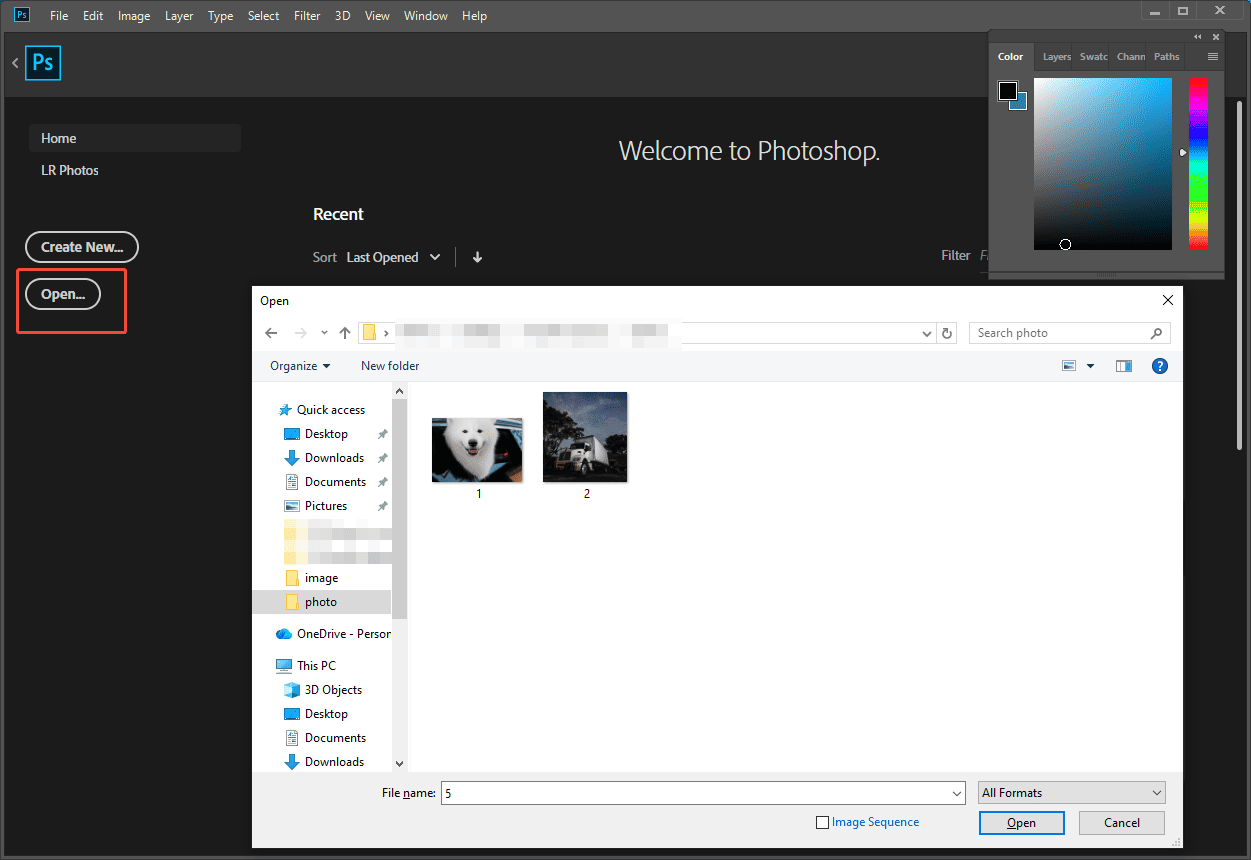
Step 1: Import Your Photo
Launch Photoshop on your computer. Then, click the Open option and select your photo to enter the main editing interface.
Step 2: Add a Glass Effect to the Photo
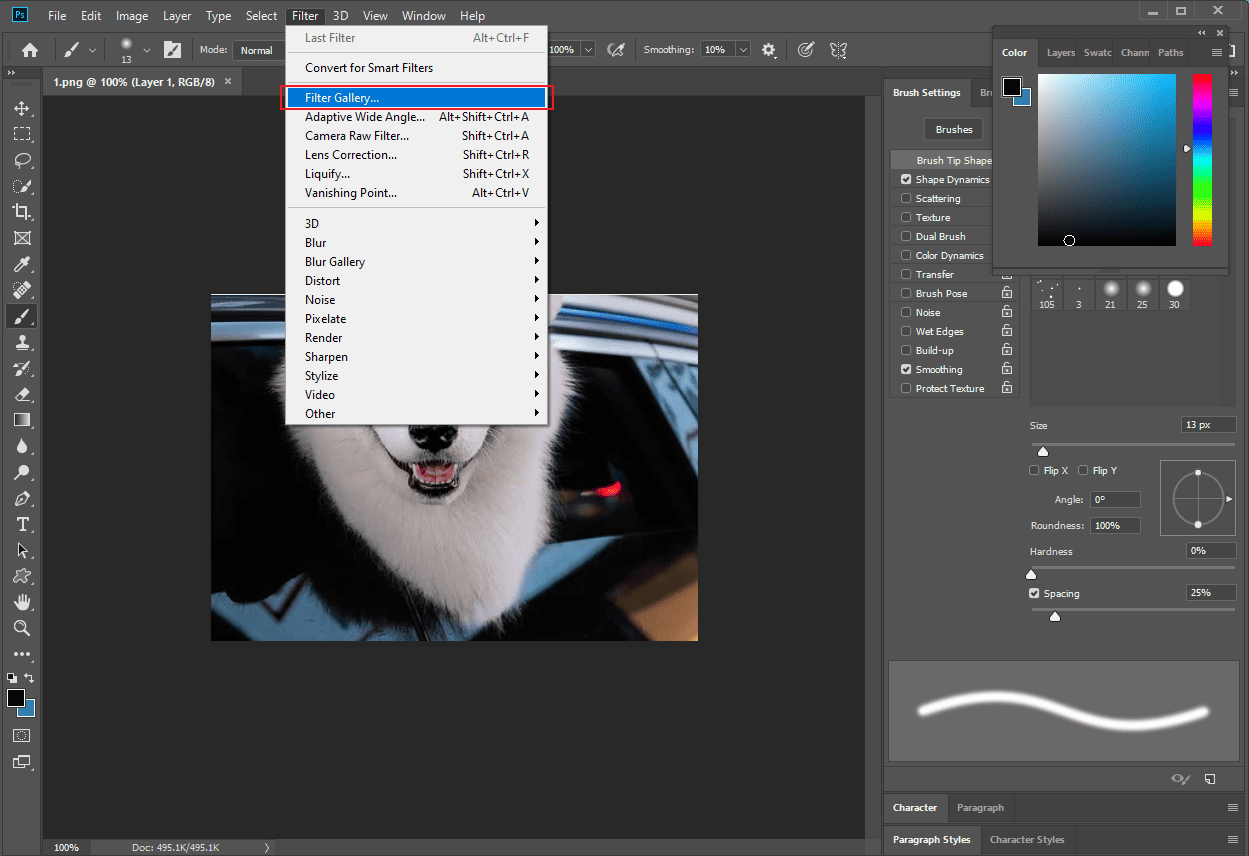
Click the Filter tab at the top of the menu and select the Filter Gallery…option.
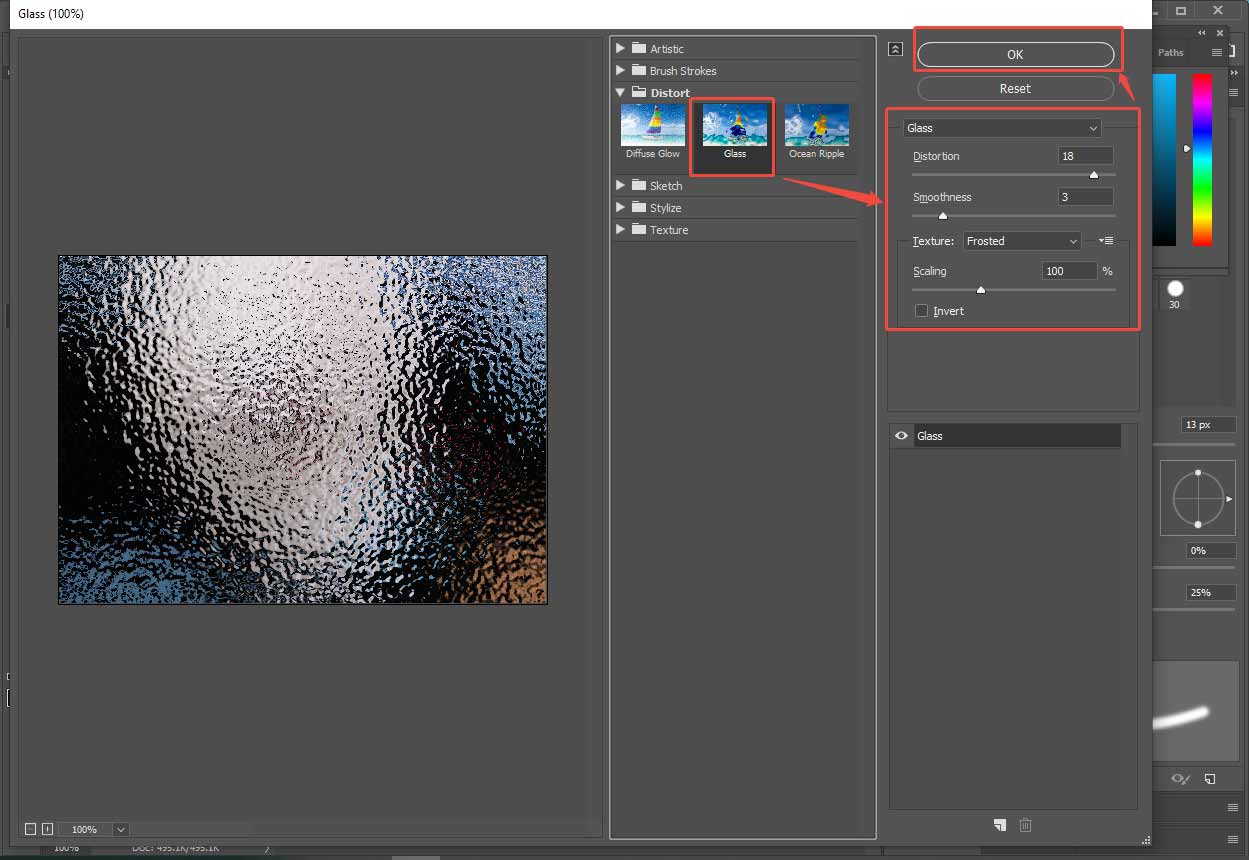
Then, open the Distort effects and select the Glass effect. You can use any values you want for the Distortion, Smoothness, and Scale options, and select the preferred glass texture. Next, click OK at the top of the window.
Step 3: Export the Final Photo
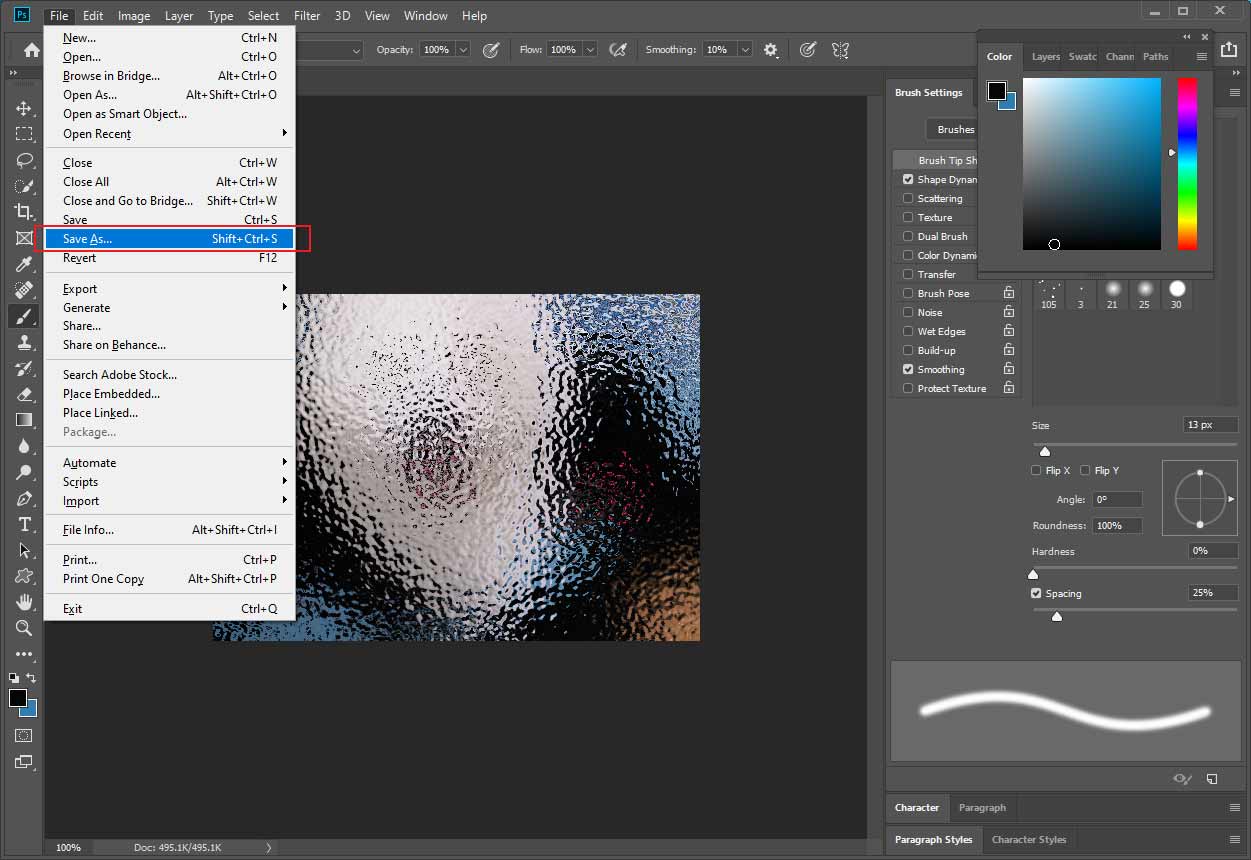
After finishing all operations, click File and select Save As to download the photo to your computer.
Conclusion
This post introduces two easy ways to add a glass effect to photos. Each method allows you to enhance your images with just a few clicks. Choose the one that best suits your needs and make your photos look even more stunning. Hope you find this guide helpful!
About The Author

Position: Columnist
Alice is a tech writer at MiniTool, specializing in tutorials and guides on video editing and screen recording. She stays up to date with the latest tools and techniques to ensure her content is accurate and easy to follow. By combining hands-on testing with continuous learning, Alice aims to help readers solve tech problems efficiently.
User Comments :