With the rise of high-definition content, cutting 4K videos has become increasingly popular. This article explores 3 best 4K video cutters and provides step-by-step guides for using various tools.
What Is 4K Video Cutting
4K video cutting refers to cutting or splitting a 4K video file without losing any of its quality. 4K resolution refers to video content with a width of around 4,000 pixels, offering four times the resolution of Full HD (1080p) videos. When cutting 4K videos, it’s crucial to avoid quality loss to ensure the final product looks just as clear as the original footage.

Top 4K Video Cutters
There are many 4k video cutters on the market. Below are some top choices for 4K video cutting without quality loss.
MiniTool MovieMaker
MiniTool MovieMaker is a free and user-friendly video editing application designed to help you cut 4K videos without losing quality. It is perfect for beginners and those who want a simple tool to handle their video editing needs. Here’s how to cut 4K videos using MiniTool MovieMaker.
Step 1: Click the button below to download this free 4k video cutter, and follow the on-screen instructions to install it on your computer.
MiniTool MovieMakerClick to Download100%Clean & Safe
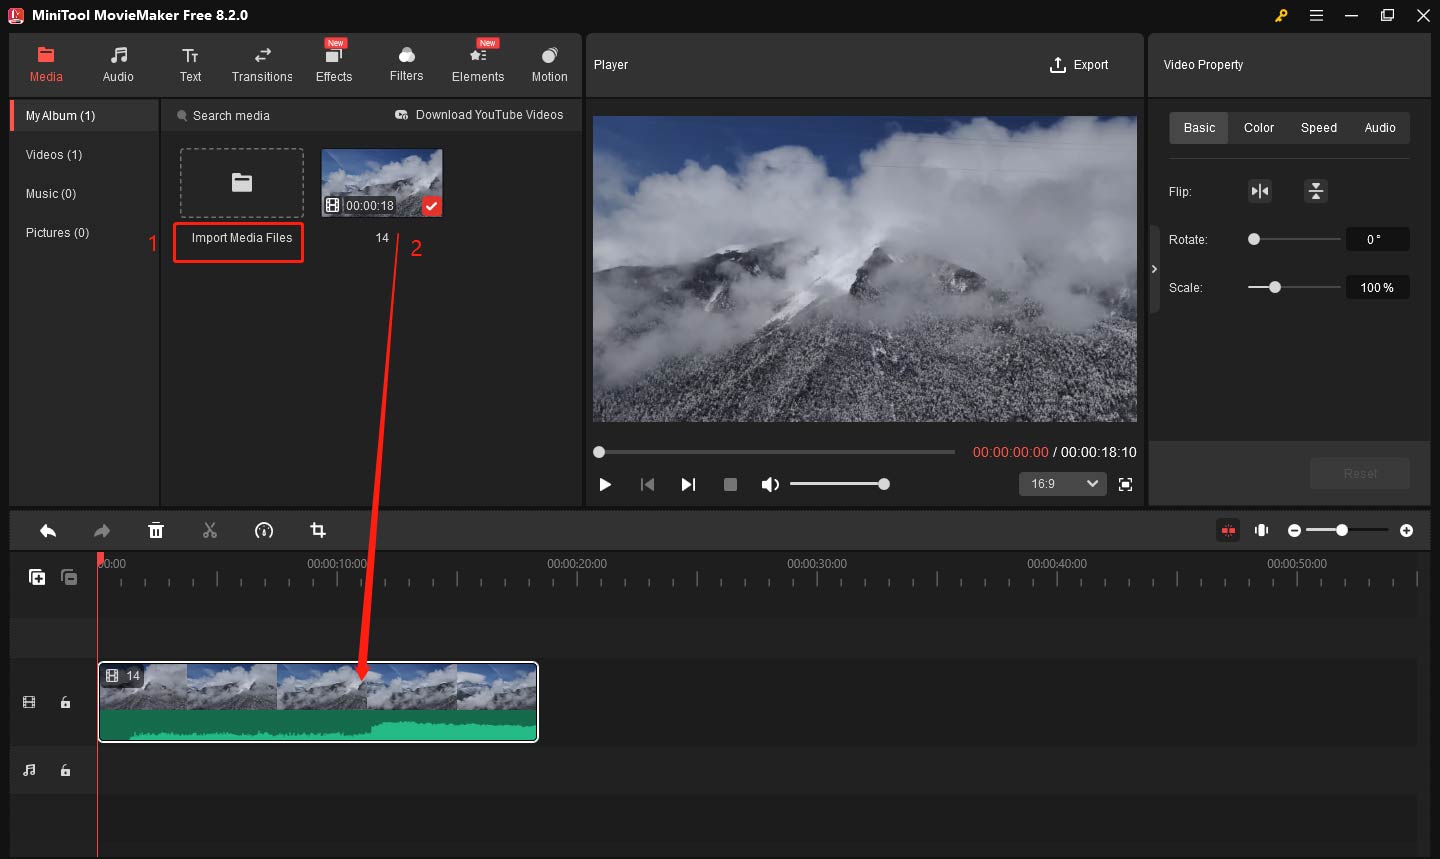
Step 2: Once installed, open the program and click on New Project. Click the Import Media Files button to upload your 4K video into the program. After the video is imported, drag it onto the timeline at the bottom of the screen.
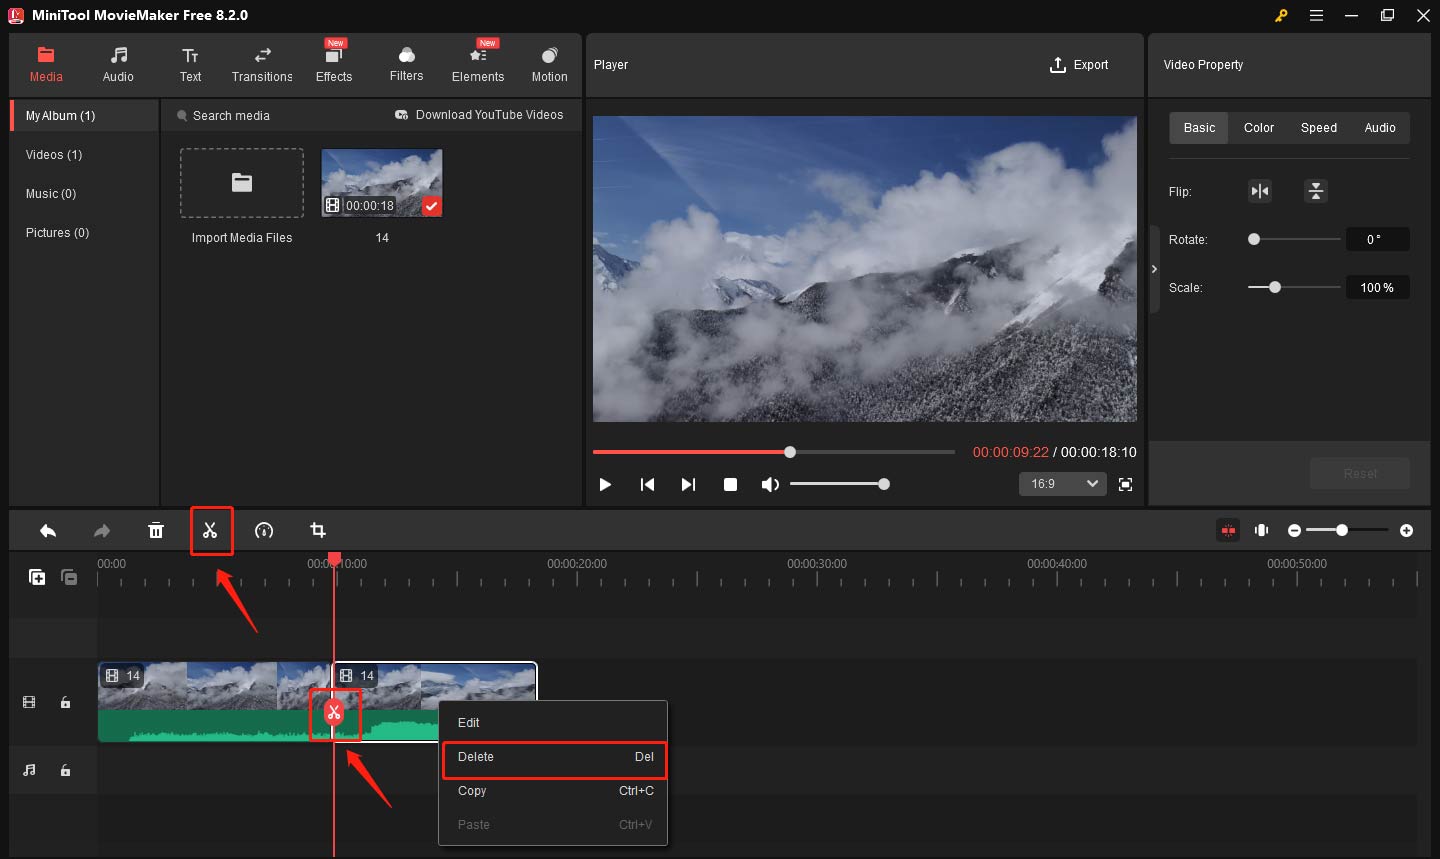
Step 3: To cut the video, move the playhead to the position where you want to make a cut. Click the Split icon (scissor) on the playhead or on the timeline toolbar, and the video will be divided into two parts at that point. If there is a section of the video you don’t need, you can right-click on it and choose Delete to remove it from the timeline.
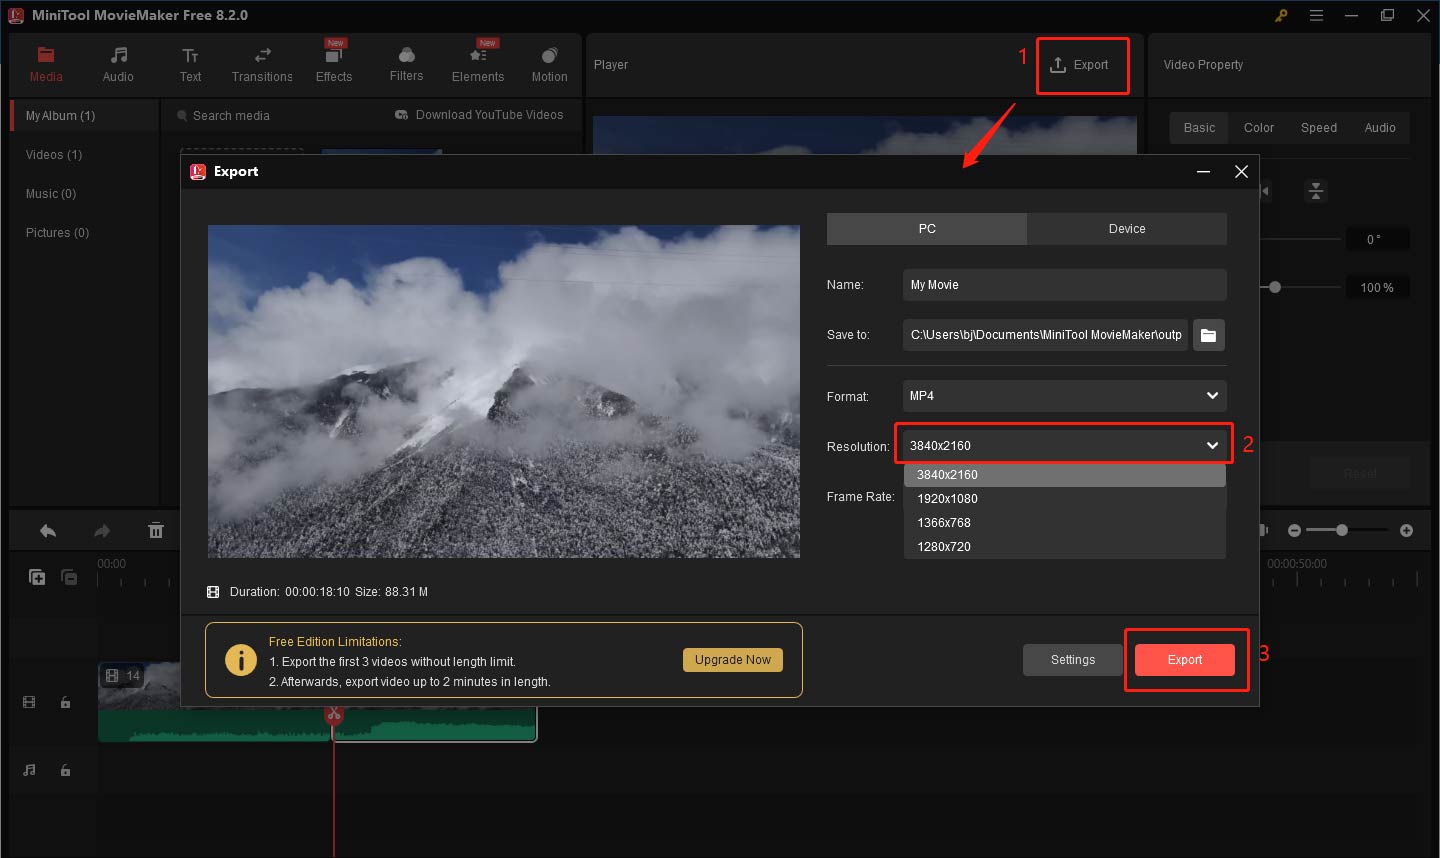
Step 4: Once you’ve made the necessary cuts, it’s time to export the video. Click on Export in the top-right corner. To maintain the original quality, choose 3840×2160 in the Resolution dropdown menu. Click Export again, and the program will save your edited 4K video without any loss in quality.
Premiere Pro
Premiere Pro is one of the most popular professional video editing software programs. It offers advanced features for editing 4K footage. With Premiere Pro, you can precisely edit the video while keeping the quality intact.
How to cut 4K videos in Premiere Pro:
- Download and install Premiere Pro.
- Open Premiere Pro and start a new project.
- Import your 4K video by going to File > Import.
- Drag the video to the timeline.
- Move the playhead to the position where you want to cut the video.
- Use the Razor Tool to split the video.
- Delete the unwanted sections from the timeline.
- Export the video by selecting File > Export > Media, and make sure to choose the 4K resolution in the export settings.
DaVinci Resolve
DaVinci Resolve is a powerful video editing application known for its color grading and professional editing features. It’s widely used in the film and television industry. However, its complex interface may annoy beginners.
How to cut 4K videos in DaVinci Resolve:
- Download and install DaVinci Resolve.
- Open the software and create a new project.
- Import your 4K video by dragging it into the media pool.
- Drag the video to the timeline.
- Use the Blade Tool to make cuts at specific points on the timeline.
- After cutting, delete unnecessary sections and adjust your clips as needed.
- To export, go to the Deliver page, select the 4K resolution, and hit Add to Render Queue.

Conclusion
Cutting 4K videos without losing quality is possible, but you need to use the right tools and techniques. MiniTool MovieMaker is an excellent free option for beginners, while tools like Adobe Premiere Pro, DaVinci Resolve, and Final Cut Pro provide professional-grade features for advanced editing. No matter which 4K video cutter you choose, always remember to export in the original resolution to maintain the sharpness of your 4K footage.
About The Author

Position: Columnist
Yulia has a great passion for life. She enjoys photography and travel, and is always eager to record cherished moment through her lens. This also led to her strong interest in video editing, and she kept learning multimedia-related knowledge, hoping to bring readers better advice on images, audio, video, and related topics.
User Comments :