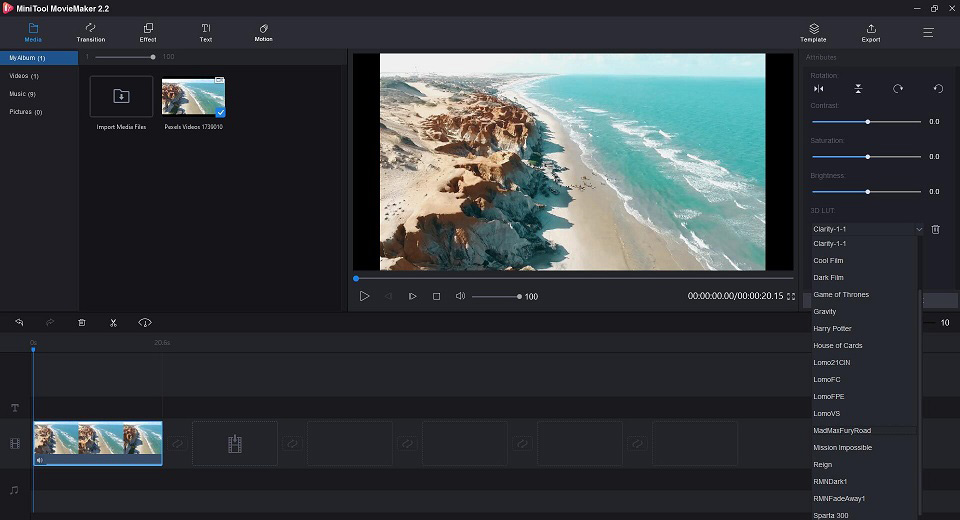
Applying LUTs is the quickest way to grade your video footage once you’ve color corrected it. It set preset colors for your video clips and a specific LUT can convert the material into your favorite movie.
About LUT
What is a LUT in video production?
Known as Lookup Table, LUT is a term used to describe a predetermined array of numbers that provides a shortcut for a specific computation. In the field of color grading, LUT is used to convert input color values into different output color values.
In other words, a LUT is a smart video preset. This video preset can help you immediately perform color grading and change the appearance of the video. You can apply it to your video footage or still images through editing software, which can help you to distinguish your work from other content creators.
1D LUT or 3D LUT?
1D LUT and 3D LUT are the most common types of LUTs. 1D LUT is controlled by a single parameter value and can be simplified to a preset gamma curve, which is sufficient for making basic color balance and contrast adjustments, while 3D LUT maps hue, saturation, and brightness to a single axis, so you can better control specific color values in the image.
Why do people use LUTs?
- Available at any time and free of charge.
- Set a predetermined look for a specific visual experience.
- Improve the speed of color grading.
- Use as a reference to develop your unique style.
Recommend post: Top 10 Best Video Loopers – Loop Videos for Free
How to Apply LUT to Video
Many excellent editing software on the market can help you apply LUT to video. Here we recommend MiniTool MovieMaker most. It is a professional yet free video editor and the biggest source of free LUTs.
Now, let’s learn how to apply LUT to video with this free video editor. Before applying LUT, make sure you have corrected the color.
Related article: How to Do Color Correction in Your Videos
Step 1. Free to launch MiniTool MovieMaker on your PC and select Full-Feature Mode to enter the main interface.
MiniTool MovieMakerClick to Download100%Clean & Safe
Step 2. Click Import Media Files to import your video and then click + to add it to the timeline. Or you can simply drag and drop the video to the timeline.
Step 3. Double-click the video clip on the timeline and the video editing window will pop up. To apply a LUT, click the drop arrow and select the one you like.

Step 4. Now, you can immediately see the result in the playback window. If you’re satisfied, just click OK. If you’re not happy with the result, just click Reset to cancel the change.
Step 5. Hit Export to open the exporting window, where you can give a name choose the output format, select the store destination, and even select the resolution for the video. At last, click Export.
Bottom Line
Now you know what a LUT is and how to apply it to your video footage. It’s time to have a practice. If you have any questions or suggestions about it, please let us know via [email protected] or share them in the comments section below.


User Comments :