

This post covers two simple picture-in-picture video editor tools, including MiniTool MovieMaker and Microsoft Clipchamp, to help you create eye-catching PiP videos in minutes.
What Is Picture-in-Picture Video Editing
Picture-in-picture (PiP) video editing is a common technique that layers one video or image over another, enabling both to be visible at the same time. The result includes a larger video background accompanied by smaller overlay clips in the foreground.
The PiP effect is particularly useful when creating tutorials or demos, overlaying an instructor or a screen recording onto a main demonstration video for clear guidance.
Best 2 Picture-in-Picture Video Editors for Beginners
With the right tool, it is not difficult to create a picture-in-picture effect. In the following sections, I will introduce two essential tools that make PiP effects simple and accessible.
- MiniTool MovieMaker
- Microsoft Clipchamp
1. MiniTool MovieMaker
MiniTool MovieMaker is a user-friendly picture-in-picture video editor for Windows users. The software has a multi-track timeline, currently with 9 video tracks (1 main track and 8 additional ones). This allows users to easily layer an overlay video or image onto your main background footage. I can also layer captions, filters, effects, motion effects, and stickers onto the video and edit them separately and flexibly.
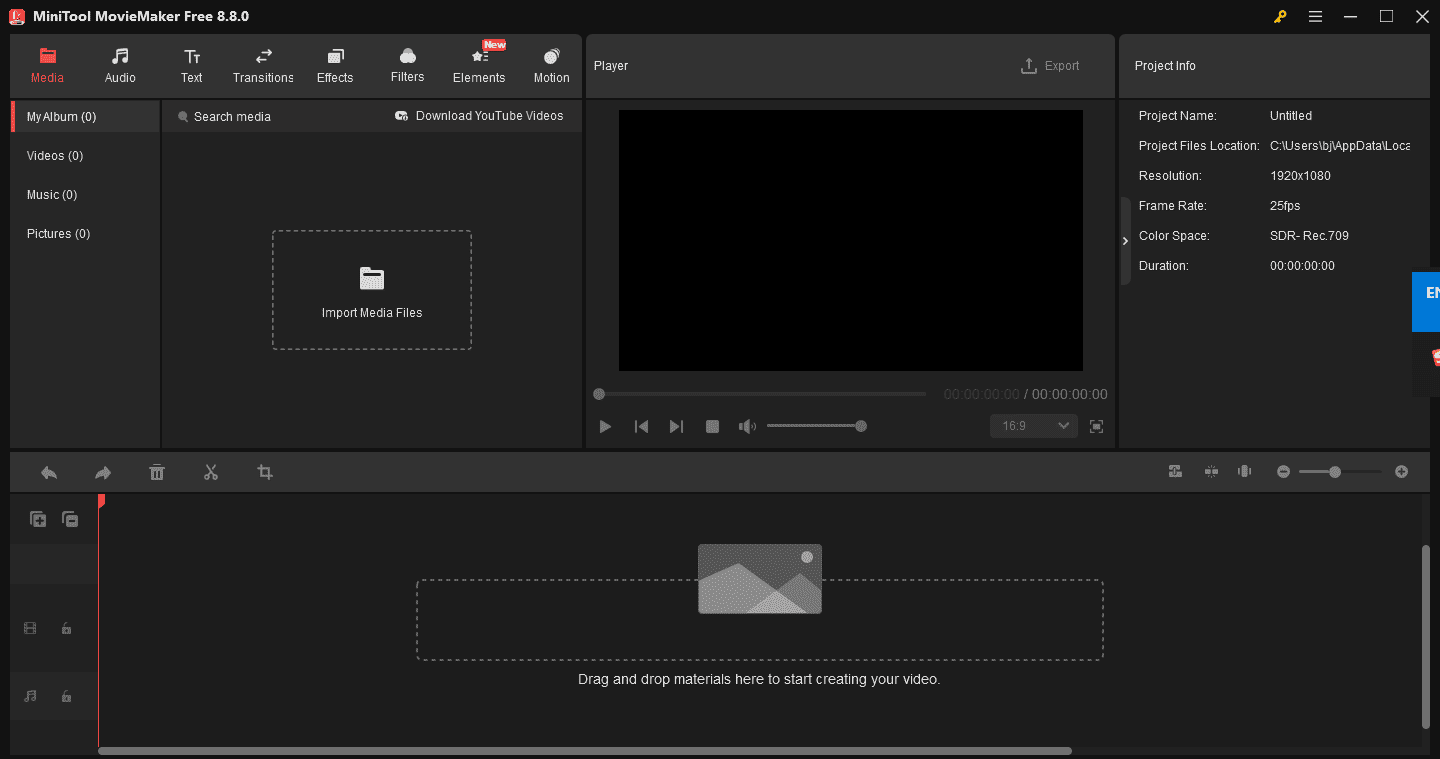
With its clean layout, creating PiP videos is easier than I thought. I just drag the overlay clip to a higher track and adjust its size and position directly in the preview window. Thanks to the software’s simple interface, this process is straightforward and perfect for beginners who need to craft picture-in-picture videos.
Additionally, this overlay video editor includes a suite of editing tools, such as cropping, aspect ratio adjustment,3D LUTs, and video text templates to enhance videos. Best of all, it offers a free, full-featured version that supports 4K export without a watermark.
2. Microsoft Clipchamp
Microsoft Clipchamp is the built-in picture-in-picture video editor for Windows 11. It is also accessible in browsers and available for Windows 10. The software does not have a hard fixed maximum limit on the number of video tracks.
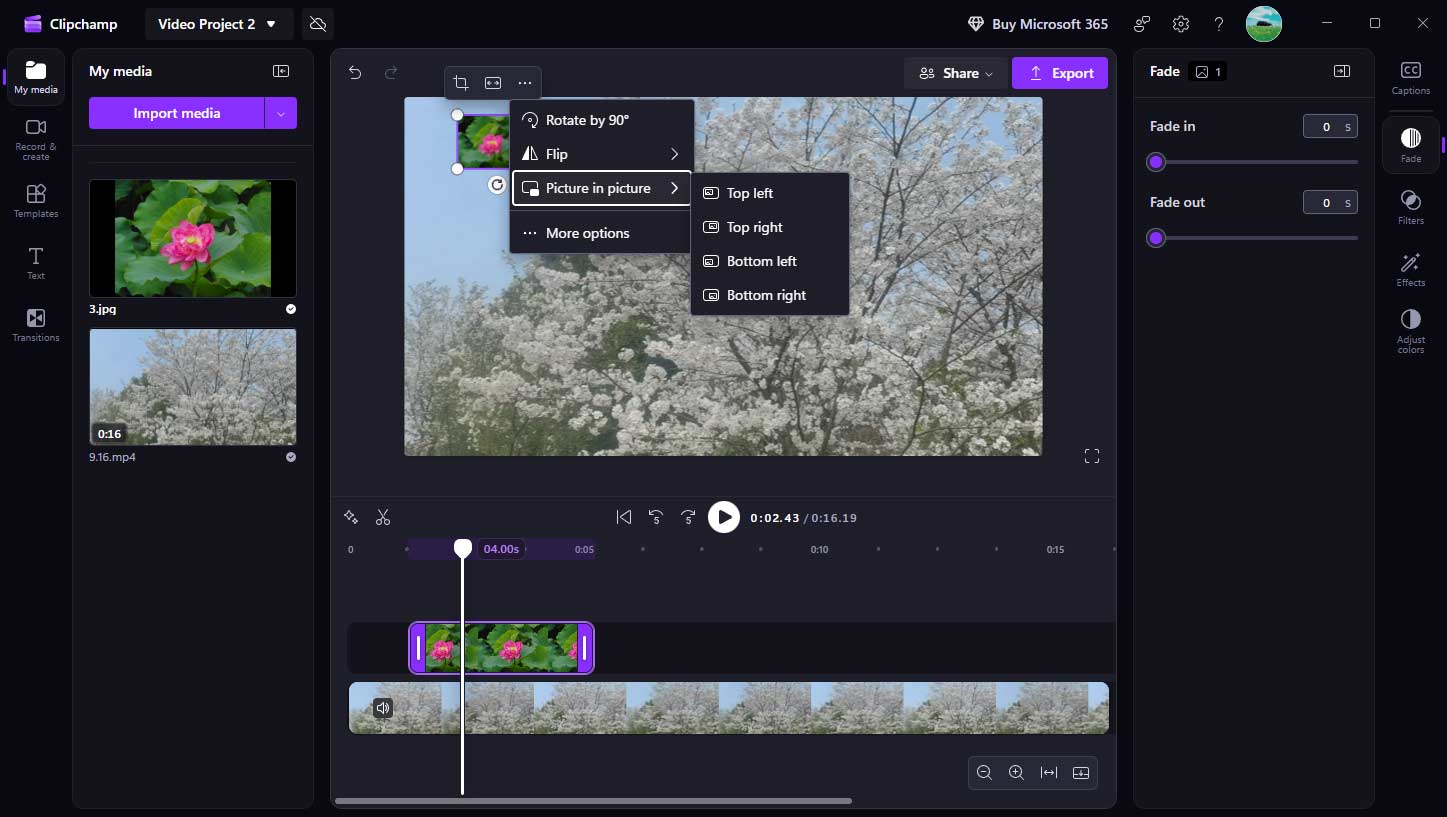
To create the PiP effect, just stack video/image clips one above the other on the timeline. Next, I can freely reposition the image/video overlay anywhere in the frame and drag its corners to resize it. The software also offers 4 options to place the overlay on the main video background.
Another feature that impressed me is the green screen effect. When I make a PiP video, this effect can remove the background from my overlay, easily creating a more unified look for the entire video.
Beyond PiP, Clipchamp features various tools for producing eye-catching videos, such as filters, color adjustments, transitions, text-to-speech, and automatic captions. The free version allows exports in up to 1080p resolution.
Picture-in-Picture Video Editor: Quick Comparison
Both MiniTool MovieMaker and Microsoft Clipchamp are picture-in-picture video editors designed for Windows users, particularly those with limited editing experience. Which one to choose? Here is a concise comparison table.
| Software | MiniTool MovieMaker | Microsoft Clipchamp |
| Platform | Windows 10/11 | Window 10/11and Web |
| PiP Support | Yes, via a multi-track timeline | Yes, via standard video layering on the timeline |
| Key Features | 9 video tracks, various video text templates, transitions, effects, filters, elements | Extensive stock library, auto captions |
| Export | Free 1080p and 4K export No watermark 2-minute limit after 3 exports | Free 1080p export 4K exports require a subscription No watermark No length limit |
| Best For | Beginners who want a simple, traditional desktop editor | Beginners needing a quick, accessible, and integrated tool |
How to Create PiP Videos: Step-by-Step Guide
Fast Track Steps:
- Download and install picture-in-picture video editor.
- Start a project and import media files.
- Layer the video/image clips on the timeline.
- Adjust the overlay and make other edits.
- Export the picture-in-picture video.
1. Install the Picture-in-Picture Video Editor
Click the button below to download and install the software on the computer.
 MiniTool MovieMaker
-
 Split and trim videos to remove redundance.
 - Change video aspect ratio to match screen sizes.
- Add bubble texts, bgm, transitions, and more effects.
- Create PiP or split-screen videos by multitrack editing.
2. Import Media
Launch the application and click New Project in the pop-up window to access the main user interface. Next, click Import Media Files to add your video or image files.
3. Add Files to the Timeline
First, drag and drop the main background video onto the main video track in the timeline. Next, drag the chosen PiP video or image on top of your background video. You can add up to 8 video tracks for multiple overlays.
4. Adjust the Overlay
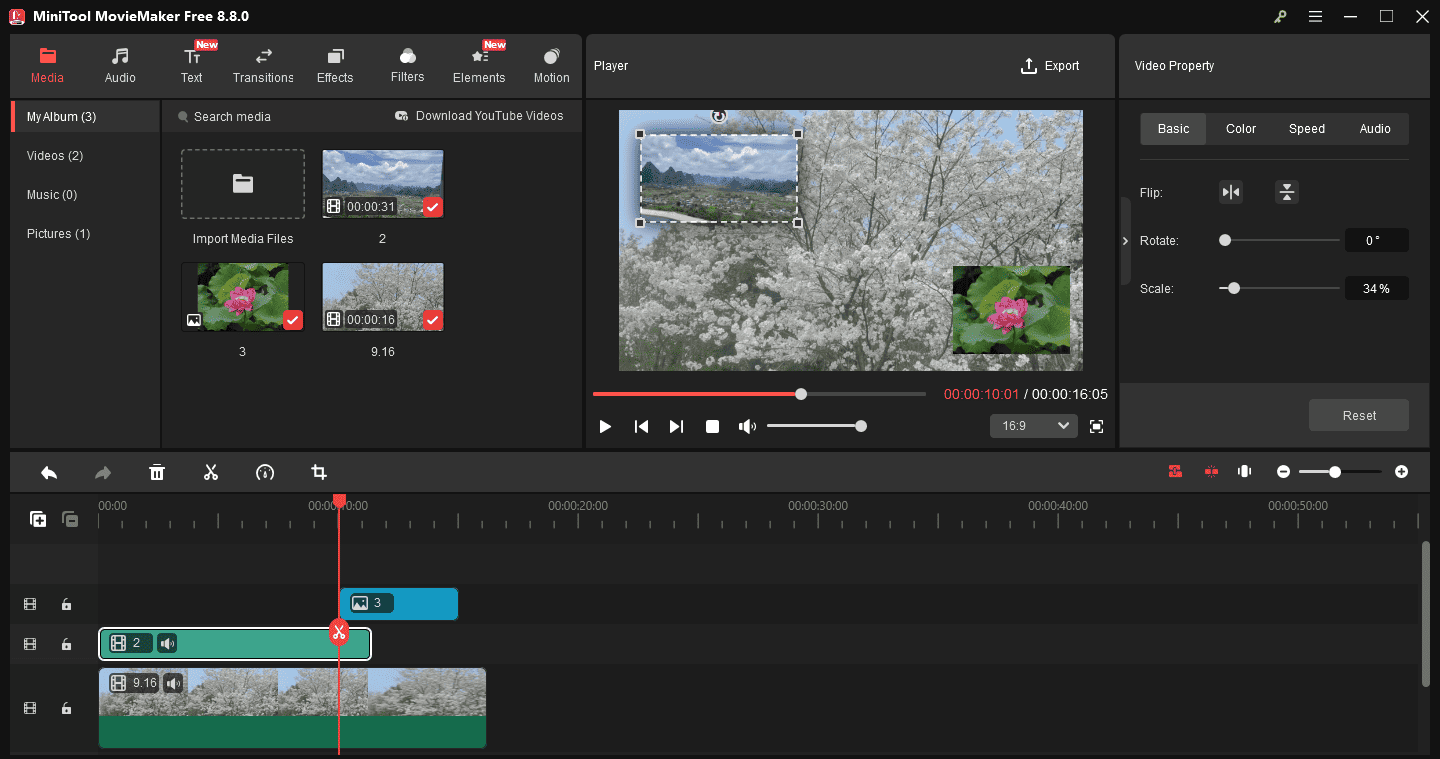
Click the overlay on the timeline. In the preview window, click and drag the corner handles to resize it. You can also click and drag the overlay itself to reposition it anywhere on the screen.
5. Edit the Video/Image Overlay
From the Video/Image Property panel on the right side, you can flip or rotate the overlay, edit contrast, saturation, and brightness under the Color tab, change the video playback speed, etc.
6. Export the PiP Video
Click Export in the upper-right corner. On the Export window, you can configure the output format, resolution, frame rate, and save path. Finally, click Export again to begin rendering the video.
Conclusion
With the picture-in-picture video editors in this post, I think everyone, especially beginners, can easily overlay videos, images, and other elements onto videos to create the desired result.
Finally, if you encounter problems while using MiniTool MovieMaker, contact the support team via [email protected] for help.
People Also Ask
1. Open the video editor and start a new project.
2. Click Import to add your video files to the media pool.
3. Place your main video on the bottom timeline track.
4. Drag your second video onto the track directly above the main video.
5. You can also add a third video onto the track above the second one.
6. In the preview window, drag the corner handles to scale down the video and change its position.
7. Save and export the video.
2. Start a project and import multiple pictures.
3. Adjust the clip’s order on the timeline.
4. Add transitions between clips, insert text, and apply effects.
5. Export the video.
About The Author

Position: Columnist
Cora is a tech writer specializing in digital media workflows, with over six years of hands-on experience in video post-production, media transcoding, and screen capture. Her writing is always clear and practical. Cora also produces in-depth software reviews for users across skill levels to help them find the right tool and enjoy video editing.
User Comments :