The Rise of Low Quality Video Making
The term “low quality video maker” refers to individuals or software that create videos that exhibit poor visual and audio quality. These videos often suffer from pixelation, blurry visuals, distorted audio, and other quality-related issues. While some low-quality videos are intentionally made for comedic effect or as memes, others are the result of inadequate video editing skills or the use of subpar editing software.
Low Quality Video Maker Memes and Humor
The Internet thrives on memes, and the low-quality video maker trend has not gone unnoticed. Memes poking fun at the poor quality of certain videos have become increasingly popular. They often highlight the distorted visuals, exaggerated audio glitches, or other unintentional comedic elements found in low-quality videos. This light-hearted humor has resonated with many Internet users, leading to the spread of low quality video maker memes across various platforms.
Video Editing Software Limitations
One of the key factors contributing to low-quality videos is the choice of video editing software. While there are numerous editing tools available, not all of them guarantee professional-quality results. Some users may opt for free or beginner-friendly software options, which often lack advanced rendering capabilities or provide limited control over video quality settings.
While low quality video makers (software) offer a range of features and functionalities, they may struggle to produce high-quality output, especially when used by inexperienced or unaware users. Users might inadvertently select low-quality rendering settings or encounter technical issues that affect the final video output.
How to Convert Low Quality Videos to High Quality
If you find yourself with a low-quality video and want to improve its visual and audio fidelity, using reliable video editing software like MiniTool MovieMaker or MiniTool Video Converter can help.
Way 1. Change Low Quality to High Quality with MiniTool MovieMaker
MiniTool MovieMaker offers advanced features that allow users to enhance and refine their videos.
The following is a quick guide for you to convert a low-quality video to high-quality.
MiniTool MovieMakerClick to Download100%Clean & Safe
Step 1. Download and install MiniTool MovieMaker on your Windows PC. It supports most Windows operating systems like Windows 11, 10, 8, and Windows 7.
Step 2. Open MiniTool MovieMaker. The main windows will appear with a small window overlay. In the small popup, you can select a preferred video aspect ratio and click the New Project button in the upper left of the window to continue.
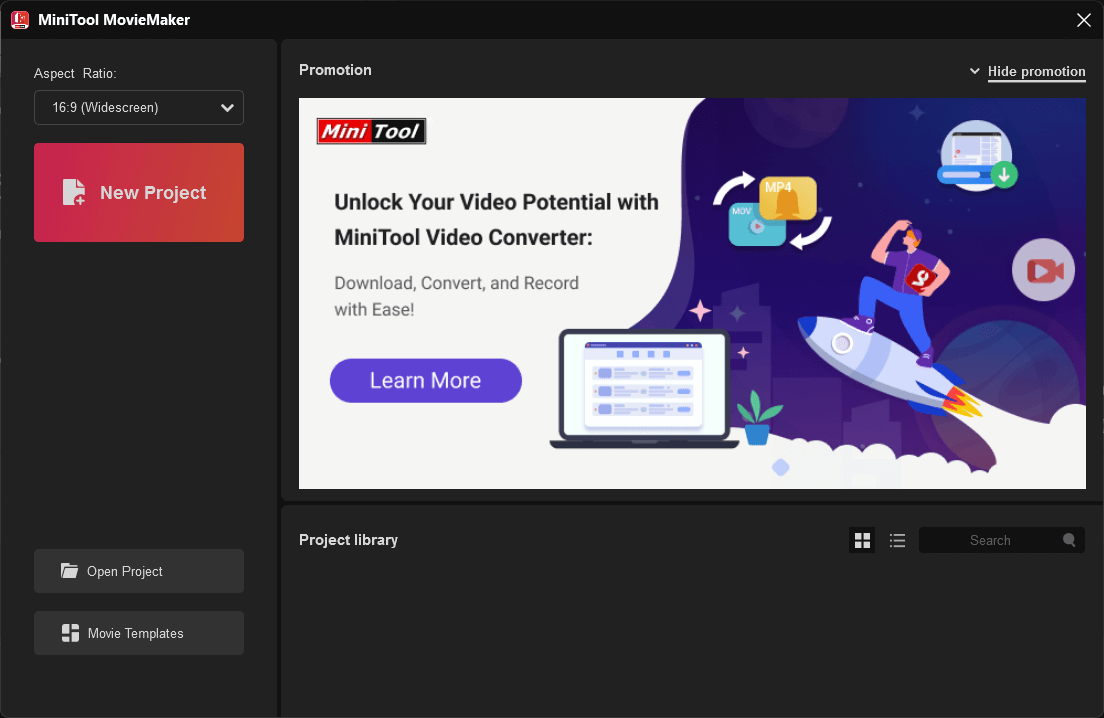
Or you can directly close the cover window to enter the main interface of MiniTool MovieMaker. Then you can set your aspect ratio in the Player section (lower right).
Step 3. Click Import Media Files to upload your low-quality video to MiniTool MovieMaker.
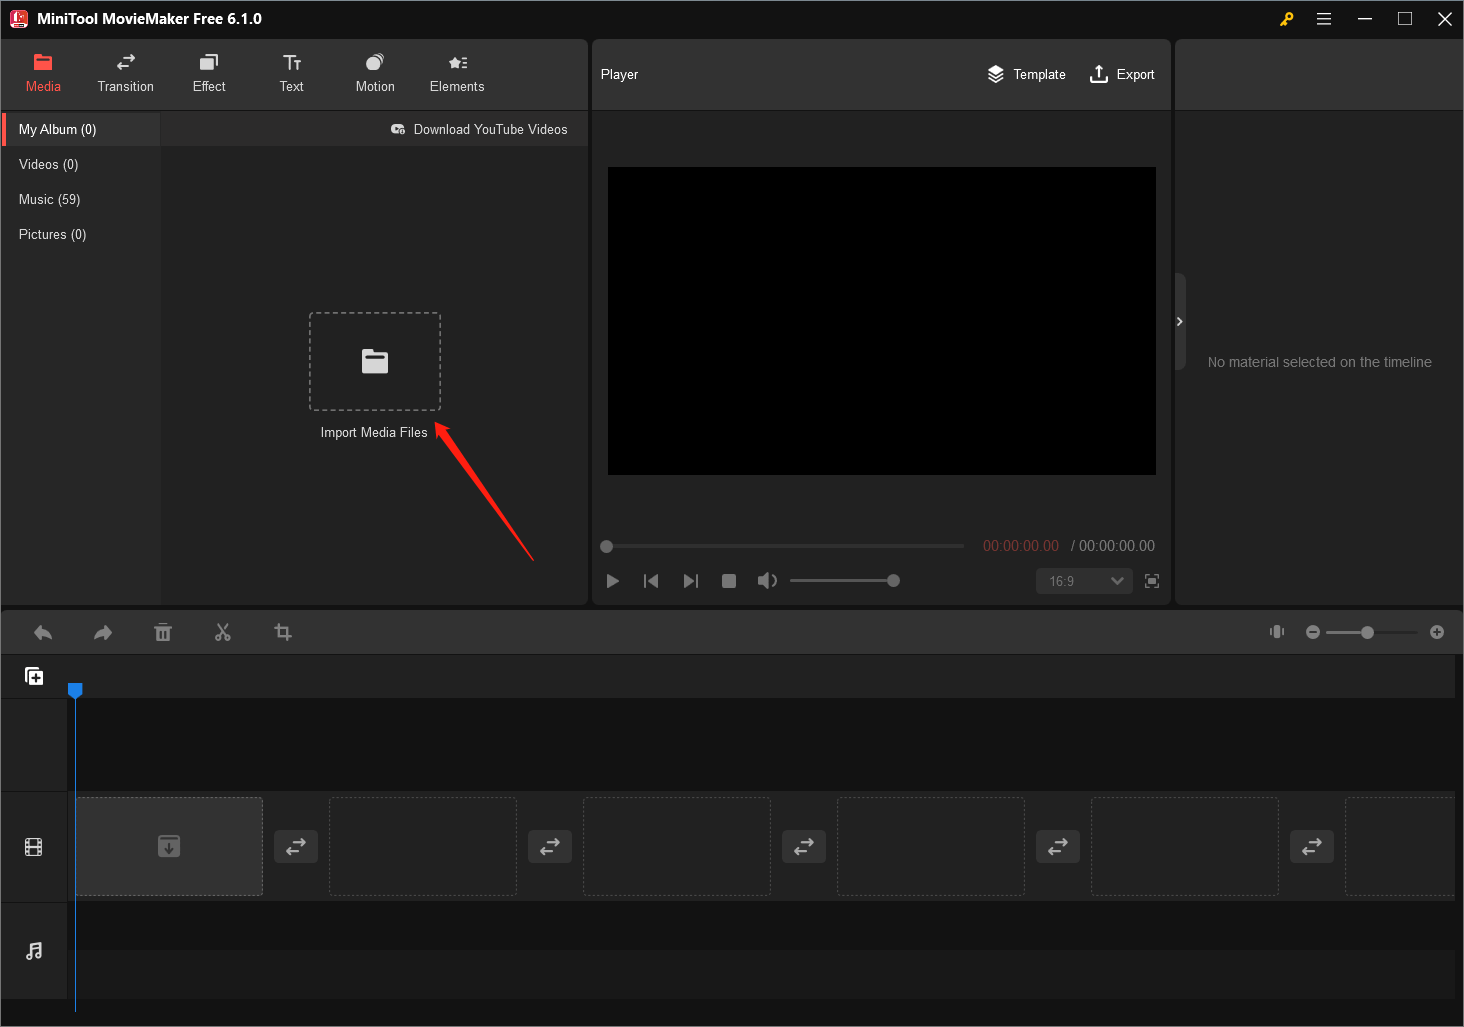
Step 4. Drag and drop the uploaded low-quality video to the video track of the below timeline.
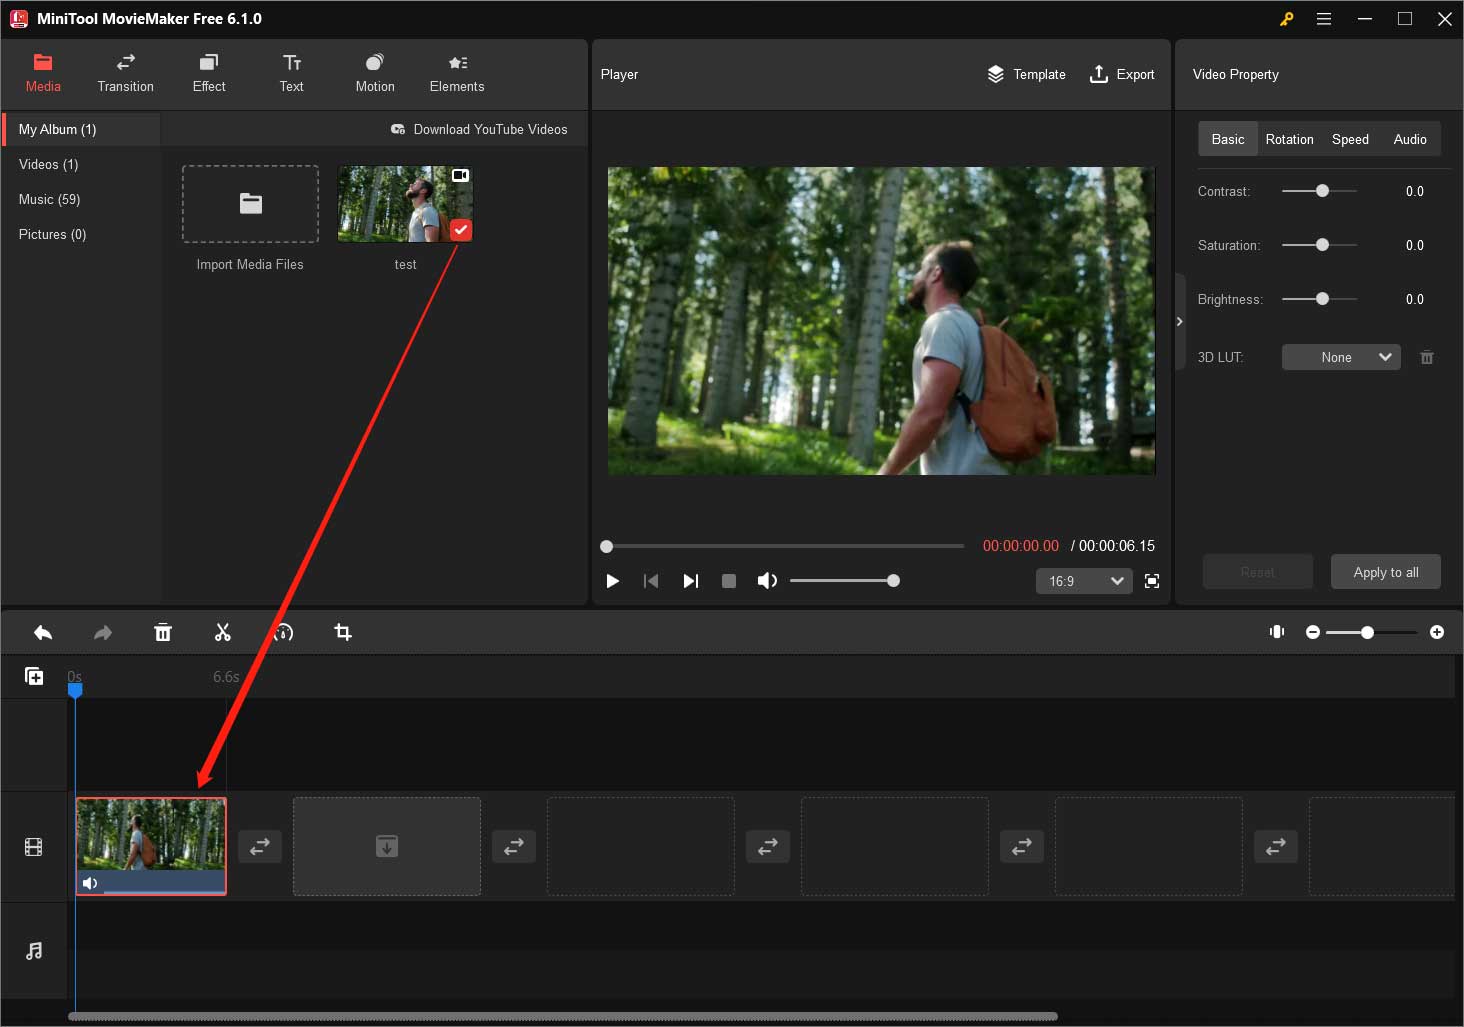
Step 5. You can do some editing to the low-quality video by the way like adding some filters, trimming unwanted parts, replacing its background music, etc.
Step 6. Click the Export option in the upper right corner of the Player section.
Step 7. Then, a new window will pop up showing you the parameters of the export video. There, you can specify the name, format, and save location of the video. The default resolution is 1080p, which is the ideal high quality for most users.
Step 8. If you would like to change the video resolution, just click the Settings icon.
Step 9. In the new popup, you can further customize the quality, encoder, resolution, bit rate, and frame rate of the export video. Just choose the proper settings to make it a high-quality video and click the OK button to save the changes.
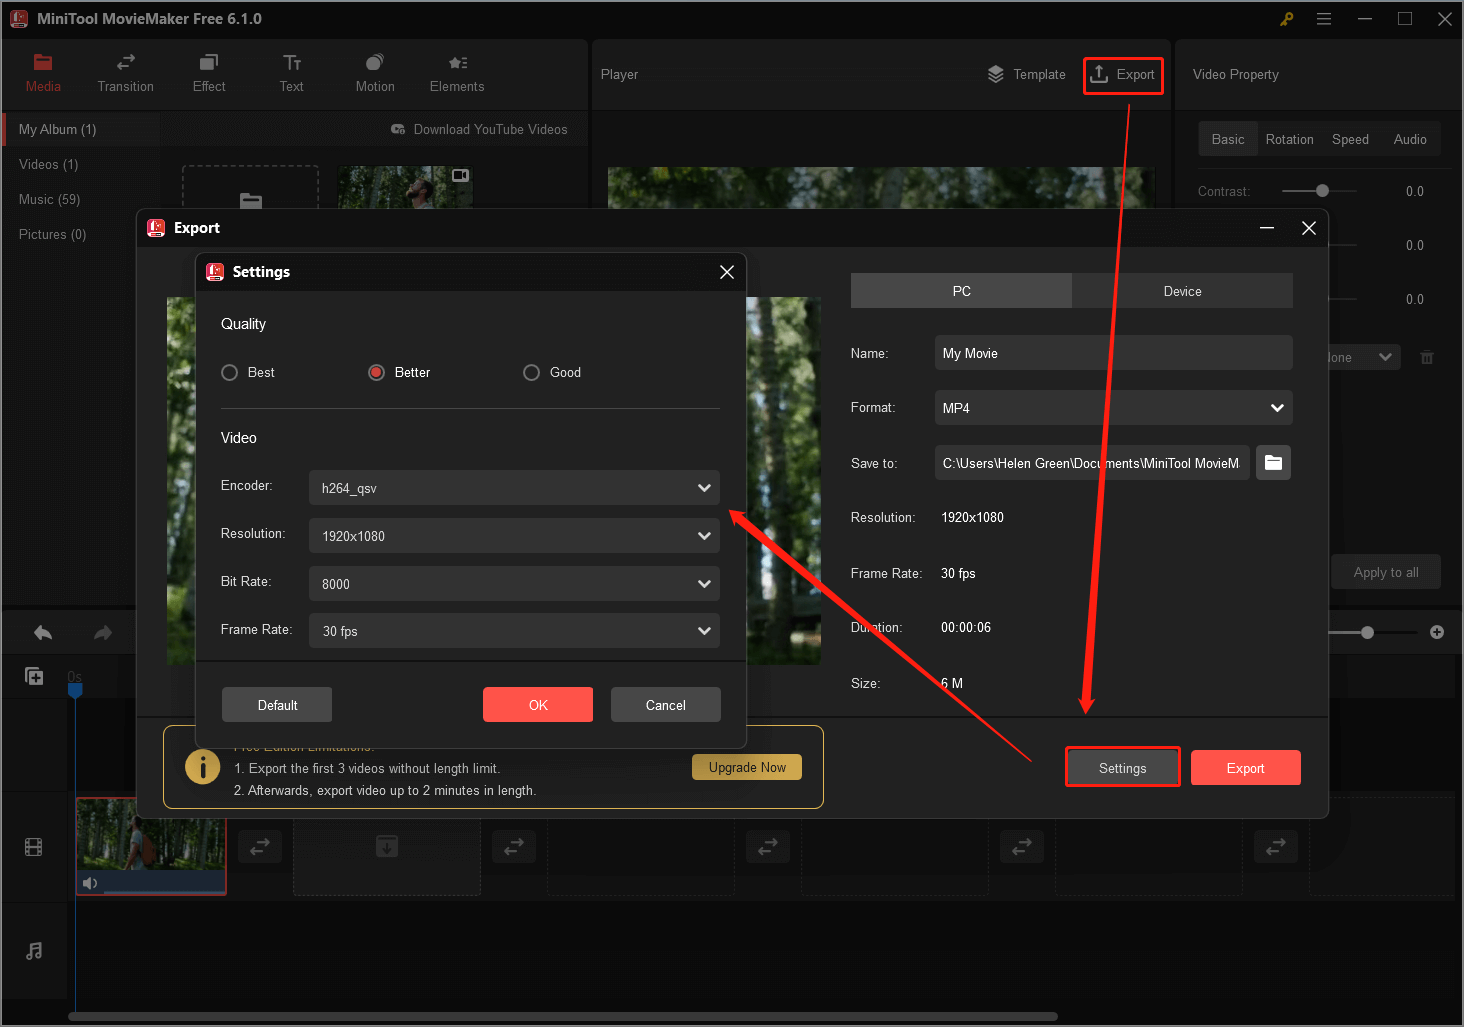
Step 10. Finally, click the Export button to start the conversion.
Wait until the process finishes. Then, you will get your high-quality video from the original low-quality video.
Way 2. Turn Low Quality into High Quality by MiniTool Video Converter
Now, let’s see how to upscale the quality of low-resolution videos using another MiniTool product – MiniTool Video Converter.
MiniTool Video ConverterClick to Download100%Clean & Safe
1. Download, install, and launch this program on your computer.
2. In its default Converting subtab of the Video Convert tab, drag and drop your low-quality video into the center area.
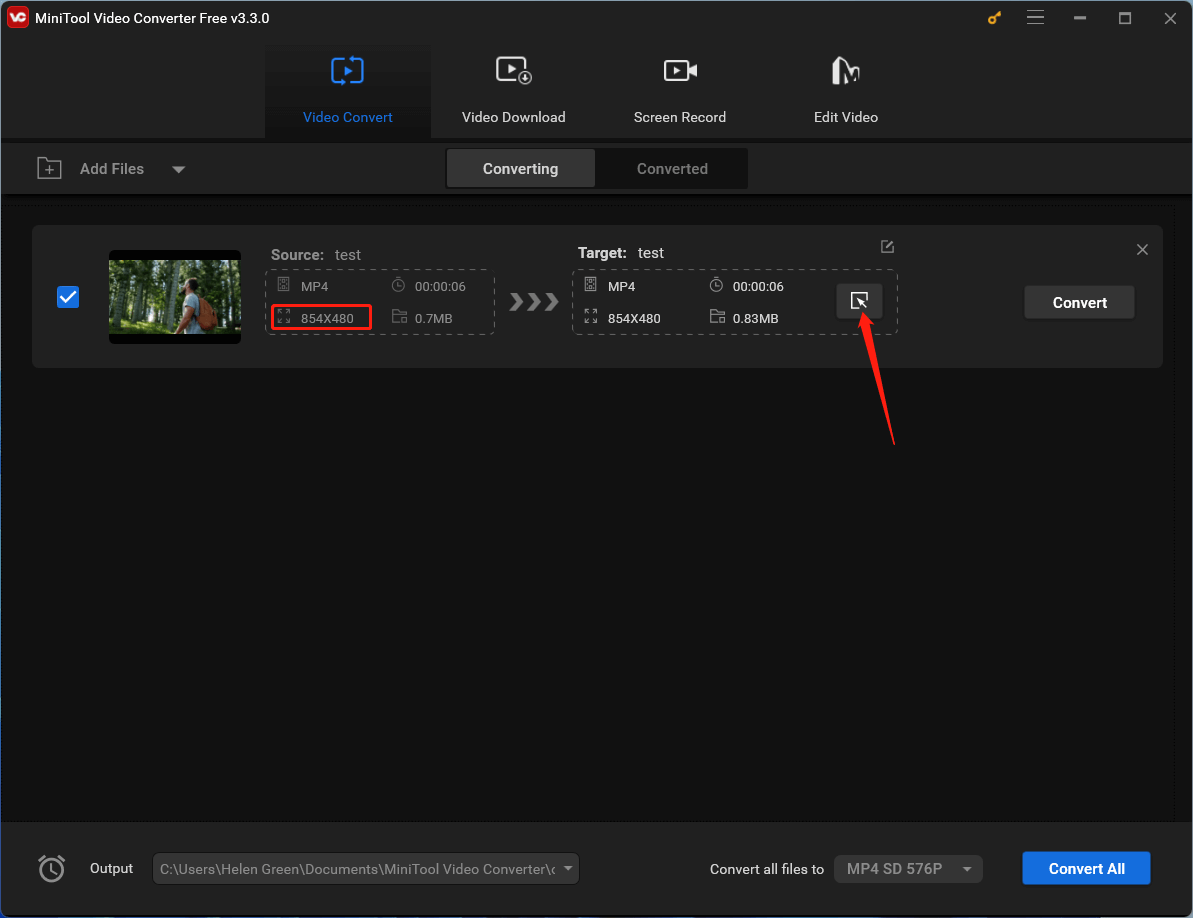
3. Then, click the settings icon of the Target area to personalize the parameters of the destination video.
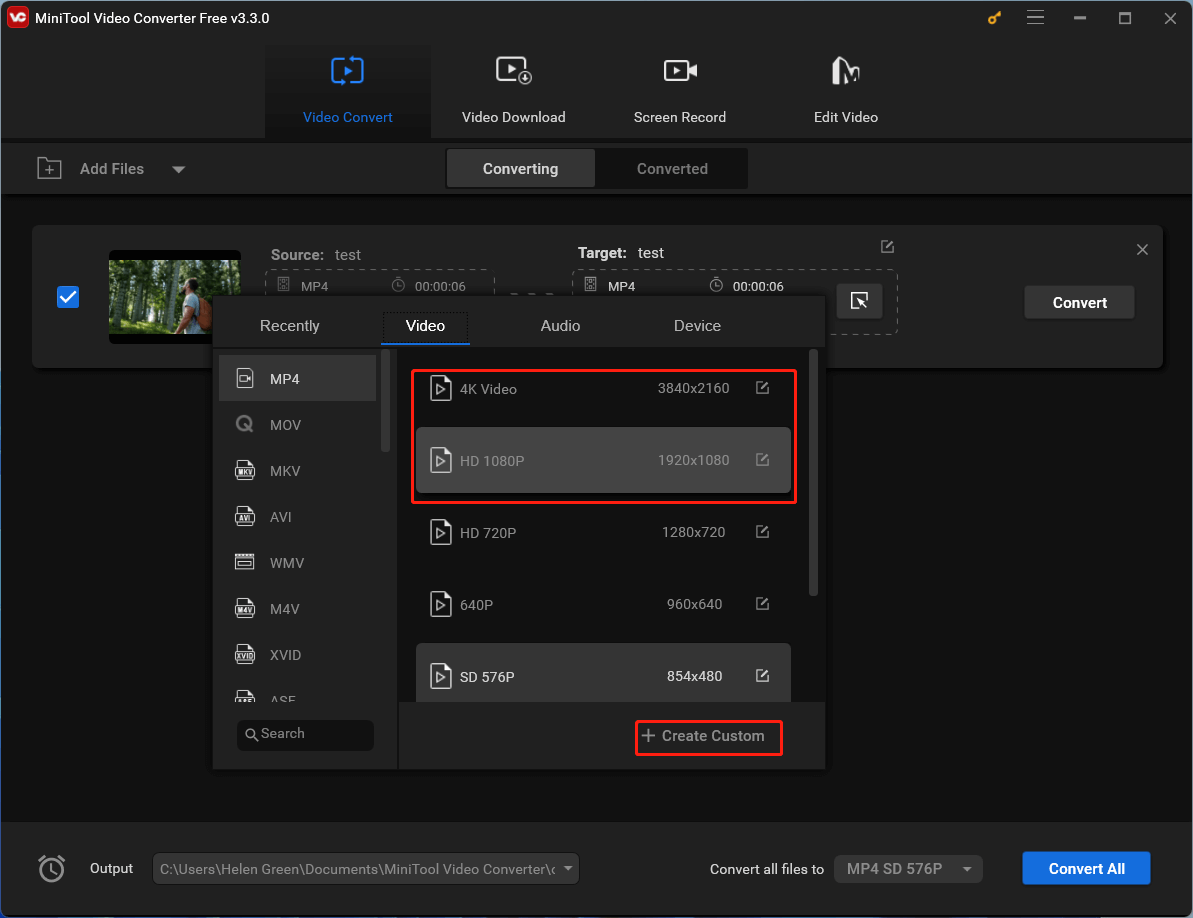
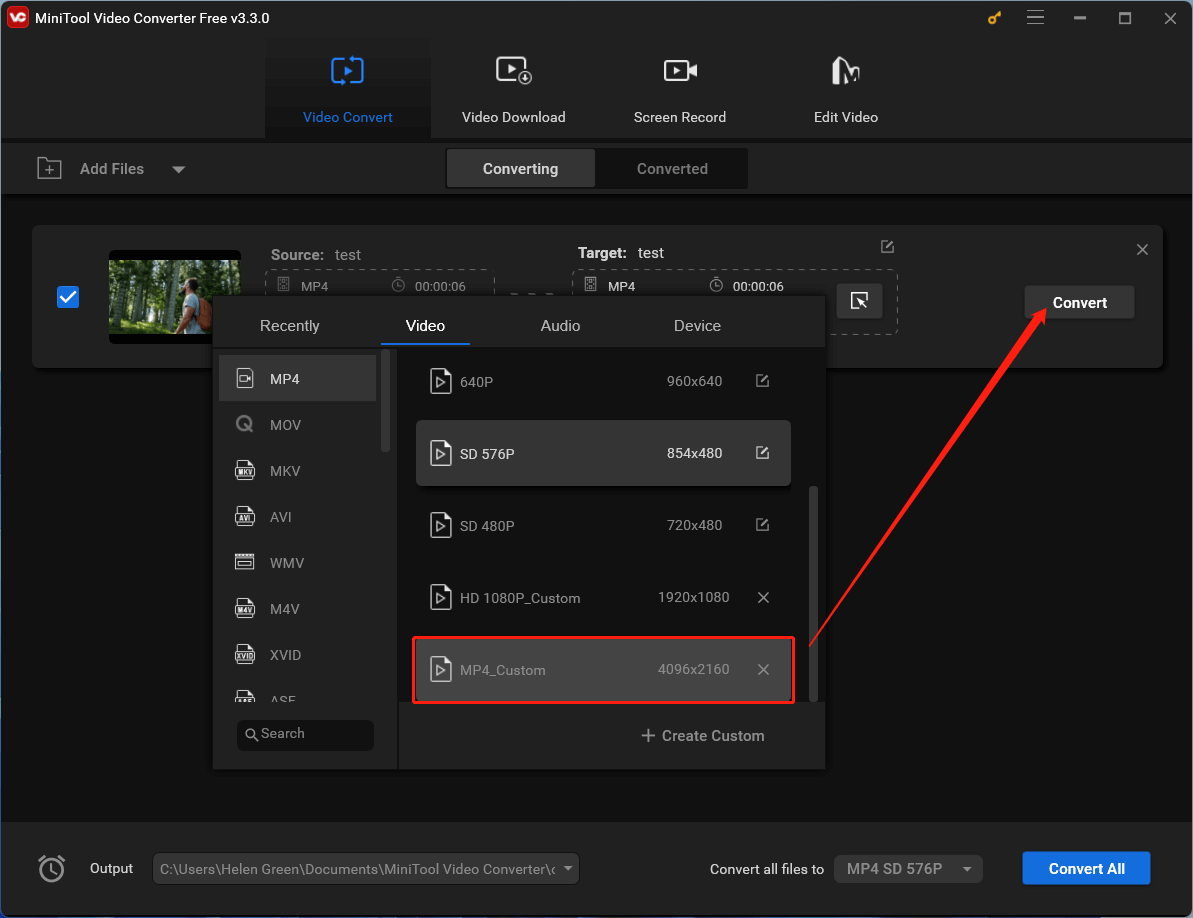
4. In the next window, switch to the Video tab. You can keep the original format of the video but select a higher resolution. You can further customize the selected format through the settings icon behind it. Or you can click the Create Custom option to fully specify the video settings.
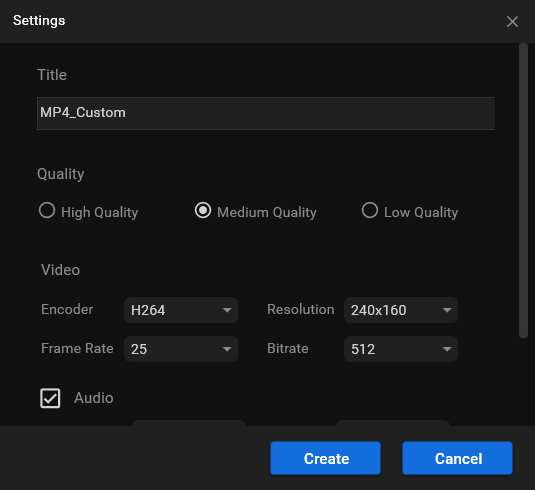
5. Next, set the quality, encoder, resolution, frame rate, and bitrate of the video. If it has embedded audio, you can customize the encoder, sample rate, channel, and bitrate of the audio. Click the Create button to save your settings.
6. You will be directed back to the upper-level window. There, choose your customized video format and click the Convert button in the main interface to begin the conversion.
Wait until the task completes.
Conclusion
The low quality video maker trend, while often humorous and meme-worthy, highlights the importance of using proper video editing tools and techniques. While some videos intentionally embrace low quality for comedic effect, many others suffer from unintentional issues caused by limited editing skills or inadequate software. By selecting a reliable video editing software like MiniTool MovieMaker and understanding its settings, users can create high-quality videos that capture the attention of their audience without becoming the subject of memes.


User Comments :