What Is Illustrator Recolor Artwork?
Recolor Artwork is a collection of magic features from Adobe Illustrator that can easily generate an unlimited number of color variations. There are three amazing features including Color Library, Color Wheel, and Color Theme Picker. With Illustrator, users can intelligently find the color palette when designing an artwork.
With the help of the Adobe Illustrator Recolor Artwork tool, you can automatically extract colors from any image and apply them directly to your creations. Even better, it enables you to intelligently pick out a brand-new palette from an existing image, move it up, and apply it as yours. Also, you can quickly make changes to the tray on the fly. It used to take minutes to hours to view trays of color combinations in a design, but now it’s just a click away.
How to Recolor Artwork in Illustrator?
Introduction to Recolor Artwork
There are two options to go to the Recolor Artwork.
Option 1: Select the Artwork and Go to Properties > Click the Recolor button.
Option 2: Select the Artwork and Go to Edit > Edit Colors > Recolor Artwork.
Let’s get started by introducing the below options for recoloring artwork:
- Undo: Cancel the latest color adjustments to the artwork.
- Redo: Revert the latest changes that were reverted by Undo.
- Reset: Remove all color adjustments and return to the default dialog settings.
- Color Library: Select a color from the pre-defined color library.
- Colors: Select how many colors you need to use in your artwork.
- Color Theme Picker: Choose a color palette from one or more pictures, artwork, or selecting regions.
- Color wheel: Show and modify the order, brightness, saturation, and hue of colors.
- Color order: Click to modify the order of the colors at random.
- Prominent Colors: Displays all colors that are prominent in your artwork depending on their hue and other properties.
- Saturation and Hue and Lightness and Hue: Use the sliders to adjust the values, or the buttons next to the color wheel to change them at random.
- Save: Use the button to save your color palette.
- Advanced Options: Use the button to access advanced recolor options.
Color Library
You can recolor artwork with predefined colors from the Color Library drop-down menu. There are color groups, document swatches, or preset color themes available. All of the colors and themes you’ve defined are added to your Swatches panel as color groups and can be recolored.
Color Wheel
In the Recolor Artwork dialog box, the color wheel shows the color stops for each color. The color wheel can be used to change the color of the artwork in the following steps:
Step 1: Select the Artwork.
Step 2: Select the Properties Panel to click the Recolor button, and then open the Recolor Artwork dialog box.
Step 3: Click the Edit tab to see colors in the selected artwork in a color wheel. The program will choose a color from the selected artwork for the color wheel.
Step 4: Drag the colors in the color wheel to edit them.
Step 5: Click on Eyedropper to recreate the original colors from the artwork.
Step 6: Select the Link Harmony Colors option to edit all of the colors.
Step 7: Drag the colors in the color wheel to edit them together.
Step 8: Click on OK to save the color for the selected artwork.
The Illustrator recolor artwork tool gives you an efficient way to quickly and graphically change a range of colors.
Color Theme Picker
This feature shows you how to use recolor artwork in Illustrator and how to select a palette from a piece of artwork or images on the canvas or selected parts. And, you can use them to recolor your current artwork. First, select Color Theme Picker to open the color picker from the Recolor Artwork dialog box. Then, choose one option below:
Option 1: On the canvas, select the object from which you want to choose your color palette.
Option 2: Hold Shift and pick up colors from several objects.
Option 3: To select colors, drag to marquee-select specific sections of the artwork.
How to Get the Best Design Effect?
MiniTool MovieMaker is a free video color correction software that is recommended here because the colors in your artwork can be changed simply and quickly.
MiniTool MovieMakerClick to Download100%Clean & Safe
Users can click the above Download button to install it on their computers. In this section, we can use this software to get the best design effect for your artwork. Let’s see how it works:
#1. Import Your Artwork
Step 1: Launch this video color correction software on your computer and close the Project library window.
Step 2: Click the Import Media Files under the Media tab to import your artwork.
Step 3: Click + to add your artwork to the below timeline or drag it to the below timeline.
#2. Add the Effect to Your Artwork
There are three solutions to add the effect to change the color of your artwork.
Solution 1:
Click on Effect in the upper left corner of the interface to enter the effect library. There are 10 Artistic, 17 Common, 28 Instagram-like, and 1 MotionBlur effect available for you, all of which are listed below.
Artistic:
- Blackcat
- Sweets
- Whitecat
- FilmGrain
- OldFilm
- OldPhoto
- Pixelate
- Posterization
- RedGreen
- Threshold
Common:
- None
- Beautify
- Befori
- Calm
- Clarendon
- Cold
- Dream
- Holiday
- Industry
- Lark
- Lightness
- Refresh
- Romantic
- Summary
- Sunderland
- Vivid
- Warm
Instagram-Like:
- Emerald
- Evergreen
- Freud
- Latte
- Sakura
- 1977
- Antique
- Brannan
- Brooklyn
- Cool
- Earlybird
- Flushed
- Fresh New
- Healthy
- Hudson
- Inkwell
- Kevin
- Lomo
- Pixar
- Sierra
- Skin Whiten
- Sunrise
- Sunset
- Sutro
- Tender
- Toaster
- Walden
- Xpro ‖
MotionBlur:
- ColorJittering

If you want to find the right effect for your artwork, you can hover over the effect that you want to select to preview, then click the Download icon in the bottom right corner to download it.
Next, select the artwork on the timeline to highlight it and click + to add the effect to the timeline. Alternatively, drag the effect onto the artwork on the timeline.
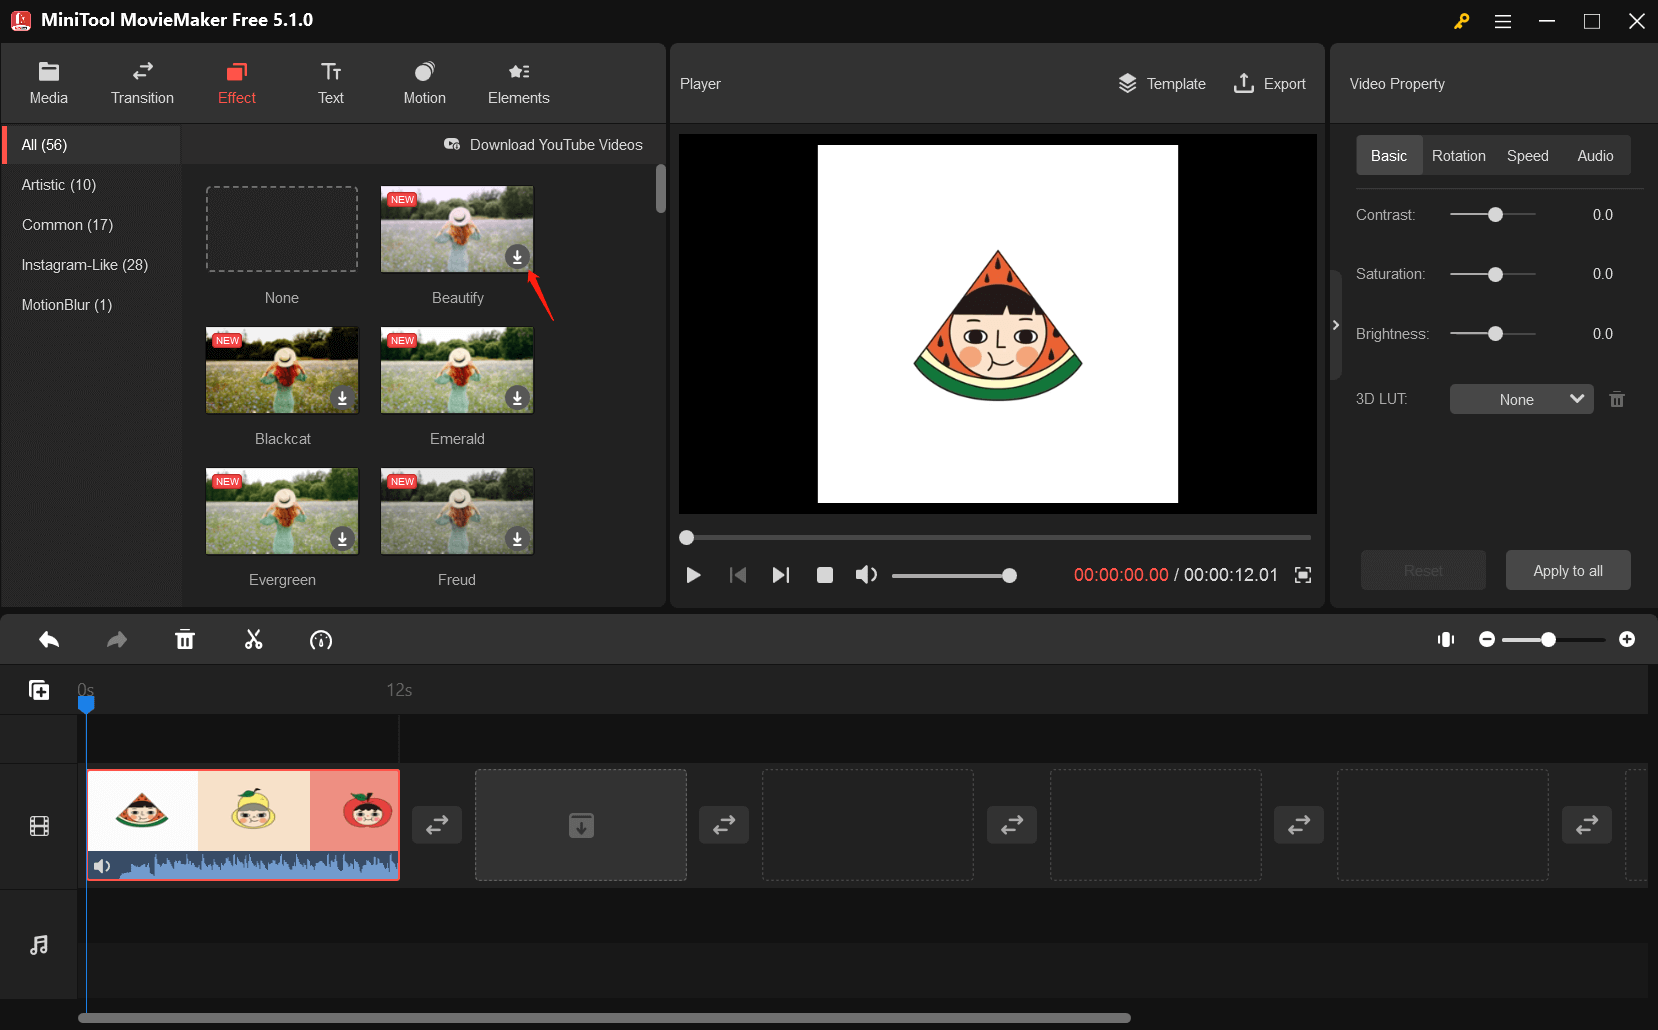
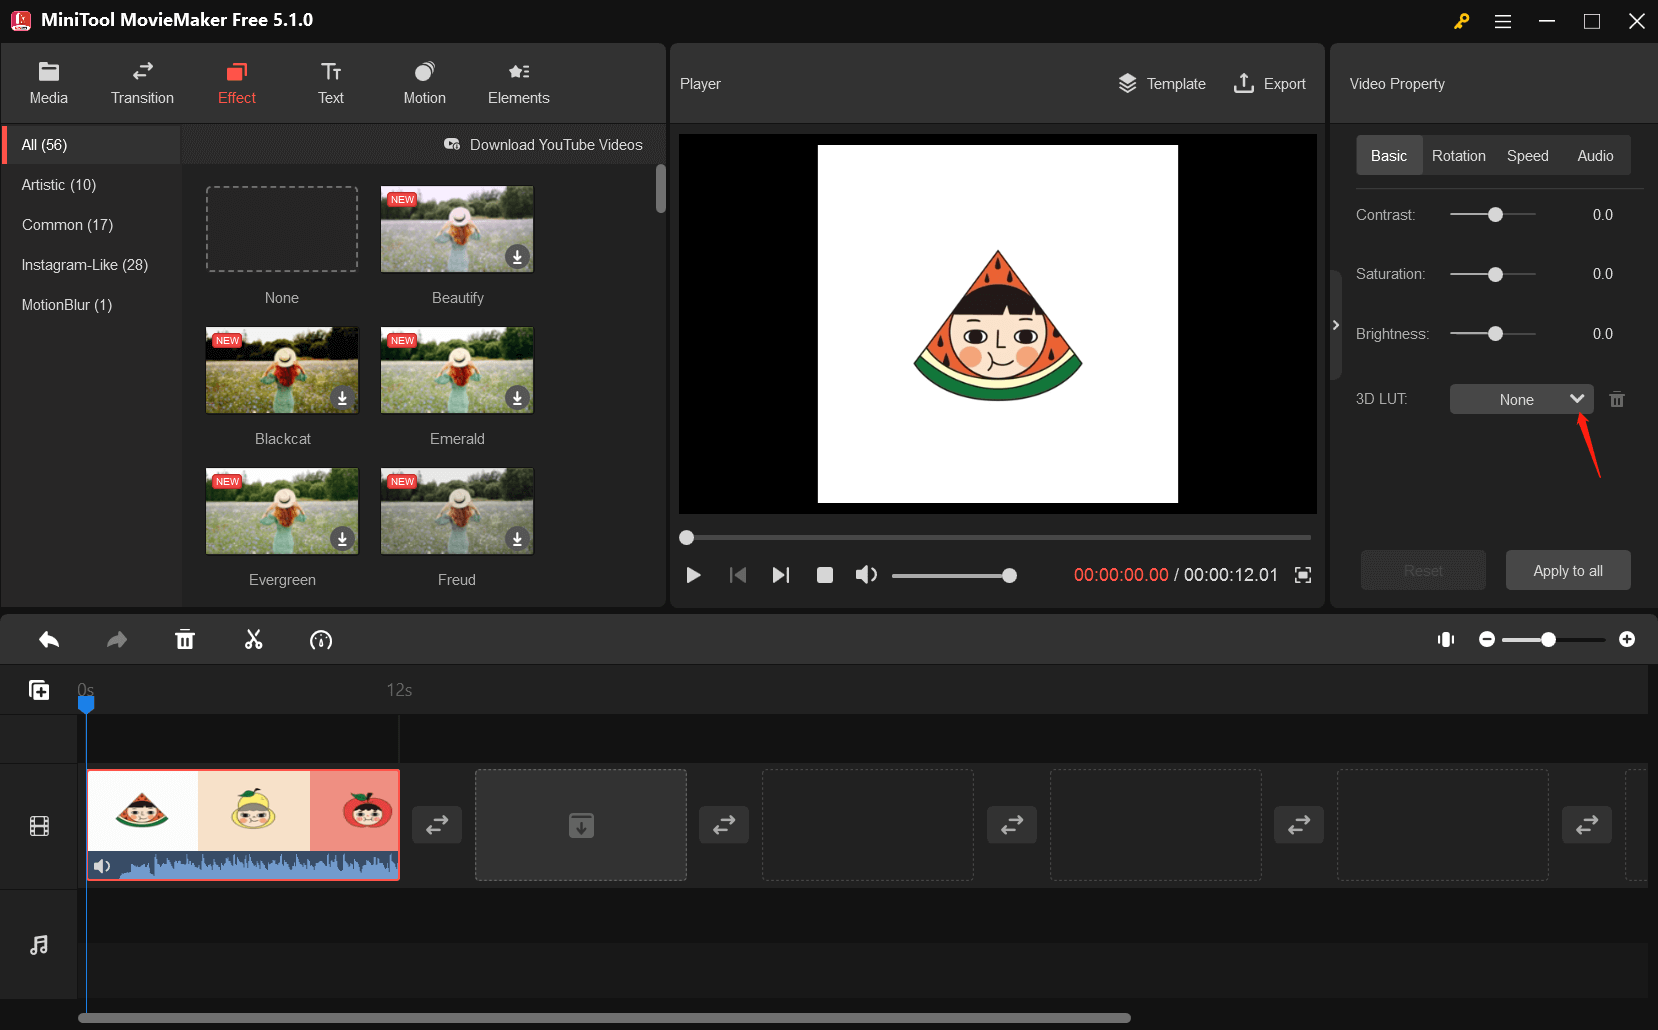
Solution 2:
Click on the artwork on the timeline, and the Video Property will appear in the upper right corner of the interface. In the Basic tab, you can move the sliders to adjust the contrast, saturation, and brightness to recolor your work.
Tip: You can immediately see the color change in the preview window. If you want to cancel all the changes, you can click the Reset button directly. Then, you can adjust the color again.
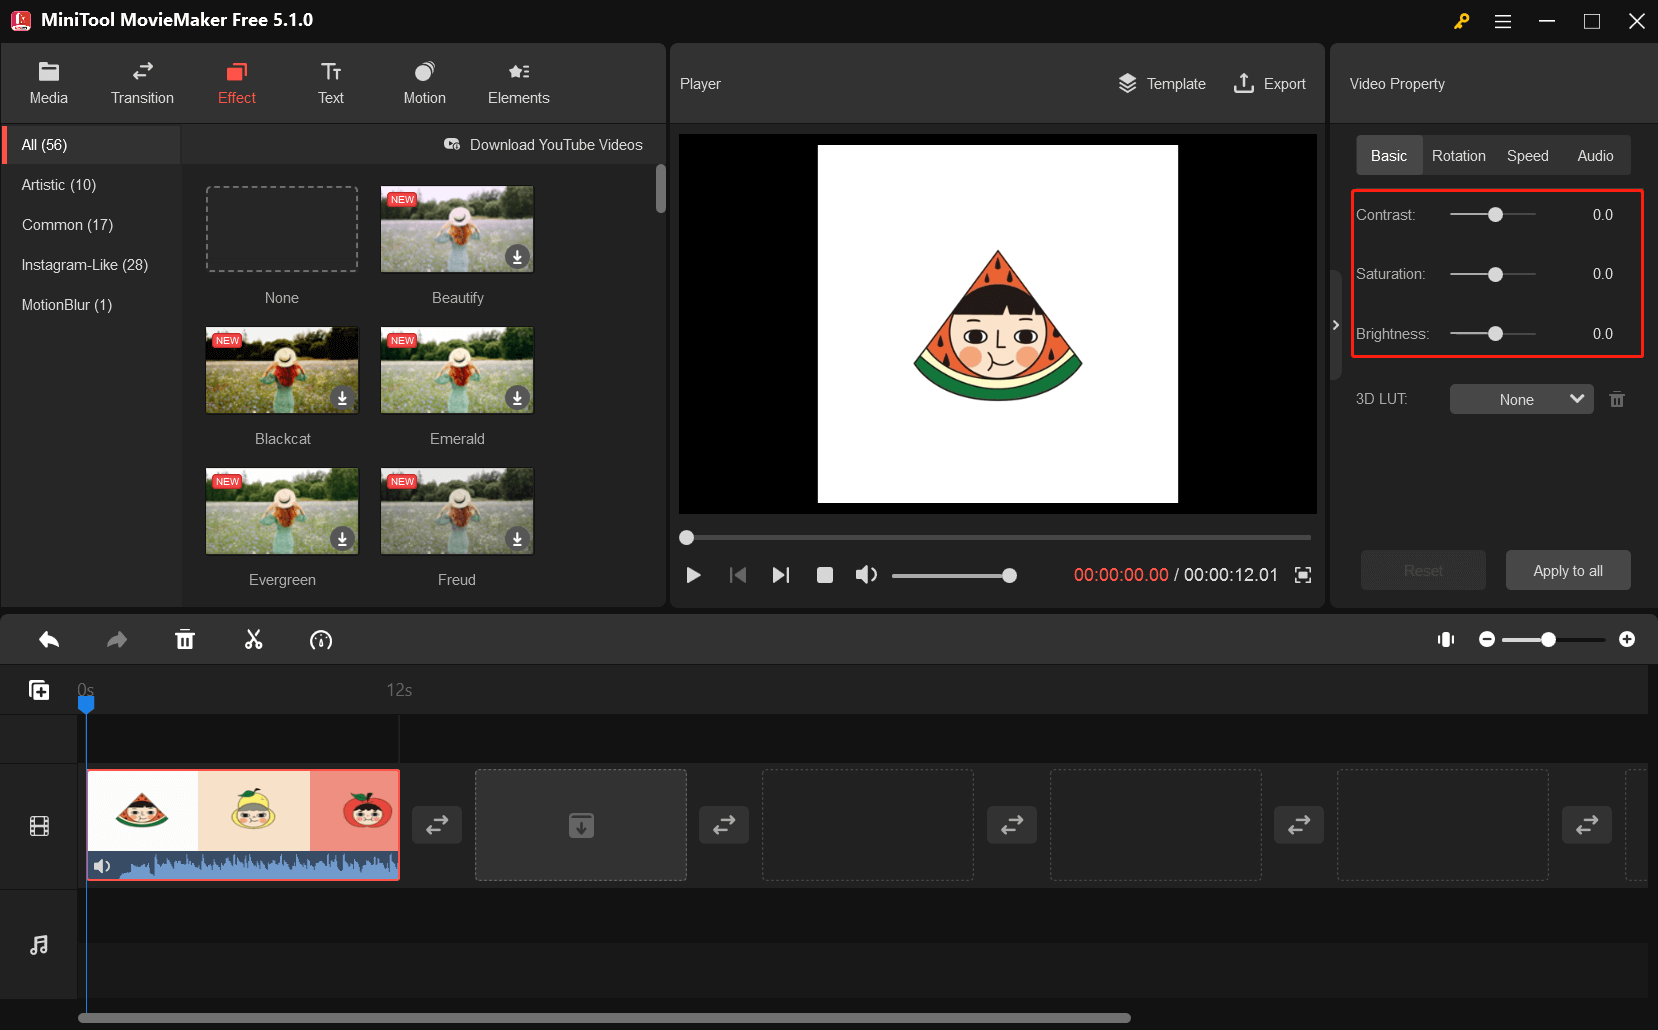
Solution 3:
In the Basic tab, you can also apply a 3D LUT effect to recolor your artwork. Just click the desired 3D LUT option from the drop-down list.
Here are some typical examples:
- 007 Series
- B&W Film
- Batman
- Clarity-1-1
- Cool Film
- Dark Film
- Gravity
- Harry Potter
- LomoFC
- LomoFPE
- LomoVS
- Reign
- Sparta 300
- Star Wars
- Walking Dead Warm Film
#3. Export Your Artwork
Now you have completed color correction on your artwork. Please click on Export in the toolbar to pop up the Export window. You can rename your artwork, select the output format, choose the save destination, and adjust the resolution, quality, and bit rate. Then, click the Export button and wait for the export process. Once done, users can click the Find Target button to view the exported artwork.
How to Select Colors in Illustrator?
In Illustrator recolor artwork, you can choose colors from a range of tools, panels, and dialog boxes. How to select a color depends on the needs of your artwork.
To select a color, you can apply any of the following features:
Swatches panel and swatch library panels: Both individual colors and color groups are provided. You have the option of using pre-existing swatches and libraries or creating your own. Also, you can import libraries.
Color Picker: It offers a color spectrum that you can choose colors visually and color value text fields that you can define colors and color swatches manually.
Eyedropper tool: When you select this tool, it takes color samples from your artwork.
You may also like: 5 Best Color Matching Apps for Both Android and iOS
Color panel: A color spectrum, specific color value sliders (such as a Cyan slider), and color value text boxes are all provided. From the Color panel, you can choose the colors for the fill and stroke. With the Color Panel’s menu, you can make inverse and complementary colors for the current fill or stroke color as well as swatches of the selected color.
Color Guide panel: Different color variations can be created by using tones, shades, warm and cool colors, or bright and muted colors. In the Edit Colors or Recolor Artwork dialog box, you can access a color group from this panel.
Edit Colors or Recolor Artwork dialog box: A piece of this dialog box offers tools for accurately specifying or modifying the colors in a color group or artwork. The other section enables you to recolor your artwork with colors from the color group or reduce or convert your colors for output.
Add Selected Colors command or New Color Group button: You can make a color group from the colors in the selected artwork. The Swatches panel is where you’ll find both the command and button.
How to Adjust Colors in Illustrator?
Blend Colors
The Blend commands produce a succession of intermediate colors from a collection of three or more filled objects based on whether the objects are vertical or horizontal oriented or their stacking order. Strokes and unpainted objects are not impacted by blending.
Choose at least three filled objects. Then, Try one of the following:
- Select Edit > Edit Colors > Blend Front to Back to fill the intermediate objects with graduated blends between the frontmost and backmost filled objects.
- Select Edit > Edit Colors > Blend Horizontally to fill the intermediate objects with graduated blends between the leftmost and rightmost filled objects.
- Select Edit > Edit Colors > Blend Vertically to fill the intermediate objects with graduated blends between the topmost and bottommost filled objects.
Adjust the Tint of a Color
From the Swatches panel, you can choose a global process color or spot color, or choose an object to which a global process color or spot color has been applied in recolor artwork Illustrator.
To adjust the color’s intensity, you can move the T slider or type a value into the text box in the Color panel. The tint can range from 0% to 100%. Also, the smaller the number, the lighter the color.
You can drag the color to the Swatches panel or select the New Swatch option in the Swatches panel to save the tint as a swatch. You can name the tint with the same name as the base color, but you need to name the swatch with the tint percentage.
Adjust the Color Mode of a Document
Select File > Document Color Mode > RGB Color or CMYK Color.
Invert Several Colors
Choose several objects whose colors you want to invert.
Select Edit > Edit Colors > Invert Colors.
Adjust the Saturation of Several Colors
Choose several objects whose colors you want to adjust.
Select Edit > Edit Colors > Saturate.
You can type a certain number between -100% and 100% to adjust the color or spot-color tint.
Conclusion
That’s all about the Illustrator recolor artwork and the best design effect. If you’re looking for a quick way to recolor your artwork, try MiniTool Movie Maker to make it more appealing.
If you have any problems when using MiniTool MovieMaker, please send an email to [email protected] with a brief explanation.
User Comments :