As we all know, videos can either be in portrait or landscape orientation. If you record a video in the wrong orientation on your iPhone, there might be some black bars when you view or share it. How to eliminate these black bars? Try rotating the video. Here’s how to rotate a video on your iPhone using Photos and iMovie.
How to Rotate a Video on iPhone via Photos
The easiest way to rotate videos on iPhone is to utilize Photos. It is an app that comes pre-installed on your iPhone. Here are the steps on how to rotate a video on iPhone with Photos.
Step 1. Open the Photos app on your iPhone firstly.
Step 2. Click Photos > All Photos to select the video that you want to rotate.
Step 3. Tap on the blue Edit button in the upper right corner of the screen.
Step 4. Click the Crop icon at the bottom of your screen.
Step 5. Tap on the Rotation icon in the top-left corner of your screen. Every time you tap on the icon, the video will be rotated at 90° clockwise.
Step 6. After you rotated the video to the desired orientation, tap on the Done button at the bottom right.
Step 7. Then the video will be re-saved to your Photo Library and replace your original video.
Recommend post: How to Rotate Video Online
How to Rotate a Video on iPhone via iMovies
iMovie is an excellent video editor app developed by Apple Inc. for macOS and iOS devices. You need to install iMovie from the App Store, although it is a free app from Apple. Now, let’s get started to learn how to rotate a video on iPhone with iMovie.
Related article: Top 10 Best Android Video Editor (Free & Paid)
Step 1. Open the iMovie app on your device.
Step 2. Tap on the Projects option at the top of the screen.
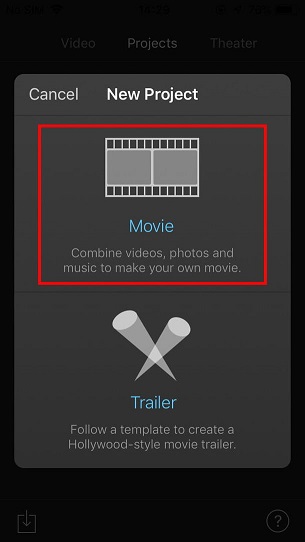
Step 3. Click the Create Project button and then select the Movie option to open up your camera roll.

Step 4. Choose the video you want to rotate and a blue tick will appear on the thumbnail of the video.
Step 5. Tap on the blue Create Movie option at the bottom of the screen.
Step 6. You’ll be taken to a new project page, where you can see your video clip at the top with the timeline below.
Step 7. Now place two fingers on the video and twist them either left or right to rotate the frame until you have rotated the frame to your desired orientation.
Step 8. When you’re happy with the orientation, hit the Done option in the upper-left corner.
Step 9. Tap on the Share button at the bottom of the screen, and then choose where you want to save it to.
Bottom Line
How to rotate a video on iPhone? There are a few video rotator apps in the Apple App Store that you can have a try. However, it is believed that Photos and iMovie must be the best two.
If you have any questions or suggestions about it, please let us know via [email protected] or share them in the comments section below.


User Comments :