What is GIF?
Short for Graphics Interchange Format, GIF is a type of image format.
Why do we create GIFs?
- GIFs are mobile-friendly.
- GIFs can instantly grab attention.
- GIFs have a smaller file size, making it easy to share.
If you’re looking to learn how to make a GIF in Photoshop, this guide will help you make it. Photoshop provides many versions to satisfy the needs of different users, and here takes Photoshop CC as an example.
You might be interested in: How to Combine Multiple GIFs into One
How to Make a GIF from Still Images in Photoshop
If you don’t have great video footage to make a GIF, you can try using a series of still images.
Step 1. Import your images
After you launch Photoshop, click File > Scripts > Load Files into Stack. Then, select the images you want to import and click OK.
Step 2. Create a GIF
Navigate to Window > Timeline, and select Create Frame Animation from the dropdown menu. Now, your first frame is set up. Then you need to fill the Timeline panel with multiple frames. There are two approaches to do this.
- Import already prepared frames – click the hamburger menu icon in the upper right corner of the Timeline panel and select Make Frames From Layers.
- Creating animations from scratch – click the New Frame button at the bottom left corner to duplicate the frame you just created and then repeat the operation as above.
Step 3. Edit the GIF
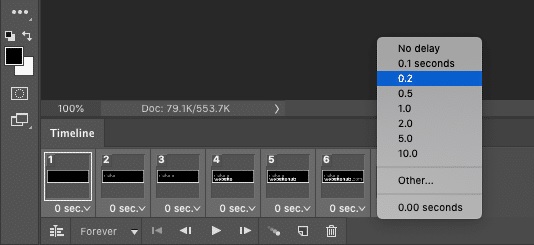
Highlight all of the current frames and right-click on them. Now it’s time to select the delay rate as needed. The higher the delay you choose, the longer that frame will stay on the screen. Last, click the Forever tab at the bottom to select how long your GIF to loop for.
Step 4. Preview and Export the GIF
Hit the Play button at the bottom of the screen to preview how the GIF looks. If you’re satisfied, go to File > Export > Save for Web (Legacy). Then set the output format to GIF and the color option to 256 in the pop-up window. When you’re done, click Save.
Related article: Top 10 Best GIF Makers + How to Make a GIF
How to Make a GIF from a Video in Photoshop
One of the most common and simple ways to make a GIF is using an existing video file you have. Of course, you can also use a professional GIF converter to convert any video to GIF.
Step 1. Import your video
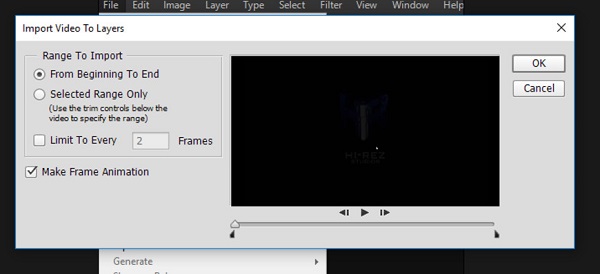
Open Photoshop on your PC, navigate to File > Import > Video Frames to Layers. This will open up a dialogue box where you can choose to import the entire video or a portion of the video. Then make sure the Make Frame Animation box is checked and click OK.
Step 2. Edit the video
After the video file is imported, you will see a series of editable frames on the right panel, and the GIF timeline window will appear at the bottom of the screen, where you can add or delete frames, or even rearrange frames.
Recommend post: Top 8 Best GIF Optimizers to Reduce GIF Size
Step 3. Save the video as a GIF
Tap on the Play button to check how your final GIF looks. If you’re happy with your GIF, go to File > Export > Save for Web (Legacy). This will open up a pop-up window, where you can set the format as GIF and the Colors box to 256. Finally, click Save to export the GIF.
Conclusion
The above have introduced how to make a GIF in Photoshop, no matter you want to use several still images or an existing video. Have you mastered it? If you have any questions or suggestions about it, please let us know via [email protected] or share them in the comments section below.
User Comments :