

Keyframe animation is available in MiniTool MovieMaker. You can add keyframes to videos, images, and elements for smooth motion effects.
Keyframe animation is a powerful and essential technique in video editing. With MiniTool MovieMaker, you can add keyframes to control the position, scale, and rotation of any video, image, or element.
 MiniTool MovieMaker
-
 Split and trim videos to remove redundance.
 - Change video aspect ratio to match screen sizes.
- Add bubble texts, bgm, transitions, and more effects.
- Create PiP or split-screen videos by multitrack editing.
How to add keyframes in MiniTool MovieMaker? Here is the guide.
Add Keyframes
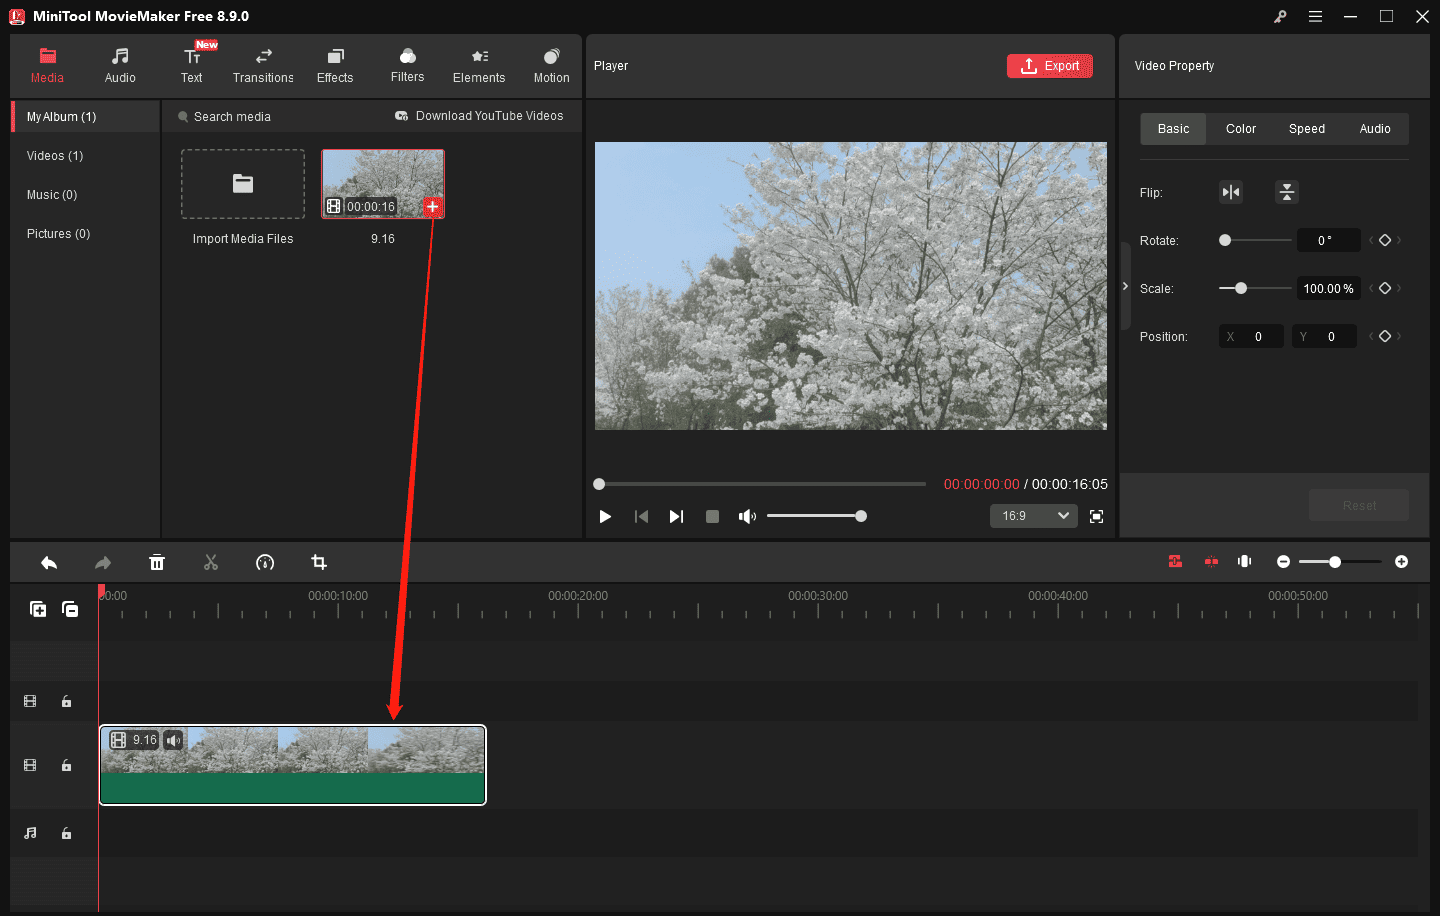
Import a Video/Image or Add an Element
Click Import Media Files to add a video or photo and drag it to the timeline. Or, go to Elements at the top to add a sticker.
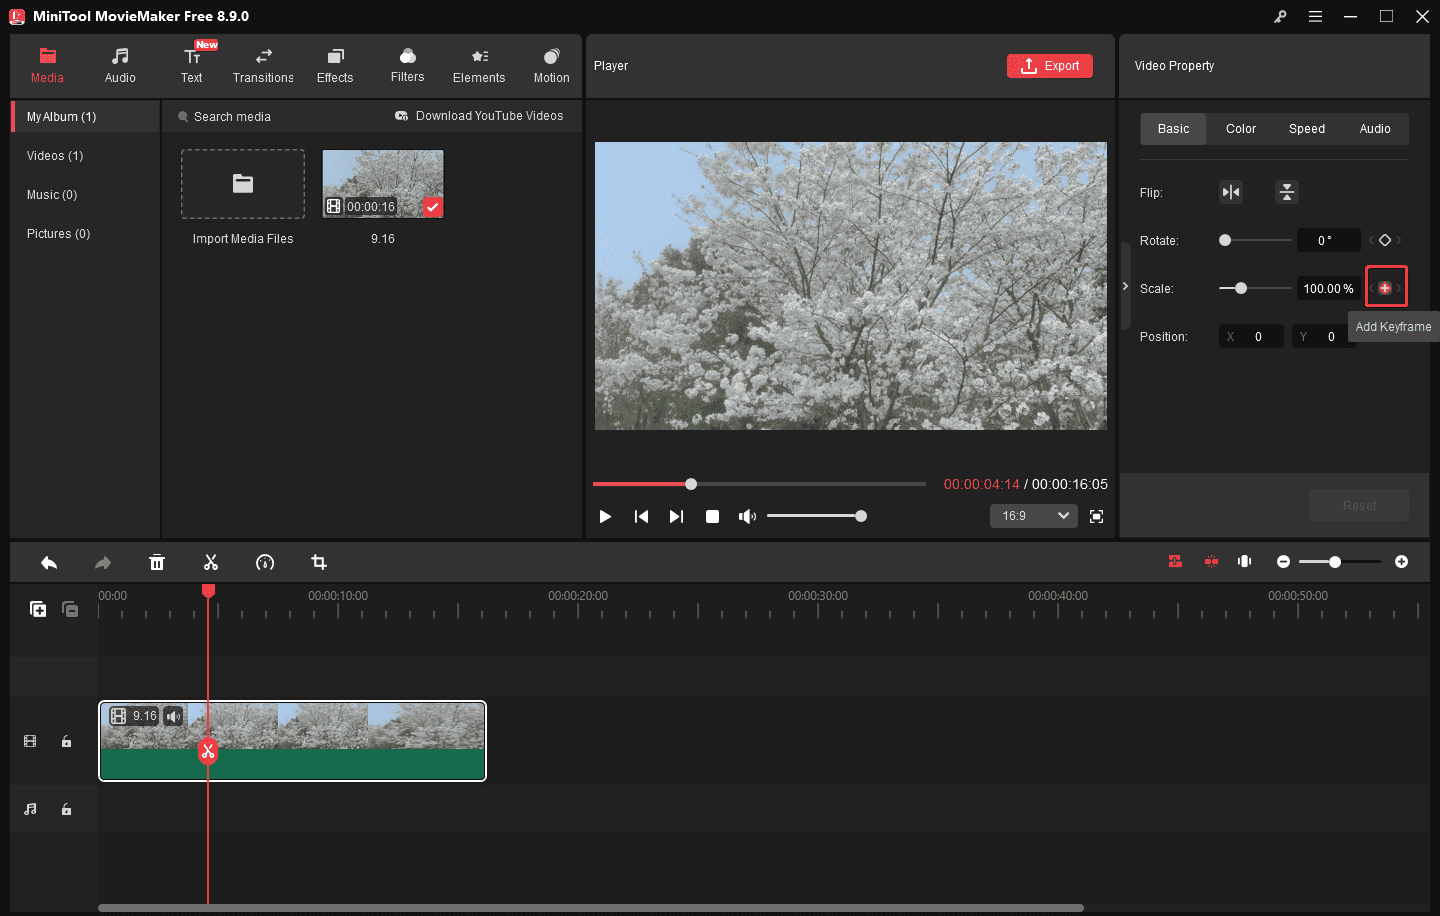
Add the First Keyframe
On the timeline, drag the playhead to the point where you’d like the animation to start. Under the Basic tab in the Property panel, you can either retain the default values or modify rotation angle, scale percentage, or position by dragging the sliders, and click the Add Keyframe icon next to Rotate, Scale, or Position to add the first keyframe.
Add the Second Keyframe
Move the playhead to the point where you’d like the animation to end, and drag the sliders to set the rotation, scale percentage, or position. Alternatively, drag the corner handles in the player to resize the clip or modify its position. Then, the second keyframe will be added automatically.
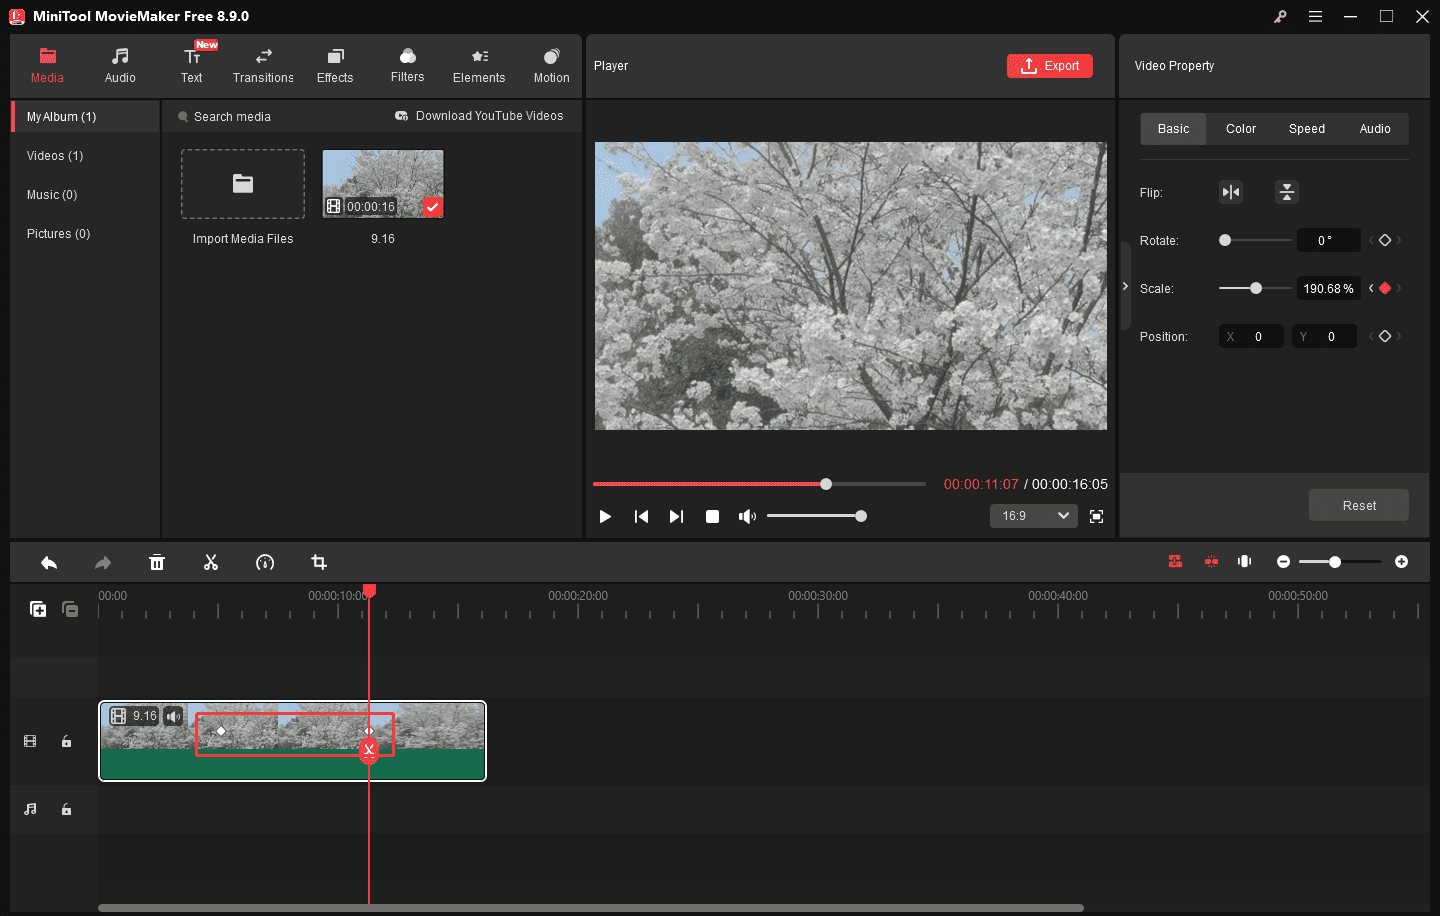
You can add multiple keyframes to achieve your desired animation effect.
Delete Keyframes
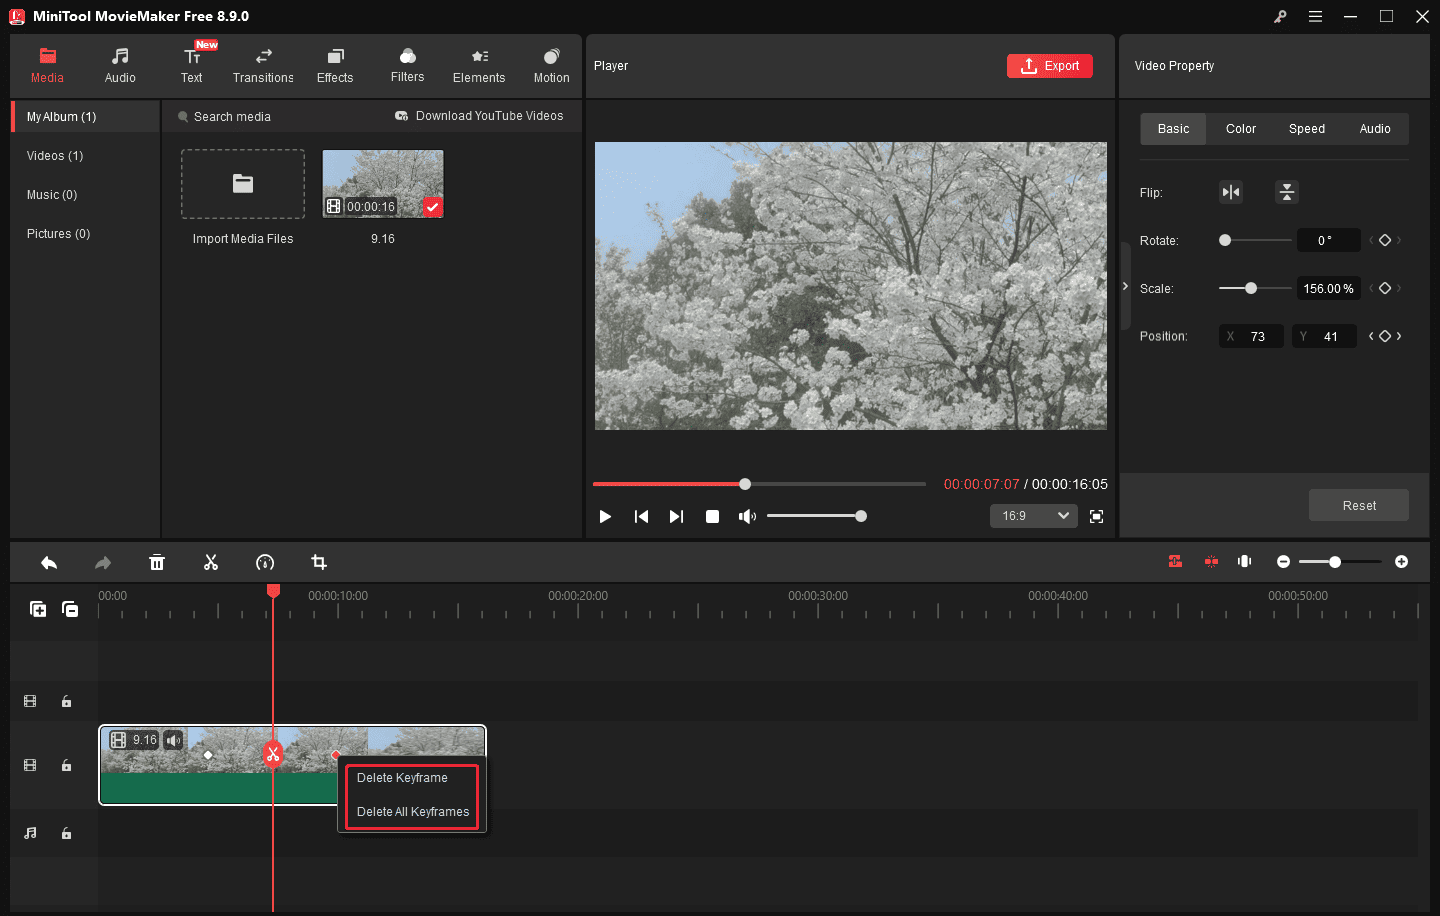
To delete a keyframe, right-click it on the timeline and select Delete Keyframe. To clear all keyframes, click Delete All Keyframes.
About The Author

Position: Columnist
Cora is a tech writer specializing in digital media workflows, with over six years of hands-on experience in video post-production, media transcoding, and screen capture. Her writing is always clear and practical. Cora also produces in-depth software reviews for users across skill levels to help them find the right tool and enjoy video editing.
User Comments :