

A keyframe is a marker that defines the start or end point of a change in a video or animation layer. This post explains what a keyframe is, what it can control in video editing, and provides examples for creating smooth animation effects in MiniTool MovieMaker, a free video editor for Windows.
What Is a Keyframe?
A keyframe is a fundamental element in video editing that defines the start or end point of any change in a clip’s properties, such as position, rotation, scale, opacity, or audio volume. By setting at least two keyframes, the editing software automatically calculates and fills in the intermediate frames to create smooth animations, zooms, fades, or motion effects.
What Is a Frame?
Before learning about what a keyframe is, we first need to figure out what a frame is. As we all know, traditional animation consists of a series of still images that are played continuously over a period of time. Each image is called a frame.
Take a one-second animation as an example. That one second actually contains multiple still images, and each image is one frame. The more frames played per second, the smoother the resulting animation will appear.
What Is a Keyframe in Animation?
So, what is a keyframe in animation? A keyframe refers to the 2-3 frames that play a decisive role in several frames that make up an animation. It determines the start and end states of the action, and the duration between the two keyframes also determines the rhythm of that action.
Initially, the keyframes of animation were created by skilled senior animators, while the middle frames were created by their assistants. But now, with the help of computers, middle frames between keyframes are completed by computers.
At this point, you may be wondering: what do keyframes have to do with video editing? In the next section, I will explore how they apply to video editing and how to use them properly.
![How to Zoom in on a Video? [Ultimate Guide]](https://images.minitool.com/moviemaker.minitool.com/images/uploads/2020/12/how-to-zoom-in-on-a-video-thumbnail.png)
Common Application Scenarios of Keyframes in Video Editing
Keyframes are very important for video post-production and widely used in many editing scenarios. Here are some common applications.
1. Motion and Position Animation
This is the most common application of keyframe animation in video editing. By adding two or more keyframes at the appropriate points, you can move an object, text, or sticker across the screen.
For example, to make a cloud sticker move from the left edge of the screen to the right edge, first position it on the left and set a keyframe. Then, move the playhead to the endpoint, drag the sticker to the right edge, and the second keyframe will be created automatically. The software will generate the smooth movement between them.
2. Scale and Rotation Effects
Keyframes can also be used to create dynamic zoom and spin effects. For instance, you can make an image or the video frame gradually enlarge or rotate continuously by setting keyframes at different points. This is often used to emphasize something, draw attention to a specific element in the frame, or just create funny effects.
3. Opacity and Layering Transitions
With keyframes, you can also control the opacity property to create crossfades. For instance, setting a start keyframe at 0% opacity and an end keyframe at 100% opacity creates a smooth fade-in. Conversely, you can create fade-out effects with keyframes.
4. Color and Filter/Effect Adjustments
In addition to the above examples, keyframes can also be applied to color correction and filter effects. For example, you can gradually change the brightness, contrast, or saturation of a clip over time, or gradually adjust the intensity of a filter or effect to indicate a change in mood.
5. Audio Volume Fades
Keyframes can be applied to audio clips to control volume, tone, reverberation, and other effects. You can set several keyframes for your music to indicate the point where the audio will gradually fade in or fade out to a certain level.
For example, if you want to make your audio fade in, you can lower the volume of the first keyframe. The volume of your audio will be gradually amplified.

How to Add Keyframes to Videos
Fast Track Steps:
- Launch your target video editing application.
- Start a project and import your video or image clips.
- Add the clips to the timeline.
- Move the playhead to where you want to add the first keyframe, make some property changes, and click that button to add the first keyframe.
- Drag the playhed to where you want to add the second keyframe, make some changes, and add the second one. If necessary, repeat this step to add more keyframes.
- Save and export the video.
In this section, I will take MiniTool MovieMaker as an example and show you how to add keyframes for position, scale, and rotation of a video/image/element to create smooth animation effects.
1: Install the Video Editor Tool
If this watermark-free video editor is not installed on your PC, click the button below to download and install the software.
 MiniTool MovieMaker
-
 Split and trim videos to remove redundance.
 - Change video aspect ratio to match screen sizes.
- Add bubble texts, bgm, transitions, and more effects.
- Create PiP or split-screen videos by multitrack editing.
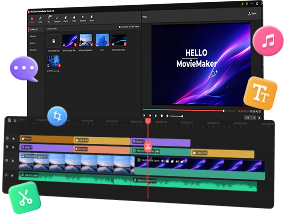
2: Import Media Files
Open the application and click the New Project button on the pop-up window to create a new project and access the main interface. Next, click Import Media Files on the left side to add the target clips and drag them to the timeline.
3: Set the First Keyframe
Select a video/image clip or the added element on the timeline, and move the playhead to the point where you’d like the animation to start. Under the Basic tab in the Property panel, you can adjust the rotation, scale, or position by dragging the sliders, or keep the default values. Finally, click the Add Keyframe icon next to Rotate, Scale, or Position to create the first keyframe.

4: Create the Second Keyframe
Next, drag the playhead to your desired endpoint of the animation, then adjust the rotation, scale, or position using the sliders. Alternatively, you can drag the corner handles directly in the player to resize or reposition the clip. The second keyframe will then be added automatically.

You can add multiple keyframes to achieve your desired animation effect.
5: Create Audio Volume Fades
Although MiniTool MovieMaker’s keyframe feature does not directly control volume levels, you can still achieve gradual volume adjustments by setting the duration of fade-in and fade-out within the software.
For this, click the audio clip on the timeline to open the Music Property section, and drag the sliders to create the fade-in and fade-out effects.

6: Export the Video
Click the Export button in the upper-right corner. From the next window, you can select the output format, folder, resolution, and frame rate. Finally, click Export again to save the video.

Conclusion
In video editing, a keyframe is a marker on the timeline that defines the specific value of a clip’s property, such as position, scale, opacity, or audio volume at a precise point. With the editing software, anyone can set two or more keyframes with different values to create animation effects over time.
If you encounter any issues while using the software, contact the support team via [email protected] for help.
People Also Ask
About The Author

Position: Columnist
Cora is a tech writer specializing in digital media workflows, with over six years of hands-on experience in video post-production, media transcoding, and screen capture. Her writing is always clear and practical. Cora also produces in-depth software reviews for users across skill levels to help them find the right tool and enjoy video editing.
User Comments :