Skewing is a common technique in image editing that helps me distort the perspective of an image, making it more visually interesting. I often use this effect in graphic design, presentations, and social media to create a sense of depth and movement. In this post, I will show how to skew images using different methods, including Adobe Photoshop and online tools like Online PNG Tools and LunaPic.
How to Skew an Image in Photoshop
When I need precise control over image distortion, I prefer using Adobe Photoshop. It provides flexible transform tools that make it easy to skew an image exactly the way I want. In addition to skewing, Photoshop also allows me to distort and warp images for more advanced edits.
Step 1: Open the Image in Photoshop
Launch Photoshop and go to File > Open to import the image I want to edit.
Step 2: Activate the Transform Tool
Go to Edit > Free Transform, or press Ctrl + T to enable the transform box around the image.
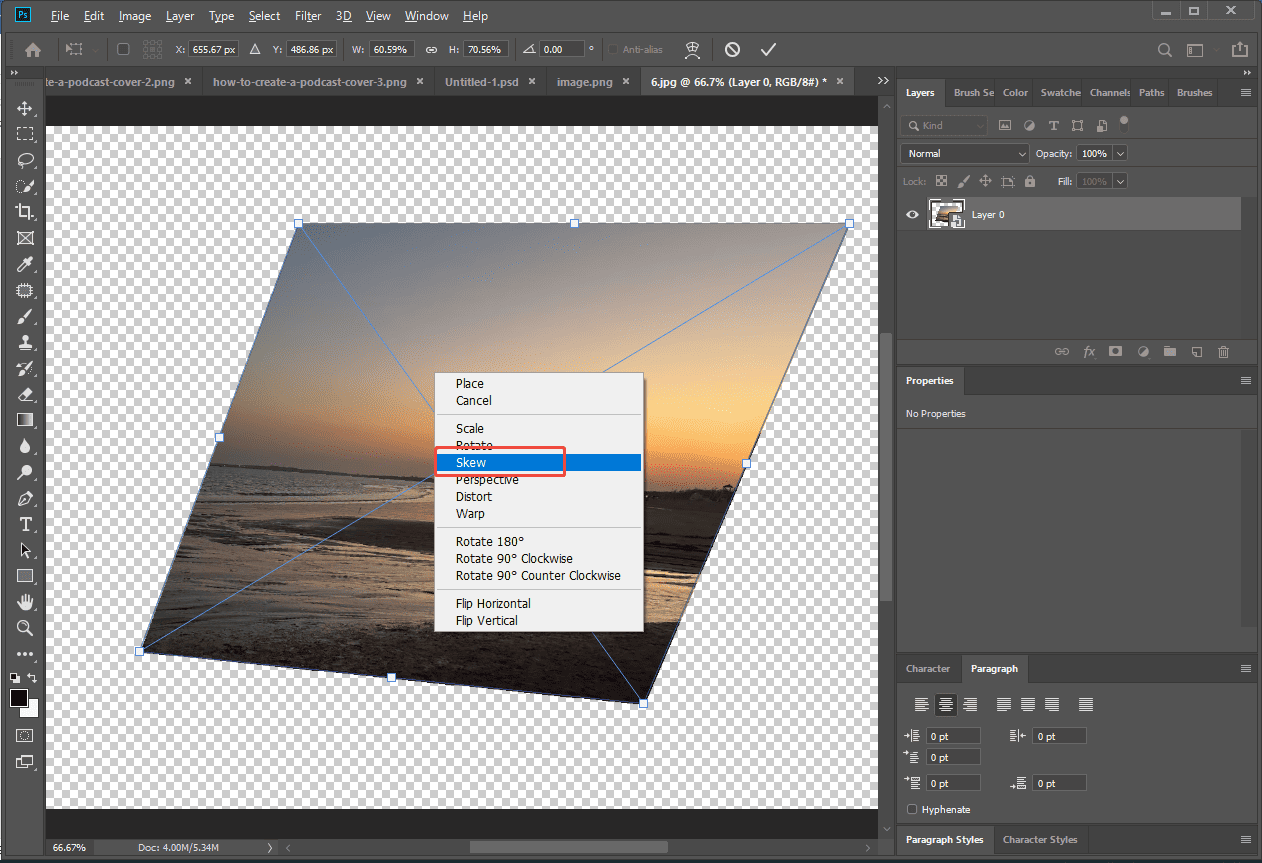
Step 3: Apply the Skew Effect
Right-click inside the transform box and select Skew. Then I drag the corner or side handles to distort the image horizontally or vertically until I achieve the desired perspective. Once satisfied, I press Enter to confirm the transformation.
Step 4: Save the Image
Go to File > Save As and choose the preferred format to export the skewed image.
While Adobe Photoshop offers powerful and precise control, it may not be the best choice when I just want a quick and simple solution. In this case, using online tools to skew images can save time and effort without installing any software.
Next, I will introduce two easy ways to skew images online for free.

How to Skew Images Online
There are two beginner-friendly online tools that allow me to skew images with just a few clicks. Let’s take a closer look at each of them.
Option 1: Use Online PNG Tools
Online PNG Tools is a simple and fast tool that lets me skew images without signing up. It works directly in the browser and is ideal for quick edits.
Step 1: Upload the Image
Go to the skew image tool on Online PNG Tools (https://onlinepngtools.com/skew-png). Select Click to load an image to import the image I want to skew.
Step 2: Adjust the Skew Settings
Find the skew options on the interface. I can adjust horizontal or vertical skew values by entering numbers. Click Background Fill Color to choose a color or keep the background transparent.
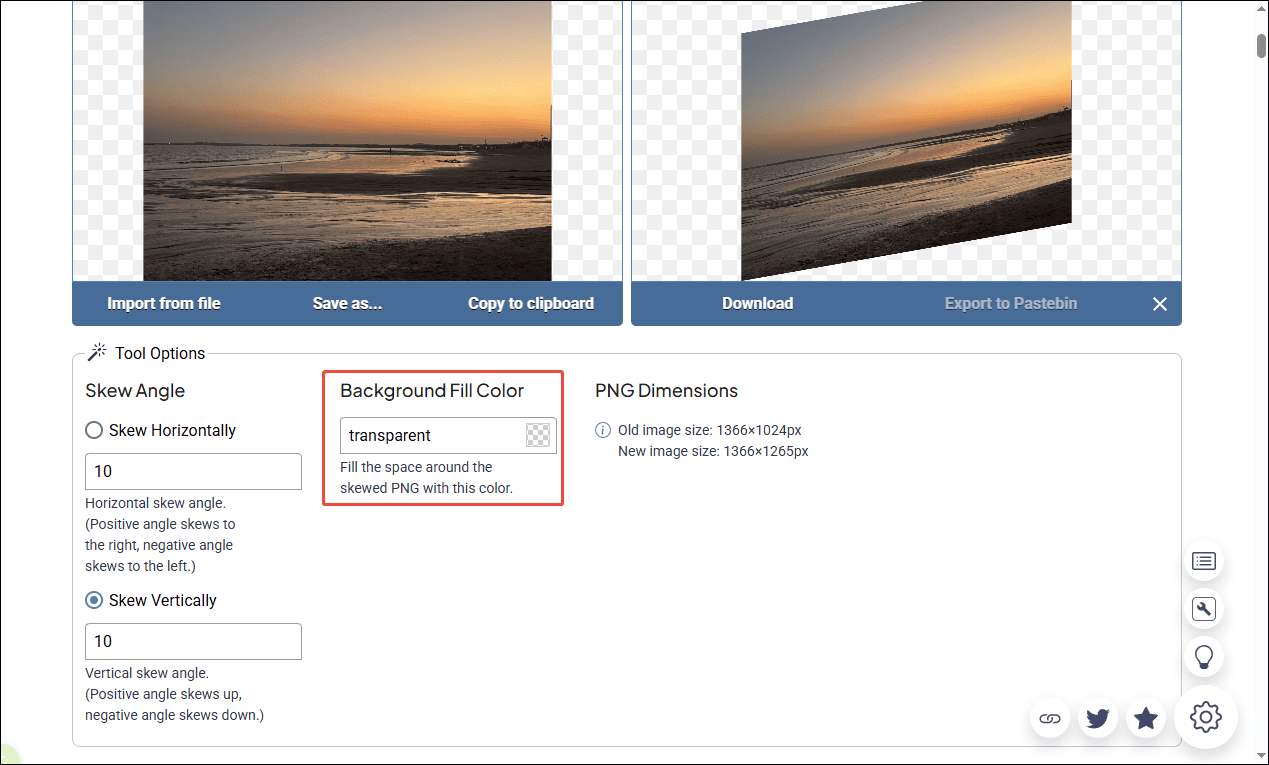
Step 3: Preview and Download the Result
The tool automatically displays a preview, allowing me to see the changes in real time. Click Save as and choose Download to save the skewed image to the computer.
Option 2: Use LunaPic
LunaPic is a versatile online photo editor that offers more advanced editing features compared to basic tools. In addition to skewing images, I can also apply various effects, filters, and adjustments, making it a great choice for more flexible edits.
Step 1: Upload the Image
Go to the LunaPic website (https://www5.lunapic.com/editor/) and click Upload to import the image I want to edit.
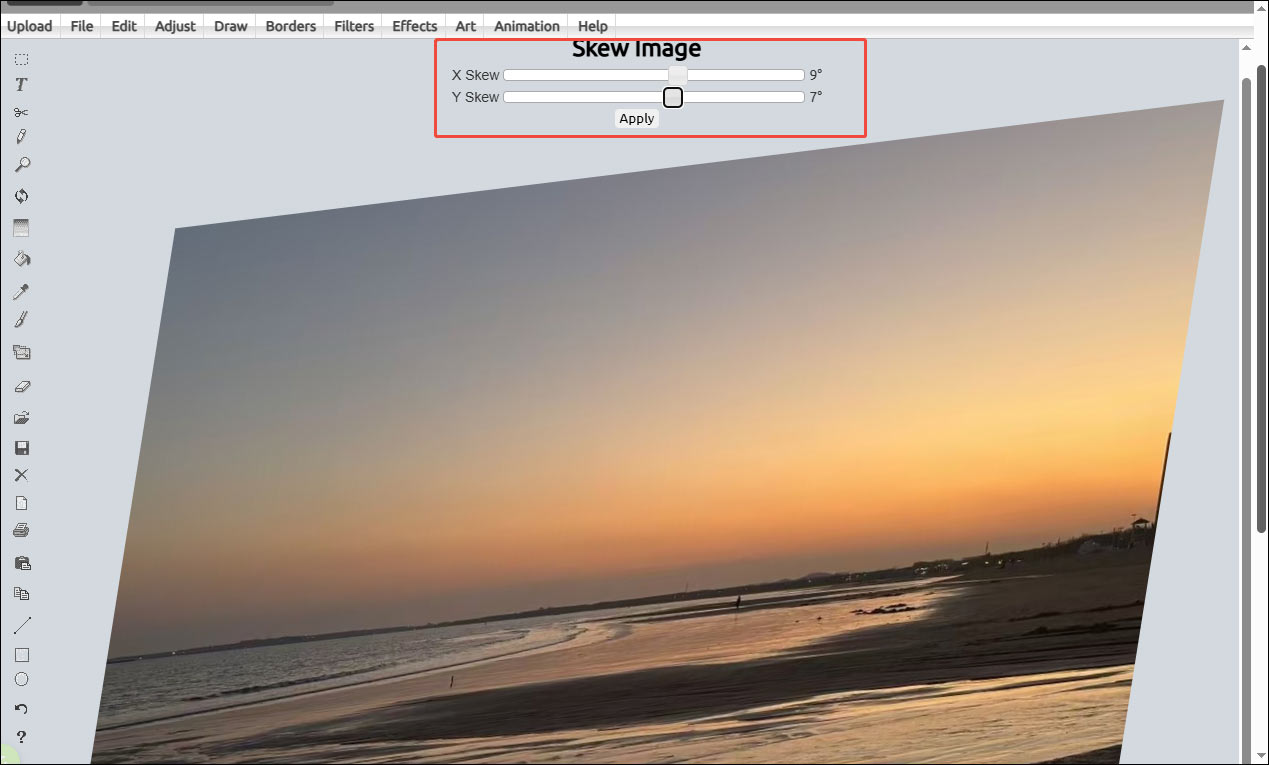
Step 2: Apply the Skew Effect
Navigate to Edit > Skew Image on the top menu. This tool provides two sliders, X Skew and Y Skew, which allow me to control the skew direction and intensity for a more precise result.
Step 3: Save the Skewed Image
Click File > Save Image and click Save as JPG to save the result to the computer.
Conclusion
In this post, I explored three practical methods to skew images, including Adobe Photoshop and online tools like Online PNG Tools and LunaPic. Photoshop offers precise control and advanced editing features, while online tools provide a quick and convenient way to skew images without installation. Hope this article helps you a lot!
About The Author

Position: Columnist
Alice is a tech writer at MiniTool, specializing in tutorials and guides on video editing and screen recording. She stays up to date with the latest tools and techniques to ensure her content is accurate and easy to follow. By combining hands-on testing with continuous learning, Alice aims to help readers solve tech problems efficiently.
User Comments :