Perhaps while viewing these memories, you'll want to share them with your friends and family, or want to create a review video to summarize the past. This article from MiniTool MovieMaker (a Windows movie maker) will introduce how to share Google Photos memories and how to share Google Photos memories as a video.
Google Photos has become one of the most popular platforms for storing, organizing, and sharing memories. One of the most delightful features is the memories function, which shows you collections of photos from specific dates or events. If you’re wondering how to share Google Photos Memories with your friends or family, this guide will meet your needs.
How to Share Google Photos Memories
Sharing Google Photos Memories is a great way to show others the moments you cherish. So how to see memories on Google Photos? How to share Google Photos memories? The following are the detailed steps.
Step 1: First, open the Google Photos app on your smartphone.
Step 2: On the main page of Google Photos, tap the Memories button at the bottom of the screen. The Memories section is the collection of the images and videos Google has grouped together based on dates, events, or even trips. Simply scroll through these memories to find a memory that you would like to share.
Step 3: Tap on the memory you want to share. This will open a collection of photos and videos that are part of that memory.
Step 4: Once you have selected the memory, tap on the Share button.
Also read: How to Share Google Photos & Stop Sharing Photos with Others
How to Share Google Photos Memories as a Video
While sharing photos directly is great, turning your memories into a video can add a personal touch. MiniTool MovieMaker is an easy-to-use video editing tool that allows you to create videos from your Google Photos memories. Here’s how to use it:
Step 1: Save Your Google Photos
Before you can use MiniTool MovieMaker, you need to download the photos from Google Photos to your computer. You can do this by selecting the photos you want to include and downloading them directly from the Google Photos website.
Step 2: Download and install MiniTool MovieMaker
Click the button below to download this software and install it on your PC according to the instructions.
MiniTool MovieMakerClick to Download100%Clean & Safe
Step 3: Import Your Google Photos
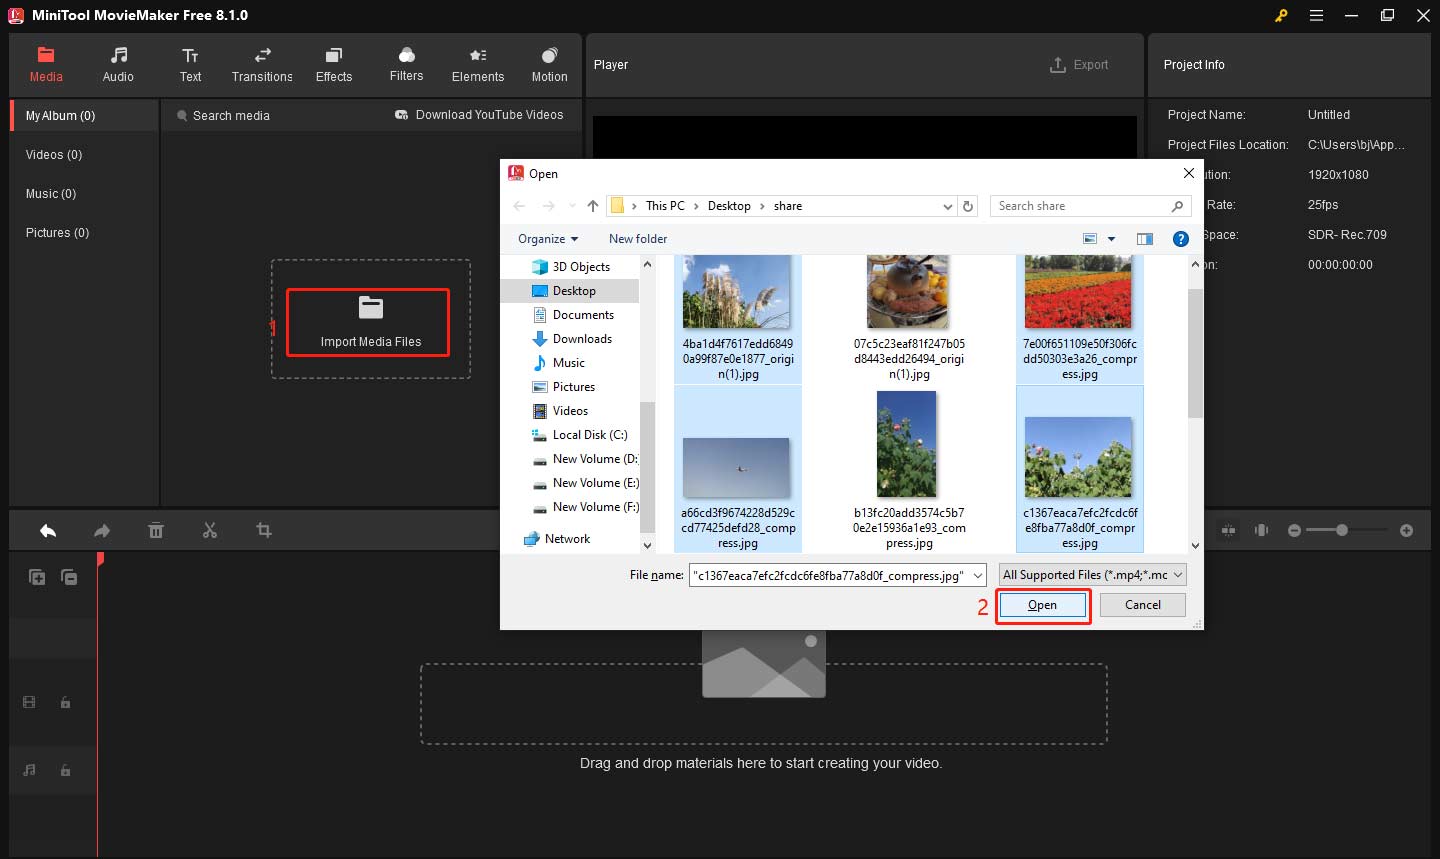
Launch this editor and close the promotion window. Click Import Media Files to select the target photos, and click Open to import them to the Media Library.

Step 4: Add Your Photos to Timeline
Click the plus (+) icon on the target photos or drag and drop them to the timeline.
Step 5: Set the Duration for Your Photos
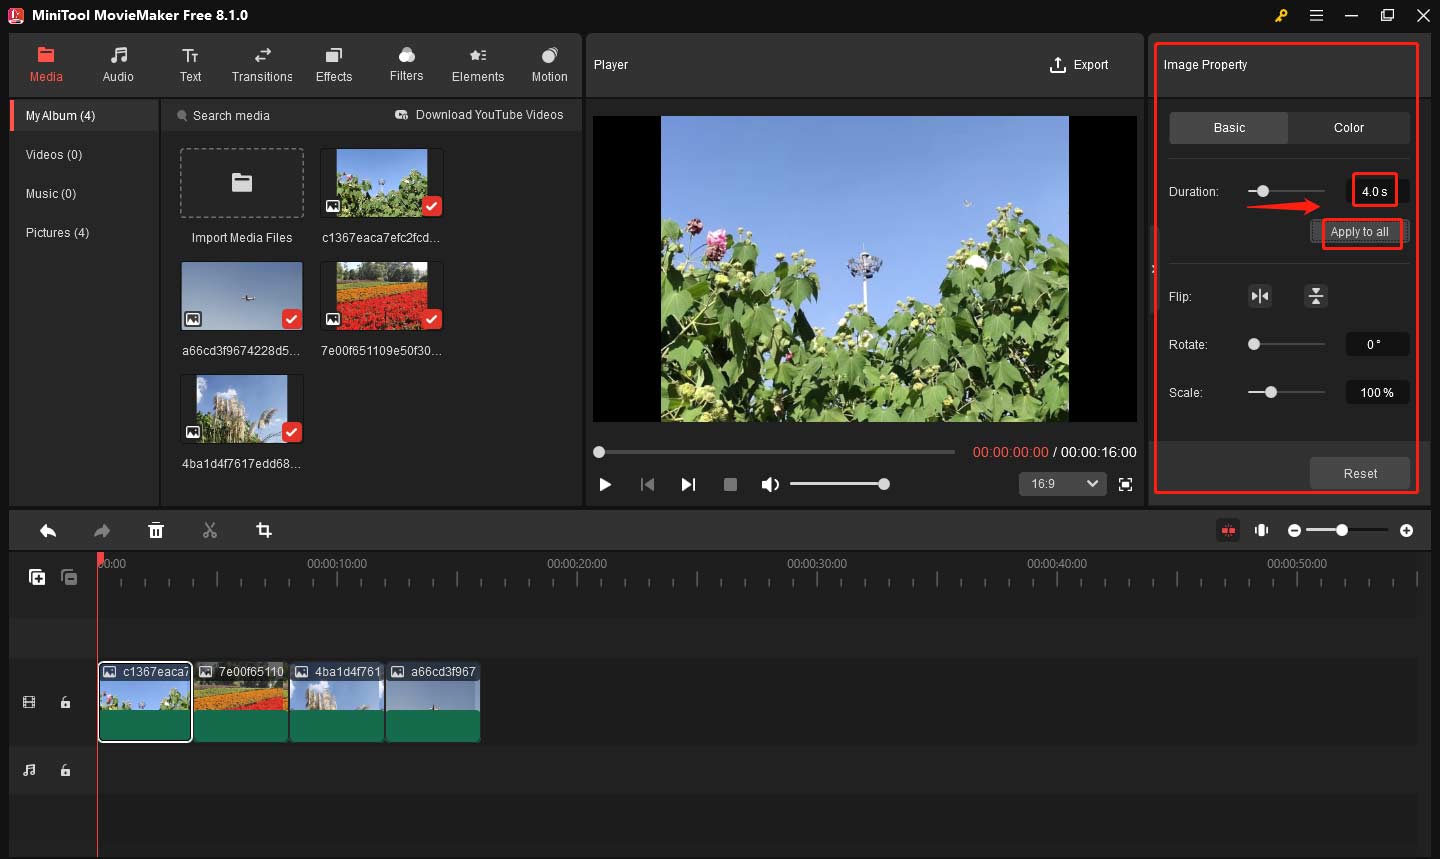
Each photo in the video should show the appropriate time to create an enjoyable viewing experience. Go to the Image Property window on the right side of the screen. Under the Basic option, drag the Duration slider or enter the desired value in the box. After setting one photo’s duration, you can click on Apply to all to apply this duration to all photos.

Step 6: Add Text to Your Photos
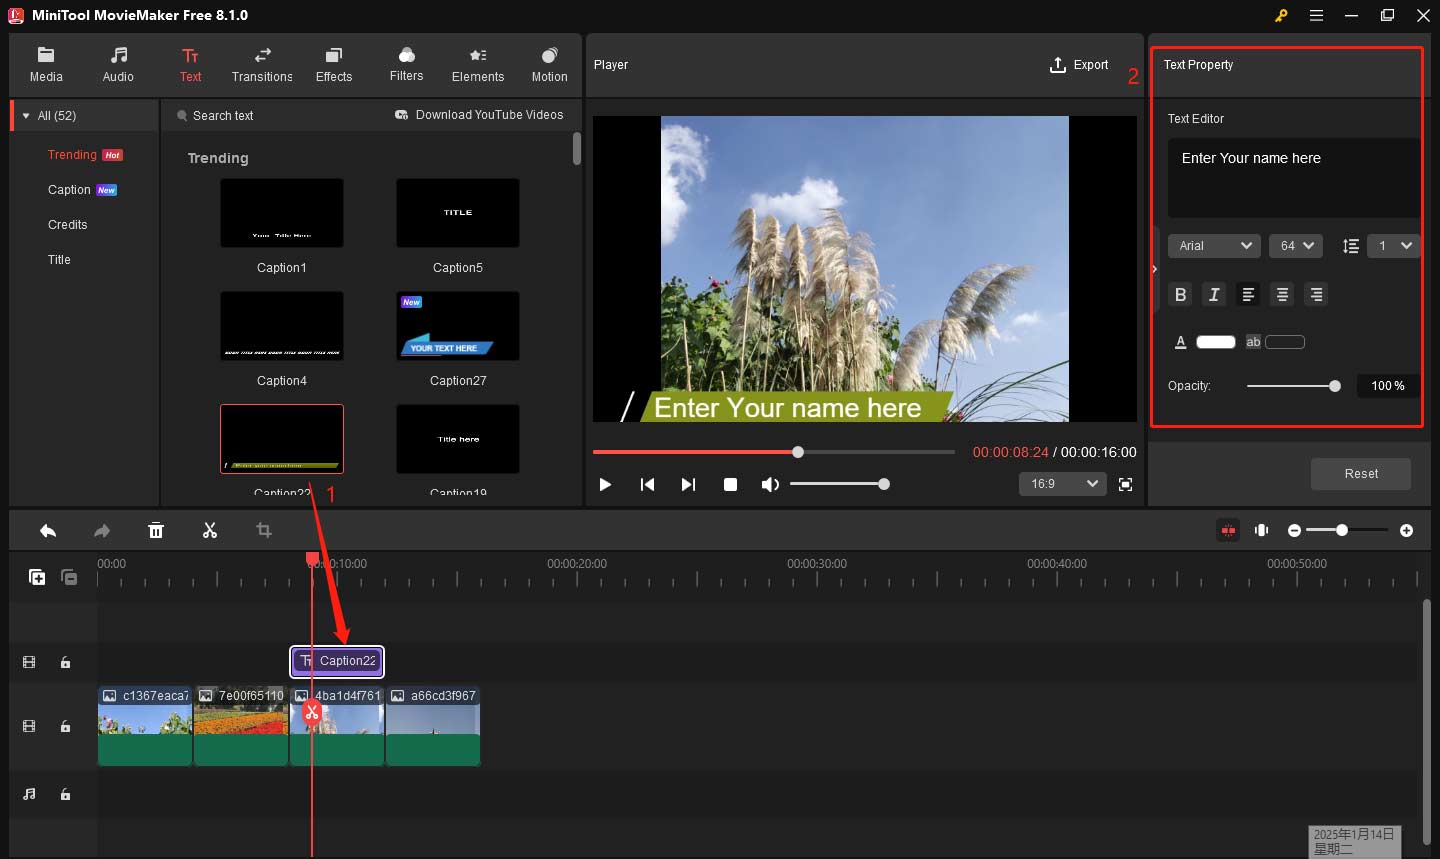
Adding text to your photos can help provide context or add a creative touch to the video. To add text, click on the photo you want to add text to in the timeline. In the toolbar, click on the Text button. Find your favorite text template and drag it above the target image. Go to the Text Property window, type your text content, and change the font, size, color, etc.

Repeat this process for each photo if you want different text on different images. This could be a date, a caption, or a personal message.
Step 7: Export the Video
If everything looks good, click on Export to save the video to your computer. You can choose the format and quality of the video depending on your needs.
Step 8: Share the Video
Now that your video is ready, you can share it. Upload it to social media platforms like Facebook, YouTube, or Instagram. Alternatively, you can send the video to others via email or messaging apps.
Bottom Line
This is all about how to share Google Photos memories. By using the Memories feature, you can quickly find valuable moments from specific dates or events and send them to friends and family. In addition to sharing photos directly, you can also turn your memories into videos using tools like MiniTool MovieMaker. Try it out and bring your favorite memories to life!


User Comments :