Replacing a sky in Photoshop is one of the simplest and most effective ways to change a photo’s mood and look. Whether you want to turn a gloomy sky into a stunning sunset, azure clouds, or a starry night sky, Photoshop’s built-in tools make the process fast, realistic, and easy to master. Here’s a complete step-by-step tutorial to help you replace sky in Photoshop perfectly.
How to Replace a Sky in Photoshop
Adobe Photoshop is an industry-leading software mainly used for image editing/design. It was developed by Adobe and allows users to manipulate layers, work with masks, and apply complicated effects, making it perfect for graphic design, photography, and web design. In addition, Photoshop offers a sky replacement tool that can help you replace the sky in your photo efficiently. Just follow the step-by-step guide below to replace sky in Photoshop.
Step 1. Access Adobe Photoshop
Go to Adobe Photoshop’s official website to subscribe and install it on your computer.
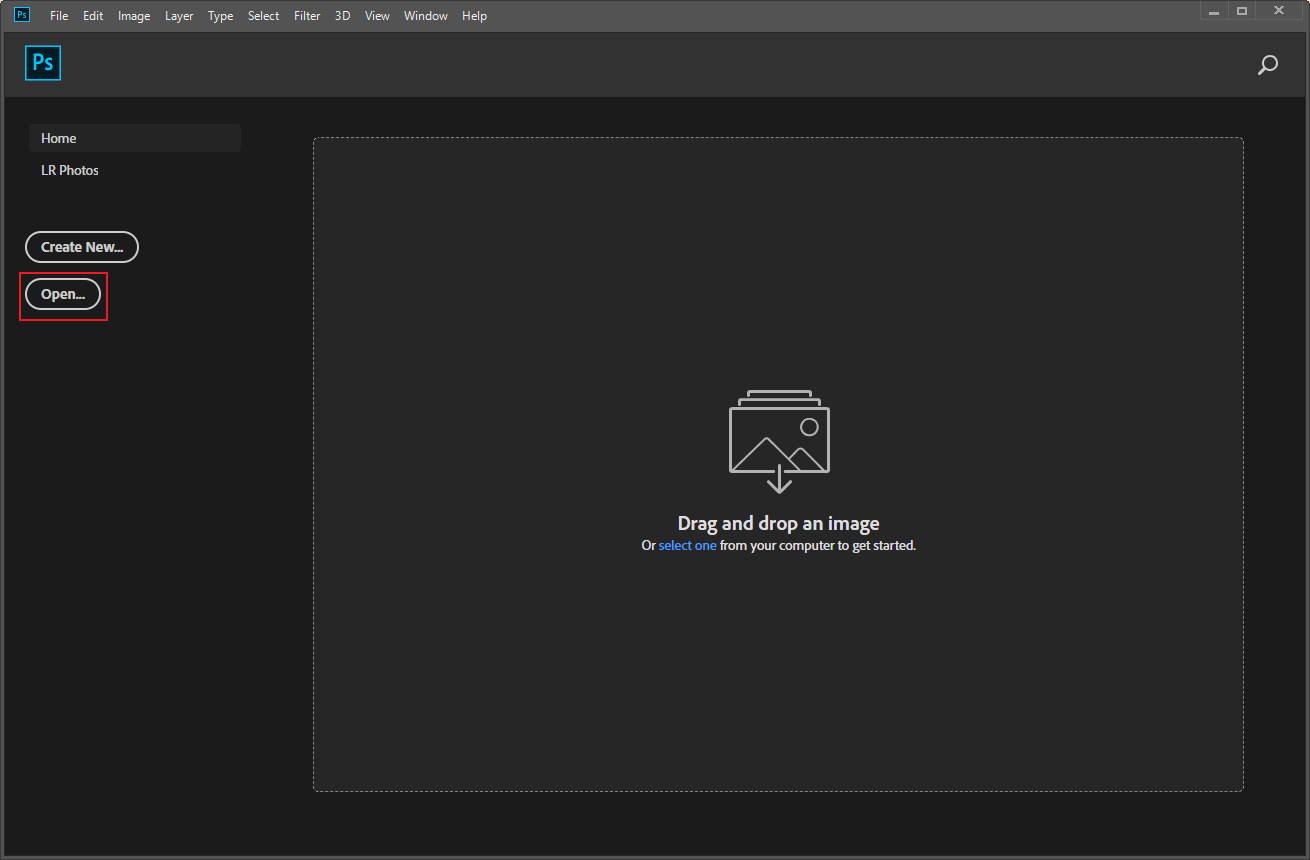
Step 2. Open Your Photo
Launch Photoshop and click the Open… option to import your photo.
Step 3. Activate the Sky Replacement Tool
Choose the Edit option and click Sky Replacement.
Step 4. View the Gallery
Browse the preset sky images and choose the one you like. Or click the + option to add your own sky images.
Step 5. Complete Adjustments
Fade or shift the edges as needed. Also, you can adjust the scale, brightness, and warmth of the new sky. Then, click OK to save the changes.
Step 6. Save the Image
Click the File option at the top left and click Save to export the photo.
All done!

Alternative Methods to Replace Sky in a Photo
Here are two alternative sky replacement tools you can use.
Method 1. Use BeFunky
BeFunky is a professional browser-based image editor empowered with an AI sky replacement tool. With only a few clicks, you can replace the original sky in your photo quickly. In addition, as an all-in-one image editing tool, BeFunky can serve as a collage maker, graphic designer, object eraser, photo enhancer, and more. Now, follow the instructions below to replace the sky in your photo.
Step 1. Access BeFunky
Go to BeFunky’s sky replacement tool by visiting https://www.befunky.com/create/sky-replacer/.
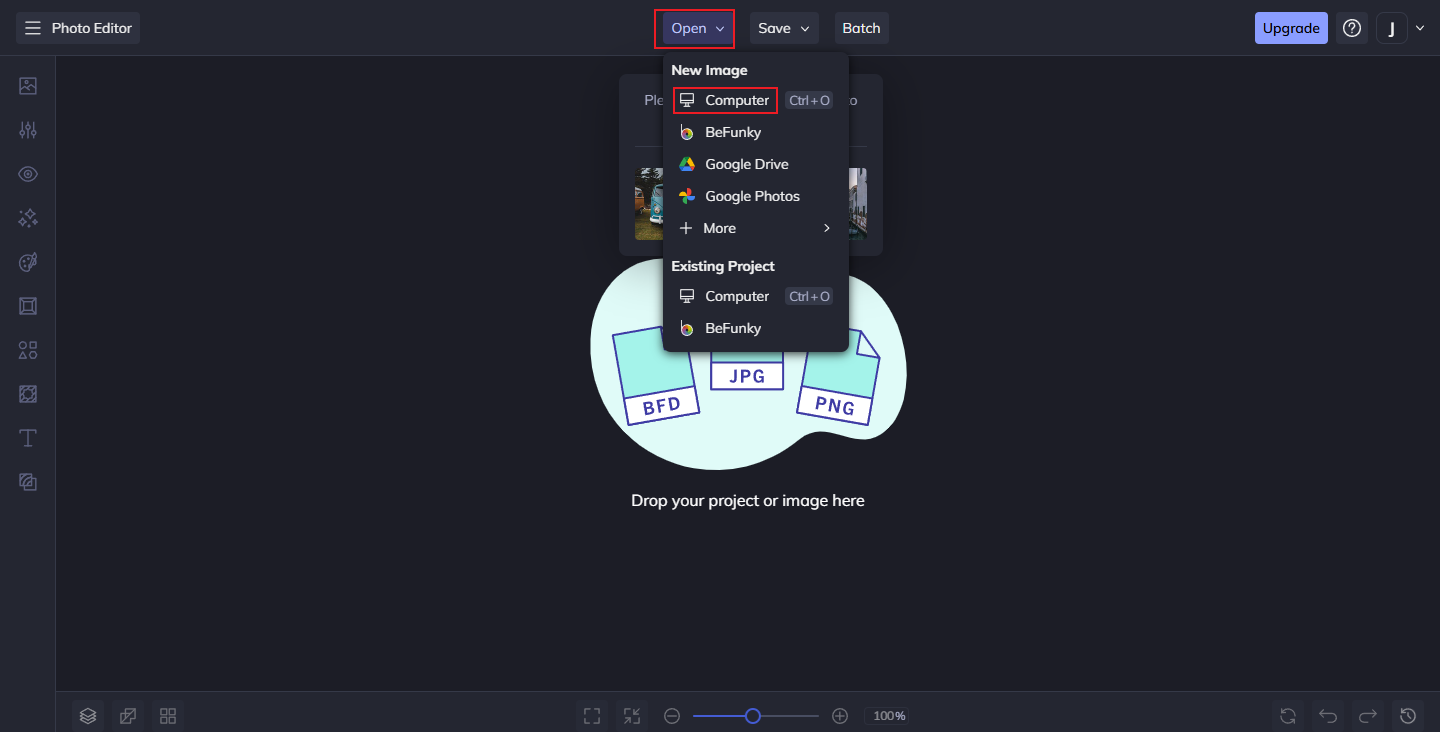
Step 2. Import Your Photo
Click the Open option in the top menu and choose a path to upload your picture from.
Step 3. Change the Sky in Your Photo
Click the Change Sky option, click Select Sky, and choose a sky you want. Or, under the Select Sky tab, you can click the Computer option to choose a sky photo from your own collection.
Step 4. Save the Photo
Click the Save option at the top and choose a destination to save the picture.
Method 2. Use Pixlr
Pixlr is an easy-to-use online photo editor designed for beginners and amateur creators. It offers quick and intuitive editing tools that require no complicated setup. Also, it features a sky replacement tool that lets you easily change the sky in your photos.
Follow the details below.
Step 1. Go to Pixlr Express
Access Pixlr Express by visiting https://pixlr.com/express/.
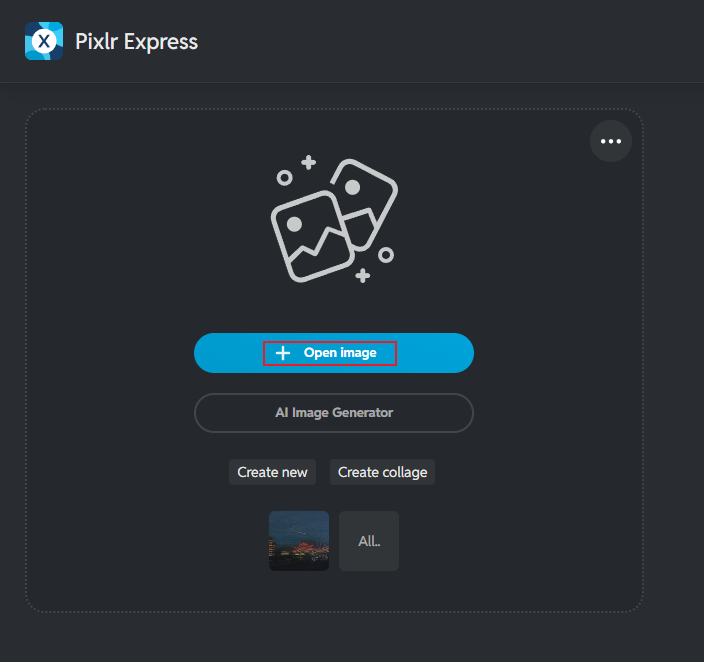
Step 2. Upload Your Image
Click the Open image option to import your photo.
Step 3. Add a New Layer
Click the + option to create a new layer and add a new sky image. Adjust the position and size of the sky for proper alignment.
Step 4. Complete the Sky Replacement
Use the draw cutout tool to remove the areas that aren’t the sky, thereby creating a new sky.
Step 5. Save the Picture
Click the Save button to save the picture.

Conclusion
Replacing a sky in Photoshop is a quick and effective way to enhance the quality of your photos. How to replace sky in Photoshop? With its built-in tool and simple adjustments, anyone can create realistic and eye-catching images with no effort.
Besides, two alternative tools that can also accomplish the job, including BeFunky and Pixlr. Feel free to choose the one you prefer. Hope you find this article helpful!
User Comments :