This article created by free video editor – MiniTool MovieMaker mainly teaches you how to remove location metadata information from photos on iPhone, Android, Google Photos, etc. with built-in photo location removing tools or third-party photo removers to help you protect your privacy.
In today’s digital age, photos often carry more than just visual memories—they also contain embedded location information known as metadata. This metadata can reveal the exact geographical coordinates where a photo was taken. While this feature can be convenient for organizing and cataloging memories, it also poses potential privacy risks. Fortunately, there are several methods to remove location info from photos across different devices and platforms.
Why Remove Location Information?
The need for removing location data from photos arises from concerns regarding privacy and security. If shared publicly, those photos can inadvertently disclose sensitive information about one’s whereabouts, which could compromise personal safety or privacy. Therefore, understanding how to eliminate this metadata is crucial in safeguarding your data before sharing images on social media or other platforms.
How to Remove Location from iPhone Photos?
There are several ways to remove location from photos on iPhone.
#1 Manual Removal
1. Using Photos App
Step 1. Open the Photos app and select the target image.
Step 2. Tap More (three dots) in the top right and select Adjust Location.
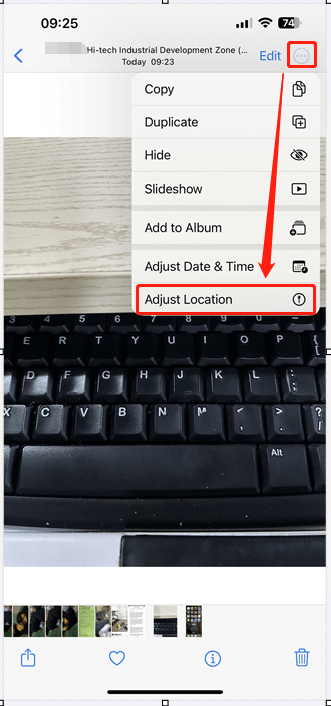
Step 3. On the next screen, choose No Location.
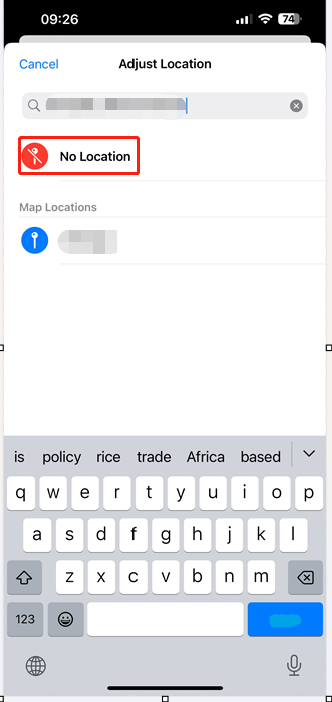
OR:
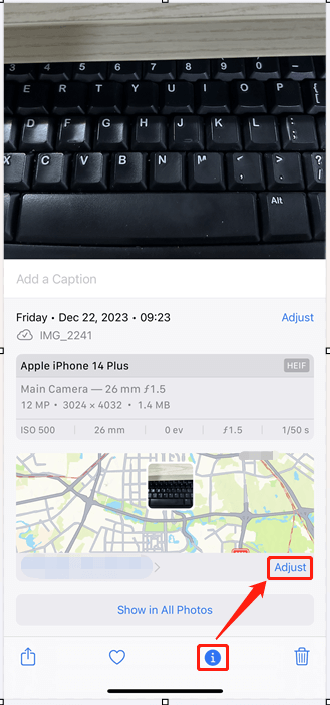
Tap the “i” symbol under the target picture and select Adjust in the popup. Then, you will access the above Adjust Location page. There, just tap No Location to turn the location off.
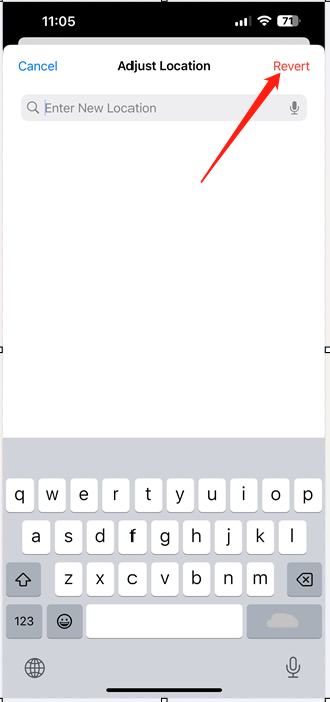
Tip: If you want to use the location information again, you can revert its location on the Adjust Location page.
2. Third-Party Apps
Various photo location removing apps like Metapho, ViewExif, or Exif Viewer allow you to view and remove location metadata.
#2 Bulk Removal
There is a method to delete location from future photos in bulk (once and for all).
Go to iPhone Settings > Privacy & Security > Location Services > Camera and select Never to prevent future photos from being geotagged.
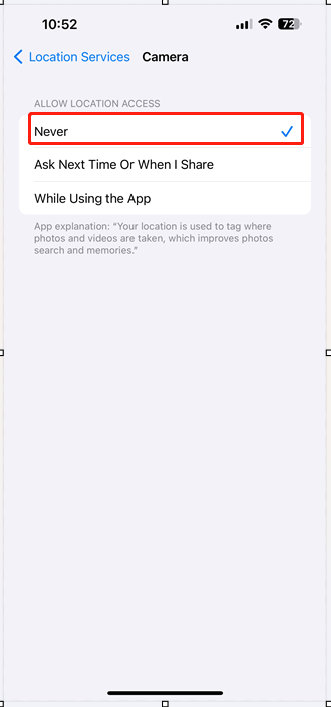
If you want to add a location mark to your future photos again, just select While Using the App in the camera location privacy settings.
#3 Sharing Without Location
Or you can choose not to share location data when sharing a specific photo:
Step 1. After tapping the Share icon under the target picture, select Options in the pop-up window.
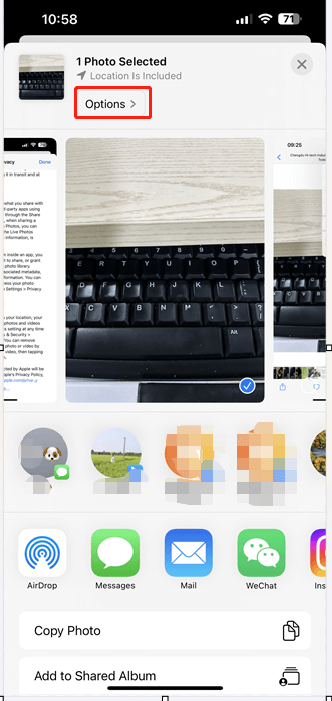
Step 2. Next, switch off the Location option and tap Done.
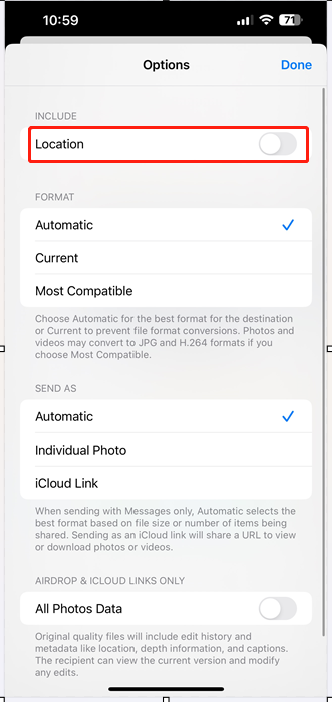
Step 3. Continue to find the person you want to share this photo with.
How to Remove Location from Photos Android?
The ways to wipe location info from photos on Android phones are similar to those on iPhones. In general, you can rely on the smartphone’s built-in photo app or third-party photo location removing software like ExifTool or ExifEraser.
How to Remove Location Metadata from Google Photos?
Google Photos doesn’t provide a direct feature to remove location metadata within its app. However, by downloading the photo to a device and then editing the location information using the device’s built-in photo app or third-party tools, you can hide the geotag before sharing it.
If the location of the photo is added by estimation, you can remove it from Google Photos. The following takes removing the location information of Google photos on a computer for example to show you the guide.
1. Go to photos.google.com.
2. Open the target photo.
3. Click the “i” icon in the upper right.
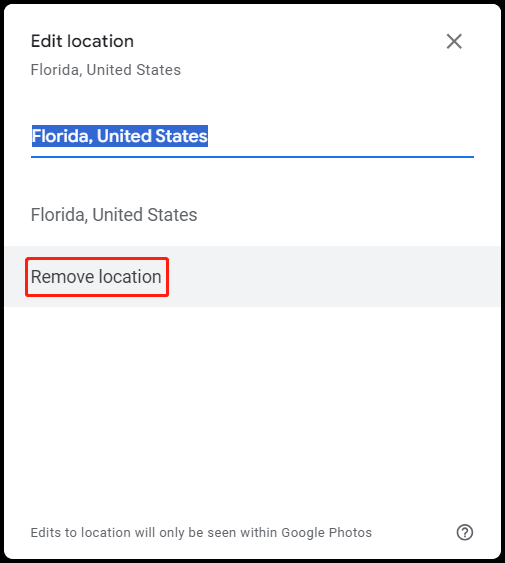
4. Select the Edit icon (pencil) behind the estimated location of the picture in the Info popup on the right of the screen.
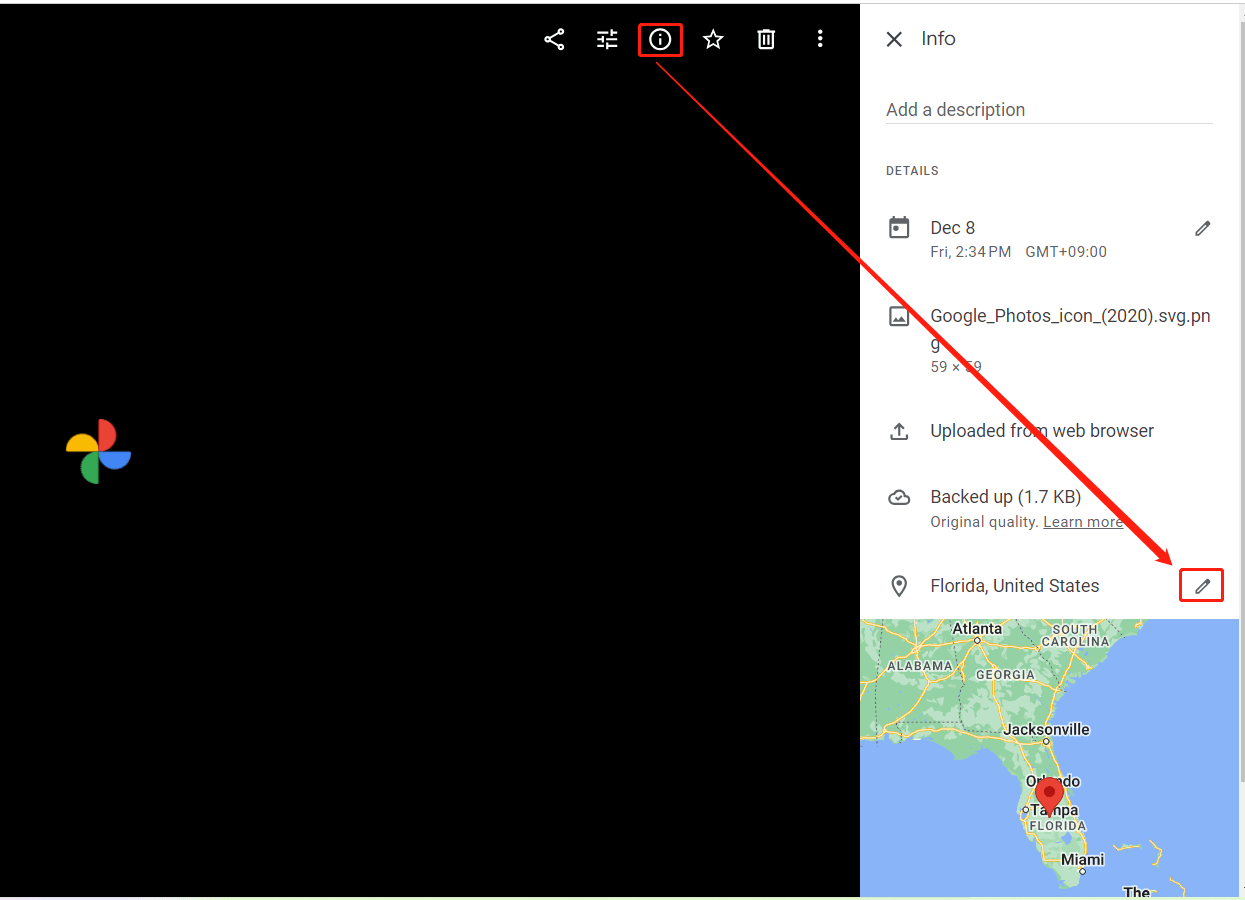
5. In the new window, select Remove location.
You can remove the estimated location of multiple photos:
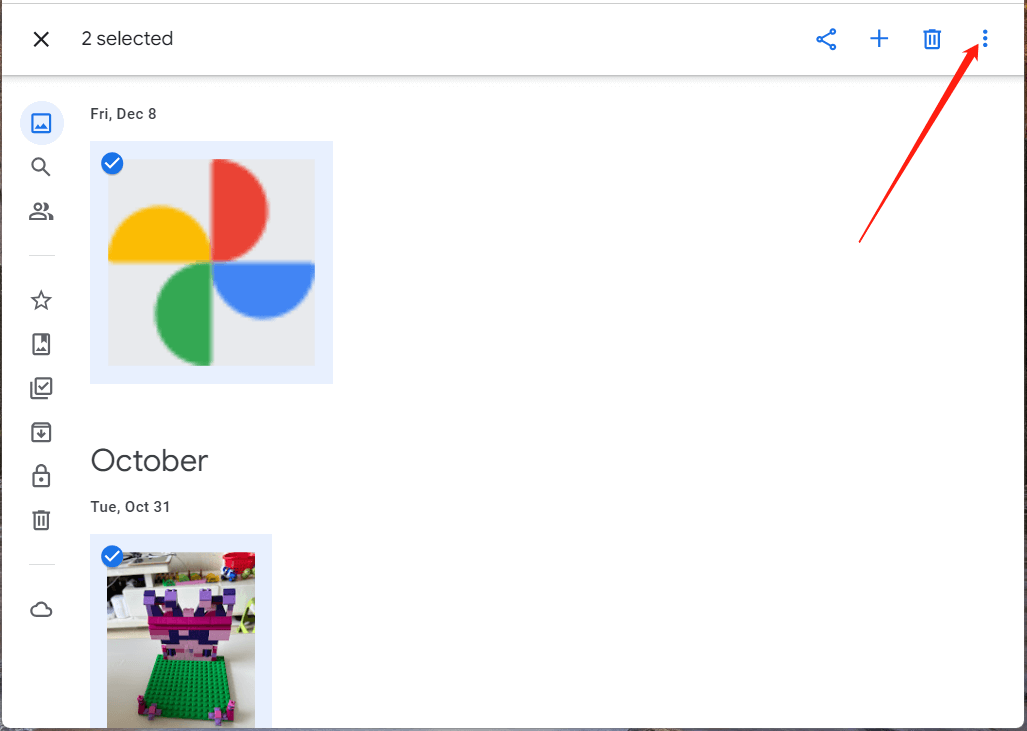
1. Select multiple photos in Google Photos.
2. Click the More option (three dots) in the upper right.
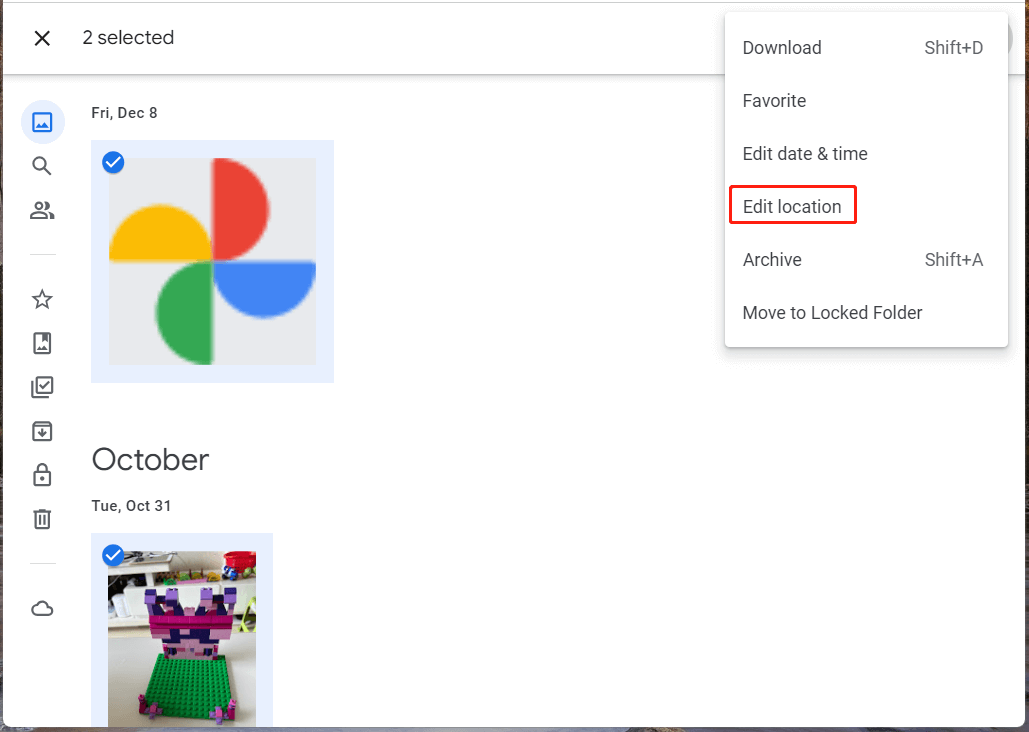
3. Select Edit location in the popup.
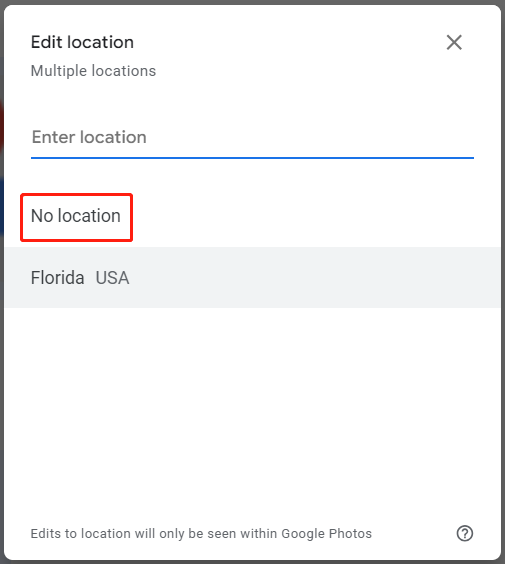
4. Next, choose Remove location in the small window.
Tip:
- When you choose several photos, you may be notified that Google Photos cannot edit the location added by your camera. To continue, you need to deselect those photos.
- If some of the photos you select have no location and some have estimated locations, you need to choose No location to remove the estimated location of the specific photos.
Social Media Platforms and Location Data
Does Facebook remove location data from photos? Regarding social media, platforms like Facebook may strip location data when uploading photos. However, it’s safer to assume that any data not removed manually could be accessible to those who view or download the image.
Conclusion
Protecting your privacy online is essential, and understanding how to remove location from photos is a crucial step. Whether on iPhone, Android, or using various photo-sharing platforms, there are methods available to safeguard your data. Regularly reviewing and managing your photo metadata before sharing can help maintain control over your privacy in the digital realm. Always remember to stay updated with the latest privacy features on your devices and apps to ensure your data remains secure.
Also Read


User Comments :