When I edit photos, one of the most common problems I run into is dull or inaccurate colors. Sometimes the image looks too dark, overly warm, or slightly faded compared to what I saw in real life. That’s where image color correction becomes essential. By adjusting elements like brightness, contrast, and color balance, I can quickly bring a photo back to life.
In this guide, I’ll walk through two simple methods for image color correction, including using Photoshop and Cutout.Pro. Enhance any photo with ease.
What Is Image Color Correction
Image color correction refers to the process of adjusting the colors in a photo to make them look more natural, balanced, and visually appealing. When I perform image color correction, I typically fine-tune elements like brightness, contrast, white balance, saturation, and color tones to fix issues caused by lighting conditions, camera settings, or environmental factors.
In many cases, photos don’t accurately reflect what we saw in real life. For example, an image may appear too dark, have a yellow or blue color cast, or look washed out. By applying proper image color correction, I can restore realistic colors, improve overall clarity, and make the subject stand out more effectively.
How to Make Image Color Correction
Image color correction can be done using professional software like Adobe Photoshop or through online tools for quicker edits. In this section, I’ll show how to perform image color correction using Photoshop and Cutout.Pro.
Method 1: Use Photoshop
When I need precise and professional results, I prefer using Adobe Photoshop. It offers powerful color adjustment tools that allow me to fine-tune every detail of an image.
Here’s how I perform image color correction in Photoshop.
Step 1: Open the Image
Launch Photoshop and go to File > Open to import the image I want to edit.
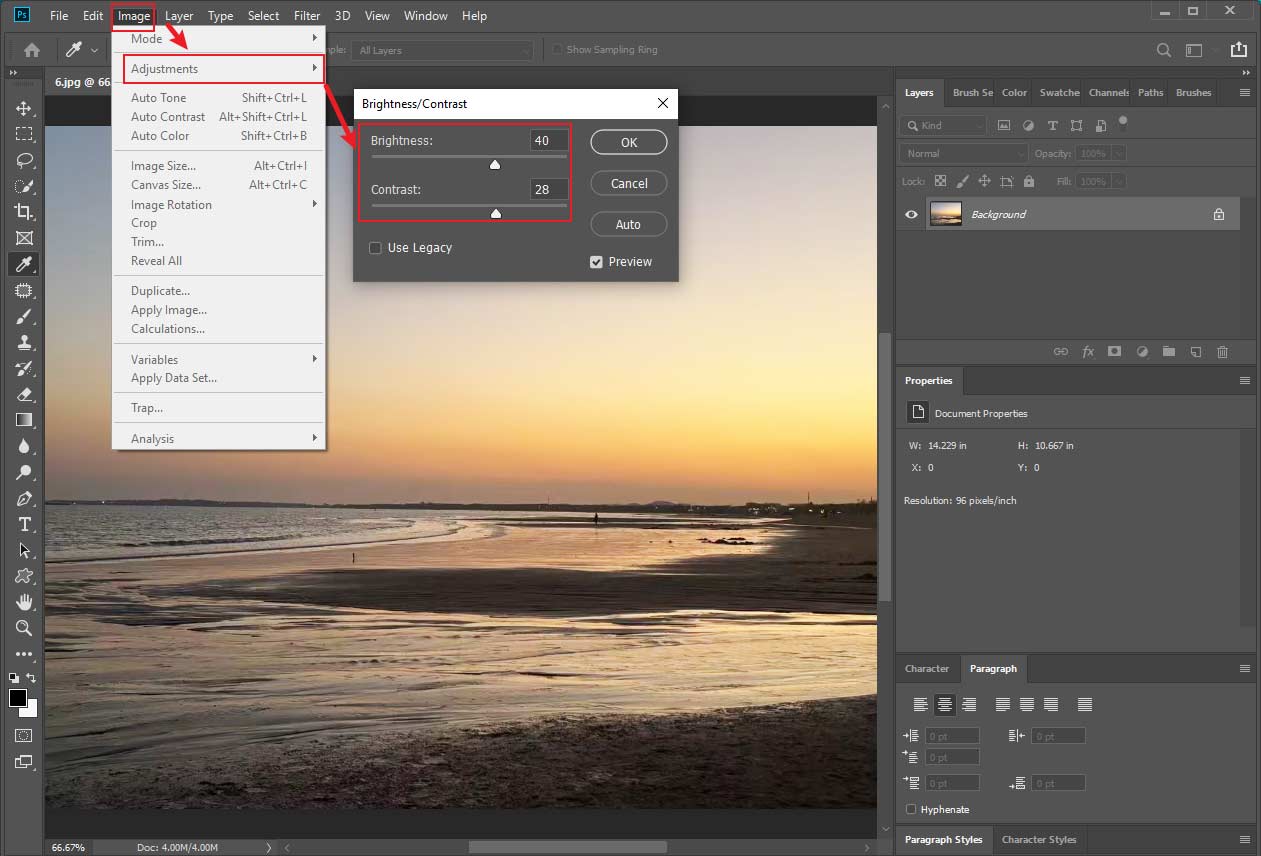
Step 2: Adjust Brightness and Contrast
Navigate to Image > Adjustments > Brightness/Contrast. I adjust the sliders to improve overall lighting and make the image clearer. The photo can be previewed in real time to achieve desired result. Then, click OK to save the adjustments.
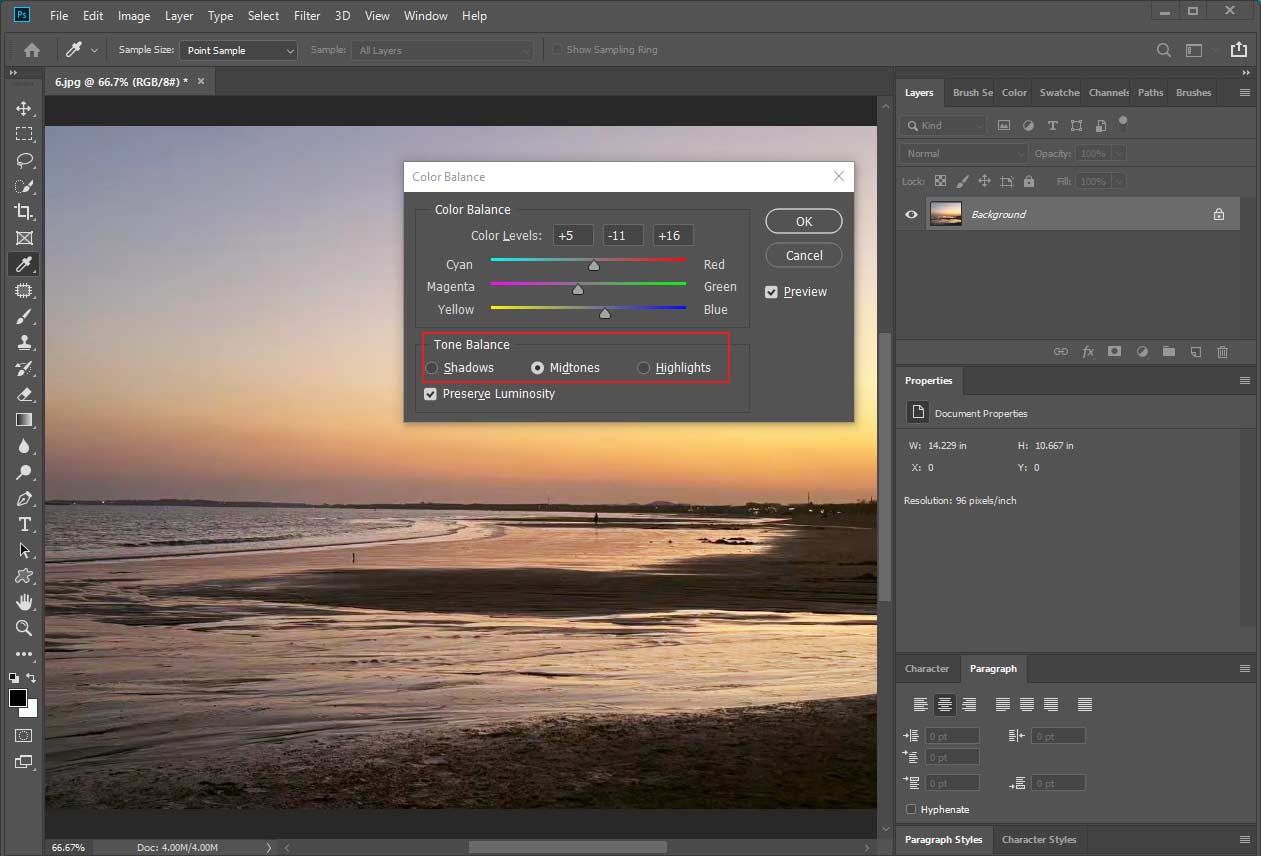
Step 3: Correct Color Balance
Go to Image > Adjustments > Color Balance. Here, I can fix unwanted color casts by adjusting the shadows, midtones, and highlights. For example, if the image looks too warm, I slightly increase the blue tones. Click OK.
Step 4: Fine-tune with Hue/Saturation
Click Image > Adjustments > Hue/Saturation. This allows me to adjust the intensity of colors and make the image more vibrant without overdoing it. Click OK.
Step 5: Use Curves for Advanced Control (Optional)
If I need more precise control, I go to Image > Adjustments > Curves. This tool lets me adjust brightness and contrast in specific tonal ranges, which is especially useful for professional-level edits.
Step 6: Save the Image
Go to File > Save As and choose the preferred format to export the image.
Using Photoshop for image color correction gives me full control over how the final image looks. Although it may take a bit more time to learn, the results are usually more accurate and visually appealing compared to basic editing tools.
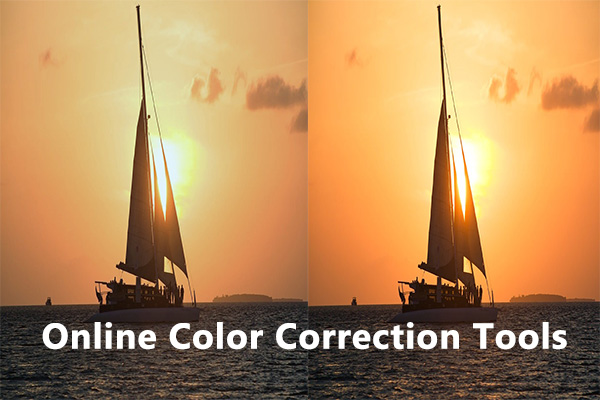
Method 2: Use Cutout.Pro
When I want a quick and hassle-free solution, I usually turn to Cutout.Pro. This online tool uses AI technology to automatically enhance and correct image colors, making it a great choice for beginners or anyone who prefers fast edits without manual adjustments.
Here’s how I perform image color correction online using Cutout.Pro.
Step 1: Upload the Image
Visit the image color correction tool in Cutout.Pro website (https://www.cutout.pro/photo-color-correction/upload). Click Upload Image to import the photo I want to edit.
Step 2: Apply Automatic Color Correction
Once the image is uploaded, the tool will automatically analyze it and enhance the colors. In most cases, I can instantly see improvements in brightness, contrast, and overall color balance.
Step 3: Download the Image
Click Download HD to save the corrected image to my device.

Using Cutout.Pro for image color correction is fast and convenient. While it doesn’t offer the same level of control as professional software, it’s perfect for quick fixes and everyday editing tasks.
Conclusion
In this post, I explored two effective ways to perform image color correction, including using Adobe Photoshop for precise adjustments and Cutout.Pro for quick, automatic enhancements. Whether I need full control over every detail or just want a fast and simple solution, both methods can help improve the overall look of a photo. Hope this article helps you a lot.
About The Author

Position: Columnist
Alice is a tech writer at MiniTool, specializing in tutorials and guides on video editing and screen recording. She stays up to date with the latest tools and techniques to ensure her content is accurate and easy to follow. By combining hands-on testing with continuous learning, Alice aims to help readers solve tech problems efficiently.
User Comments :