How to make a photo less MB? In this post, I’ve outlined four common ways to make a photo smaller in size: simply resize, crop, convert the file format, or compress it.
Large image files slow down website loading speeds and consume storage space, and they are not perfect for uploading, downloading, or sending via email or social media. I’ve come across all of these problems in my work and everyday life. Every time, I ask myself: how to make a photo less MB? I’ve tried many methods and tools to lower the image file size. Then I’ve summarized four methods to make a photo smaller for faster website performance, sharing, uploads, and storage management.
How to Make a Photo Less MB
Modern digital photos are crystal clear, sharp, and vivid, but they often produce a large file size. With the following methods, I can easily make a large image file smaller.
Method 1: Resize Image Dimensions
Resizing the image dimensions means reducing the total number of pixels, which directly decreases the data that needs to be stored. As a result, the file size will be reduced effectively.
Resizing the image dimensions is a straightforward process and doesn’t require professional tools. Frequently, I use the Windows built-in Photos and Paint apps to resize images, and they both work in the same way. The only difference is that the Photos app will offer the estimated size of the resized image. I’ll then explain how to make a photo smaller by resizing it in the Photos app.
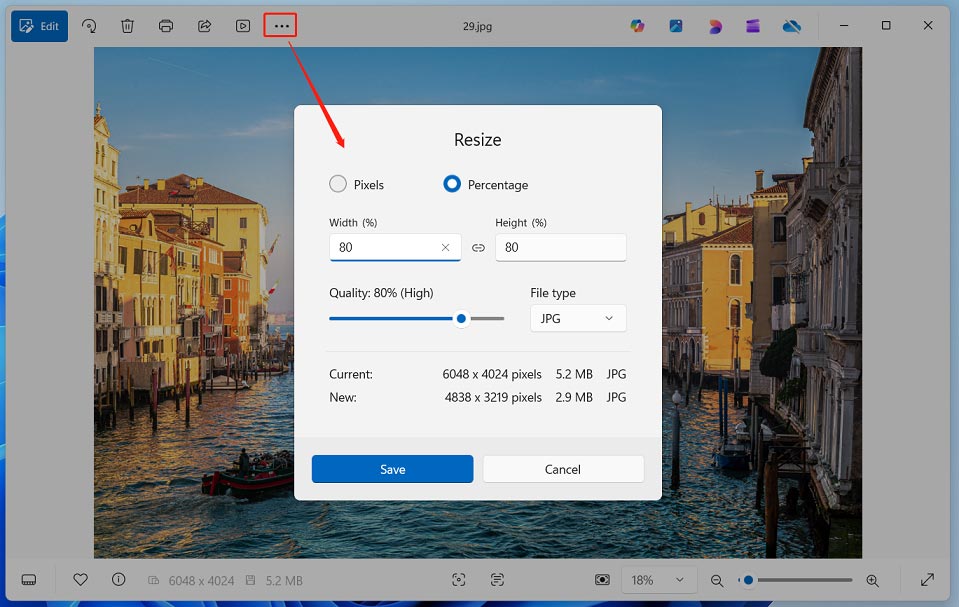
First, I need to open my target photo in the Photos app, click the See more icon (three dots) at the top of the preview window, and select Resize image from the dropdown. In the Resize window, choose a way to resize the image – by pixels or percentage. After entering the desired number, set the file type to JPG, the smallest image format available, and click Save to save the resized image.
Method 2: Crop Images
Cropping images is the process of removing pixels (image details) from the original file. Undoubtedly, reducing the total pixel count of an image, especially when removing large portions of the background, can directly generate a smaller file.
Personally, Windows Photos is a great image cropper because it allows me to crop photos freely or select a preset ratio to crop.
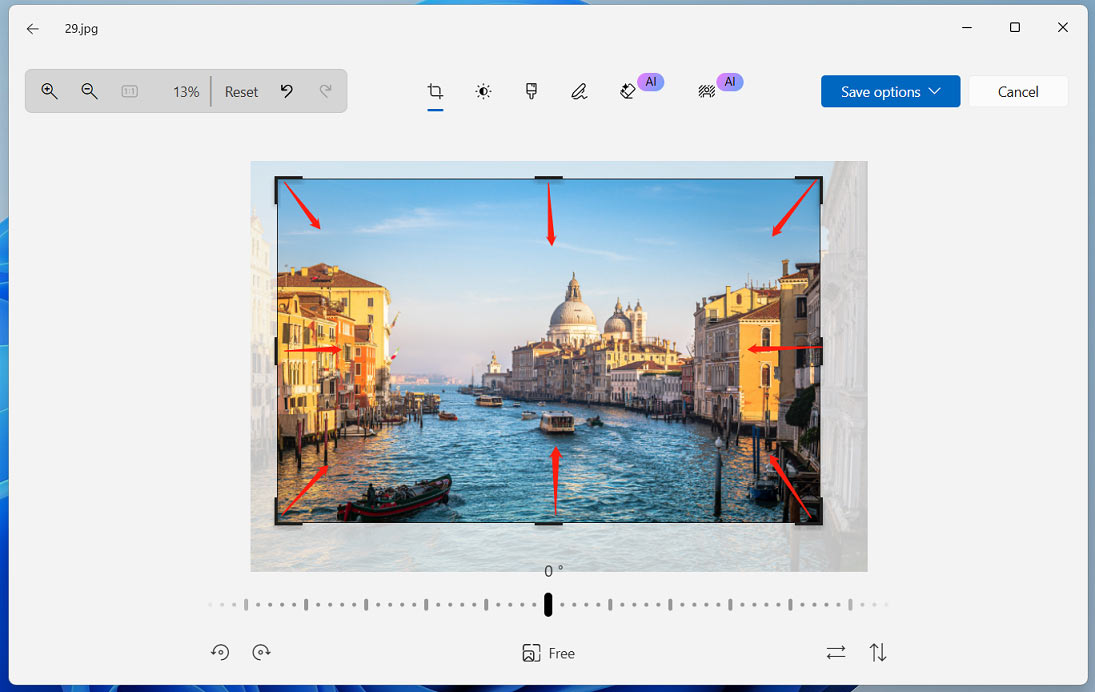
After opening the desired photo in the Photos app, click Edit in the top-left corner of the window, and I’ll be taken directly to the Crop tab. By default, I can crop the image to any aspect ratio by dragging the handles on the preview.
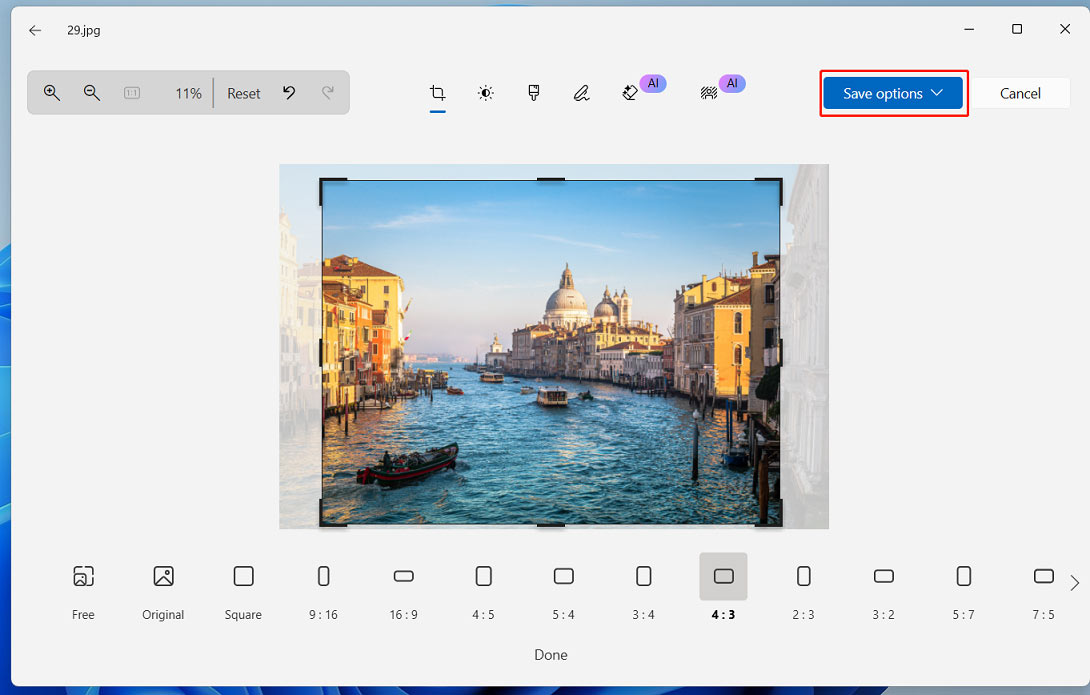
To crop the image to a common ratio, click Free at the bottom, click the desired ratio at the bottom, then drag the image to ensure the wanted parts are within the cropping handles. Finally, click Save as options to save the image.
Method 3: Change the Image Format
The image format is an important factor influencing file size. Among raster image formats, AVIF and WebP are generally considered the smallest ones. They provide higher compression efficiency than JPG and PNG. When I need smaller image file sizes for web use, I often convert my files to AVIF or WebP using CloudConvert.
However, AVIF and WebP’s compatibility is not as good as JPG and PNG formats. For instance, X/Twitter doesn’t support the AVIF files. Therefore, when I want to make a large file smaller for social media sharing or messaging, JPG/JPEG is my first choice, because it’s smaller than PNG. The Windows Photos and Paint apps can convert common image formats to JPG.
Method 4: Compress Photos
Additionally, using an image compressor is an easy way to reduce file size. There are various online compressors designed to lower image sizes. TinyPNG and iLoveIMG are my favorite tools, as they can handle common file formats and can compress images in batches. After uploading my photos, they will automatically start compression, no settings required.
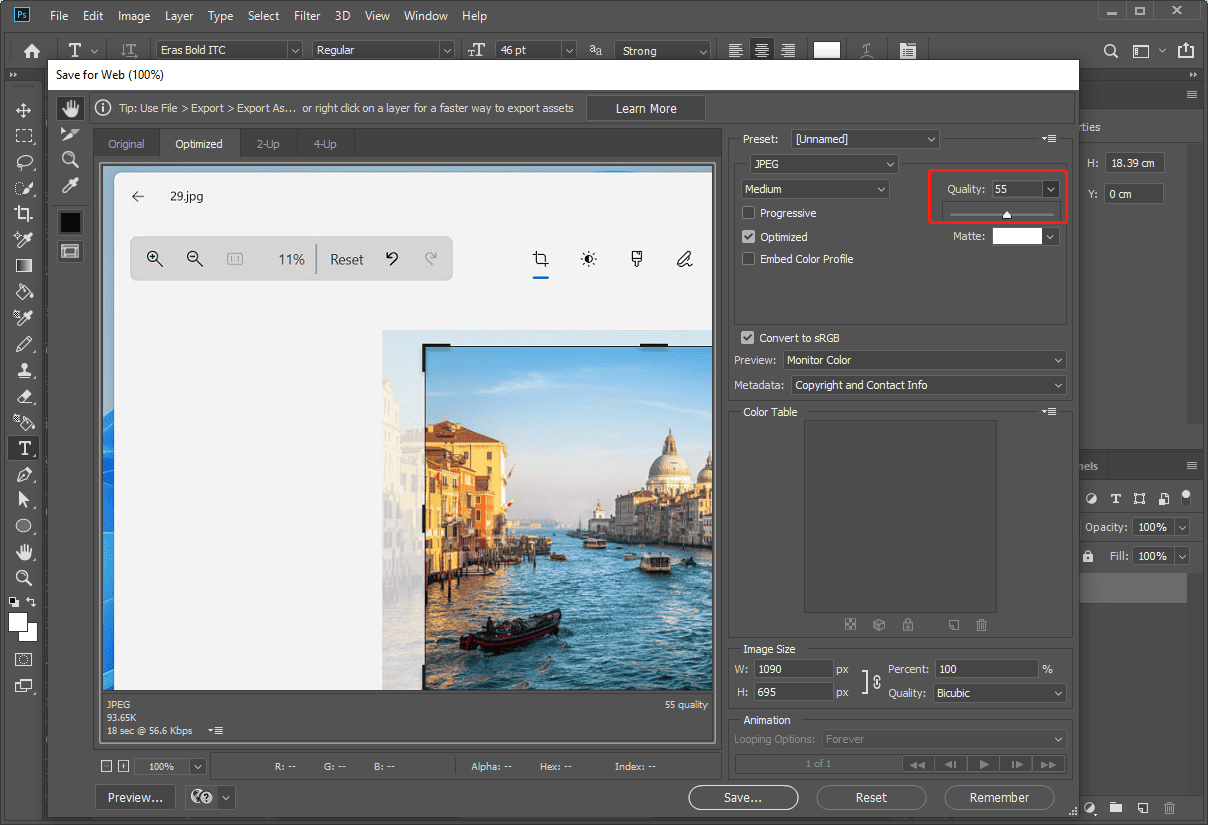
However, I am unable to customize the file size using TinyPNG and iLoveIMG, which is the only drawback. Therefore, when I need to compress photos to a specific file size, I’ll use Photoshop. It allows me to precisely control the file size by adjusting the image quality.
Conclusion
Reducing photo size is not a difficult task. I’ve summarized 4 common methods and reliable tools for minimizing the image’s file size. After checking out this post, I believe you won’t be confused anymore about how to make a photo less MB. It’s your turn now!
About The Author

Position: Columnist
Cora is a tech writer specializing in digital media workflows, with over six years of hands-on experience in video post-production, media transcoding, and screen capture. Her writing is always clear and practical. Cora also produces in-depth software reviews for users across skill levels to help them find the right tool and enjoy video editing.
User Comments :