Audio quality plays a crucial role in any creative project. This post offers clear guides on how to improve audio quality and provides practical tips to help you prepare before recording.
The quality of audio has an essential impact on the viewers’ first impression. The better audio quality gives your audience an impression of your professionalism. It’s necessary to learn how to improve audio quality to make your content more appealing.
When evaluating audio, intelligibility and decibel levels are the two key factors that determine its overall quality. To achieve the best results, it is crucial not only to prepare properly before recording but also to use the powerful audio enhancer during post-production. Let’s first start by exploring what to do before recording.
Make Preparations Before Recording
In addition to the two major factors mentioned above, other factors like background noise, balance and volume consistency, dynamic range, and more also directly influence audio quality. We need to make perfect preparation before recording. The better the original audio file is, the fewer problems we need to solve during post-production.
Choosing the Right Environment
The quiet environment can eliminate unnecessary background noise, such as honks, wind, fans, and so on. Choosing the right environment reduces unwanted noise and improves audio clarity.
Choosing the Right Hardware
Besides the right environment, you should also pay attention to picking the appropriate microphone, headphone, and pop filter. The headphone can prevent audio echoes and allow you to hear how you sound to the microphone. The pop filter can eliminate the impact of plosives on the microphone. All in all, they play an important role in producing better audio quality.
How to Improve Audio Quality Online
It is necessary to make some edits after recording to enhance the audio quality. For example, it lets you remove any unwanted parts and make the volume more consistent. As editing is an essential step, it is fundamental to choose the proper audio enhancer. For anyone who doesn’t want to spend time downloading software, the online audio enhancer is an ideal choice to enhance audio quality effortlessly.
Let’s explore how to improve audio quality online with 2 audio enhancers: Adobe Podcast and Clipchamp.
Method 1: Adobe Podcast
Adobe Podcast is a powerful AI-powered audio tool that helps users record and edit audio. It makes audio sound like it was recorded in a professional studio. It features a suite of editing tools, such as enhanced speech, eliminating background noise, and transcribing audio.
Here are the steps on how to improve audio quality using Adobe Podcast.
Step 1: Visit the Official Website
Navigate to the official website of Adobe Podcast (https://podcast.adobe.com/en/enhance) in your browser.
Step 2: Edit the Audio
Click Choose files or drag and drop your audio from your computer to upload it. Next, hit the Enhanced icon below the audio to boost the speech clarity as well as minimize the background noise.
Step 3: Export the Audio
Click the Download icon to export your final audio files to your browser.

Method 2: Clipchamp
Clipchamp is an all-in-one online content creation platform that provides a wide range of tools. It allows users to create video from images, apply effects to videos, add text to videos, and so on. With the intuitive and clean interface, it is easy for beginners to get acquainted with it. Moreover, it offers powerful and free audio adjustment features, including volume enhancement and noise reduction.
Here is how to improve audio quality for free using Clipchamp.
Step 1: Visit the Official Website
Visit the official website of Clipchamp (https://clipchamp.com) in your browser.
Step 2: Edit the Audio
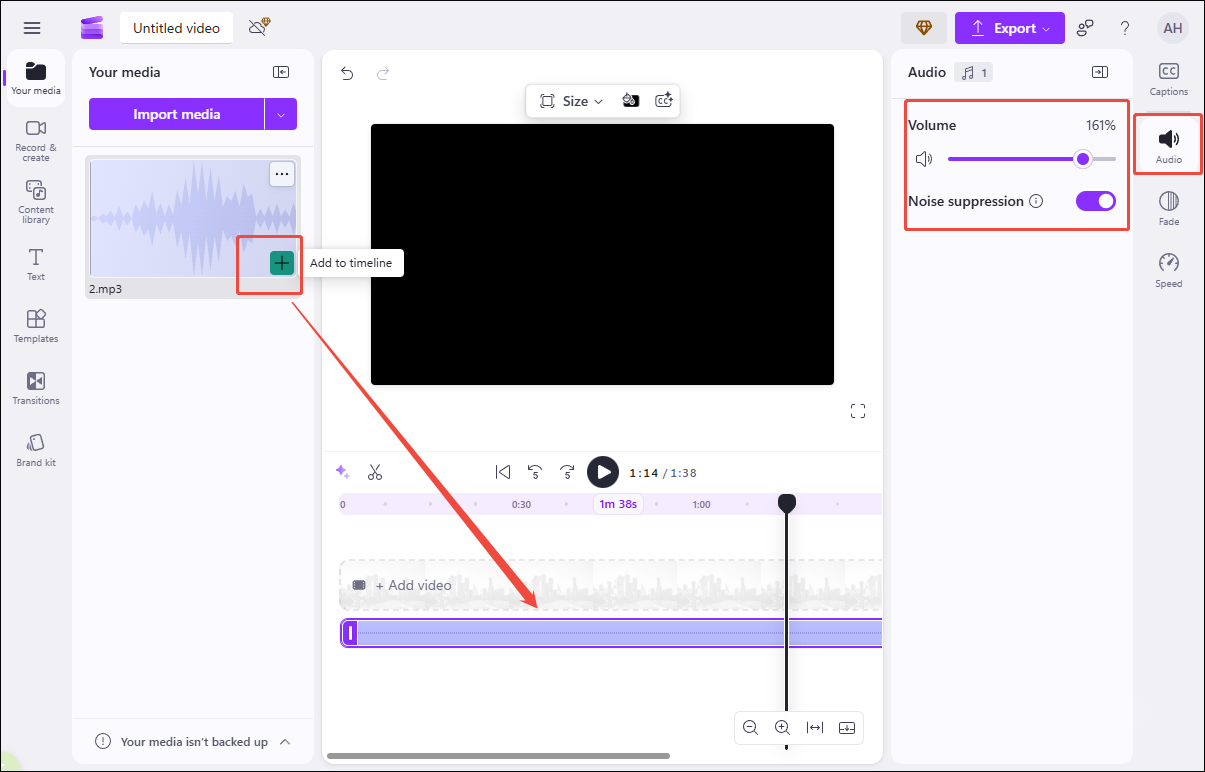
Click Create a video to log in to your account. Then, select Create a new video to access the main workspace. Click Import media to upload your audio file. Next, drag and drop the audio to the timeline or click the Plus icon to add it.
Click the Audio tab on the right panel and move the slider to increase or decrease the volume. Then, hit the Noise suppression button to eliminate the background noise.
Step 3: Export the Audio
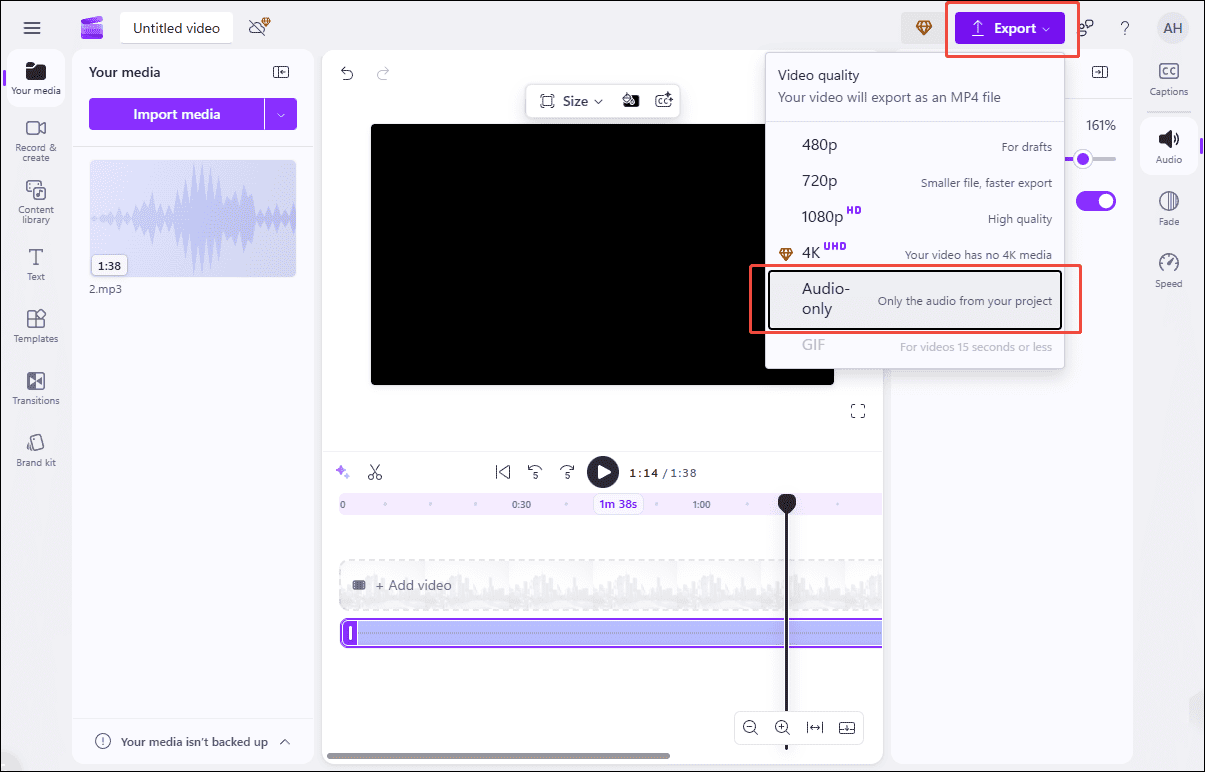
Click the Export icon and select the Audio-only option to save it to your computer.
Conclusion
The post introduces 2 online audio enhancers to help you discover how to improve audio quality and some essential preparations before recording. Choose the preferred one according to your needs to elevate your audio. Hope this article can help you a lot!
About The Author

Position: Columnist
Alice is a tech writer at MiniTool, specializing in tutorials and guides on video editing and screen recording. She stays up to date with the latest tools and techniques to ensure her content is accurate and easy to follow. By combining hands-on testing with continuous learning, Alice aims to help readers solve tech problems efficiently.
User Comments :