A professional headshot plays an important role in personal branding and making a strong first impression. This post explains how to edit professional headshots on Windows using Adobe Photoshop and GIMP, helping you produce clean and refined results.
A professional headshot serves as a visual business card when you are applying for a job or building a personal brand. While taking a great photo is the first step, refining it through editing is what truly brings out a professional look. If you are looking for how to edit professional headshots on Windows, this post will walk you through 2 reliable tools that make the editing process simple and effective.
Why Edit Professional Headshots
Editing a headshot is essential for presenting a polished and confident image. Proper editing enhances facial features, corrects lighting issues, and removes minor distractions that may draw attention away from the subject, which helps transform a simple portrait into a clean, high-quality professional headshot.
To help you create a polished and professional headshot, this post will show you 2 effective tools to edit it with ease.
How to Edit Professional Headshots on Windows
This section will introduce how to edit professional headshots on Windows using Photoshop and GIMP.
Method 1: Edit Professional Headshots on Windows Using Photoshop
Adobe Photoshop is a leading professional image-editing software known for its precision and versatility. With powerful retouching tools and a flexible layer-based workflow, Photoshop gives users complete control over every detail of a photo.
When it comes to editing professional headshots, Photoshop excels at refining facial features, correcting lighting, and achieving a natural, polished appearance. Its advanced tools make it easy to remove blemishes, smooth skin, adjust tones, and create clean backgrounds that fit a corporate style.
Here is how to edit professional headshots on Windows using Photoshop.
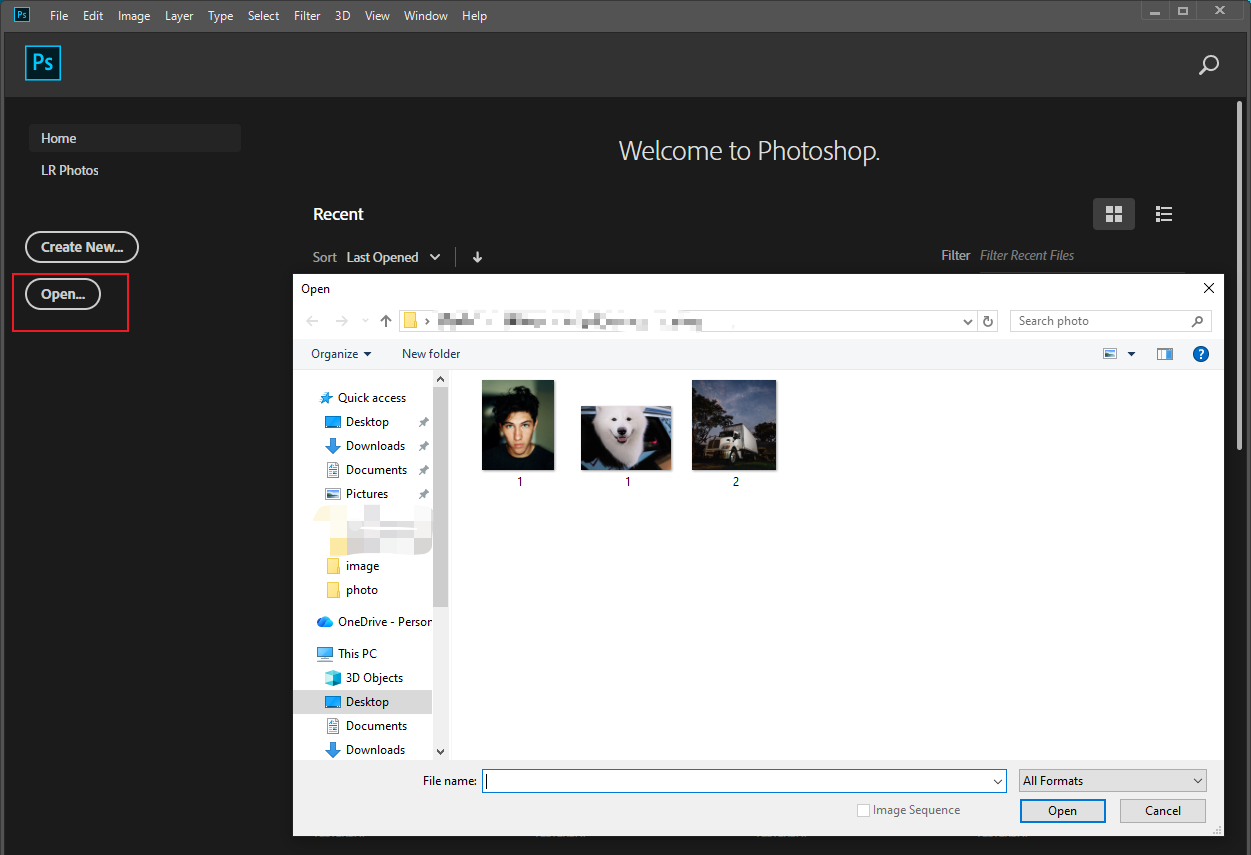
Step 1: Import Your Photo
Launch Photoshop and click the Open option to upload your photo.
Step 2: Basic Adjustments
Click the Filter option at the top of the menu and select the Camera Raw Filter…option to enter the Camera Raw window.
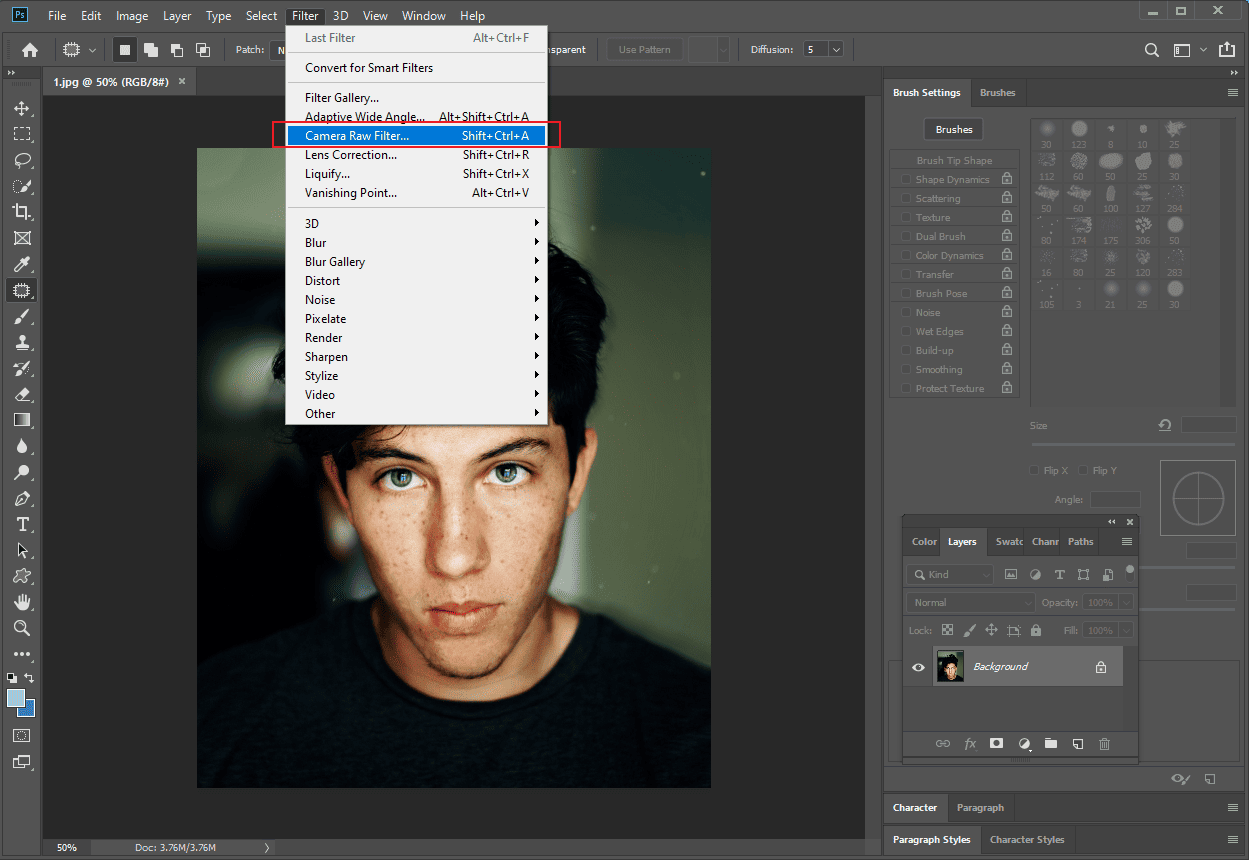
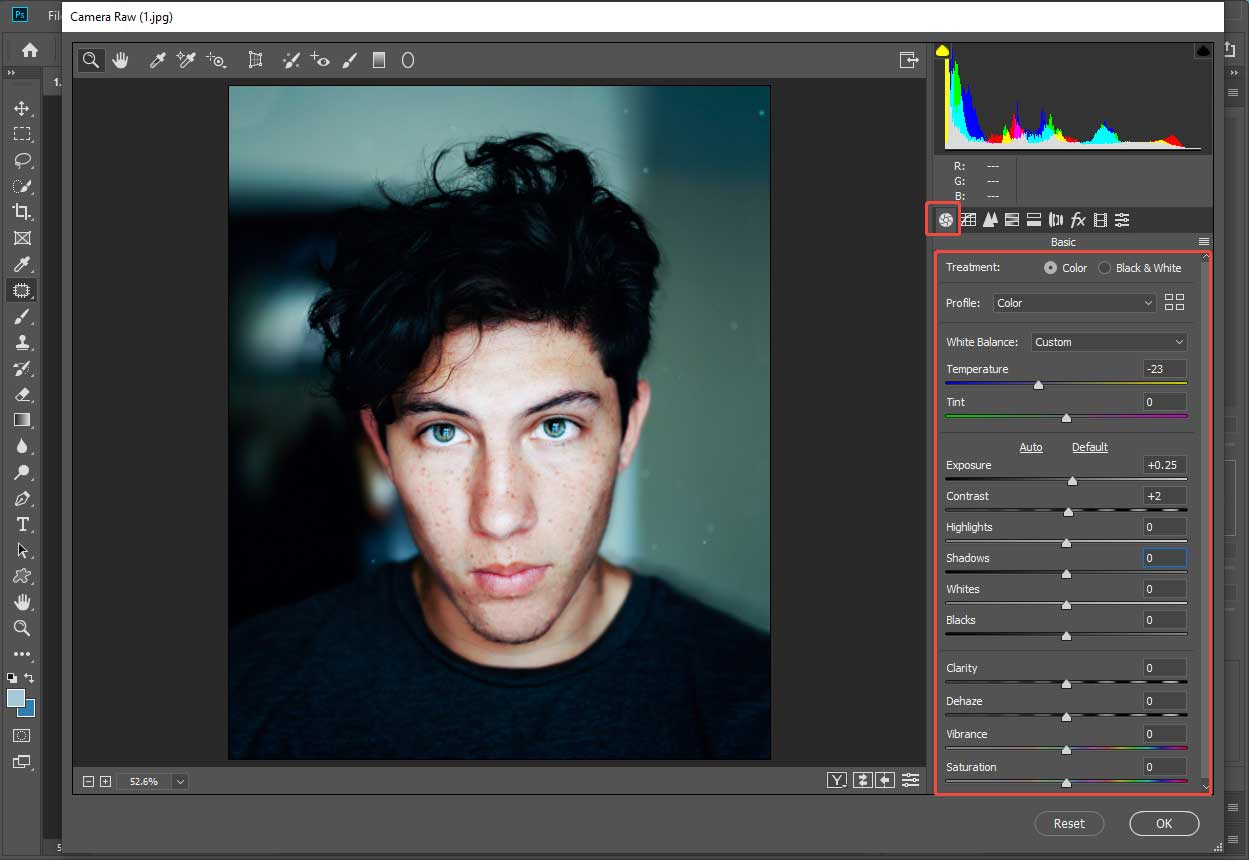
You can enter a precise value or drag sliders to change the photo color. For instance, move the Temperature slider to adjust the photo tone. Drag the Exposure and Contrast sliders to improve the photo brightness. Then, click OK to save the adjustments.
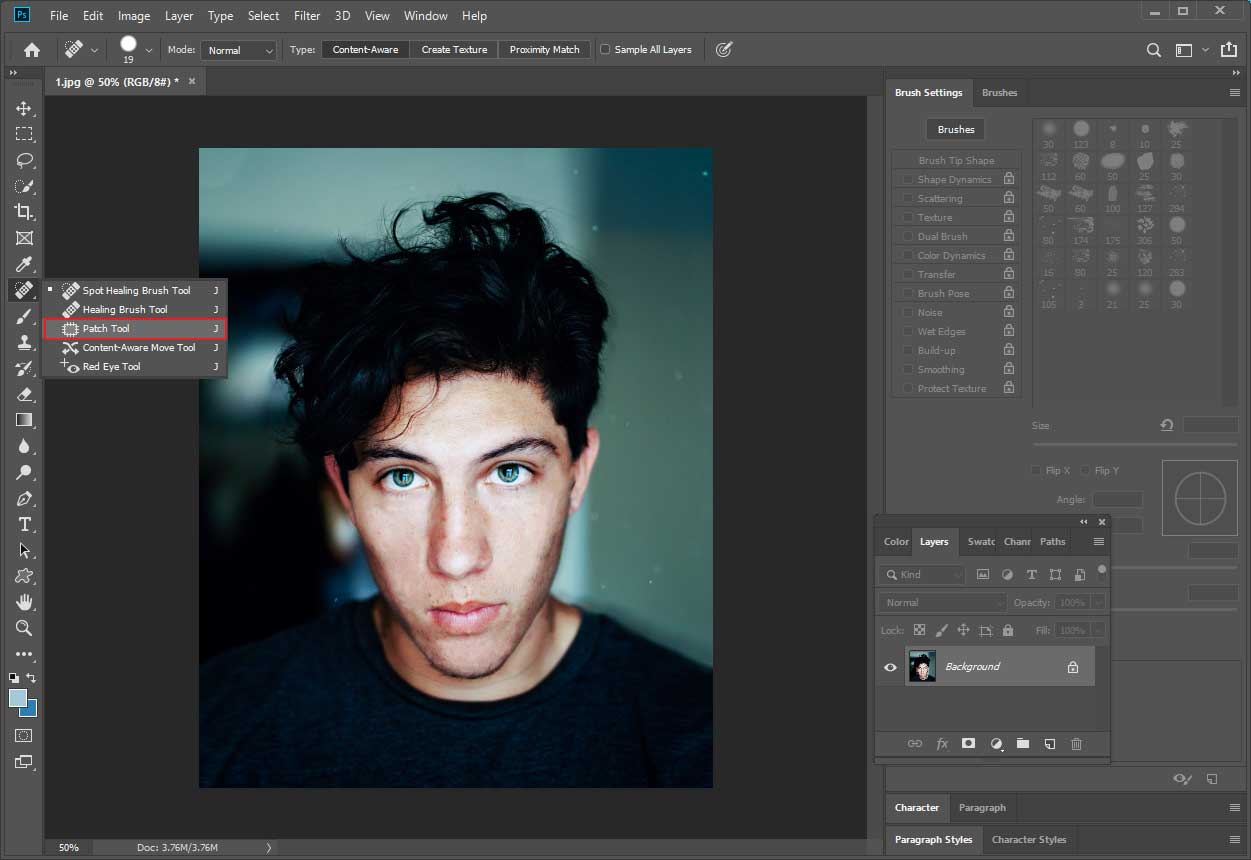
Step 3: Remove the Blemish from the Skin
Click the Spot Healing Blush Tool option in the left toolbar to remove small marks and blemishes from the skin. If you want to remove large blemishes, right-click the Spot Healing Blush Tool option and select the Patch Tool option. Draw a selection around the area you want to correct, then drag it to a cleaner area to replace the part you selected.
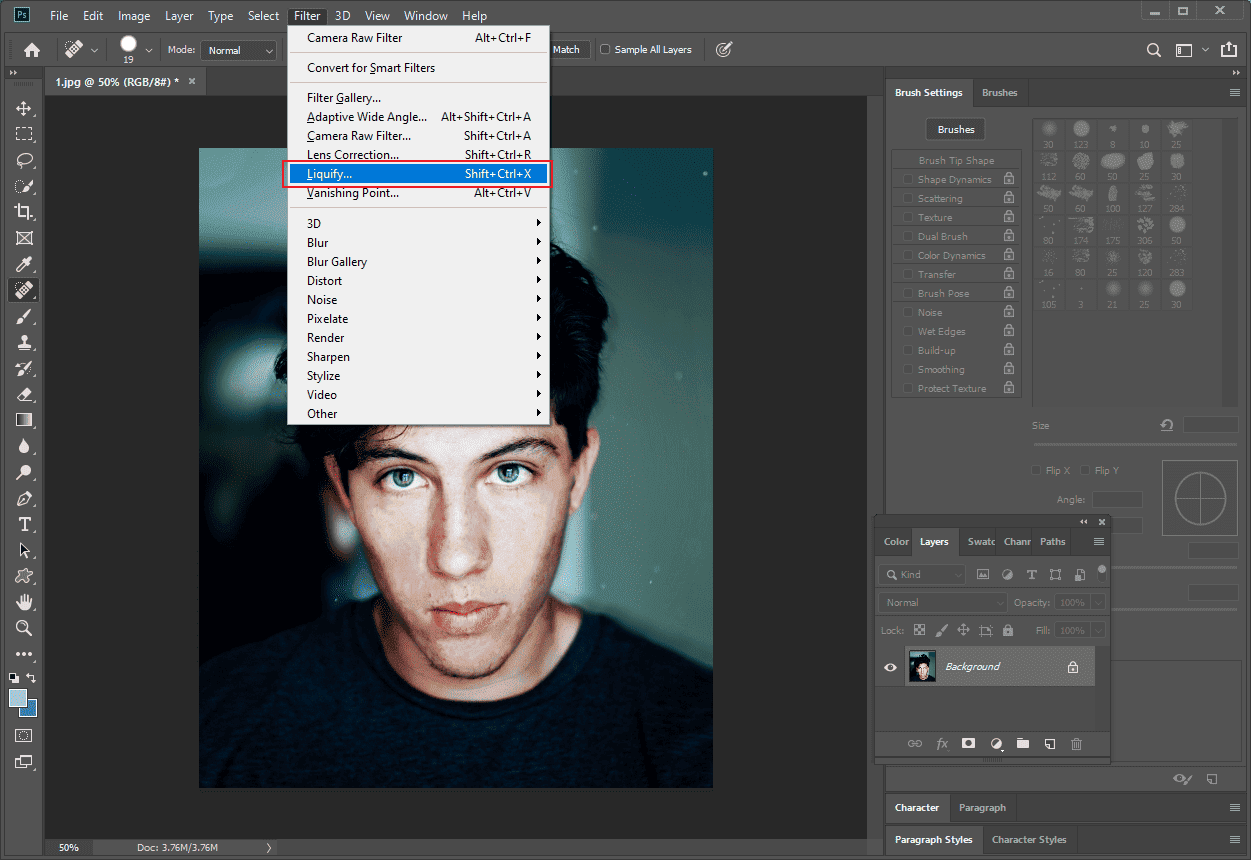
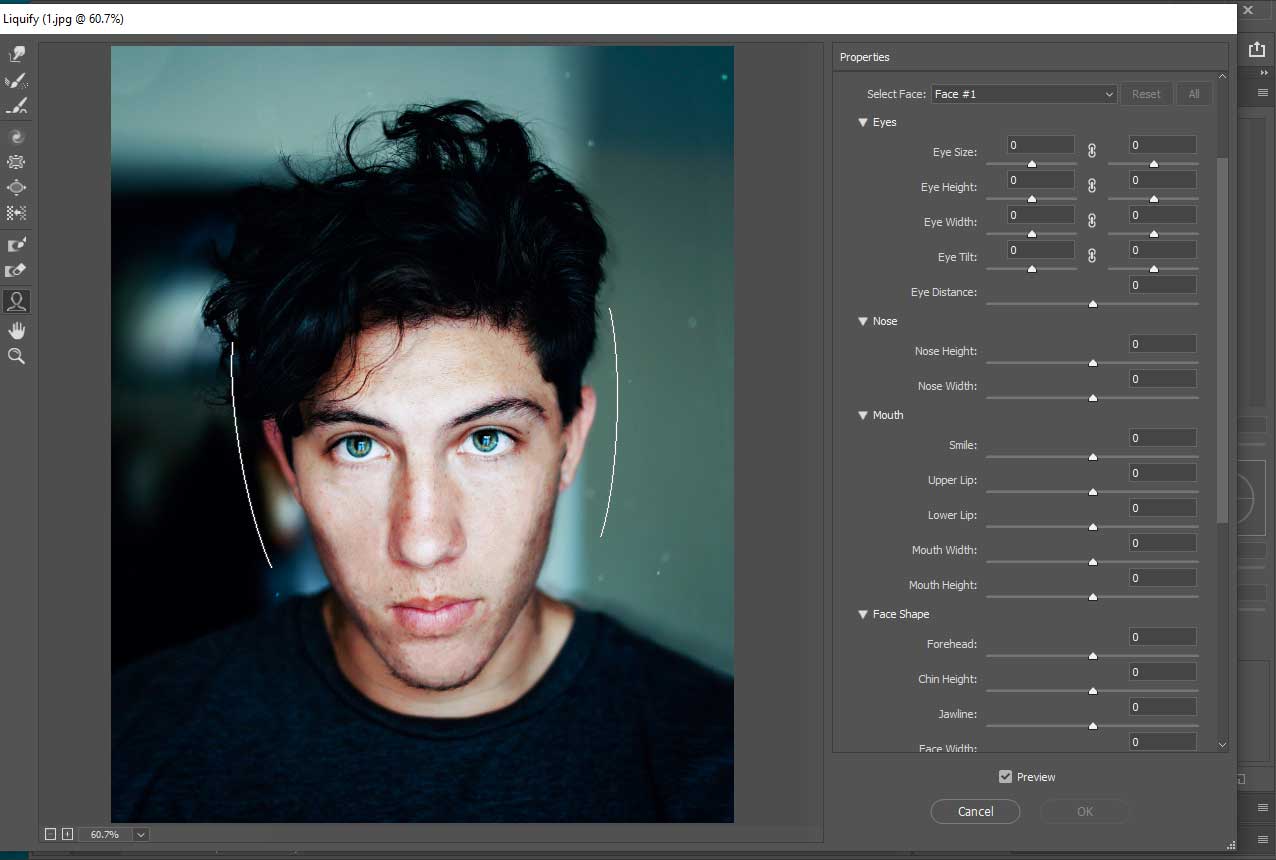
Step 4: Adjust Face Shape
Click the Filter tab at the top of the menu and select the Liquify…option.
You can adjust the facial features by entering a precise value or moving the slider. For example, if you want to change the ratio of your face, move the Forehead, Chin Height, Jawline, and Face width sliders to make it more perfect.
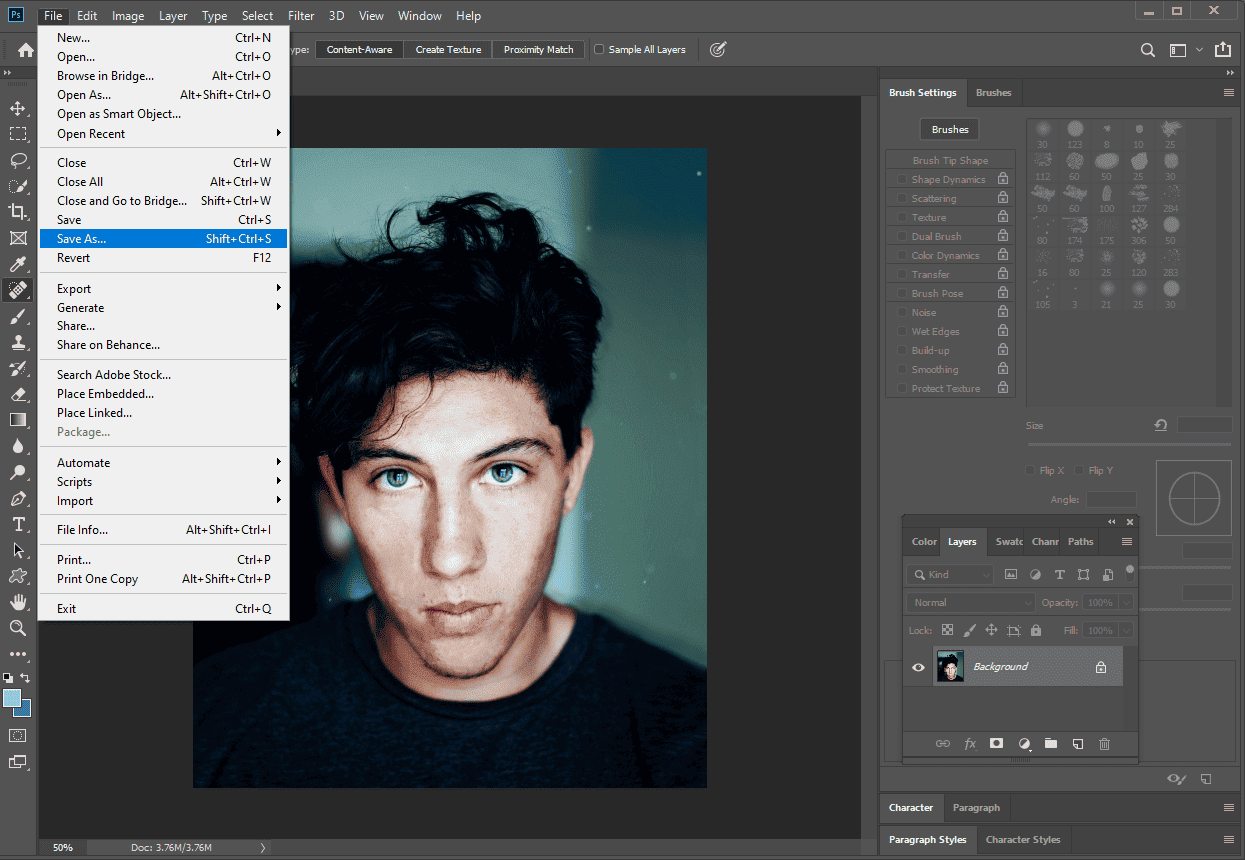
Step 5: Save the Final Photo
Once the editing is finished, click the File tab at the top of the menu and select Save As to save it to your computer.
Method 2: Edit Professional Headshots on Windows Using GIMP
GIMP is a free and open-source photo editor. Despite being cost-free, it supports a robust set of retouching and adjustment tools, making it a practical choice for users who want professional results without a subscription.
For editing headshots, GIMP offers reliable tools to improve skin texture, balance exposure, and enhance color accuracy. Its layer-based editing system allows for precise adjustments. With careful use, GIMP can produce clean, well-balanced headshots suitable for resumes, profiles, and corporate use.
How to edit professional headshots on Windows using GIMP? Follow the steps below.
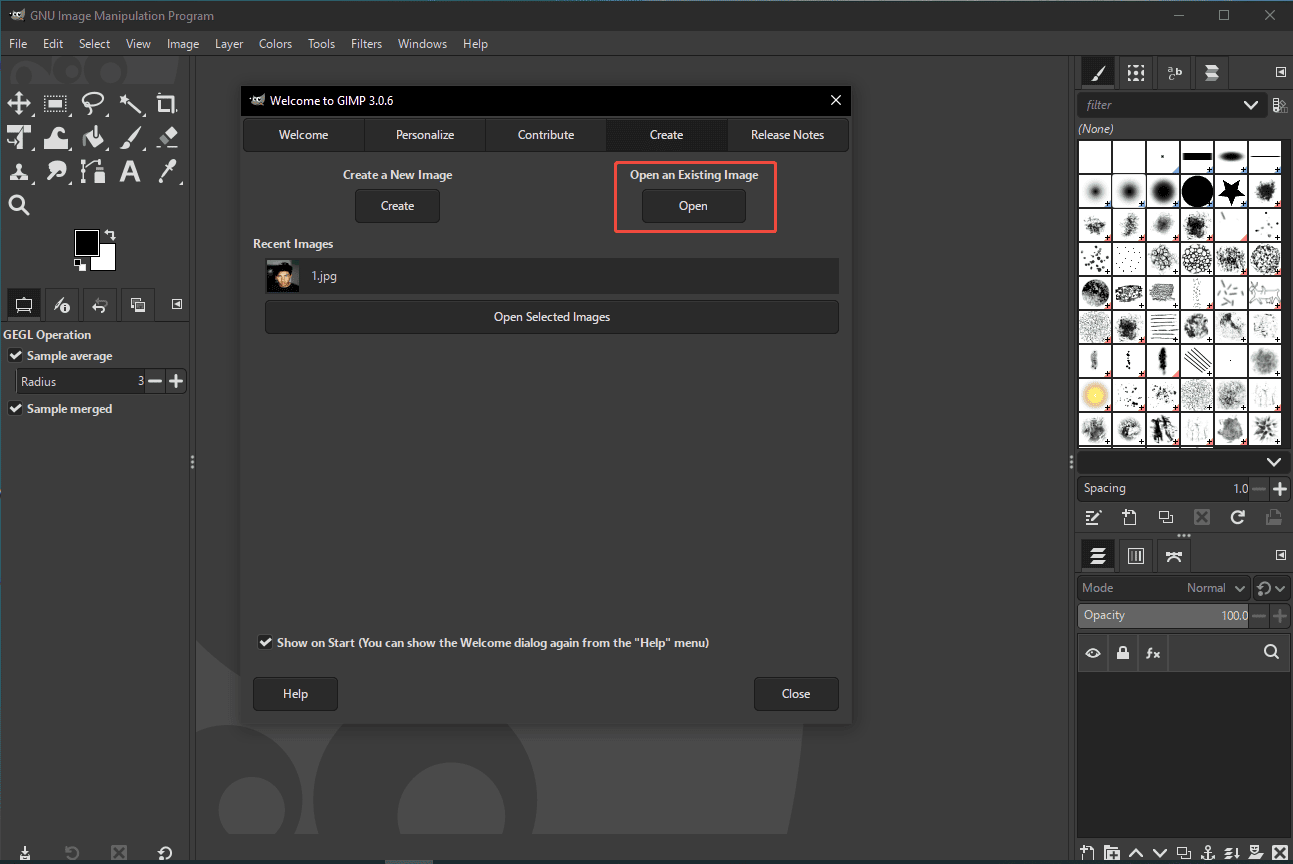
Step 1: Import Your Photo
Launch GIMP and click Open to import your photo.
Step 2: Adjust the Photo Color
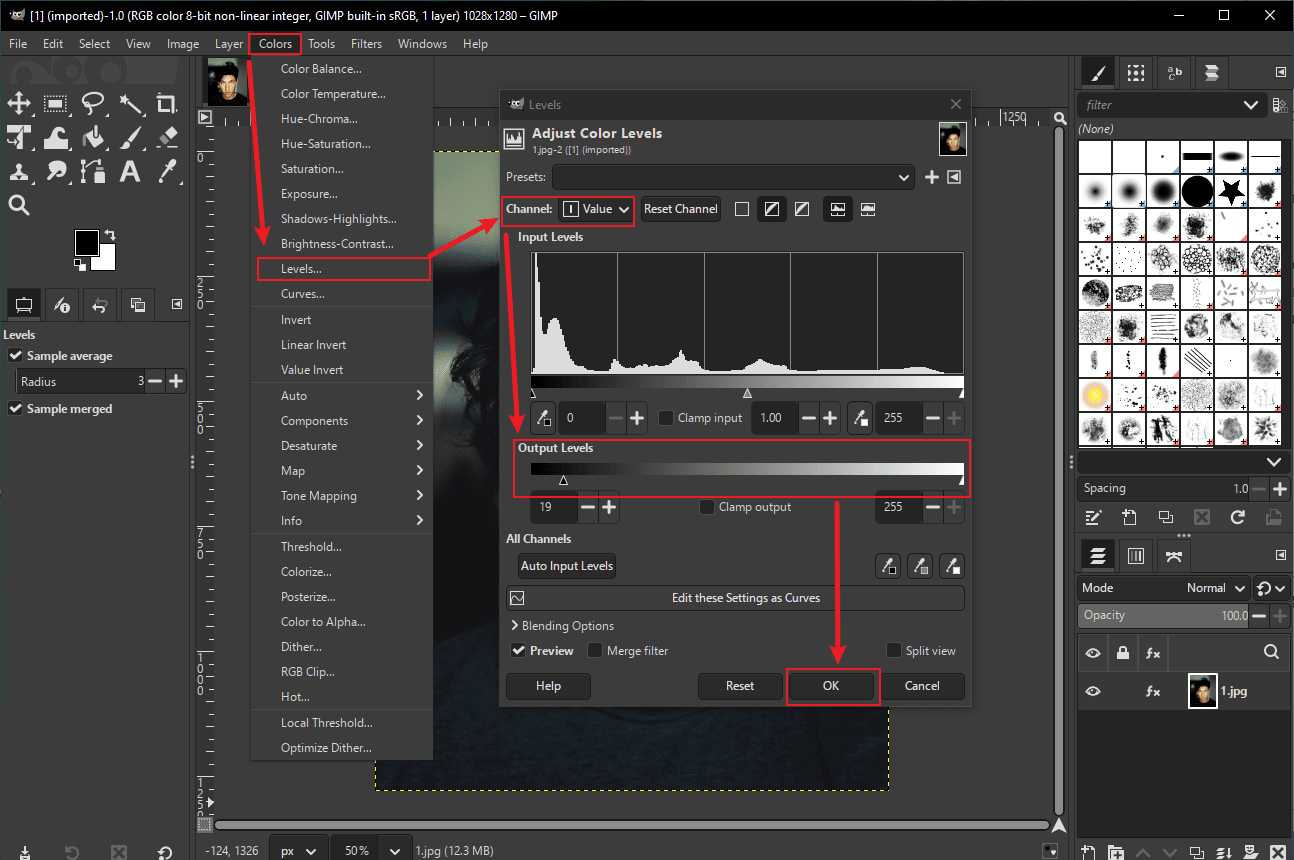
Click the Colors tab at the top of the menu and select Levels…. Then, move the Output Levels slider in the Value Channel to adjust both brightness and contrast of the image. Next, click the Channel option and select Red, Green, and Blue one by one to change the image tone. If you are satisfied with it, click OK.
Step 3: Remove the Blemish from the Skin
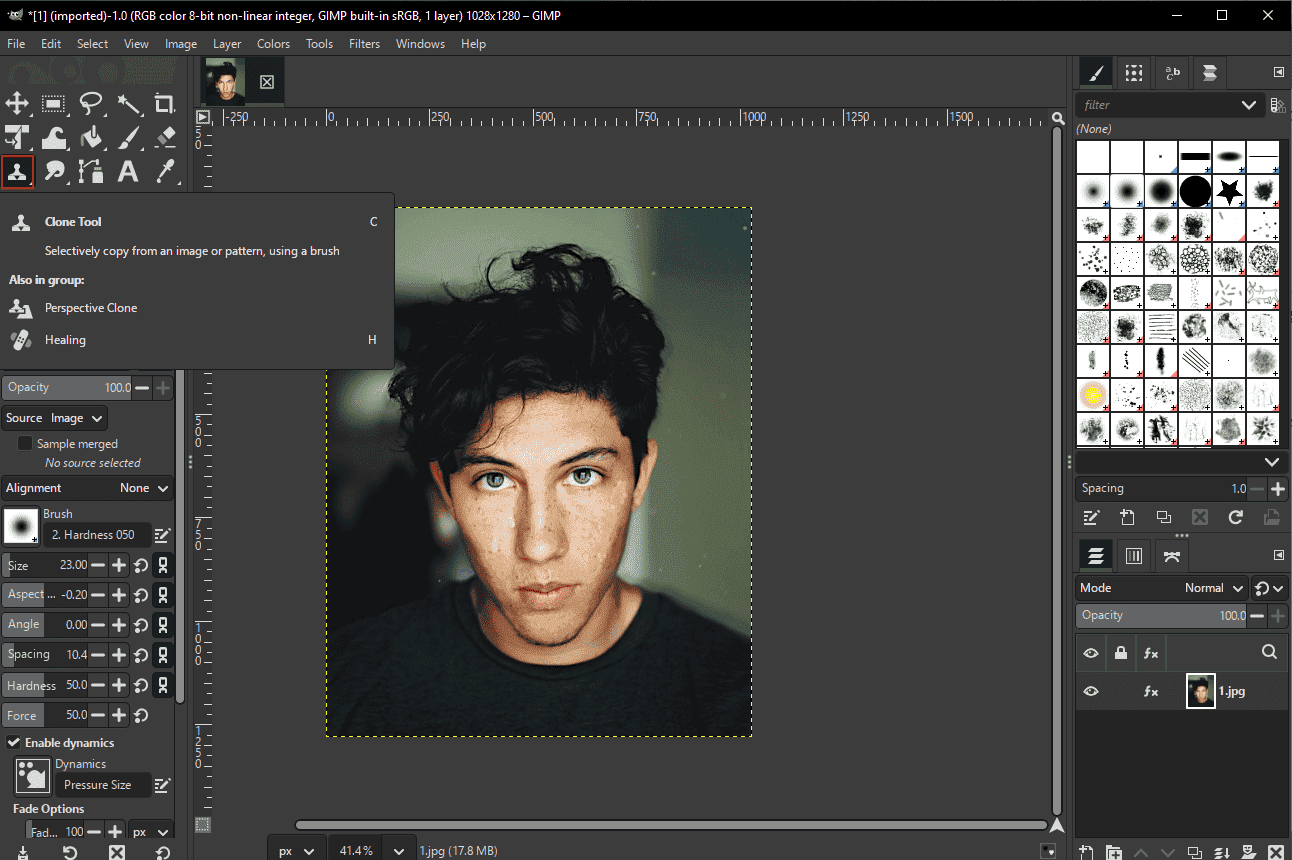
Click the Clone Tool option in the left toolbar. Press the Ctrl key and move the cursor to select a clone source. Then, click the point that needs to be improved to replace it.
Step 4: Sharpen Your Photo
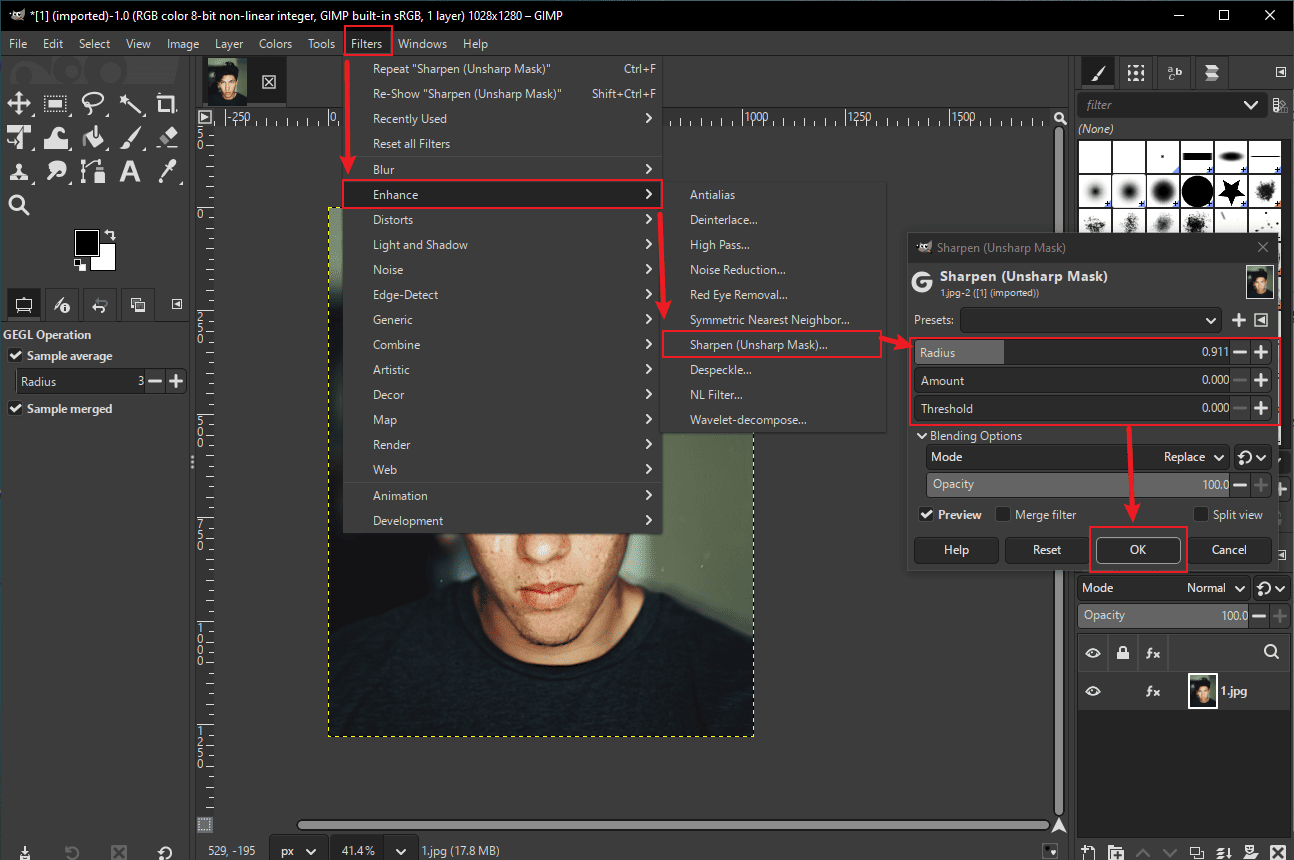
Click Filters and select Enhance. Then, select Sharpen (Unsharp Mask) to access the Sharpen window. There are three sliders here: Radius, Amount, and Threshold. The Radius slider controls how wide the sharpening area is, the Amount slider adjusts how strong the sharpening looks, and the Threshold slider decides which details are sharp enough to be affected. You can customize them to adjust the photo.
Step 5: Export the Photo
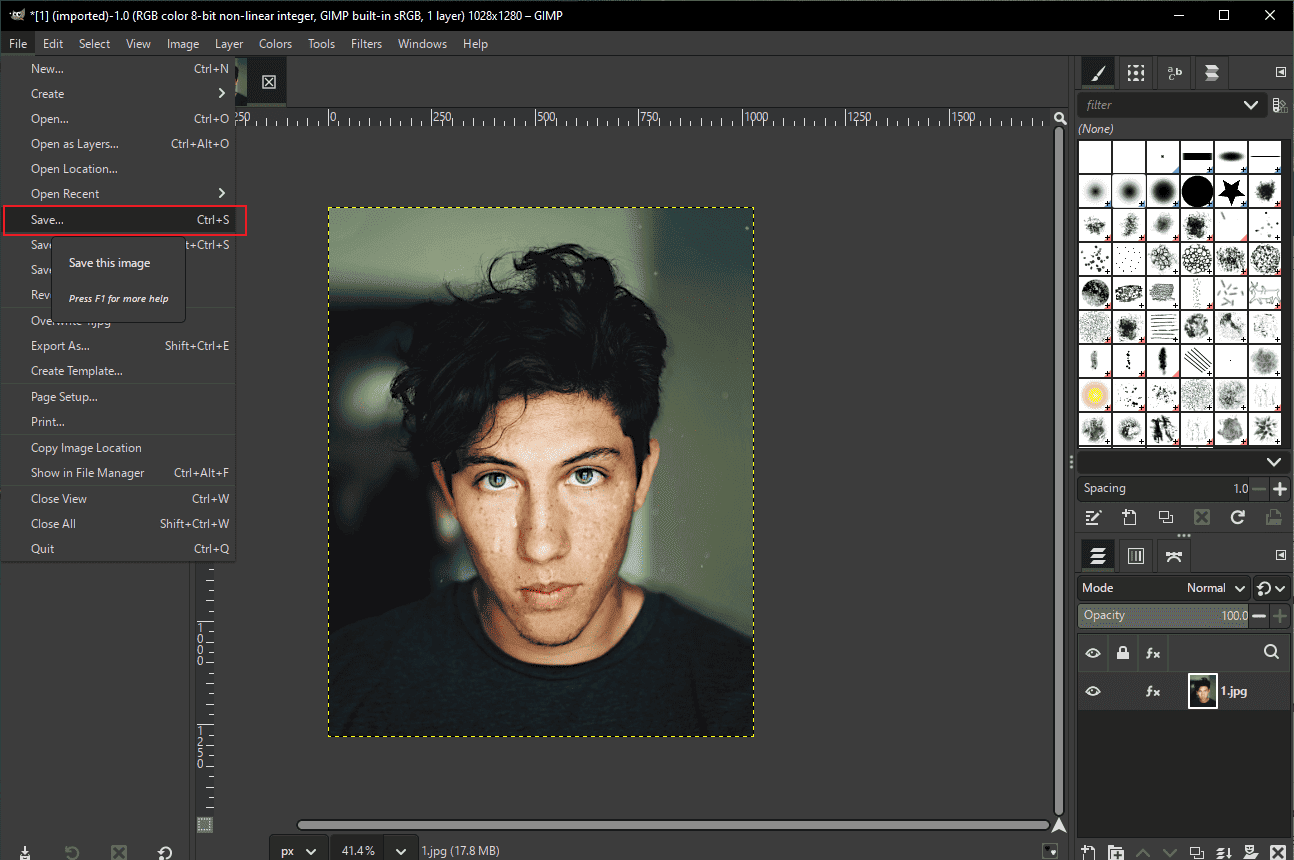
If you finish the final photo, click File and select Save to save the photo to your computer.
Conclusion
Overall, this post demonstrates how to edit professional headshots on Windows, helping you transform a simple portrait into a refined and confident image. With the right adjustments and tools, creating a standout headshot becomes both efficient and achievable. Hope you find this guide helpful!
About The Author

Position: Columnist
Alice is a tech writer at MiniTool, specializing in tutorials and guides on video editing and screen recording. She stays up to date with the latest tools and techniques to ensure her content is accurate and easy to follow. By combining hands-on testing with continuous learning, Alice aims to help readers solve tech problems efficiently.
User Comments :