Curving text in Photoshop is a creative skill. This guide from MiniTool MovieMaker – one of the best video editing software will introduce how to curve text in Photoshop to make your work more vivid and interesting.
The Benefits of Curved Text
Before learning the exact steps of how to curve text in Photoshop, you need to know the benefits of curved text so that you can better apply this effect in practice.
Curved text has several benefits in design, making it an important element in many creative projects. First of all, curved text can add visual appeal and help your design stand out.
Second, curved text can add a sense of movement and flow to a design. By combining text with other graphic elements, you can create work with more layers and depth.
Additionally, curved text better matches the overall style of the design. Whether it’s a gentle curve or a sharp angle, proper text bending can enhance the consistency of a design, making it professional.
MiniTool MovieMakerClick to Download100%Clean & Safe
How to Curve Text in Photoshop
As we all know, Photoshop is a very professional image editing application. It provides a wealth of tools and options, including image compositing, painting, word processing, etc. You can adjust and beautify your images with a variety of tools. Photoshop also has curved text generator tools that let you curve text so that you can add dynamism and personality to your graphic works.
In the following, we’ll cover three different ways to bend text, each with its unique advantages. After mastering these techniques, you’ll be able to integrate curved text into your designs easily. Let’s take a look at the three methods!
Method 1: Use the Text Warp Tool
The text warp tool is Photoshop’s easiest and fastest way to curve text.
Step 1: Go to the Photoshop official website, download and install it on your computer.
Step 2: Launch this software, select Create New, and input your design’s name, dimensions, and other features on the pop-up window. Click Create to create a new document.
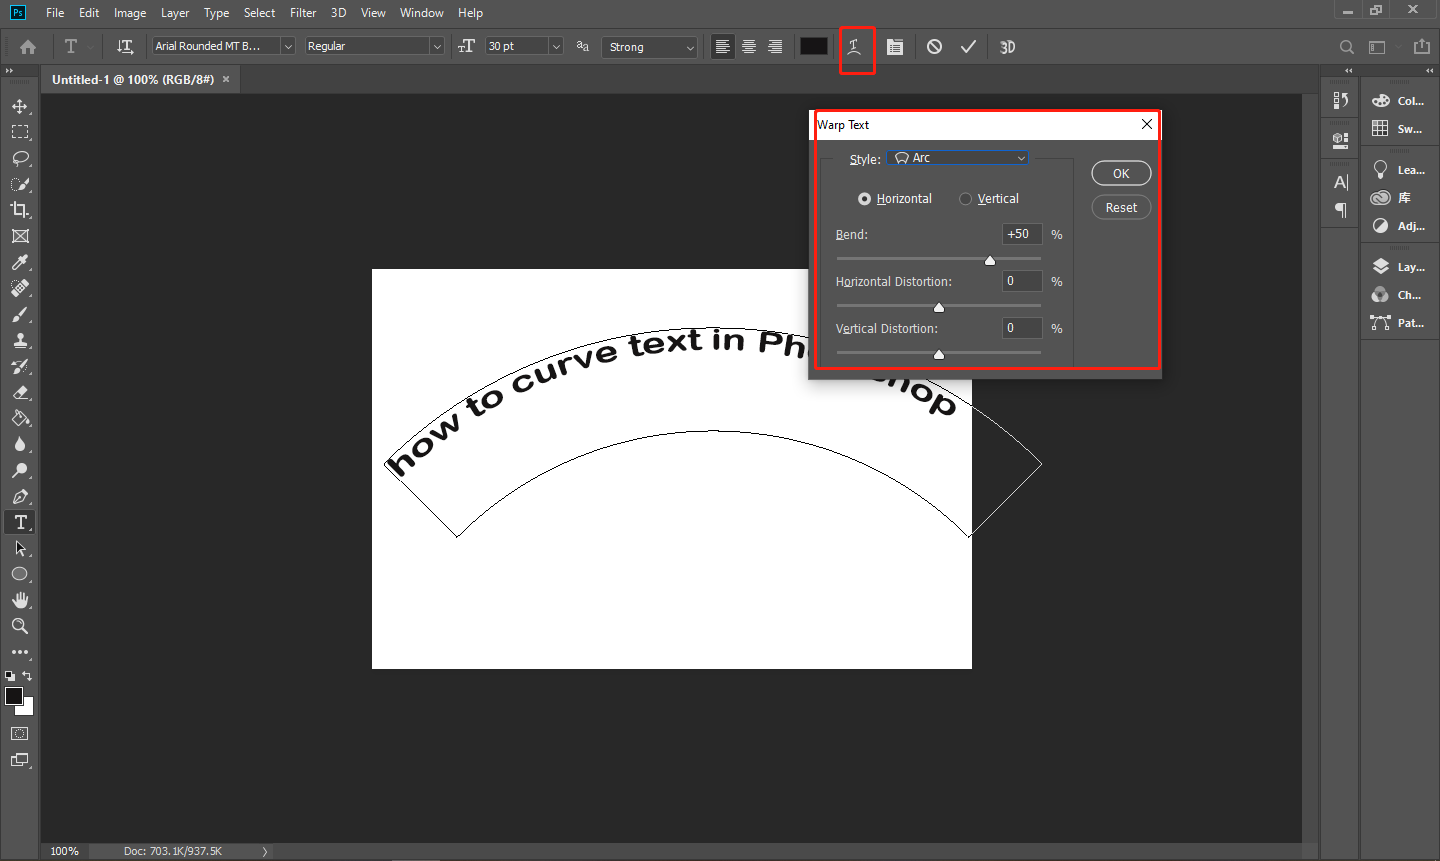
Step 3: Click the T icon in the left toolbar. Click anywhere on the canvas and input the text you want, and you can change the text font style, size, text orientation, alignment, etc. in the top toolbar.
Step 4: Click the Create warped text icon in the toolbar, and select the Arc style in the pop-up window. Under Style, you can select Horizontal or Vertical, and adjust the degree of the text’s arc by moving the Bend slider. You can also set the Horizontal Distortion and Vertical Distortion by their slider. Then click OK to save the design.
Step 5: After getting the curved text, go to File > Save As to save your work.
Method 2: Use the Ellipse Tool
Here’s how to bend text in Photoshop around a circle using the ellipse tool.
Step 1: Open Photoshop, and go to Create New > Create to save a new document.
Step 2: Right-click on the Rectangle tool button from the left toolbar and choose Ellipse Tool. Change the Shape mode to Path in the top toolbar, and draw a path on the canvas.
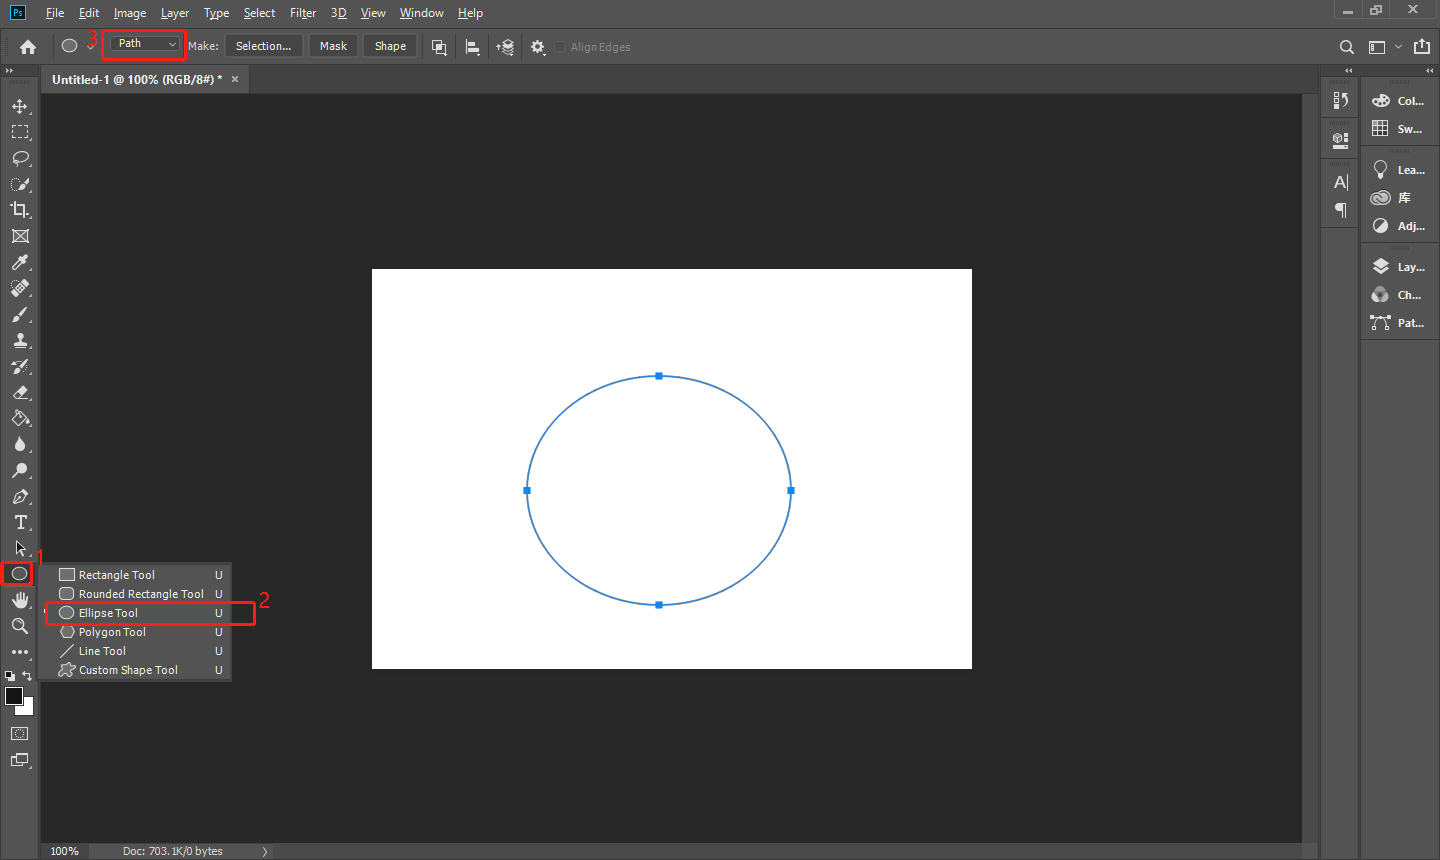
Step 3: Click the T icon and click anywhere on the path. Then type your text content and click the check icon to save the editing. If you want to change the starting and ending point of your curved text, click the Path Selection Tool icon and drag the point to reposition your text.
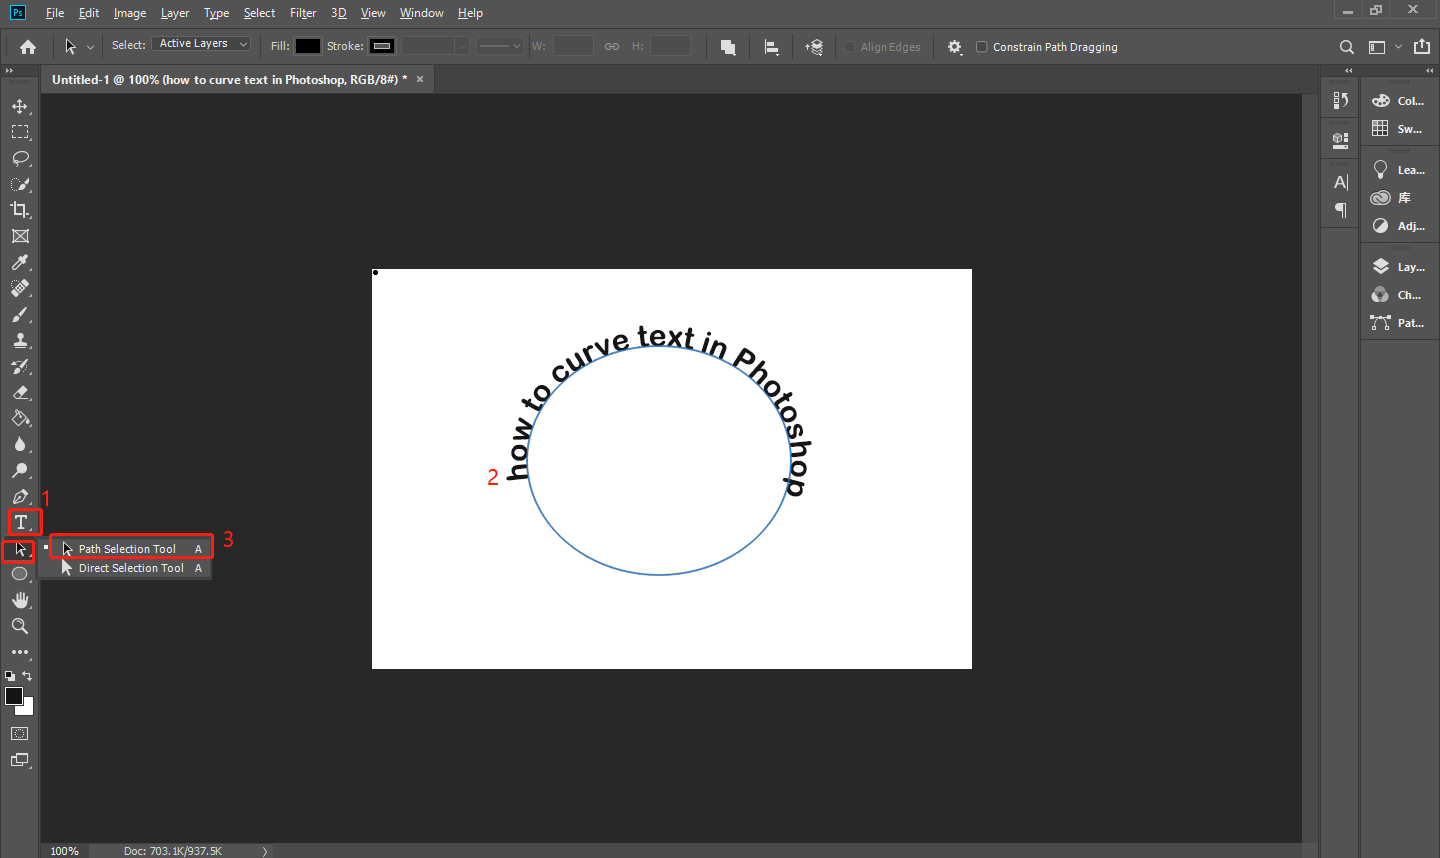
Step 4: After finishing the above editing, go to File > Save As to save your work.
Method 3: Use the Pen Tool
The third method allows you to create paths that are used to curve text in various shapes.
Step 1: Launch Photoshop and create a new document.
Step 2: Click Pen Tool in the left toolbar, and select Path mode in the top toolbar. Click once on the canvas. Then, click another part of the canvas to place the second anchor point, and this time press Shift while dragging down with the mouse.
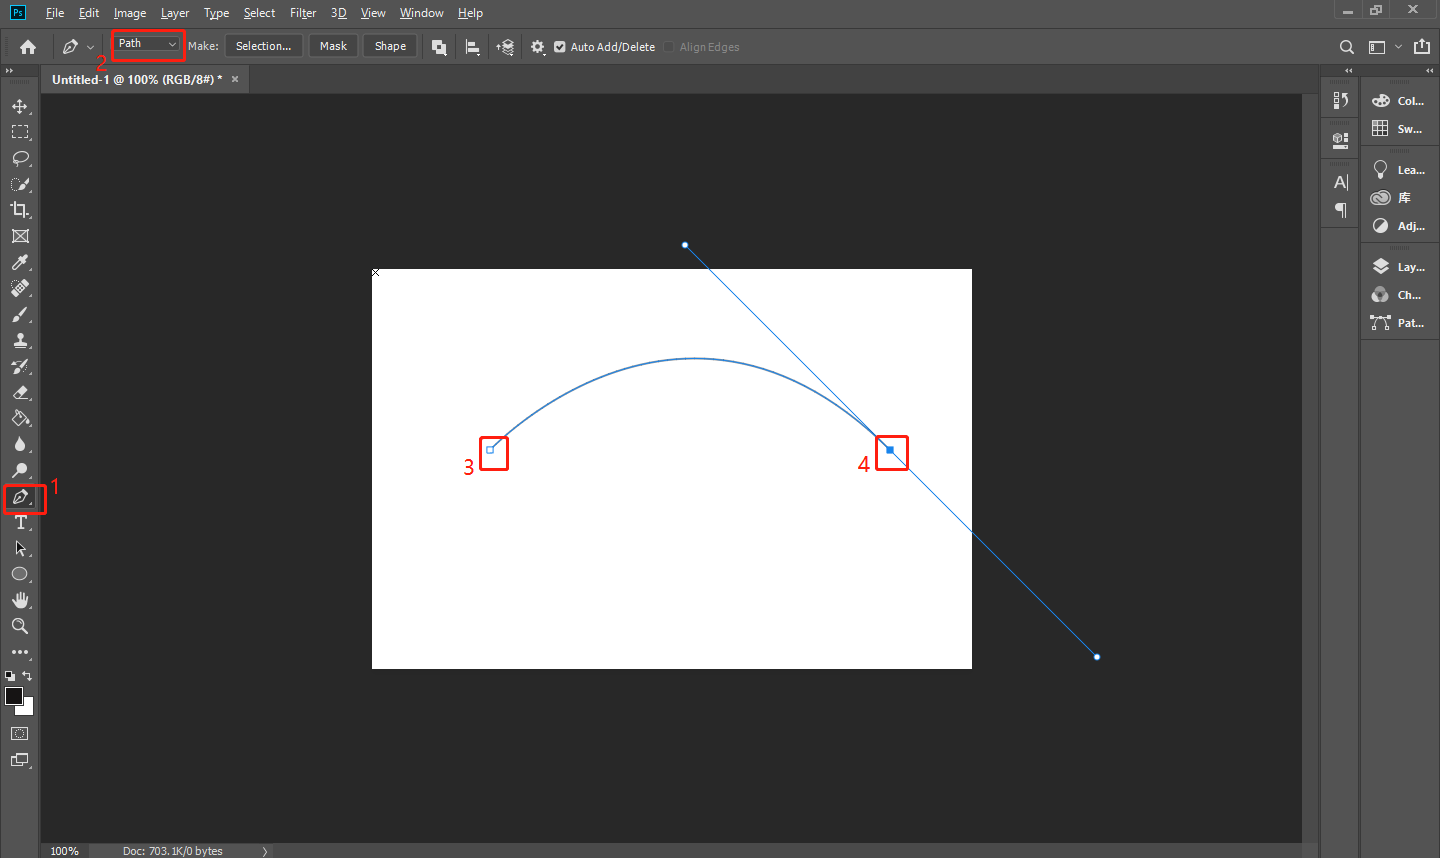
Step 3: Select the T icon, click anywhere on the path, and input your text content. After that, click the check icon in the top toolbar to save the curved text.
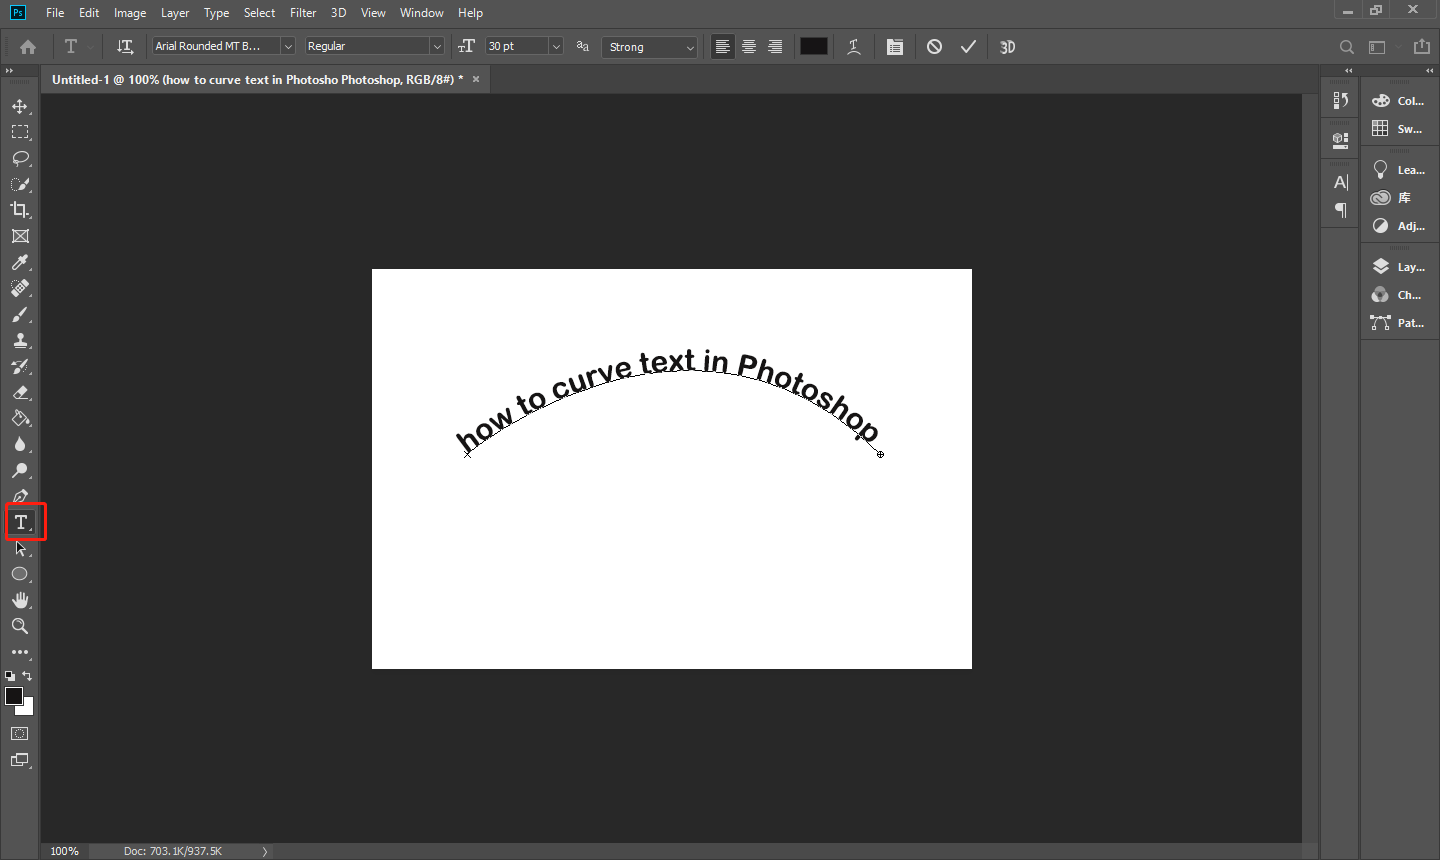
Step 4: Go to File > Save As to save your work.
Bottom Line
In conclusion, curving text in Photoshop is a very creative technique. I am sure you have mastered how to curve text in Photoshop and I’m looking forward to your better work.


User Comments :