Smoke effects are often used to add mystery and layer. This article from MiniTool MovieMaker – one of the best video editing software will explain how to create a smoke effect in Photoshop to add a unique look to your work.
Photoshop is a very important and powerful tool that offers rich tools and features to handle a wide range of complex visual effects. Among them, the smoke effect, as a unique visual element, is often used to create atmosphere and enhance the expression of the work. Next, this article will introduce 2 solutions on how to create smoke in Photoshop, adding a unique atmosphere and charm to your creations.
MiniTool MovieMakerClick to Download100%Clean & Safe
Method 1: How to Create Smoke in Photoshop Using Overlays
Utilizing overlay layers is a simple and effective way to simulate smoke effects in Photoshop. This method overlays a ready-made smoke image onto your design and achieves a natural effect by adjusting the opacity and blend modes.Let’s take a look at the detailed steps on how to add smoke to a photo.
Step 1: Go to the official Photoshop website, download and install it on your computer.
Step 2: Launch this software, and click Open to import your base image. Go to File > Place Embedded to import the overlay image.
Step 3: Adjust the overlay image’s position and size by dragging the mouse arrow. Then click the check icon to save the current operation.
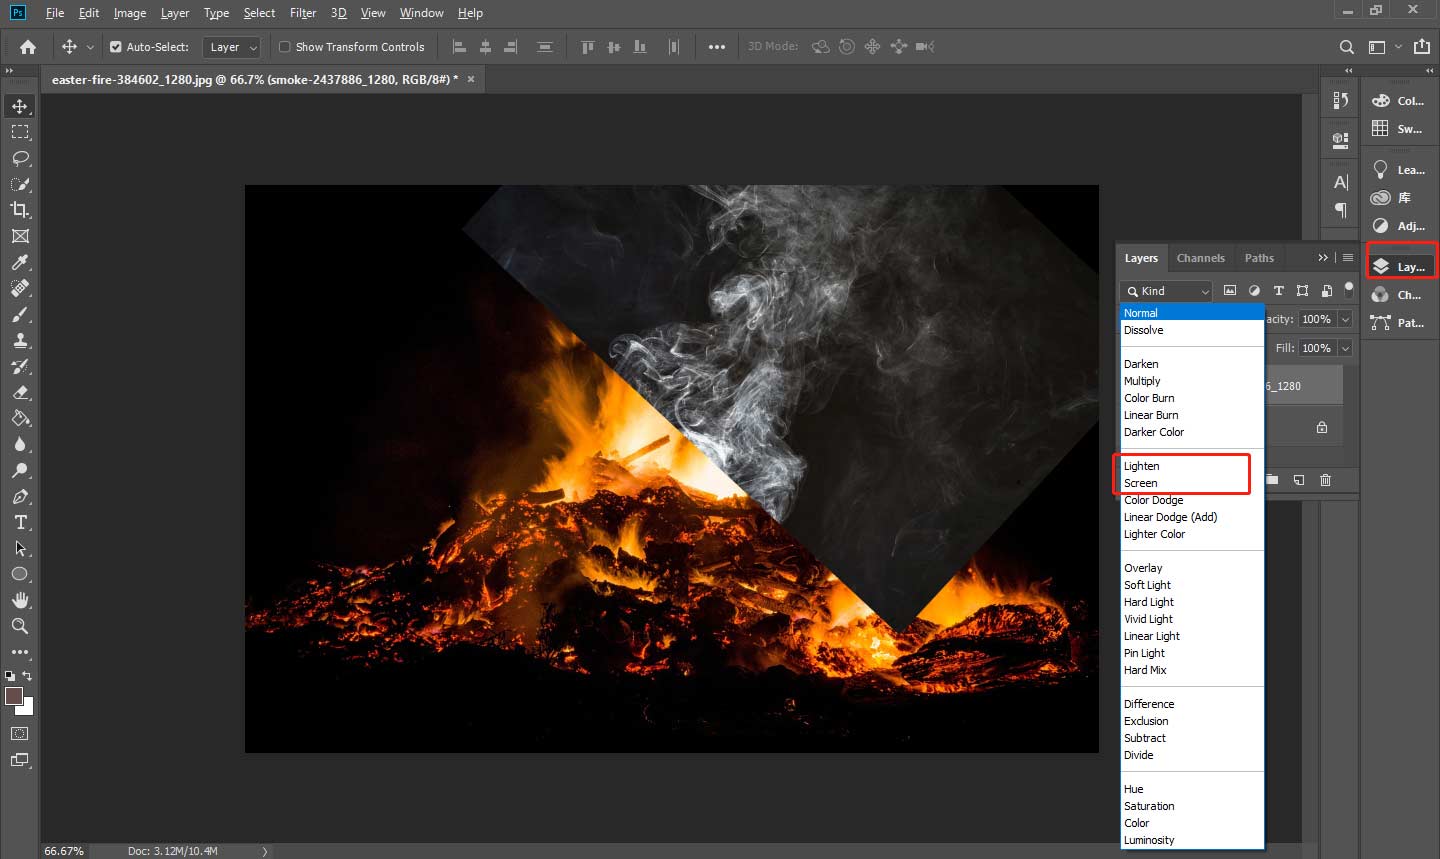
Step 4: Find the Blend Mode in the Layers panel, and select Lighten or Screen in the dropdown menu. After that, you can reduce the Opacity by dragging its slider to the left, making the smoke effect blend better into the image

Step 5: If you want to adjust the edges of the overlay, you can use a layer mask. Click the Add layer mask icon at the bottom of the Layers panel.
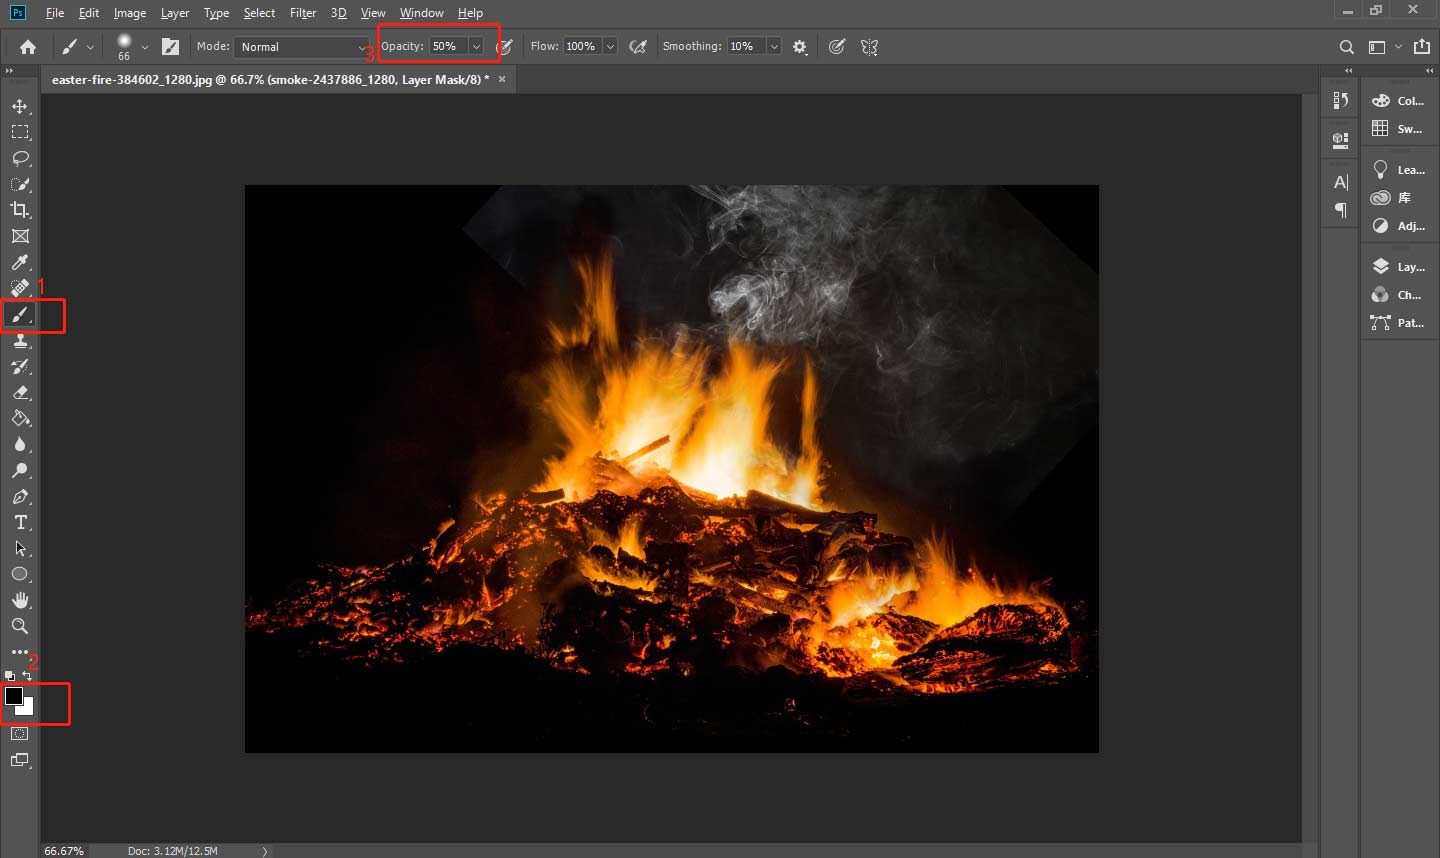
Step 6: Select the Brush Tool and set the foreground color to black. Reduce the Opacity by dragging the slider to the left. Use the Brush Tool to brush the smoke area you want to remove.

Step 7: After getting a satisfactory smoke effect, go to File > Save As to save your work.
Method 2: How to Create Smoke in Photoshop Using Brushes
Using the brush tool is one of the easiest and fastest ways to create smoke effects in Photoshop. By choosing the right smoke brush, you can manually draw unique smoke shapes and flows. This method gives greater creative freedom for you. Follow the steps below to get started.
Step 1: Download and install Photoshop on your computer. Then click Open to upload your image.
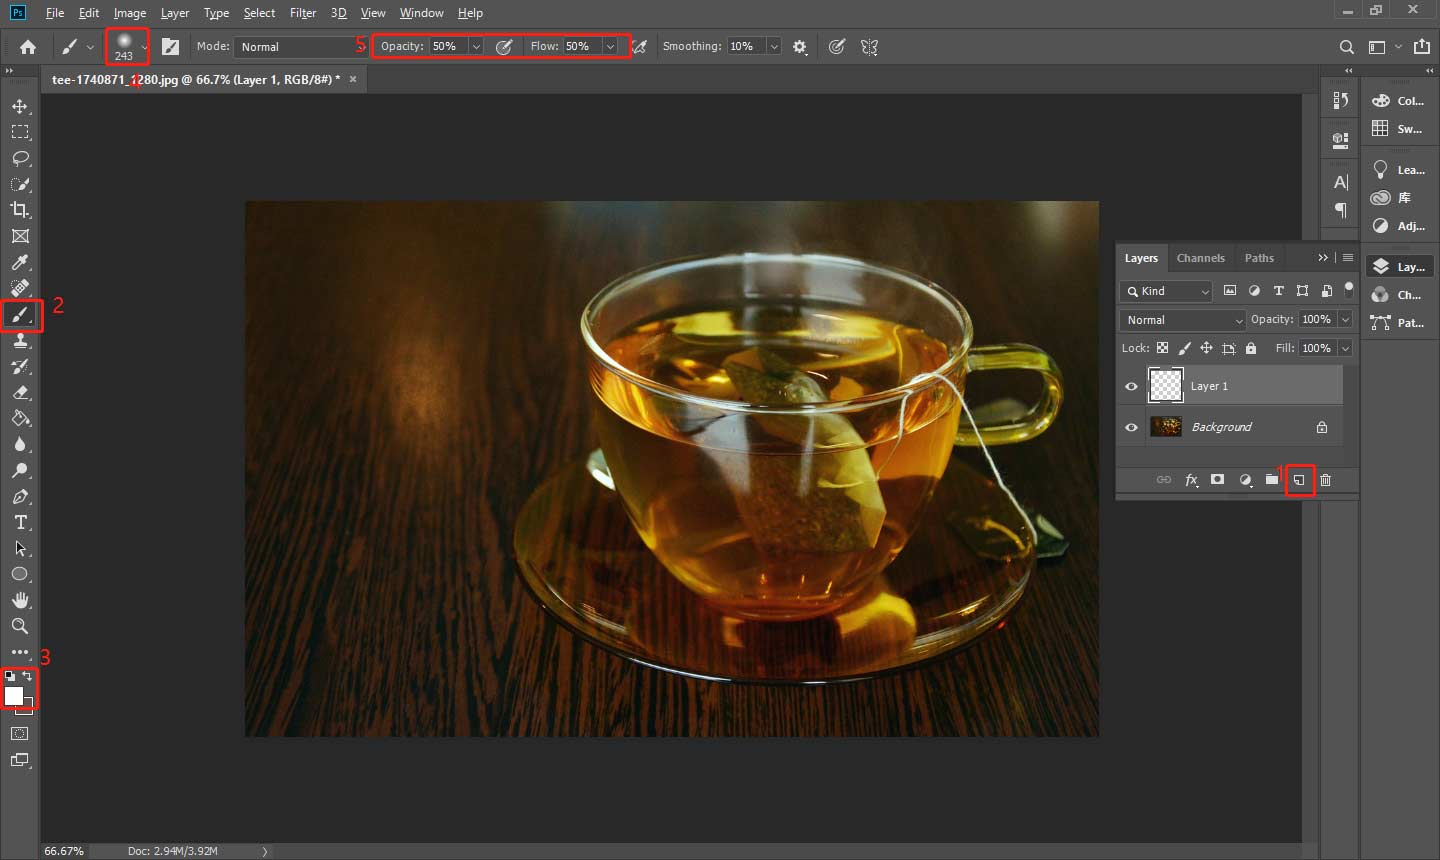
Step 2: Click the Create a new layer button in the Layers panel. Select the Brush Tool in the left toolbar. Set the foreground color to white. Click the Brush Preset picker button and choose the Soft Round Brush. Set the Hardness to 0%, set the Opacity to 50%, and set the Flow to 50%.

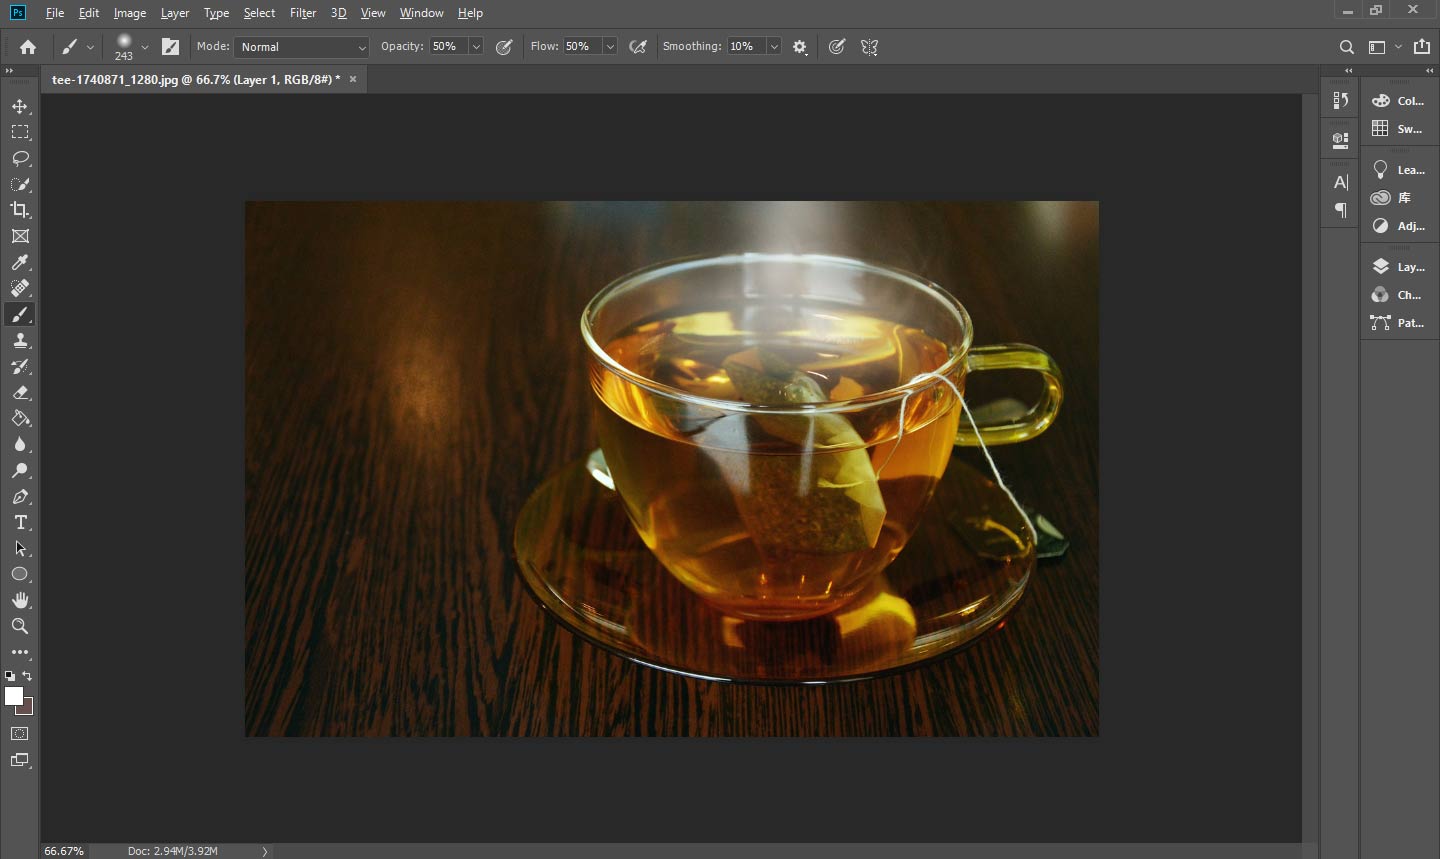
Step 3: After completing the above editing, draw the shape of the smoke you want by using the brush tool.

Step 4: Go to File > Save As to save your work.
Method 3: How to Create Smoke in Photoshop Using Smoke Filters
In Photoshop, the smoke filter is a handy tool for quickly generating smoke effects. By applying a specific filter, you can instantly add a smoke effect to your image, thus enhancing the visual impact of your work. Here are the detailed steps to create a smoke effect using the cloud filter.
Step 1: Download and install Photoshop and click Open to upload your image.
Step 2: There is no directly available smoke filter in Photoshop, but you can adjust the cloud filter to create a smoke effect. Go to Filter > Render > Clouds to apply the cloud filter. Apply the Motion Blur or Radical Blur filters in Filter’s dropdown menu.
Step 3: You can use the Distort and Liquify filters to make your smoke effect more natural.
Step 4: Change the layer blend mode to Screen or Overlay in the Layers panel, and drag the Opacity slider to the right position.
Step 5: Go to File > Save As to save your new work.
Bottom Line
Learning how to create smoke in Photoshop will bring new possibilities for your creation. With the right use of layers, brushes, and blur effects, you can easily achieve realistic smoke effects.


User Comments :