Understanding Subtitle Types
There are two subtitle types, soft subtitles and hard (hardcoded) subtitles. Before learning how to add subtitles to VOB files, let’s first understand the difference between them.
Soft Subtitles
Soft subtitles are independent subtitle files, such as SRT, ASS, and SSA formats. They can be recognized and displayed by your video player. Soft subtitles cannot be permanently attached to the video.
Soft subtitles are categorized into two types: embedded soft subtitles and external soft subtitles. The former is packaged with your video file, such as MP4, MOV, or MKV. The latter is separate from the video file and exists as SRT, VTT, or TXT files.
When viewing videos with soft subtitles, you can choose to turn them on or off, switch between different languages, and change font, size, color, and position.
Soft subtitles are commonly used on streaming platforms, such as YouTube and Netflix, as well as on Blu-rays and digital video files (MKV and MP4) with separate subtitle tracks.
Hard Subtitles
Hard subtitles are permanently burned into videos, meaning the text is an integral part of the video and cannot be removed. In other words, hard subtitles cannot be turned off or edited. Likewise, the font, size, and position are set during encoding and cannot be changed.

How to Add Subtitles to VOB Files
The main difference between soft subtitles and hard subtitles lies in the embedding method and text customization capabilities. After knowing the basics, let’s see how to add subtitles to MOV files.
How to Add Soft Subtitles to VOB
VOB is a DVD video container format that does not natively support external subtitle files (subtitles in DVD files are typically hardcoded), so you can’t directly add soft subtitles to VOB videos. However, there is still a workaround.
You can convert VOB to MKV or MP4 with soft subtitles. To complete this task, you can try MKVToolNix, an excellent tool for managing MKV files, such as the ability to merge multiple video, audio, and subtitle files into one MKV file, add, remove, or extract subtitles, split MKV files, etc.
Here’s how to add soft subtitles to VOB and convert to MKV using MKVToolNix.
Step 1. Download the software
Go to the MKVToolNix website to get the installer and then complete the installation.
Step 2. Add your VOB and subtitle files
Launch the software and click the Add source files button at the bottom to add your VOB file. Then, click the Add source files button again to upload your subtitle file.

Step 3. Embed subtitles in the video
Click the Start multiplexing button at the bottom to burn the subtitles into the video. Once finished, you’ll get an MKV file.
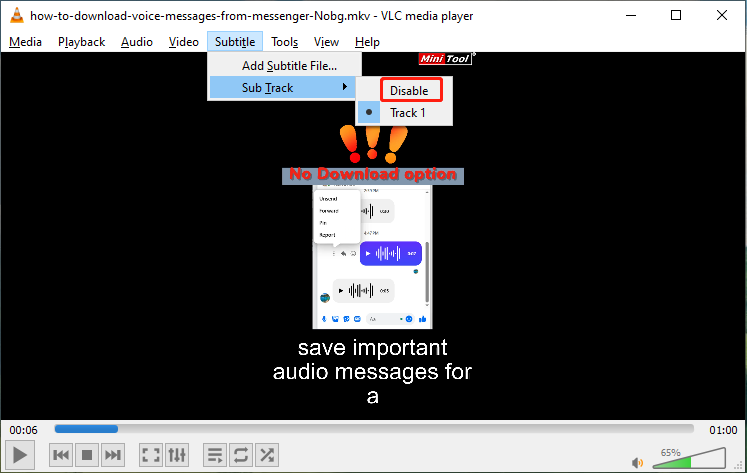
When playing the MKV file with VLC, you can see the embedded subtitles at the bottom of the video frame. If you want to turn off subtitles, go to Subtitles > Sub Track > Disable.
How to Add Hard Subtitles to VOB
In this section, let’s see how to add hardcoded subtitles to VOB files using CapCut and Clideo.
Option 1: Use CapCut
CapCut allows you to add SRT, LRC, and ASS subtitles to many video files, such as MP4, MOB, WebM, and MKV. However, like many other video editors, it does not support the VOB format.
Therefore, you need to convert VOB to MP4 first for easier editing. To accomplish this task, you can try MiniTool Video Converter, a free video converter with no watermarks and file size limits.
Follow the steps below to add subtitles to your MP4 file using CapCut.
Step 1. Download the video editor
Navigate to the CapCut website or the Microsoft Store to install the application on your PC.
Step 2. Import your MP4 file
When you open the software, click the Create project button at the top to enter the main interface. Then, click the Import button in the upper left corner to upload your MP4 file. Next, drag and drop the video to the timeline.
Step 3. Add your subtitle file
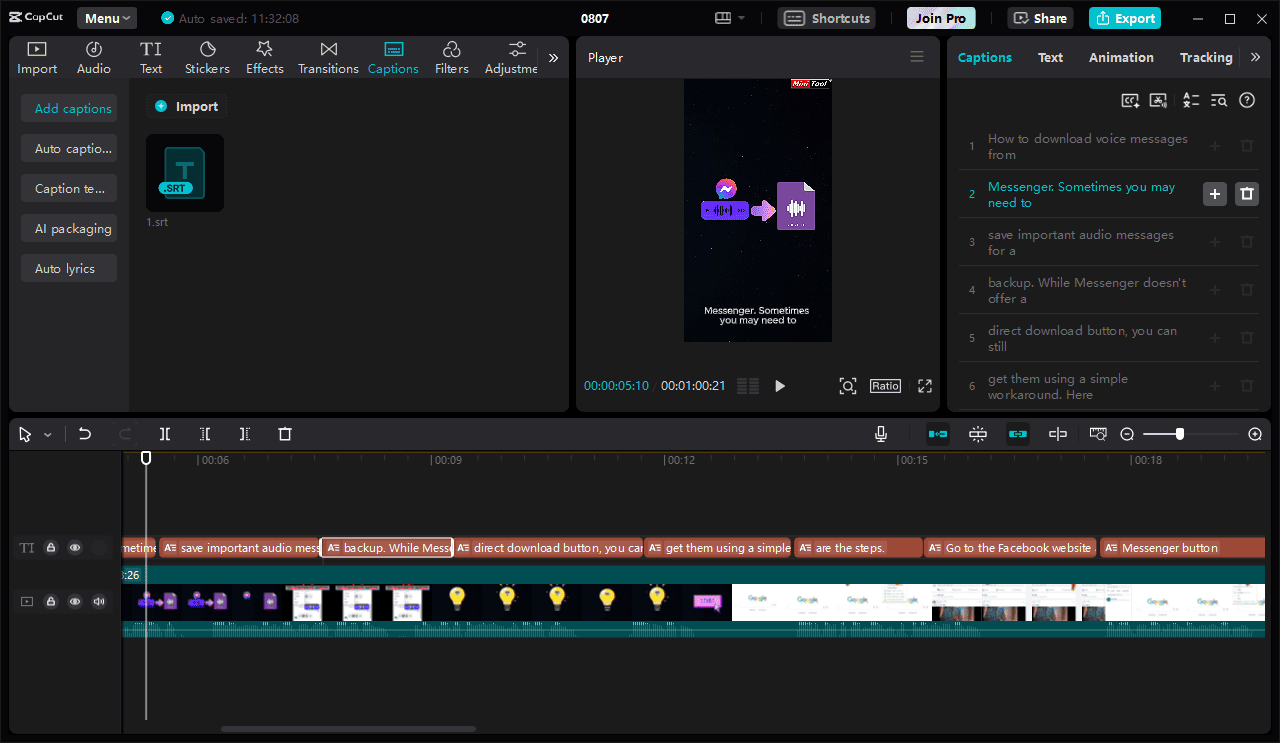
Go to the Captions tab, select the Add captions option on the left sidebar, and click the Import button to add your subtitle file. Then, add it to the timeline.
Step 4. Edit your subtitles
Under the Captions tab on the right, you can view, delete, or add text to your subtitle file. If you need to change the text size, font, color, and other settings, switch to the Text tab next to Captions.
Step 5. Export your video
Click the Export button in the top right corner. Then, customize the resolution, bitrate, codec, format (MP4 or MOV), and frame rate. Finally, click the Export button to render the subtitles directly onto the video.
When you open the video again using VLC media player, you will find that the subtitles cannot be disabled.
Option 2: Clideo
Clideo lets you add subtitles to VOB files online. However, it can only handle SRT captions. Besides, the free version includes a watermark on the exported video.
Step 1. Add your VOB file to Clideo
Visit the Clideo website and click the All tools option. Then, find and click the Add subtitles button. Next, click the Choose file button to add your VOB video.
Step 2. Add your SRT subtitles
Once the video is loaded, click the Upload .SRT button in the pop-up window to add your SRT file.
Step 3. Edit your subtitles
You can then add or delete text in the Subtitles tab and go to the Styles tab to change the position, alignment, font, size, and color of the text.

Step 4. Export the video
Expand the Format menu and choose the desired output format from the dropdown list. Then, click the Export video button to start rendering the video with subtitles.
Conclusion
This post provides you with a step-by-step guide on how to add subtitles to VOB files and explains the differences between soft and hard subtitles. I hope you enjoyed this blog post!
About The Author

Position: Columnist
Cora is a tech writer specializing in digital media workflows, with over six years of hands-on experience in video post-production, media transcoding, and screen capture. Her writing is always clear and practical. Cora also produces in-depth software reviews for users across skill levels to help them find the right tool and enjoy video editing.
User Comments :