The AU format is an audio format that is not very commonly used nowadays. To edit AU files on Windows, this post offers three free and professional audio editors: Wondershare Filmora, Joyoshare VidiKit, and Fineshare.
What Is AU
AU is a simple audio format developed by Sun Microsystems for Unix-based systems. It is usually uncompressed, resulting in a larger file size. It was widely used for Unix sound files and early web pages, but in comparison to more recent formats, it is now regarded as outdated.
Have some AU files and want to edit them for personal use? This article has what you want. In the following content, I’ll show you how to edit AU files with three expert audio editors. Read on for more.
MiniTool MovieMakerClick to Download100%Clean & Safe
![Edit M4B Files on Windows with 3 Best Audio Editors [Pro Guide]](https://images.minitool.com/moviemaker.minitool.com/images/uploads/2025/09/edit-m4b-files-thumbnail.png)
Edit AU Files with Wondershare Filmora [Offline]
Wondershare Filmora is a feature-rich audio editor that enables you to process AU files efficiently. Except for trimming, splitting, and speeding up AU files, this application can also extract audio from video, add audio to video, merge multiple audio files into one, and more. With its intuitive user interface, you can edit AU files with no effort.
Here’s how to edit AU files using Wondershare Filmora:
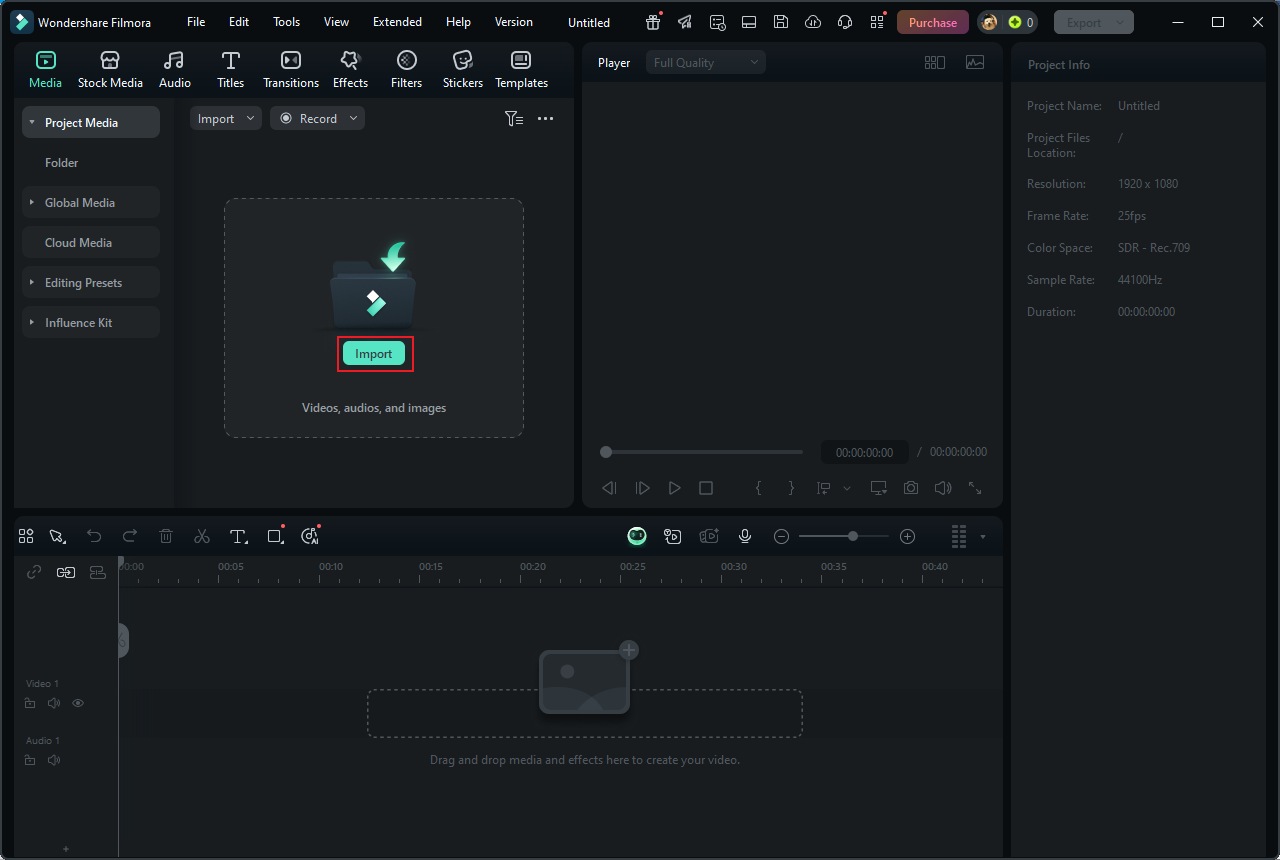
1. Download and Install Wondershare Filmora
Visit Wondershare Filmora’s official website and install it on your computer. Then, launch this program.
2. Import the AU File
Click New Project and click the Import option to import the AU file.
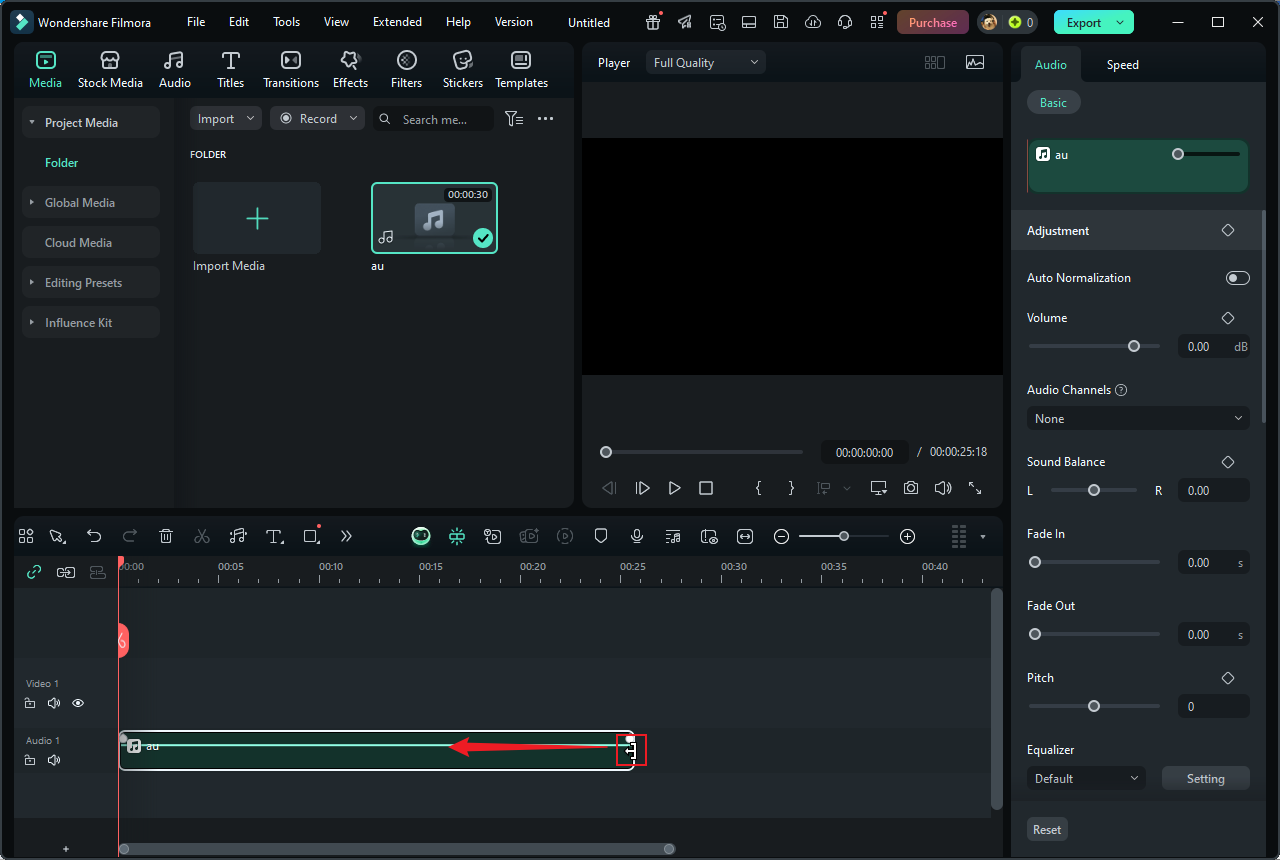
3. Edit the AU File
Drag the added AU file to the timeline.
Trim the AU File
Move the mouse pointer over the start or end of the audio track, then drag the Trim icon to the right or left to remove the unwanted audio part.
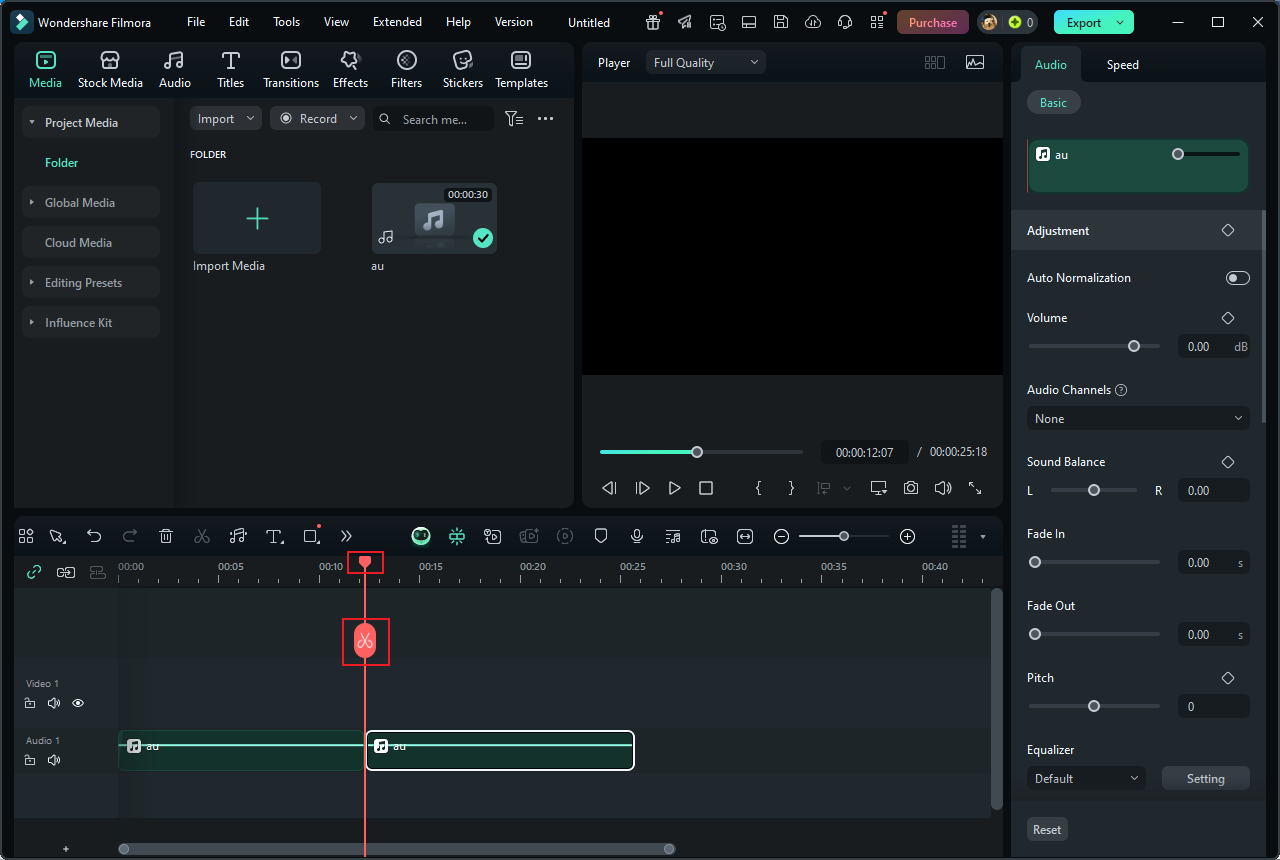
Split the AU File
After moving the playhead to the desired audio split location, click the Scissors icon. Next, delete the unwanted part according to your needs.
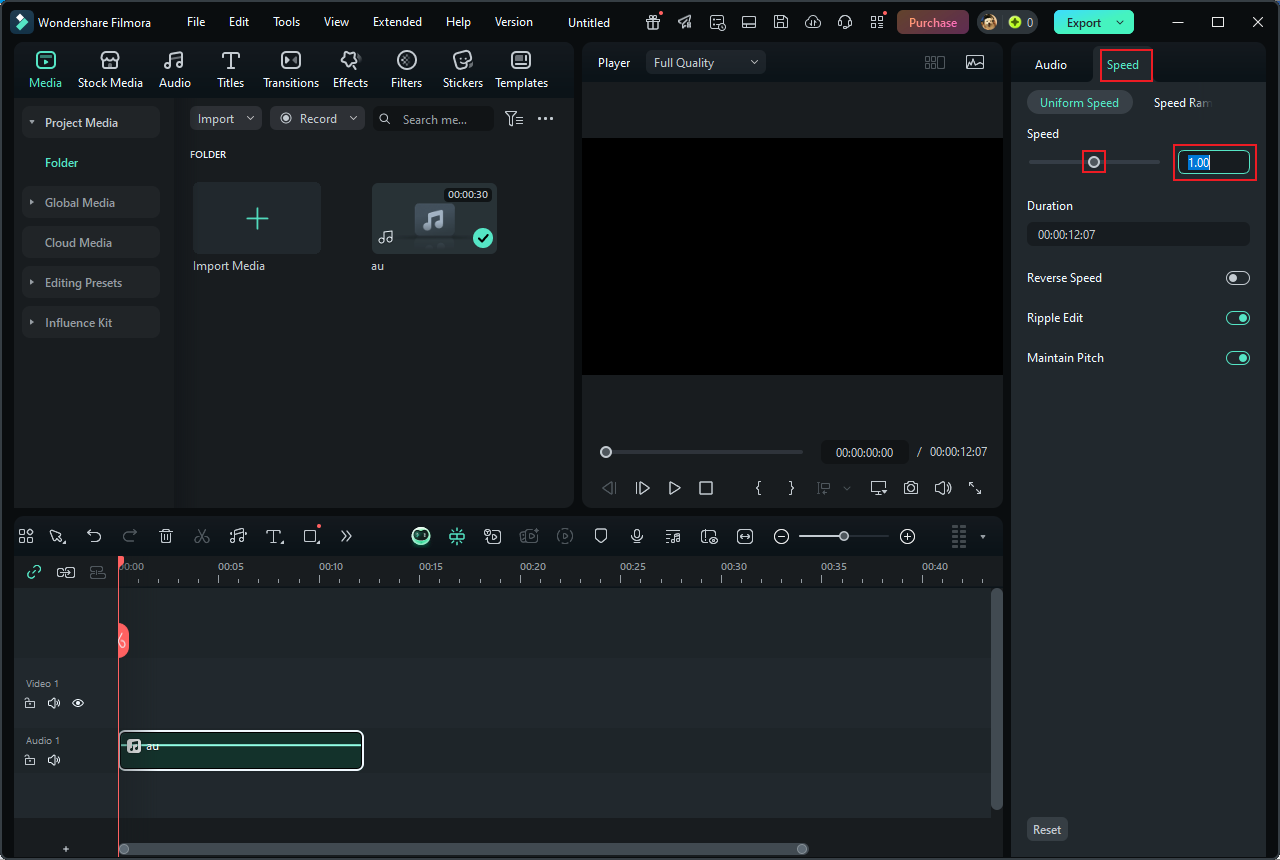
Change the Audio Speed
Click on the audio track on the timeline, navigate to the right section, and then you can see the Speed option. Change the audio speed by dragging the Speed slide. Or you can input the desired speed into the Speed box.
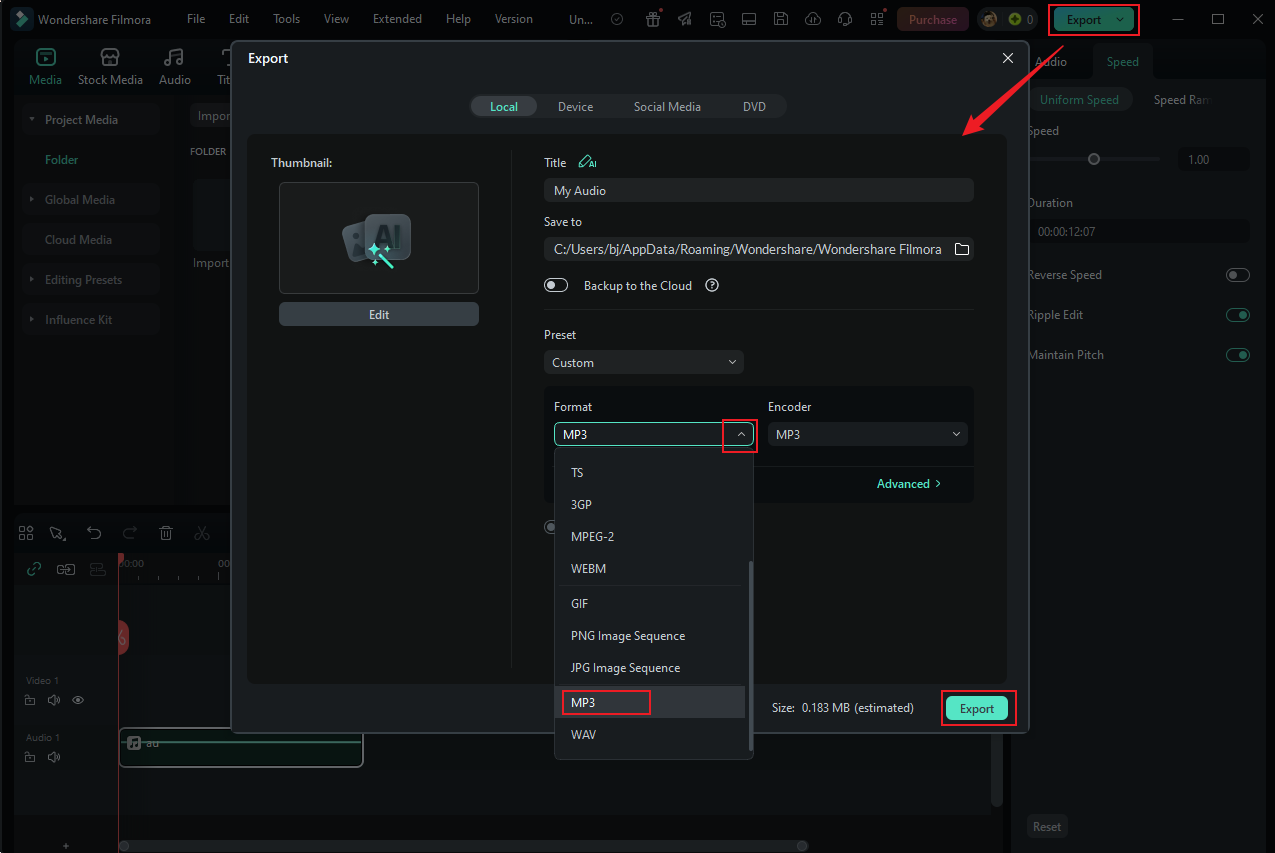
4. Export the Audio File.
Click the Export button at the top right. In the Export window, expand the Format option and select your preferred audio format (MP3 is suggested here). Then, click Export to export the audio file.
Edit AU Files with Joyoshare VidiKit [Offline]
Joyoshare VidiKit can serve as an audio editor, audio converter, audio joiner, video editor, video merger, video converter, and more. It is an all-in-one tool that comes with a simple layout, allowing everyone to easily navigate. Plus, Joyoshare VidiKit supports various audio formats, including AU, MP3, AAC, AIFF, AC3, etc. Follow the guides below to edit AU files.
1. Download and Install Joyoshare VidiKit
Go to Joyoshare VidiKit’s official website to download and install this program.
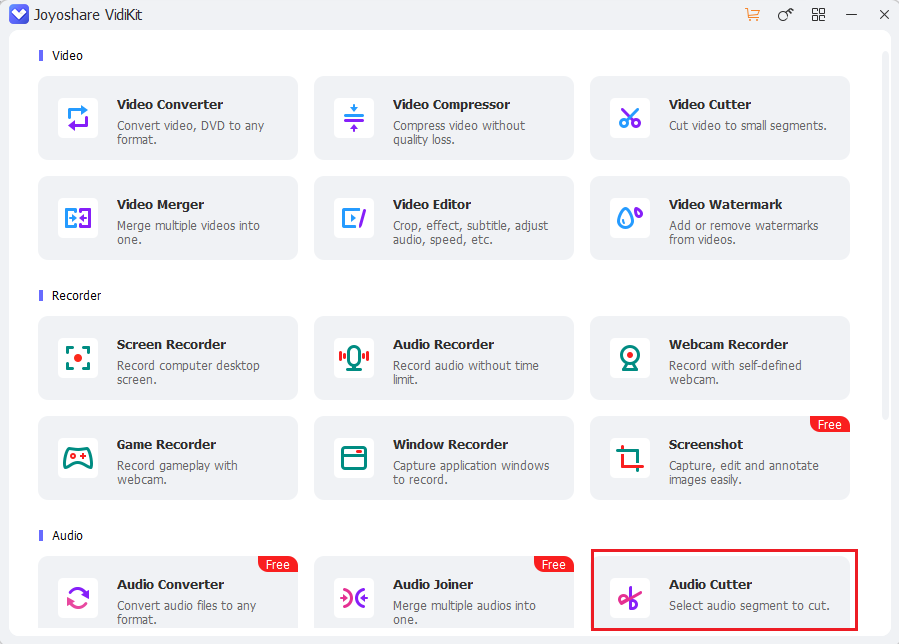
2. Access Joyoshare VidiKit’s Audio Cutter
Launch Joyoshare VidiKit and select Audio Cutter.
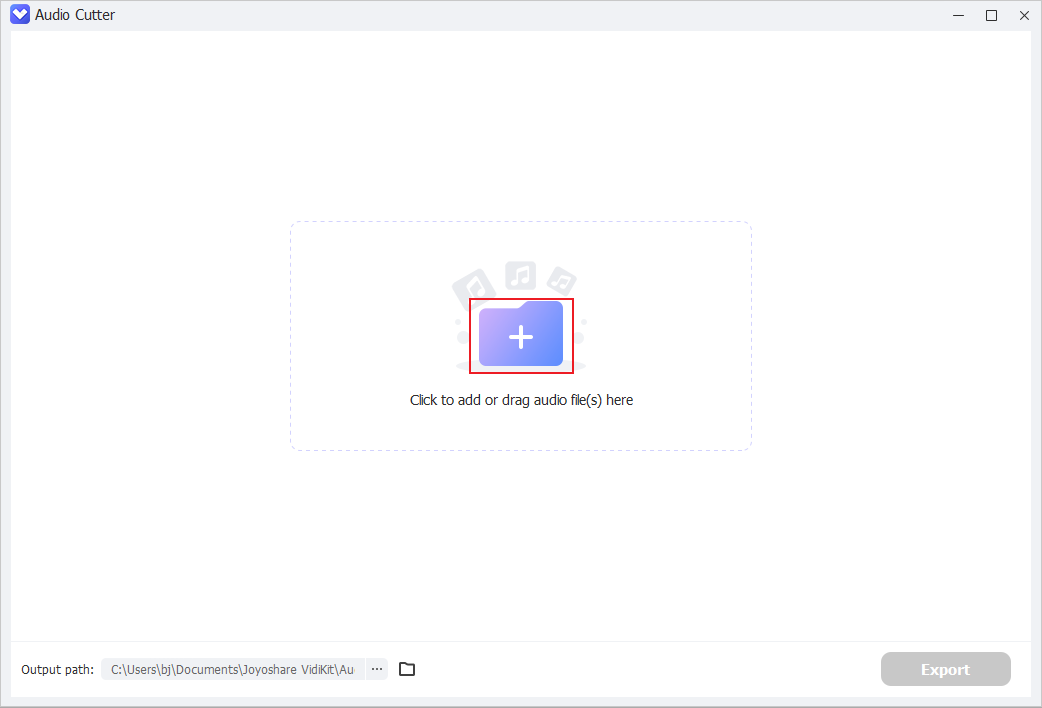
3. Import the AU File
Click the + icon to import the AU file you wish to edit.
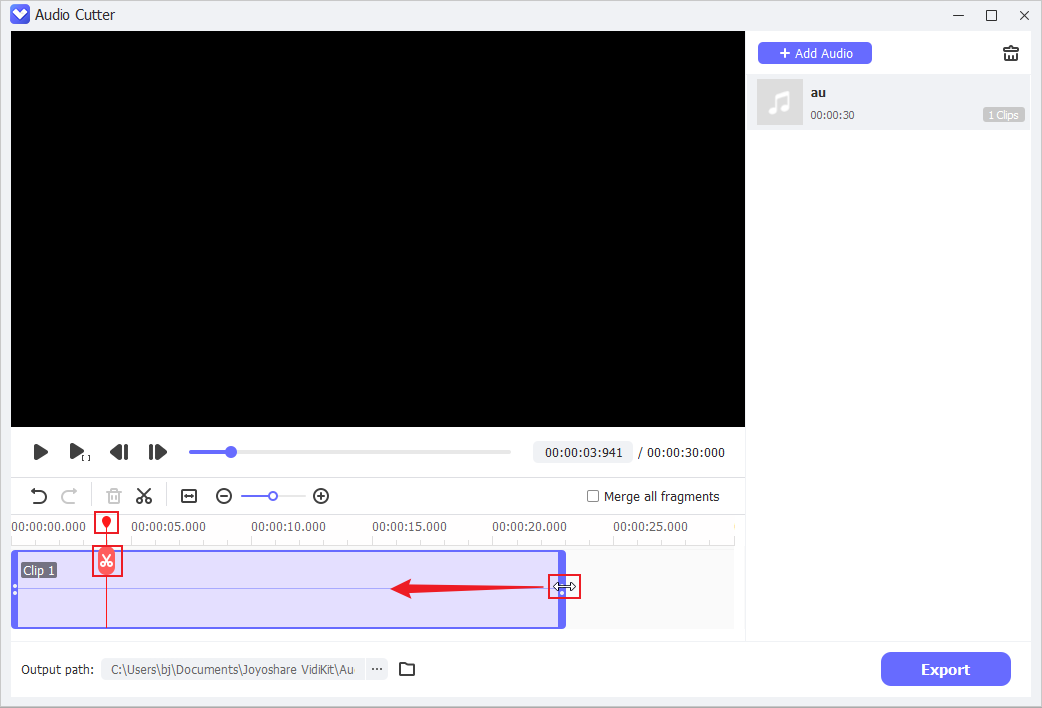
4. Edit the AU
- Split the AU File: Move the playhead where you want to split the audio and click the Scissors icon.
- Trim the AU File: Hover the mouse cursor on one of the two edges of the audio track and drag the double-arrow icon inwards to remove the unwanted part.
5. Export the AU File
After the audio editing process is done, click the Export button to export the audio file.
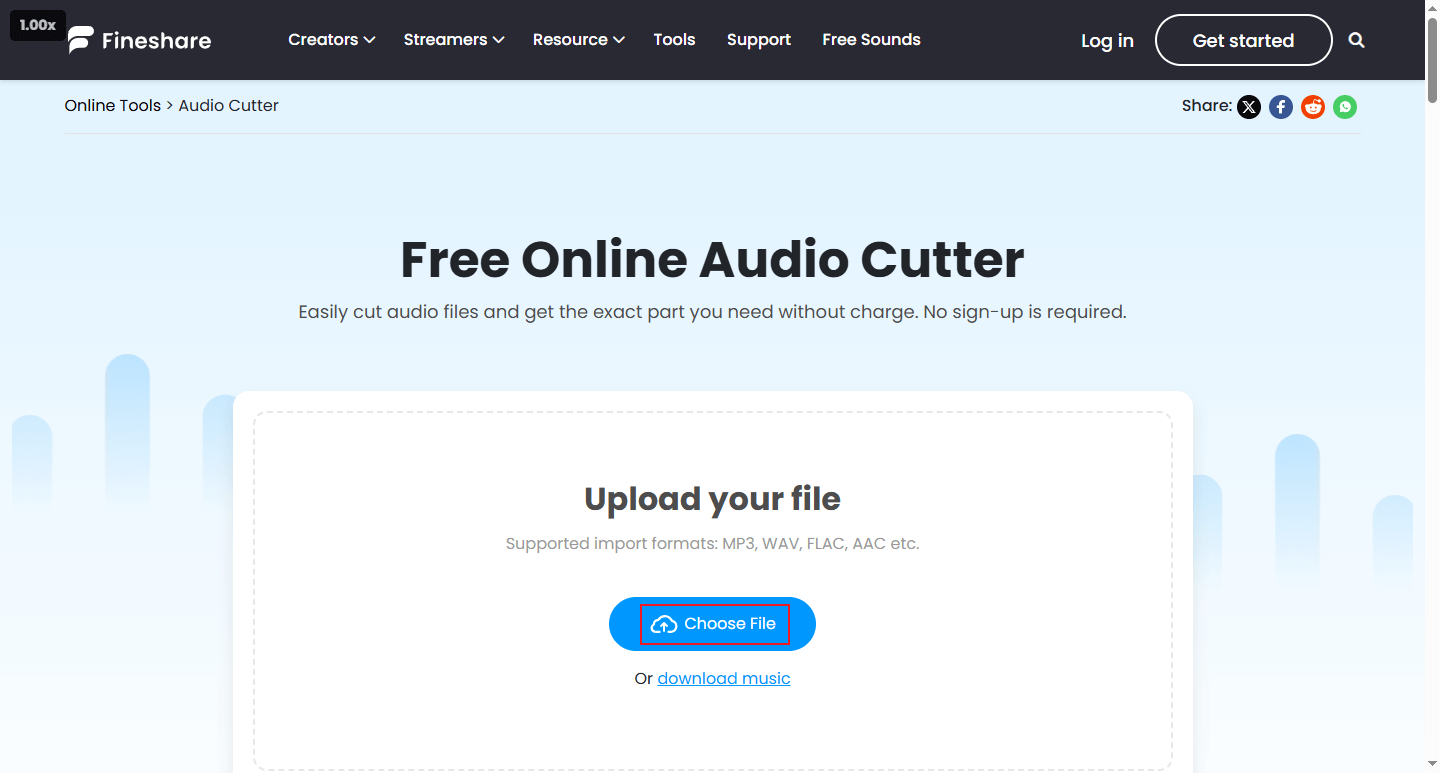
Edit AU Files with Fineshare [Online]
Fineshare is an online AU editor that can be used without installation, making it easy to access. After editing, this online tool enables you to export audio in multiple formats, including MP3, WAV, and FLAC. Simply follow the instructions below to edit AU files online.
1. Access Fineshare’s Audio Cutter
Visit https://www.fineshare.com/audio-cutter/.
2. Import the AU File
Click the Choose File option to add the AU file to Fineshare.
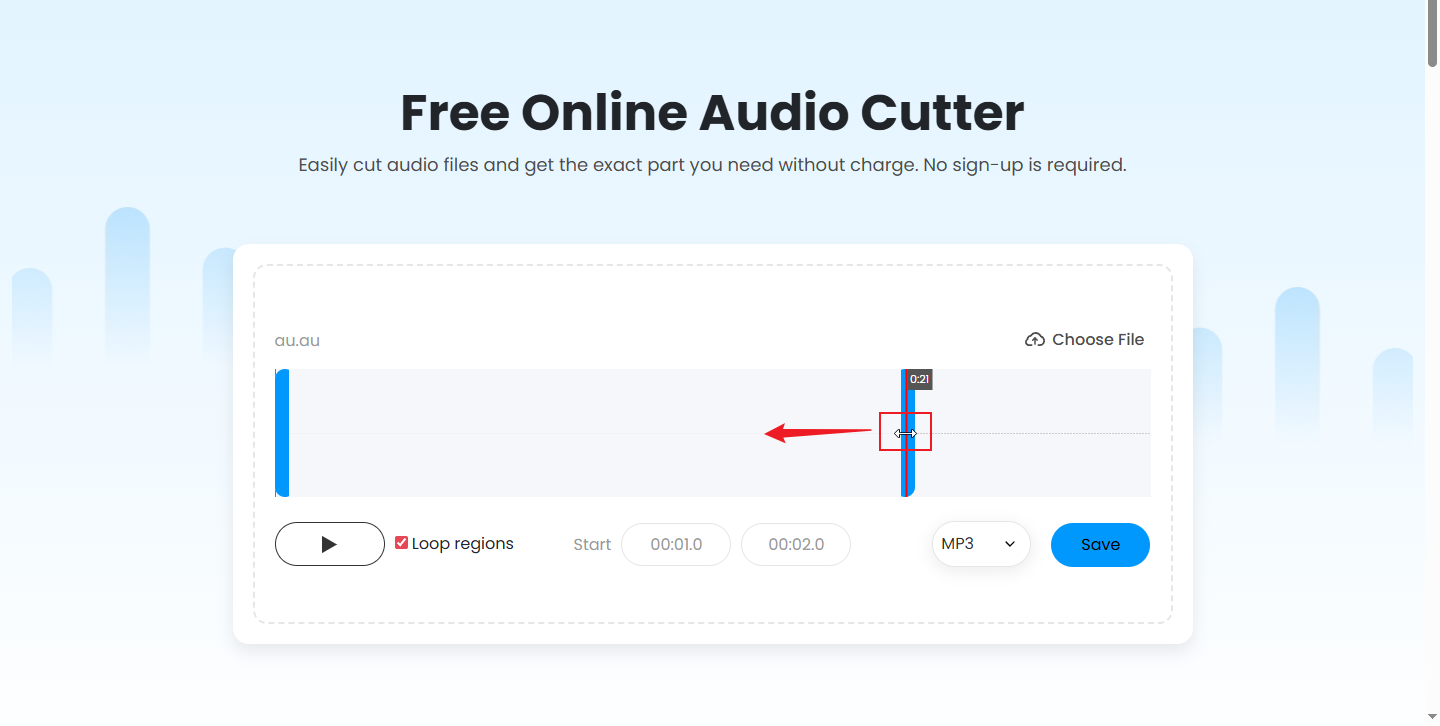
3. Edit the AU File
Hover the mouse cursor on one of the two edges of the audio track until you see the double-arrow icon. Drag it inwards to delete the undesired part.
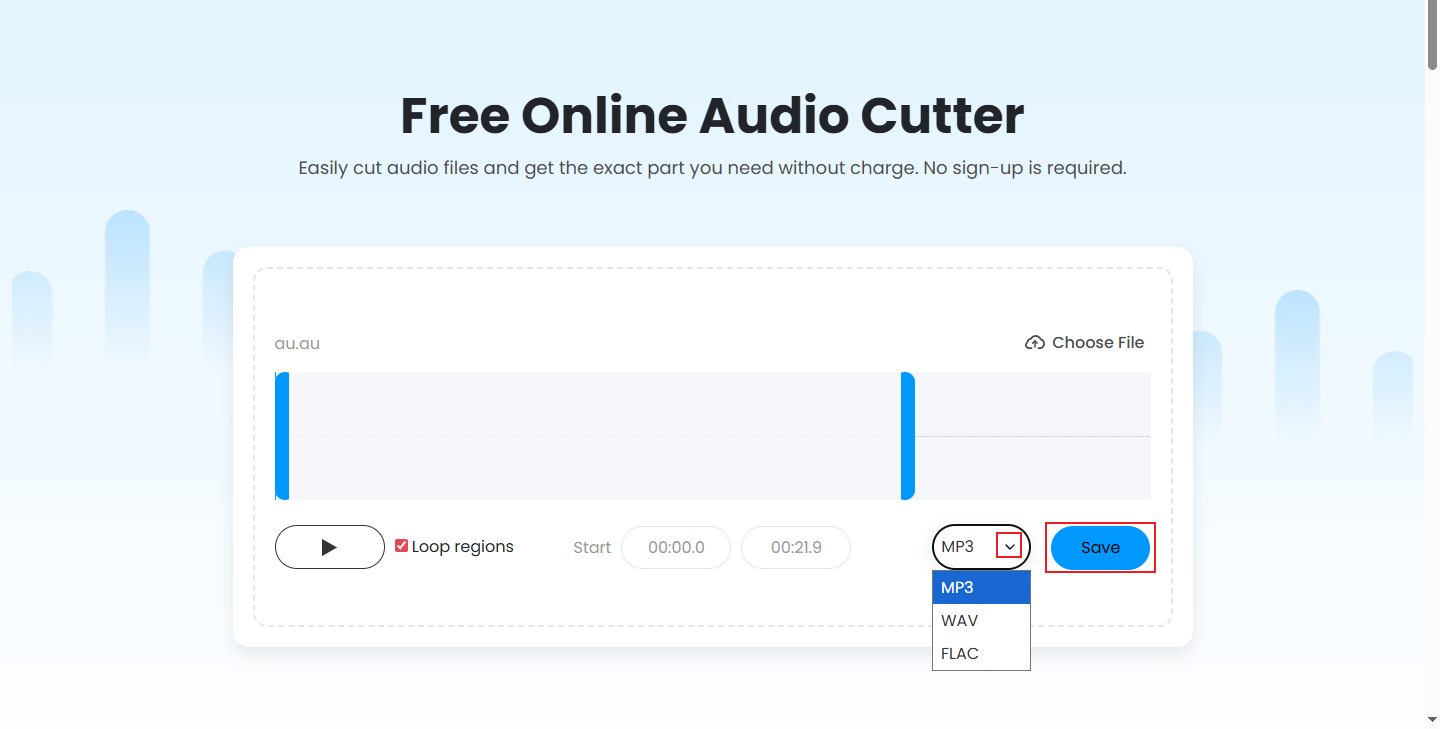
4. Export the Audio File
Expand the Format option and choose the desired output audio format. Then, click Save.
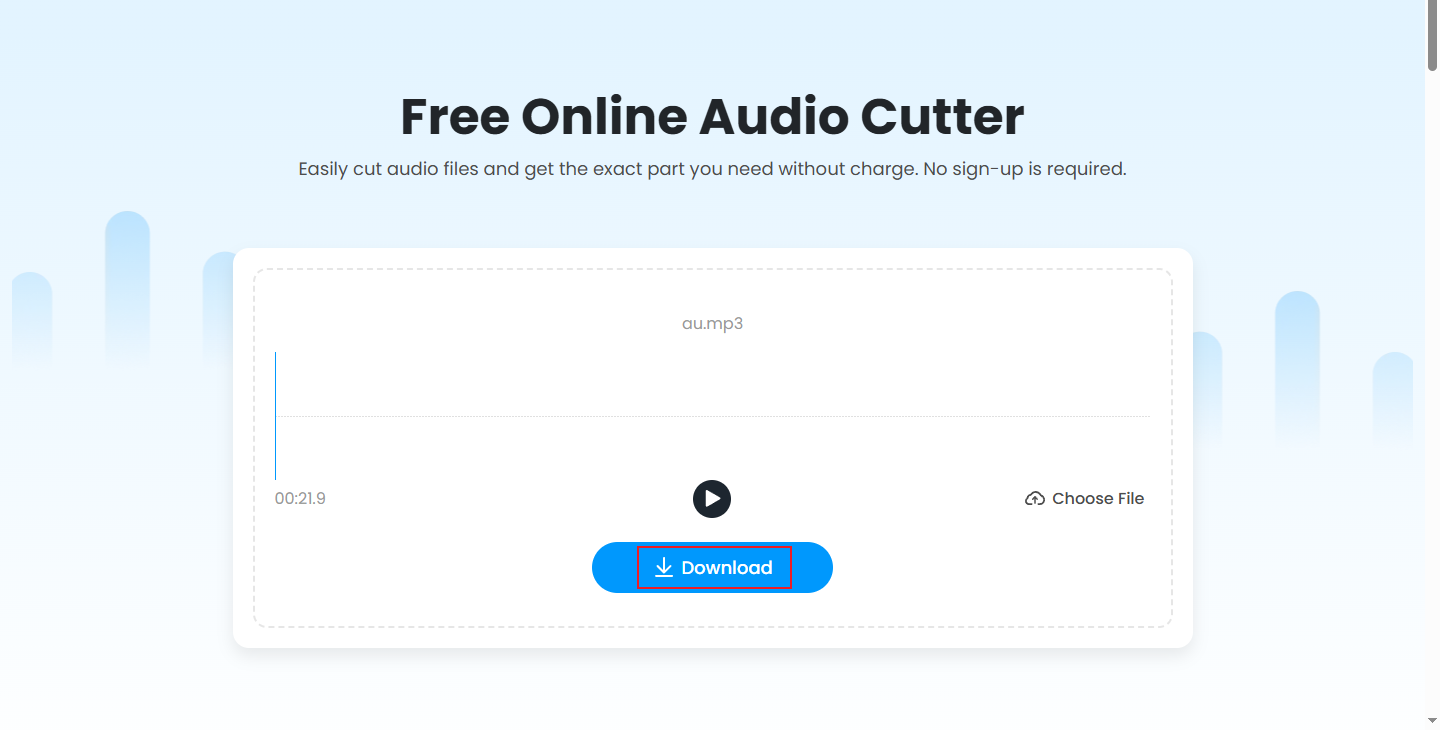
Once the exporting process is done, click the Download button to save the audio file to the local folder.
In Summary
To edit AU files on Windows PCs with ease, this post recommends three reliable and free audio editors. You can follow the details mentioned above to complete the audio editing task. Feel free to choose the AU editors you prefer. Hope this article can help you a lot!
User Comments :