Cropping photos into different shapes can highlight the content and leave a fun impression on viewers. This post will show you how to crop photos into shape using 3 easy methods: Canva, Microsoft PowerPoint, and Fotor.
Compared with common photo aspect ratios such as 16:9, cropping photos into different shapes offers a more engaging and visually appealing way to present your images. This approach not only helps the key content stand out but also adds a creative touch to the original image. This effect is widely used in casual scenarios such as self-introduction photos and social media posts, as well as in more formal tasks like product design.
In the following section, we will explore 3 effective methods to crop photos into shape.
Method 1: Crop Photos into Shape with Canva
Canva is widely regarded as one of the best online image croppers thanks to its ease of use and robust features. It supports multiple aspect ratios such as 1:1, 9:16, 5:4, and freedom cropping. If you are unsure how to capture the best part of the image, the Smart Crop feature can automatically frame the most visually appealing part, saving your time and effort during the editing process.
Moreover, Canva allows you to crop photos into shape with just a few clicks. It provides a rich library of resources that includes basic shapes like circles, triangles, and arrows, as well as more complex shapes such as hearts, flowers, and many others.
Here are the detailed steps on how to crop photos into shape using Canva.
Step 1: Navigate the Official Website
Go to the official website of Canva’s cropping image tool (https://www.canva.com/features/crop-image/) in your browser.
Step 2: Import Your Photo
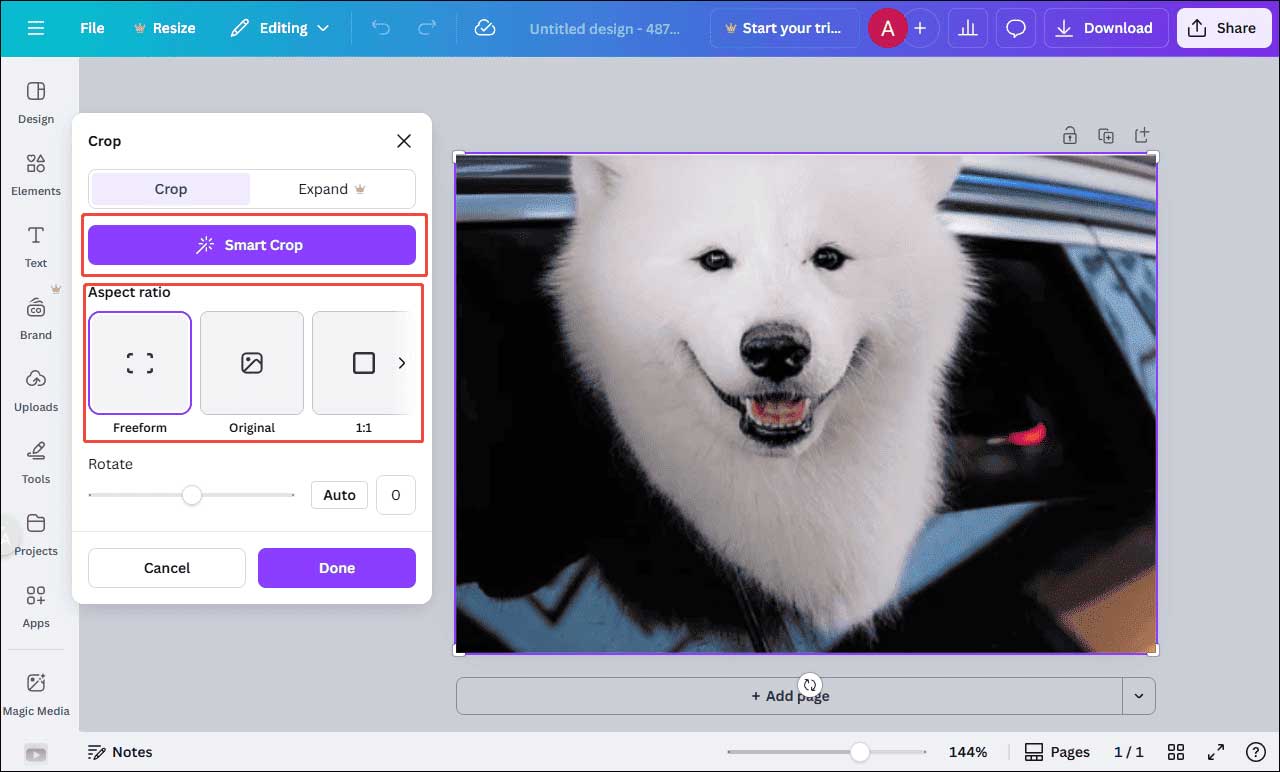
Click Upload your image to enter the main editing interface. Here, you can change the aspect ratio of the image or use Smart Crop to capture the best part.
Step 3: Crop the Photo into Shape
Click the Elements tab on the left toolbar. Scroll down to find Frames or enter keywords like frames in the search bar.
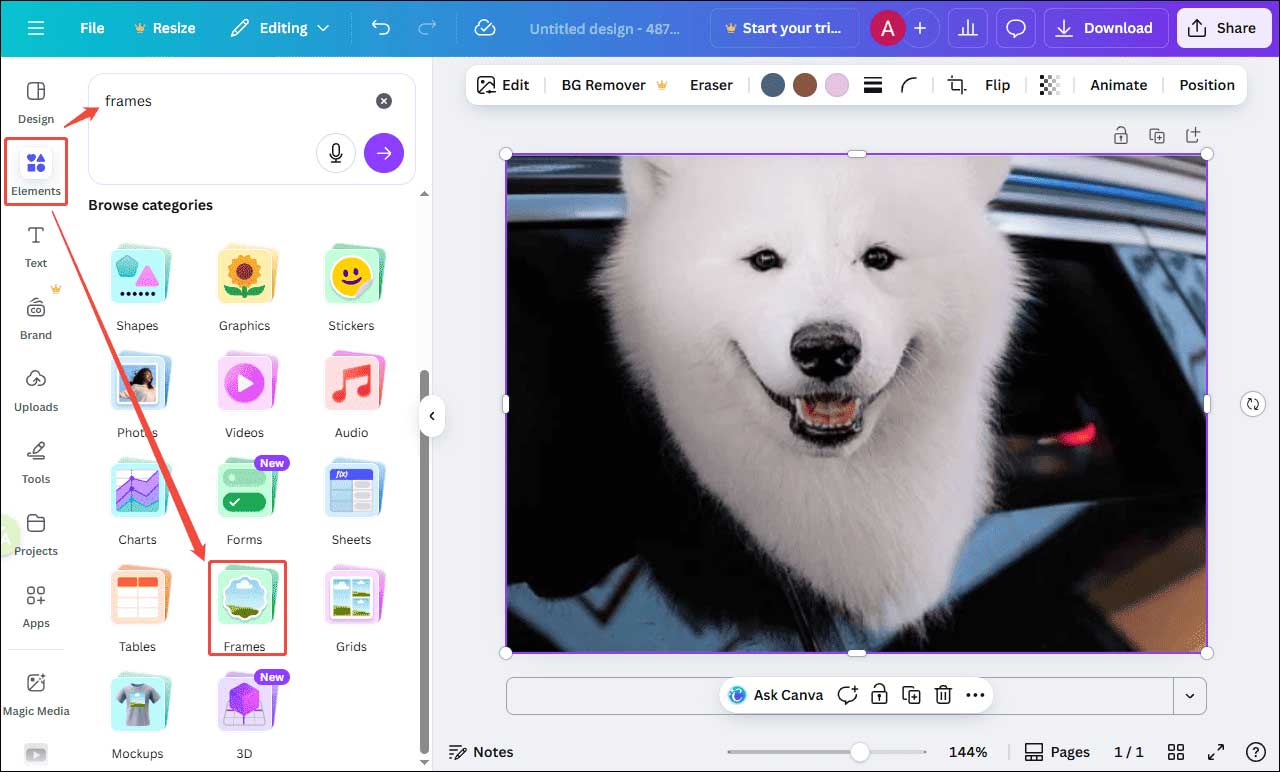
Then, you can pick the desired shape and click it. Drag the image behind the shape to fit the frame.

Step 4: Download the Shaped Image
If you are satisfied with the image, click Download at the top of the menu to select the appropriate file type. Then, click Download at the bottom to save the image to your computer.

Method 2: Crop Photos into Shape with Microsoft PowerPoint
Microsoft 365 applications, such as PowerPoint, Word, Outlook, and Excel, all allow users to change the outline of a photo by cropping it into a specific shape, offering great convenience for quick image editing. Taking PowerPoint as an example, the software enables users to crop pictures into shapes, including basic shapes, block arrows, equation shapes, flowcharts, stars, and banners, which cover nearly all common cropping needs.
Let’s take a look at the detailed steps on how to crop photos into shape using Microsoft PowerPoint.
Step 1: Import Your Photo
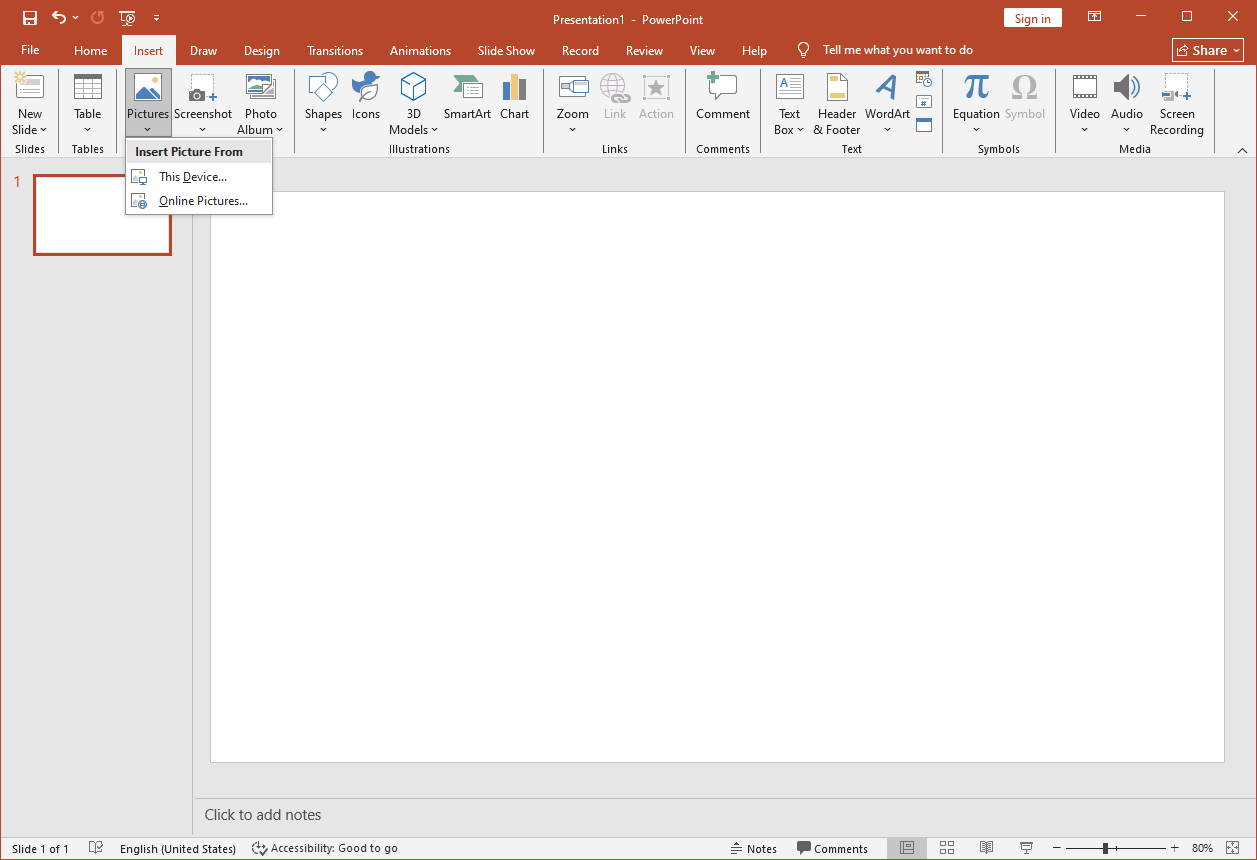
Open Microsoft PowerPoint and click Blank Presentation to start editing. Click the Insert tab on the top toolbar and select Pictures to upload your photos.
Step 2: Crop the Photo into Shape
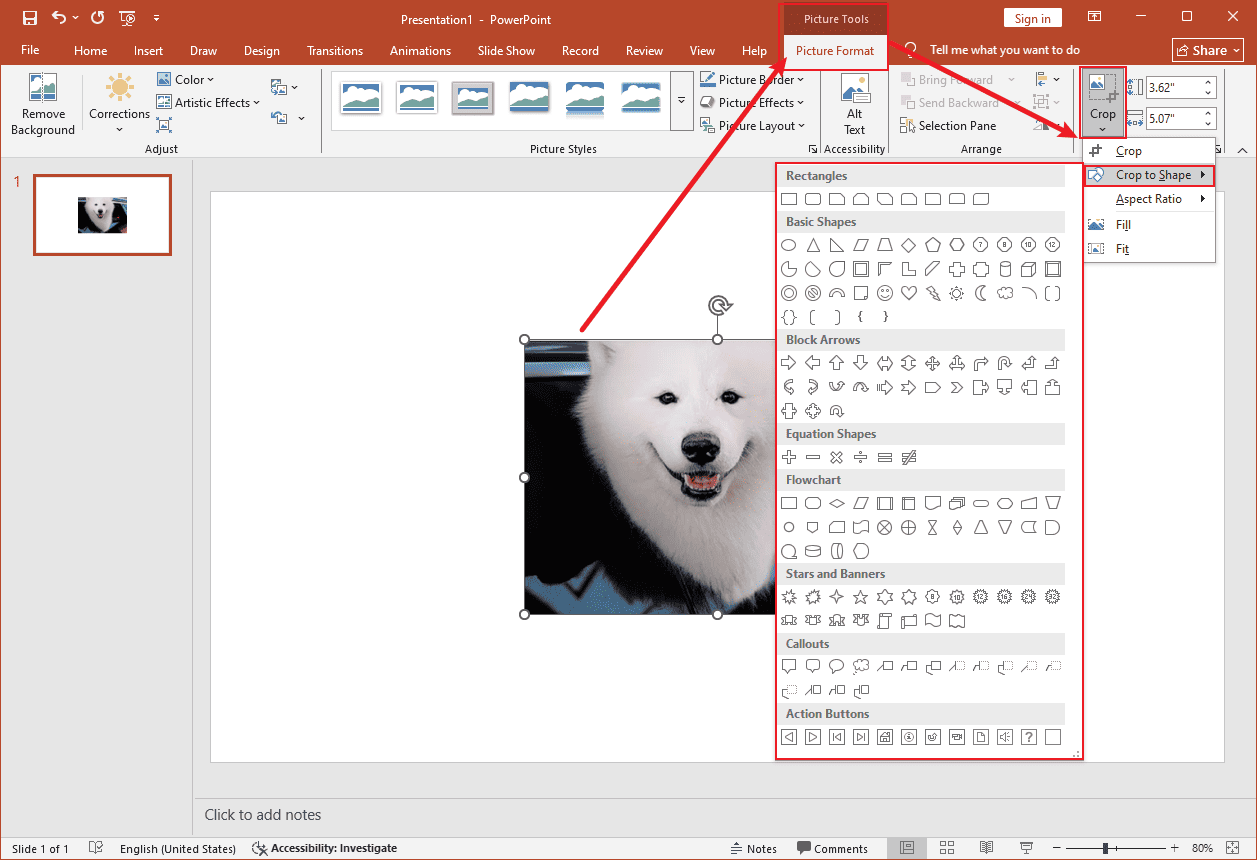
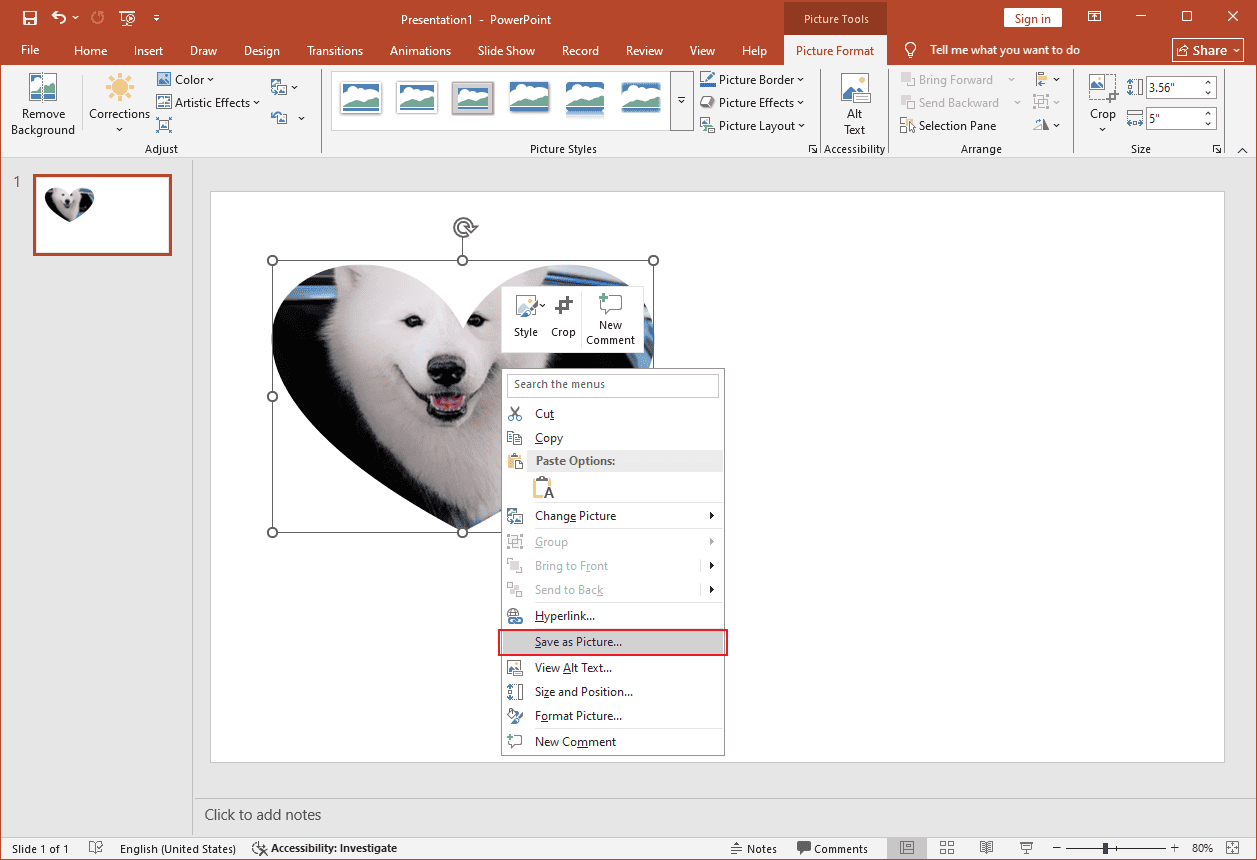
Select the image on the editing page and click Picture Format to click Crop. Then, select Crop to Shape to click the preferred pattern. The shape will be automatically applied to the image.
Step 3: Save the Shaped Image
Right-click the cropped image and select Save as Picture to download the image to your computer.
Method 3: Crop Photos into Shape with Fotor
Fotor is also considered a powerful image cropper that enables users to crop pictures into shape. You can directly select different aspect ratios or shapes to adjust the photo’s outline. In addition, Fotor provides more precise templates designed for WhatsApp DPs, Instagram Posts, Wallpapers, and other social media formats. The cropped shapes also come with a transparent background option, which offers greater convenience when integrating the image into other designs.
Here are the detailed steps on how to crop photos into shape using Fotor.
Step 1: Navigate the Official Website
Visit the official website for Fotor’s cropping photos tool (https://www.fotor.com/features/shape-image/) in your browser.
Step 2: Import Your Photo
Click Upload Image to import your photo.
Step 3: Crop the Photo into Shape
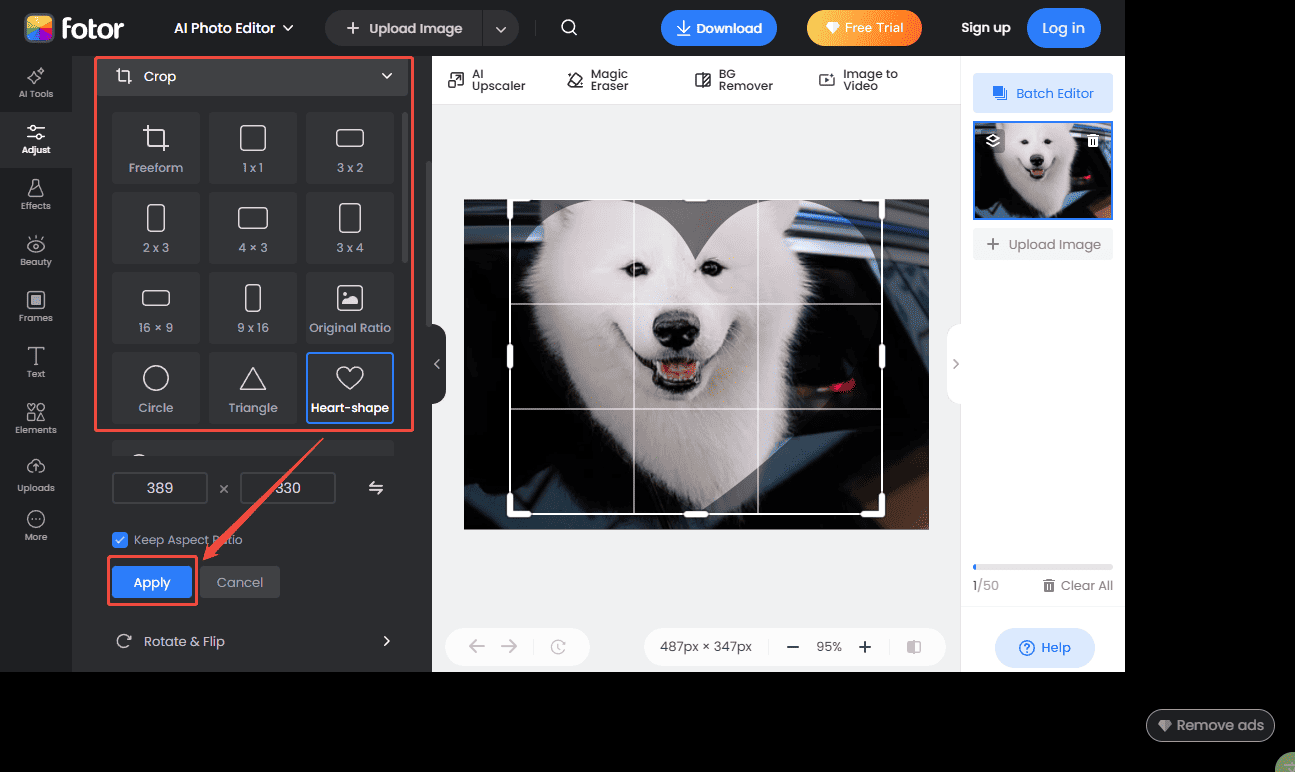
Select the desired shape and adjust its location. Then, click Apply to crop the image.
Step 4: Save the Shaped Photo
Click Download at the top of the menu and select the image format to save it to your computer.

Conclusion
This post shares 3 effective methods to crop photos into shape. All of them are easy to use and show high effectiveness. Select the one that best covers your needs to make your image more polished. Hope this post helps you!
About The Author

Position: Columnist
Alice is a tech writer at MiniTool, specializing in tutorials and guides on video editing and screen recording. She stays up to date with the latest tools and techniques to ensure her content is accurate and easy to follow. By combining hands-on testing with continuous learning, Alice aims to help readers solve tech problems efficiently.
User Comments :