Portrait photos are recommended for Instagram and Snapchat. Every time before I share a landscape picture, I’ll turn it into a portrait one for a better viewing experience. Besides, this also removes distracting side elements and focuses on vertical objects.
Personally, it’s easy to convert a landscape photo to a portrait one. In this post, I’ll introduce two excellent tools I frequently use for this task.
How to Convert Landscape Photo to Portrait
Method 1: Use Microsoft Photos
Windows 10 and 11 come with a free, built-in app called Photos. It’s primarily designed as a photo and video viewer/organizer to open, manage, and share media files. Additionally, it includes some useful photo editing capabilities, including cropping, color and light correction, drawing tools, filters, blur effects, the ability to remove backgrounds, etc.
How to make a landscape photo portrait using the Photos app? Follow me.
Step 1: Open the target photo
Right-click the desired photo, hover over the Open with option from the dropdown list, and select Photos.
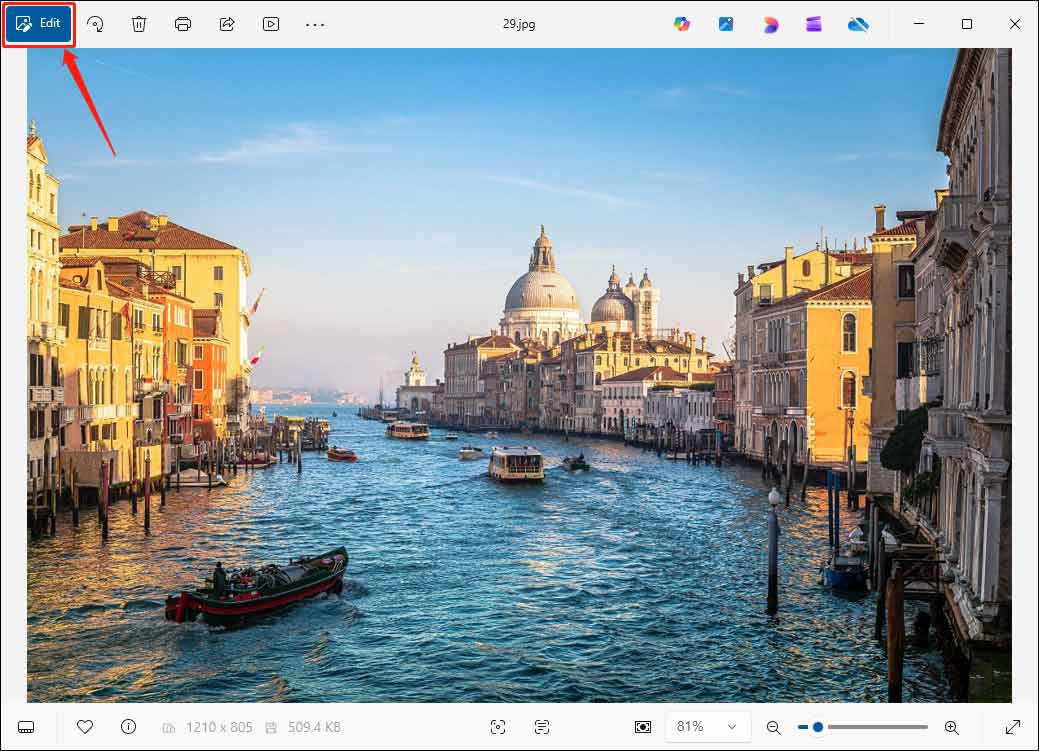
Step 2: Access the editor in Photos
In the preview window, click Edit in the upper left corner to open the editing window.
Step 3: Turn the landscape photo into a portrait one
Microsoft Photos offers two quick ways to make a horizontal picture vertical.
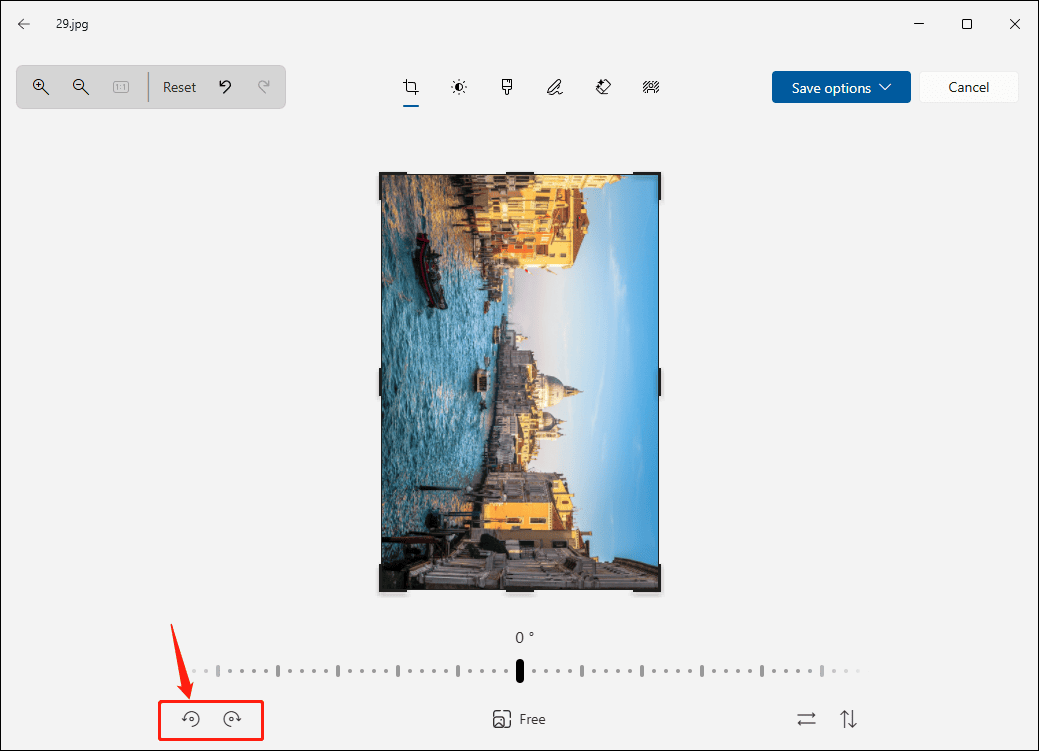
Option 1: Rotating
Click the Rotate image 90 degrees counter-clockwise or Rotate image 90 degrees clockwise icon at the bottom.
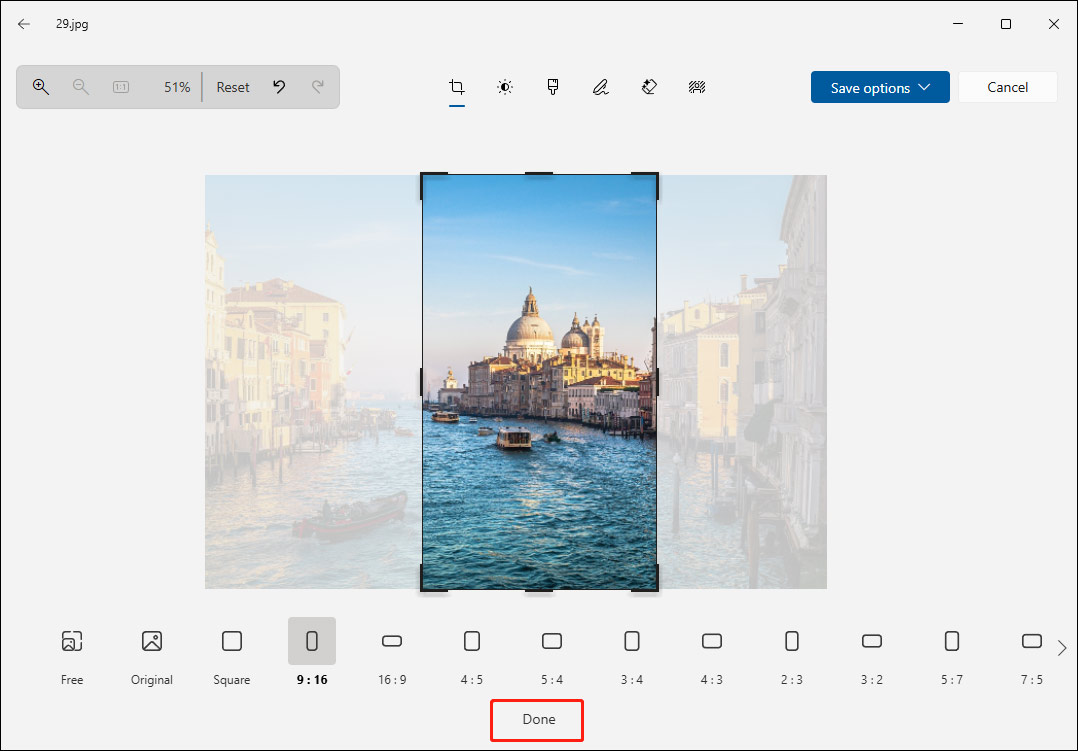
Option 2: Cropping
By default, the Photos app lets me crop a picture freely. It also offers common aspect ratio options to crop images. Click Free at the bottom to enable these options. To make a vertical photo, ratios like 9:16, 2:3, 4:5, 3:4, 5:7, and 1:2 are recommended. After confirming the desired ratio, drag the image preview to choose the portion I’d like to keep, and click Done at the bottom to apply changes.
Step 4: Save the portrait photo
Click the Save options in the upper right and select Save as copy or Save to save the vintage photo to the computer.
The Photos app is built into the system, so I don’t need to download and install it. When I need to convert a landscape photo to a portrait, I always use this application for quick edits.
Method 2: Use Instasize
Instasize is an online image resizer and photo editor. It allows me to resize pictures for social media platforms using the standard aspect ratio preset. Whether I want to turn a landscape photo into a portrait one for Instagram Stories/Reels, Facebook Story/Event Cover, Pinterest Portrait Pin, or Snap Story, I can find the appropriate ratio on the platform.
Furthermore, Instasize can expand images with AI, add backgrounds, apply filters, remove backgrounds, and generate images from text.
How to turn a landscape photo into a portrait on Instasize? Here’s my experience.
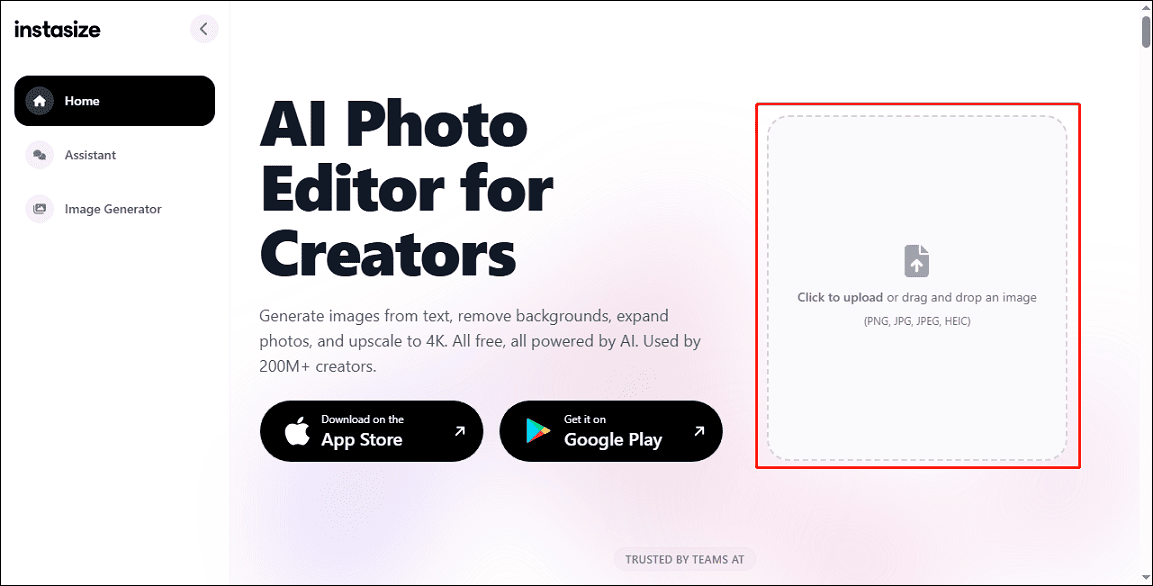
Step 1: Upload the desired photo to Instasize
Navigate to the Instasize website and click the image upload area on the right side to select the target picture.
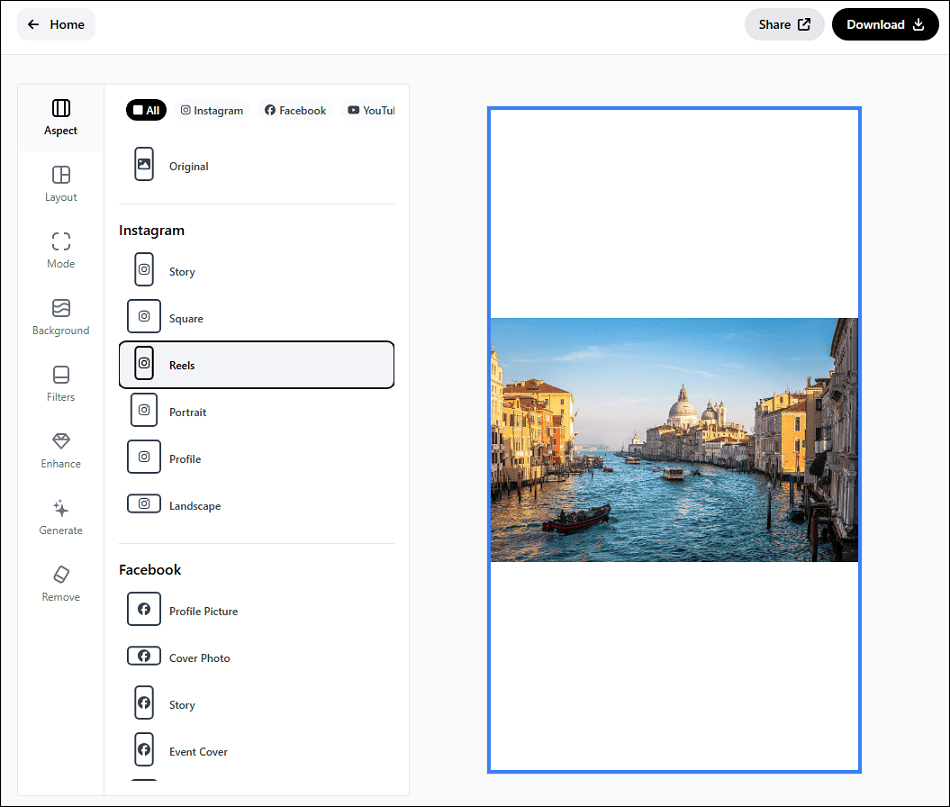
Step 2: Select the preset for the portrait photo
In the Aspect tab, I can see a long list of aspect ratios for various platforms. Find and click a preset, and the image will be placed on a portrait canvas.
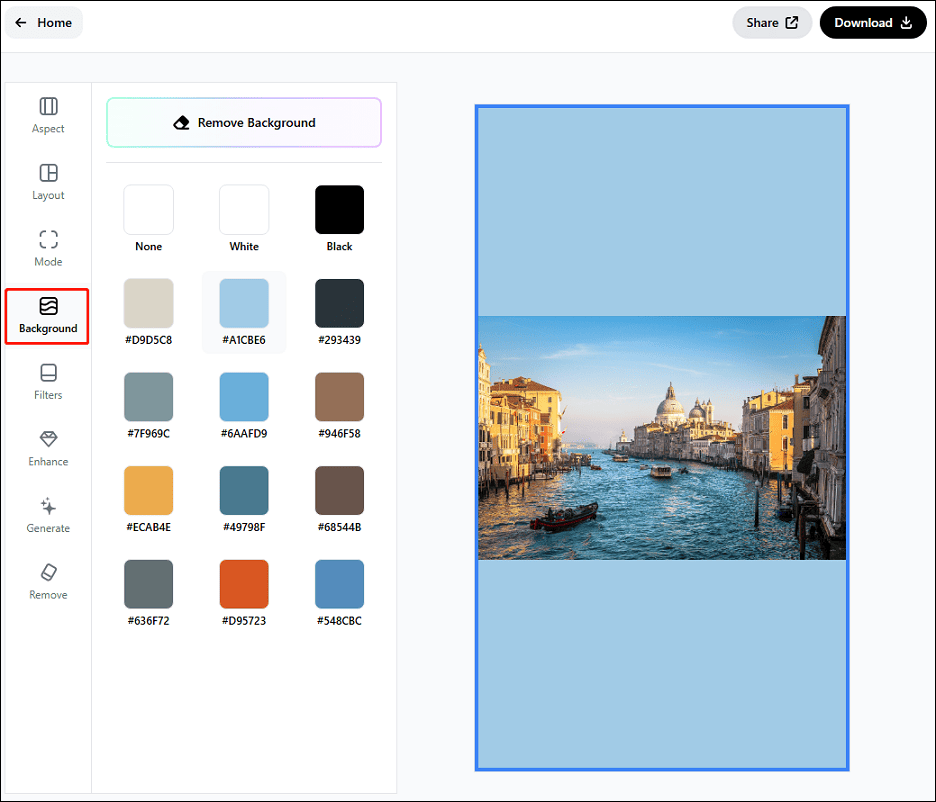
Step 3: Remove white bars
Here are two options to eliminate black bars at the top and bottom of the portrait photo.
Option 1: Add a background
From the left sidebar, click Background, and select a color that matches the photo style. Alternatively, click none to make the image transparent.
Option 2: Expand the image
Select Mode on the left side, click AI Expand, and Instasize immediately extends the photo.
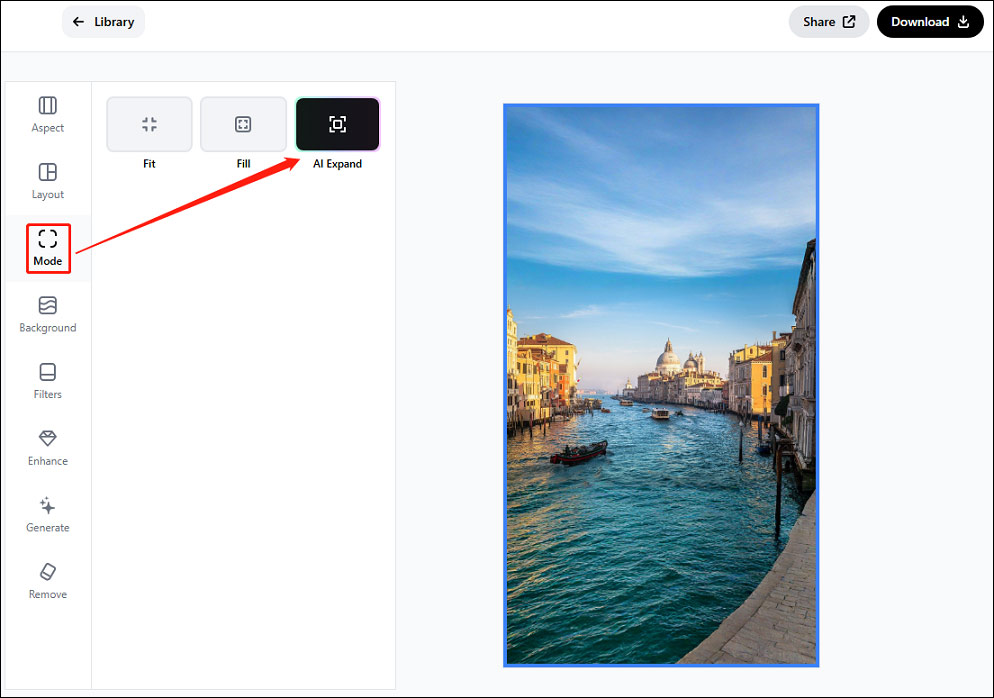
Besides, I can click the Fill option to make the photo fit the canvas by automatic cropping.
Step 4: Save the photo
Click Download in the upper right corner. After confirming the output format and quality, click Download again to save the photo to the computer.
When I need to turn a landscape photo into a portrait for a specific social media platform, Instasize is my first choice. I really love its extensive aspect ratio presets and the image extension capability, which gives me more opportunities to transform my pictures.
Conclusion
Microsoft Photos and Instasize offer simple and direct steps to convert a landscape photo to a portrait one. It’s your turn now! Follow my steps and transform your landscape photos into stunning portrait formats easily
About The Author

Position: Columnist
Cora is a tech writer specializing in digital media workflows, with over six years of hands-on experience in video post-production, media transcoding, and screen capture. Her writing is always clear and practical. Cora also produces in-depth software reviews for users across skill levels to help them find the right tool and enjoy video editing.
User Comments :