This post will explain how to compress H264 video files for smaller sizes using an efficient video editor and a video conversion tool.
H.264 (Advanced Video Coding, AVC, or MPEG-4 Part 10) is the most popular video compression standard, also by far the most commonly used format for recording, compressing, and distributing video content. Many multimedia container formats work with this video coding format, such as MP4, MKV, MOV, AVI, FLV, TS, etc.
H.264-encoded video files are usually smaller than other videos of the same quality, but sometimes you still need to make them smaller for easy sharing or storage. So, how to compress H.264 video files? Read on to find useful tips to shrink the size of your H.264 encoded videos.
How to Compress H.264 with MiniTool MovieMaker
The first way you can compress H.264 encoded videos is to remove unwanted parts with a video trimmer and cutter like MiniTool MovieMaker.
MiniTool MovieMaker is an easy-to-use and free video editor that allows you to trim, split, crop, rotate, flip, and reverse videos, apply filters and effects, add text and animated stickers, and more. Use this program to compress H.264-encoded MP4, MOV, AVI, MKV, and FLV video files in just a few clicks.
How to compress H.264 videos using MiniTool MovieMaker? It offers 4 options:
- Trim unnecessary length.
- Remove the unwanted part in the middle.
- Speed up the video to make it shorter.
- Customize the resolution and bitrate.
Step 1: Install the Software
Click the button below to download and install MiniTool MovieMaker on your PC.
MiniTool MovieMakerClick to Download100%Clean & Safe
Step 2: Import Your Video
Launch the app and close the promotional window. Then, click Import Media Files to upload your video, and drag the clip to the timeline or click the + icon to add it.
Step 3: Shorten the Video
Reduce the video length to decrease file size using these methods:
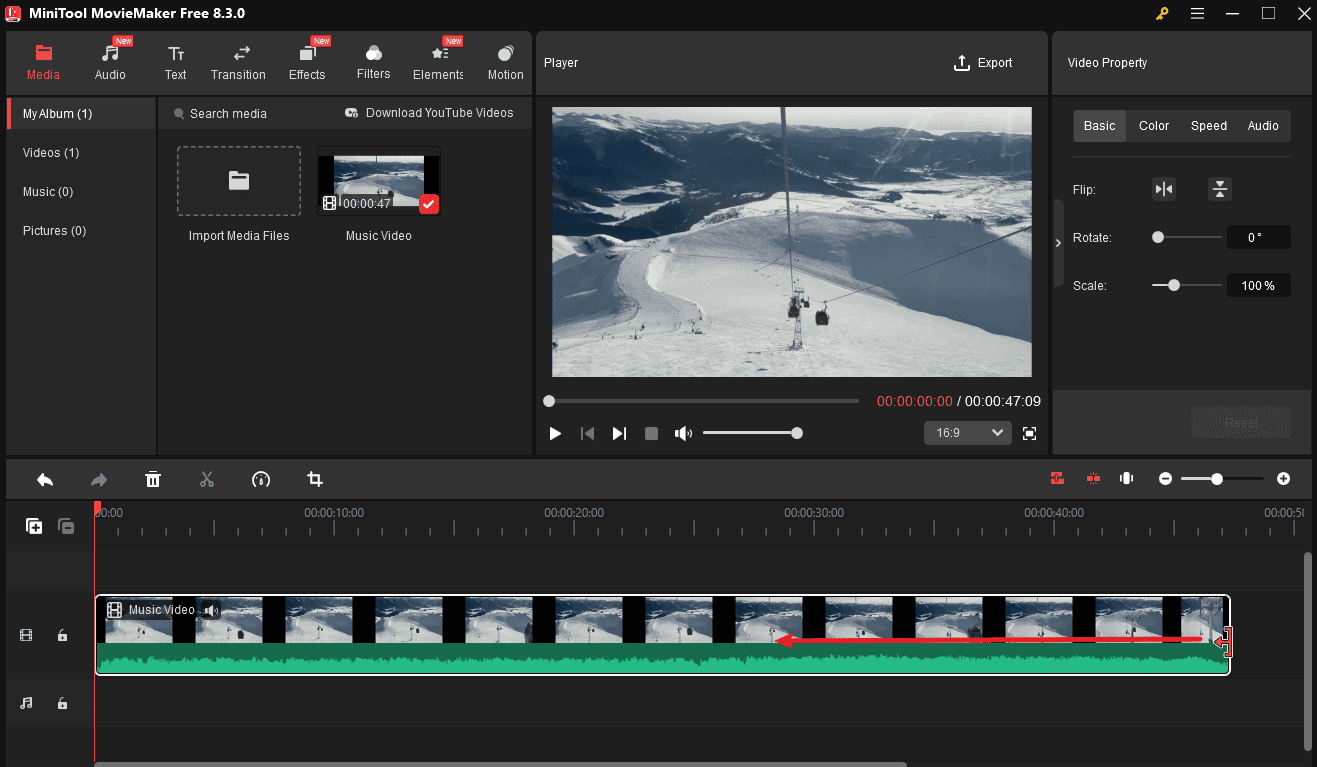
Option 1: Trim the Video
Hover over the start or end of the clip, then drag the Trim icon inwards to cut unwanted sections.
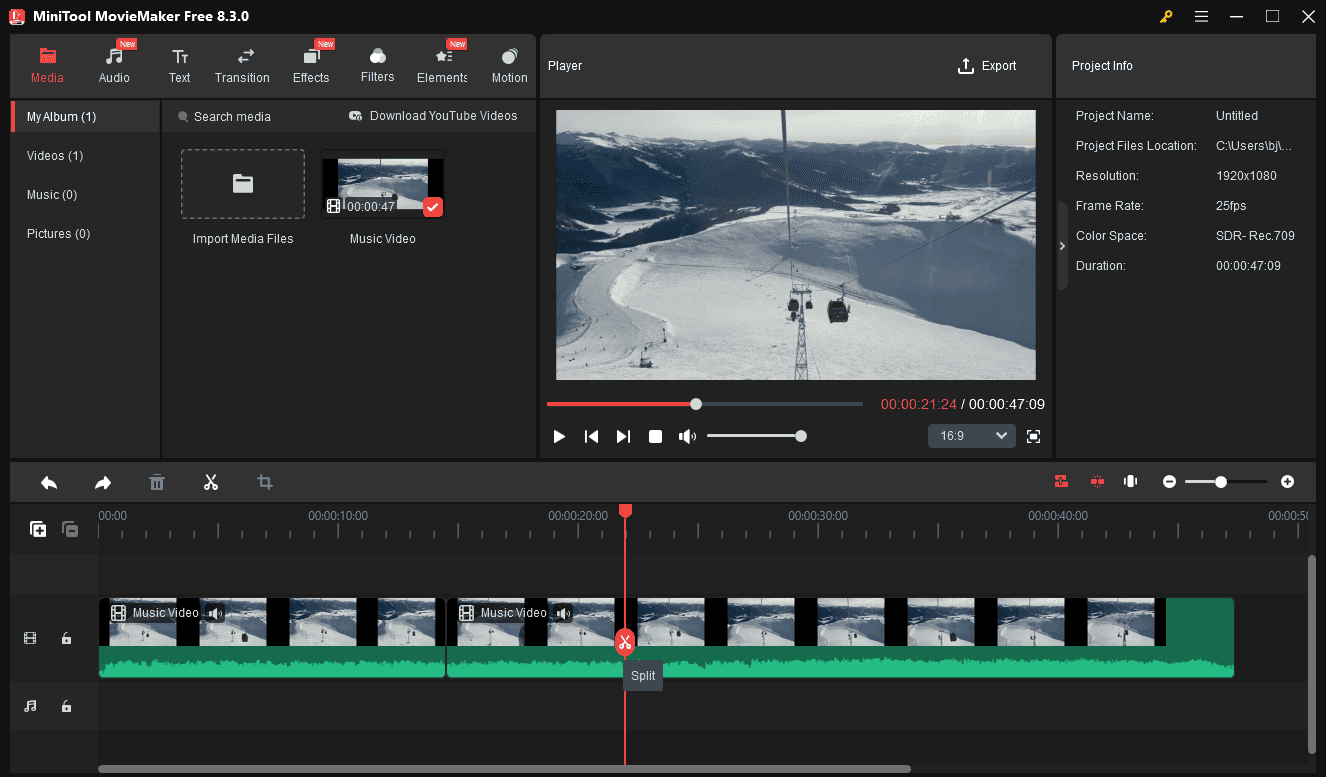
Option 2: Remove Middle Segments
First, isolate the unwanted part using the Split tool: Drag the playhead to the start point of the clip you want to remove, and click the Split icon; continue moving the playhead to the end of the clip, and click the Split icon again. Then, right-click and select Delete.
Option 3: Speed Up the Video
Select the clip, go to Speed in the Video Property panel, and adjust the slider.
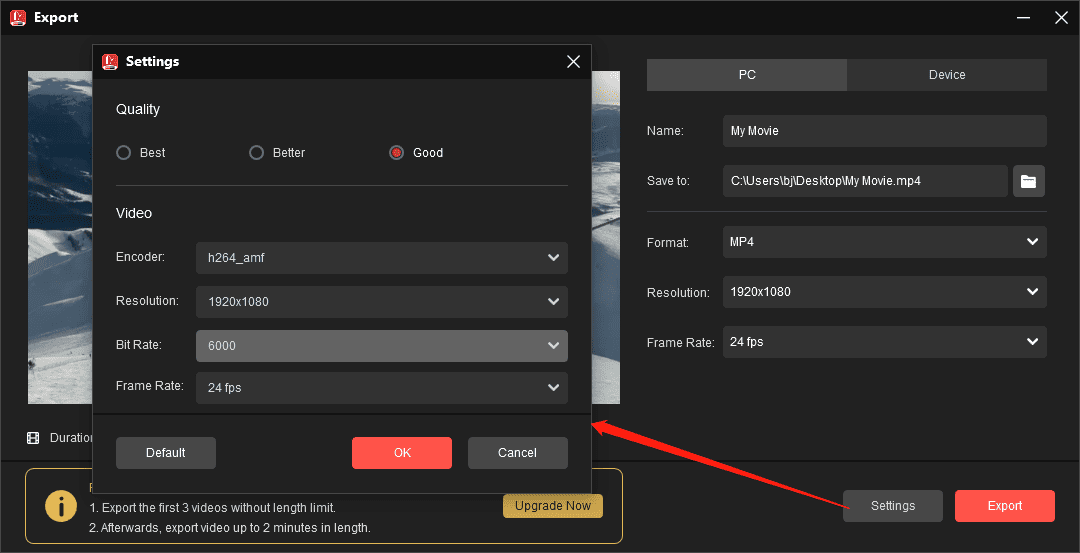
Step 4: Adjust Export Settings
Click Export in the top-right corner to open the Export window, then you can:
- Name your video and choose a save location.
- Keep the default MP4 (H.264) format for best compression.
- Lower the resolution (e.g., 1080p or 720p) for smaller files.
- Click Settings, set Quality to Good.
- For further compression, manually reduce the bitrate below 6,000.
Step 5: Export the Final Video
Check the estimated file size. If you’re satisfied, click Export to save.
How to Compress H.264 Using MiniTool Video Converter
MiniTool Video Converter is a free video compressor and converter, enabling you to process various video files. It offers two methods to compress H.264 video files.
Method 1: Use the Built-in Video Compressor
MiniTool Video Converter offers quick and easy video compression with minimal effort, no complex settings required. Best of all, it’s free to use with no file size restrictions, won’t leave a watermark on compressed videos, and can compress up to 5 videos at once.
Step 1. Download and install
Click the button below to download and install the video compressor for Viber on your PC.
MiniTool Video ConverterClick to Download100%Clean & Safe
Step 2. Import your video
Go to the Compress Video tab and click the Add Files button to add your H.264 video.
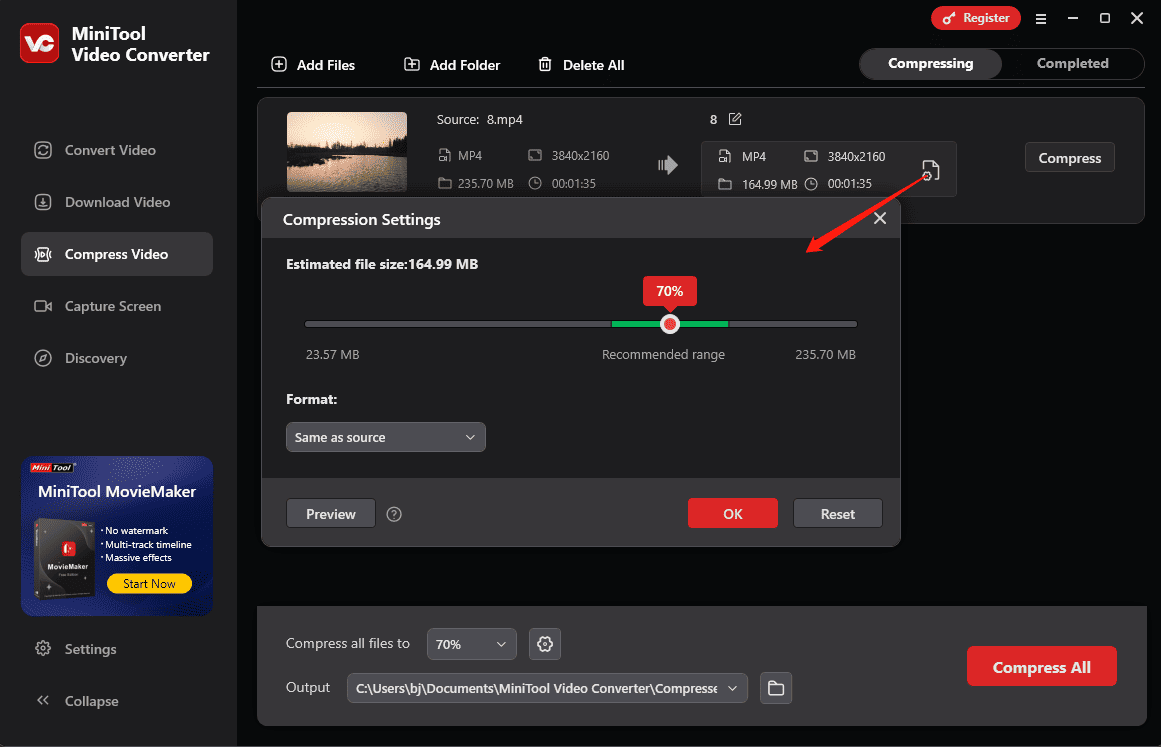
Step 3. Adjust the Compression Settings
Click the Settings icon to fine-tune your compression
- 70% is the default compression strength to reduce the file size. You can drag the slider left for smaller files. (Stay within the recommended range for optimal quality.)
- Expand the Format menu and choose from: MP4 (most compatible), MKV (high quality), and WebM (web-friendly).
Step 4. Preview (optionally)
Select Preview to load a 10-second clip of the final result. Watch the video to check the quality. If satisfied, click OK to continue.
Step 5. Finalize compression
Click Compress to begin. Once complete, your reduced-size video will be available under the Completed tab, where you can view or locate it on your PC.
Method 2: Convert H.264 to HEVC
H.265 (HEVC and MPEG-H Part 2) is a common video compression standard. It is not as good as H.264 in terms of compatibility, but it achieves higher compression efficiency (up to 50%) than H.264. Therefore, you can convert H.264 to H.265 to compress H.264 files. For this purpose, a free HEVC converter is a must.
MiniTool Video Converter is one of the best free video converters that enables you to convert between various video formats, such as HEVC, H.264, MP4, WebM, MOV, and more. Here’s how to convert H.264 to H.265.
Step 1. Add your video
Go to the Convert Video tab and click the Add Files button to upload your video.
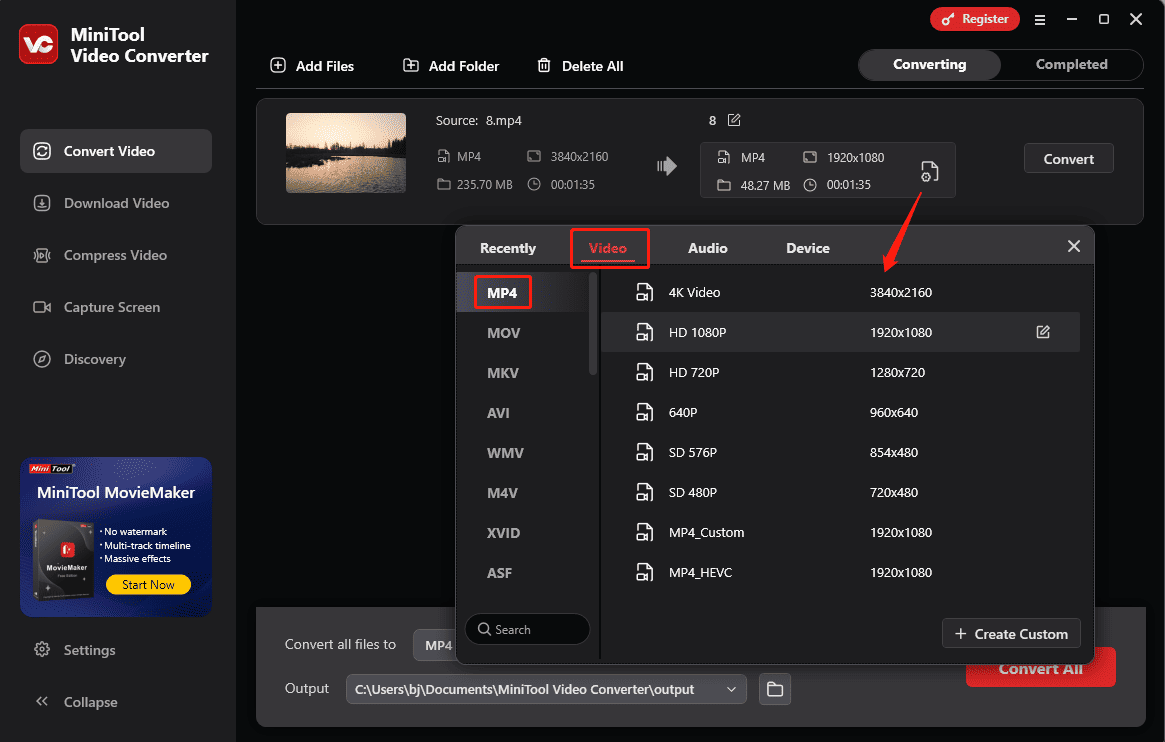
Step 2. Choose the output format
Click the Settings icon and go to the Video tab in the pop-up window. Choose MP4 on the right and choose a low-resolution preset ( like 4K to 1080P or 1080P to 720P) to optimize the video file size.
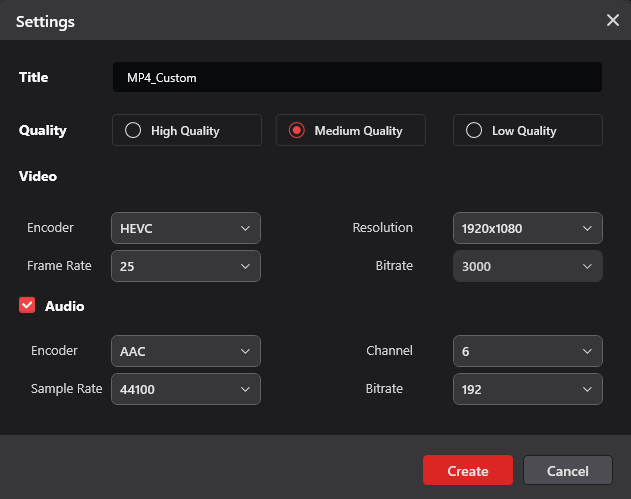
Step 3. Convert H.264 to HEVC
Click the + Create Custom button to open the Settings window. Then, set the Encoder to HEVC, and select the desired resolution, bitrate, and frame rate. Finally, click Create. Then, find and click the HEVC format to set it as the output format.
Step 4. Start the Conversion
Check the estimated file size in the Target box. If you’re happy with the result, click the Convert button to start the compression task.
Conclusion
H.264 is an efficient video encoder that can compress video into small file sizes, but it can be further reduced. With the tips explained in the post, I believe you can compress H.264 files without any hassle.
About The Author

Position: Columnist
Cora is a tech writer specializing in digital media workflows, with over six years of hands-on experience in video post-production, media transcoding, and screen capture. Her writing is always clear and practical. Cora also produces in-depth software reviews for users across skill levels to help them find the right tool and enjoy video editing.
User Comments :