Adding an echo effect to audio is a great way to create depth, enhance atmosphere, and make sound more immersive. I often apply this effect to music, voice recordings, podcasts, and video soundtracks to improve the overall listening experience. In this guide, I’ll show how to add echo effect to audio using three easy methods.
How to Add Echo Effect to Audio
Below is a step-by-step guide for using each tool.
Method 1: Use Audacity
Audacity is a free and open-source audio editor and recording application available for Windows, macOS, and Linux. It strikes a balance between an easy-to-use interface and comprehensive editing tools, allowing me to mix audio, reduce noise, and apply various effects with ease.
When it comes to adding an echo effect to audio, Audacity provides a straightforward way to achieve this. It also offers customizable settings, such as delay time and decay factor, making it easy for me to add a personalized touch to my audio.
How to add echo effect to audio using Audacity? Here is the detailed guide.
Step 1: Open the Audio File in Audacity
Download Audacity from the official website and launch it. Click File > Open to select the audio file from my computer.
Step 2: Add an Echo Effect to Audio
Drag the cursor to select the part where I want to apply the echo effect. Click Effect in the top menu, choose Delay and Reverb, and select Echo.
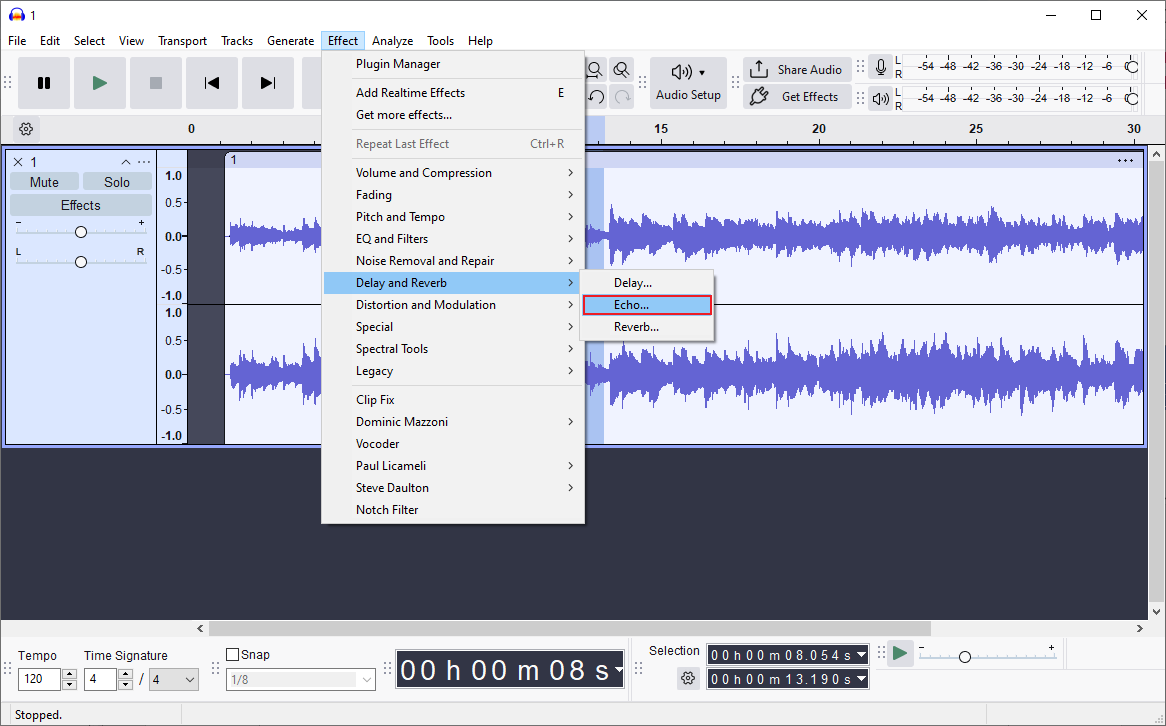
Then, enter specific values for the Delay time and Decay factor, and click Apply to confirm the settings.

Step 3: Save the Audio with Echo
Click File > Export Audio. Choose the Export to computer option, then customize the file name, format, sample rate, and encoding settings. Finally, click Export to save the edited audio to my computer.
Method 2: Use Melobytes
Melobytes is an all-in-one online platform that is capable of composing music, converting files, and editing videos. It allows me to apply various sound effects to audio without signing up. It offers a simple and accessible interface, making it a great option when I want to add an echo effect to audio quickly.
Follow the steps below to add echo effect to MP3 online with Melobytes.
Step 1: Upload the Audio File
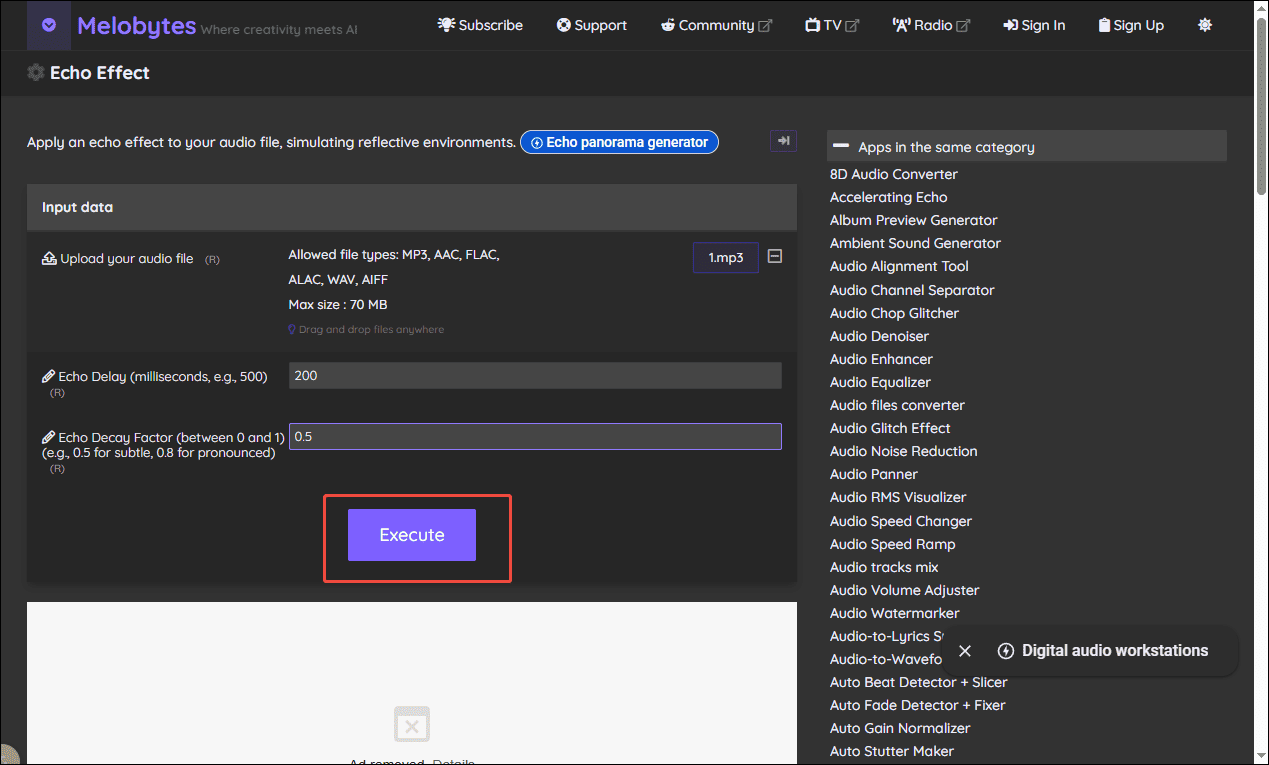
Visit the Melobytes official website and click Upload to import the audio file. This platform supports uploading MP3, AAC, FLAC, ALAC, WAV, and AIFF formats.
Step 2: Adjust the Echo Effect
Enter the desired value in the Echo Delay and Echo Delay Factor boxes. Then, click Execute to start the process.
Step 3: Download the Processed Audio
Once the processing is complete, click Download generated file to save the audio to the computer.
Method 3: Use Maztr
Maztr is an online audio mastering tool designed to improve the overall sound quality of audio tracks quickly and automatically. It offers a simple way to enhance audio with added depth and ambience. Compared with the other two tools, Maztr provides fewer customization options, making it ideal for fast edits and simple workflows.
Here is how to add echo effect to audio using Maztr.
Step 1: Upload the Audio File
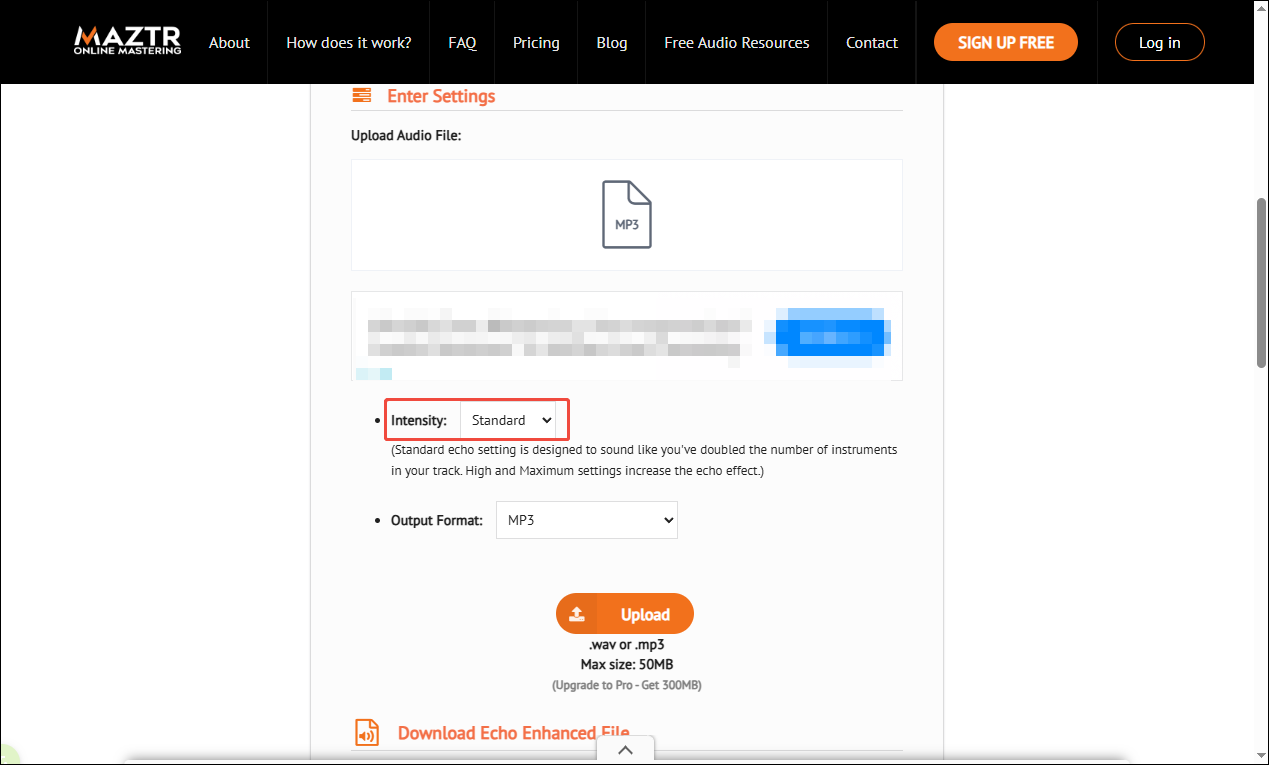
Go to the Maztr official website and open its audio processing tool. Drag and drop my audio file into the upload area.
Step 2: Choose an Intensity
Select a suitable intensity level from options like Standard, High, and Maximum. The default output format is MP3. I can also choose the WAV format, but it requires an upgrade.
Step 3: Process and Download the Audio
Click the Upload button to start processing. Once it’s done, click the Download button to save the echo-enhanced audio file to my computer.
Conclusion
In this post, I explored three easy ways to add echo effect to audio, including Audacity, Melobytes, and Maztr. Audacity offers more control with customizable settings, while online tools like Melobytes and Maztr provide quick and convenient solutions. Hope this article helps you a lot.
About The Author

Position: Columnist
Alice is a tech writer at MiniTool, specializing in tutorials and guides on video editing and screen recording. She stays up to date with the latest tools and techniques to ensure her content is accurate and easy to follow. By combining hands-on testing with continuous learning, Alice aims to help readers solve tech problems efficiently.
User Comments :